
Every stakeholder with vested interest in your project will want to see a work plan before the official kick-off meeting.
Having a comprehensive plan to present shows that you’re a professional they can trust. It also gives you a roadmap to follow during project execution and a basis for your project status reports later on.
So, here’s how to create a project work plan that will impress stakeholders and help you stay organized at work.
What is a work plan?
A work plan is a project management document that defines:
- Project goals and objectives,
- Main project deliverables or milestones needed to achieve these goals,
- Specific tasks that lead up to each milestone,
- Resource allocation per task (time, budget, equipment, and people), and
- Project risks and contingency plans.
A work plan should include the following 7 elements:
- Project scope (broken down into smaller tasks)
- Success criteria
- Schedule/timeline estimate
- Budget breakdown by task
- Work allocation and responsibility breakdown (who is responsible for what)
- Risk register
- Stakeholders
Work plans are typically written by project managers or team leads (preferably with the team’s input) and presented to the main project stakeholders before the project kick off meeting.
Read more about the benefits of a work plan, or jump right into learning how to create a great work plan for your project.
Benefits of a work plan
A work plan serves both as a roadmap to keep the project on track and as a tool for progress and budget tracking over time. It helps:
- Keep the team aligned and on schedule,
- Establish clear accountability,
- Eliminate scope creep,
- Prevent resource overlaps and misallocation, and
- Identify and mitigate project risks before they escalate.
On top of this, a solid project management work plan improves trustworthiness in the eyes of stakeholders and improves their cooperation.
Work plan vs. Project Plan vs. action plan: What’s the difference?
The terms Project Plan, Work Plan, and action plan are often used interchangeably, but you’ll find that these terms often mean different things to different people. So let’s clear things up.
A Project Plan is a formal set of documents that explains why the project exists and how it will be led and managed. It contains all signatures and agreements between you and your stakeholders, as well as documents such as the Project Charter, Risk Management Plan, Communication Management Plan, etc.
An action plan is a document that shows who is doing what and when. It’s a prioritized list of actionable tasks the team should be doing on a day-to-day basis to complete a certain deliverable. It can be as simple as a table with columns for the task, task owner, due date, priority, status, and notes. You can easily derive an action plan from the lower levels of your work breakdown structure. Of the 3, the action plan is the closest thing to a to-do list.
A work plan is an in-between document that’s more than just an action plan, but less than a Project Plan. Stakeholders don’t always want to know every minute detail of the Project Plan, or what you have planned for this week. But, they do want to know your budget estimates, when to expect a certain deliverable, who is responsible for which part of the project, and what you plan to do if something goes wrong. This is what the work plan is — information curated for stakeholders you can easily present in a meeting.
Sometimes a stakeholder will ask you for a “project plan” when they really want an action plan or a work plan. The confusion stems from a lack of shared understanding of what these terms mean. So, even if you know the difference, it’s always best to check what it is your stakeholders really need to make sure you’re on the same page and you don’t deliver the wrong document.
How to create a project work plan
Creating a comprehensive and clear work plan requires meticulous attention to detail and careful juggling of a lot of moving parts. It’s not an easy task, but following these 5 steps will make the process appear simpler and more approachable.
#1 Set S.M.A.R.T. goals and success criteria
Begin by setting high-level goals and criteria by which you will measure success.
Make sure your goals are Specific, Measurable, Attainable, Realistic, and Time-bound (S.M.A.R.T.). With S.M.A.R.T. goals in place, you can define the project’s key performance indicators (KPIs) and accurately track and report on your success over time.
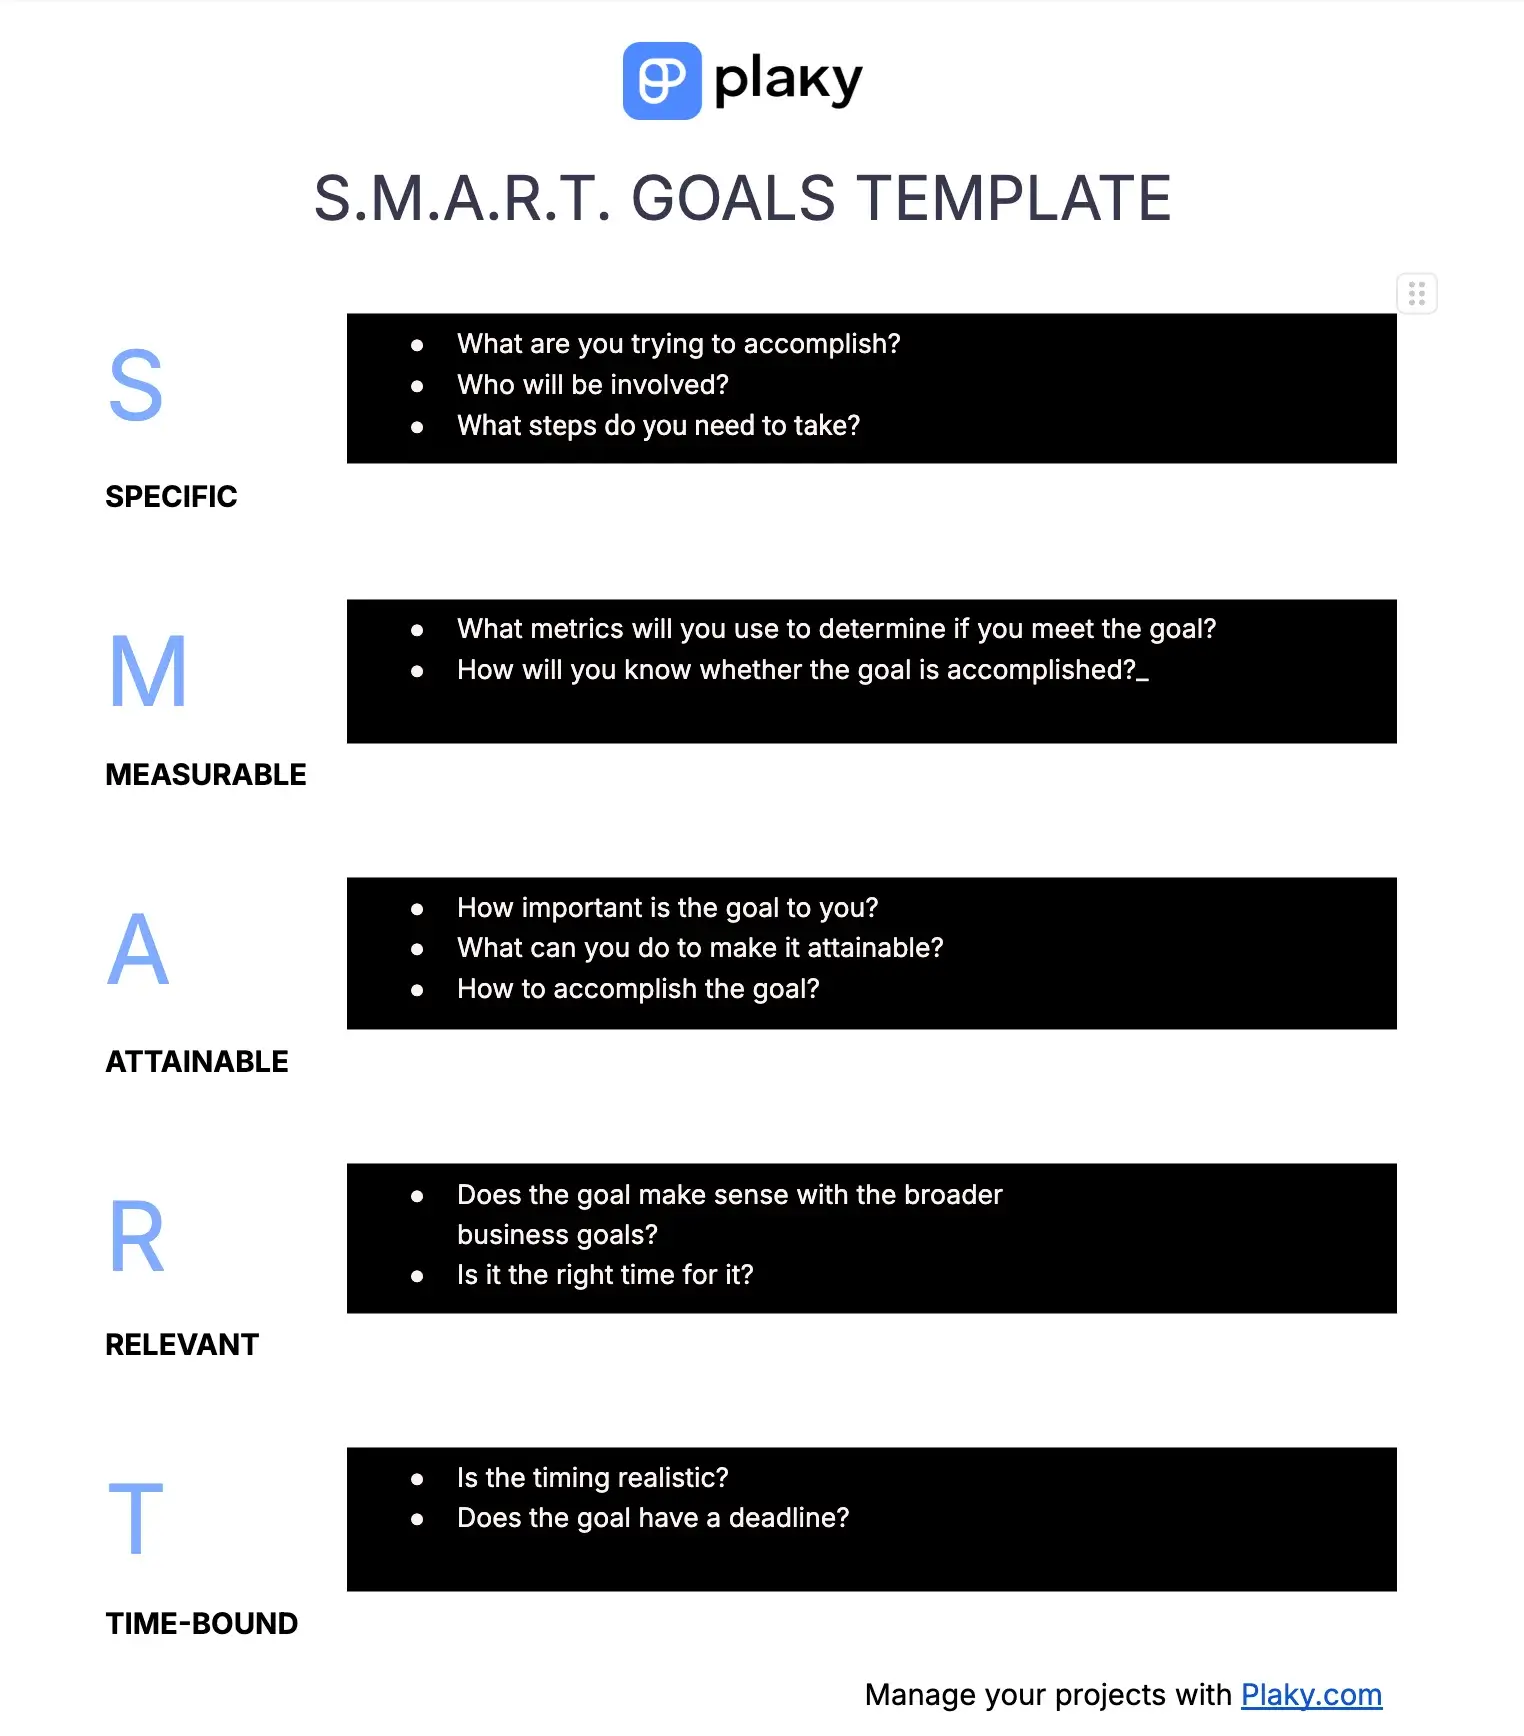
To make sure your goals match these criteria, use our free S.M.A.R.T. goals template. Write your goals or note them down in a project management tool like Plaky by CAKE.com where you can connect teams, collaborate, and track progress with dynamic statuses and charts.

#2 Define project scope
Define all the work you need to do to complete the project and achieve your goals.
A detailed project scope provides a clear roadmap you can later reference to track your progress. Defining your project scope and getting it formally approved by key project stakeholders at the very beginning is also crucial for preventing scope creep down the line.
It provides physical proof of the deal your clients agreed to, making it easier to say “no” to change requests that mess with your budget or timeline. Similarly, it makes it easier to get approval for a deadline extension or budget increase if changes are truly necessary.
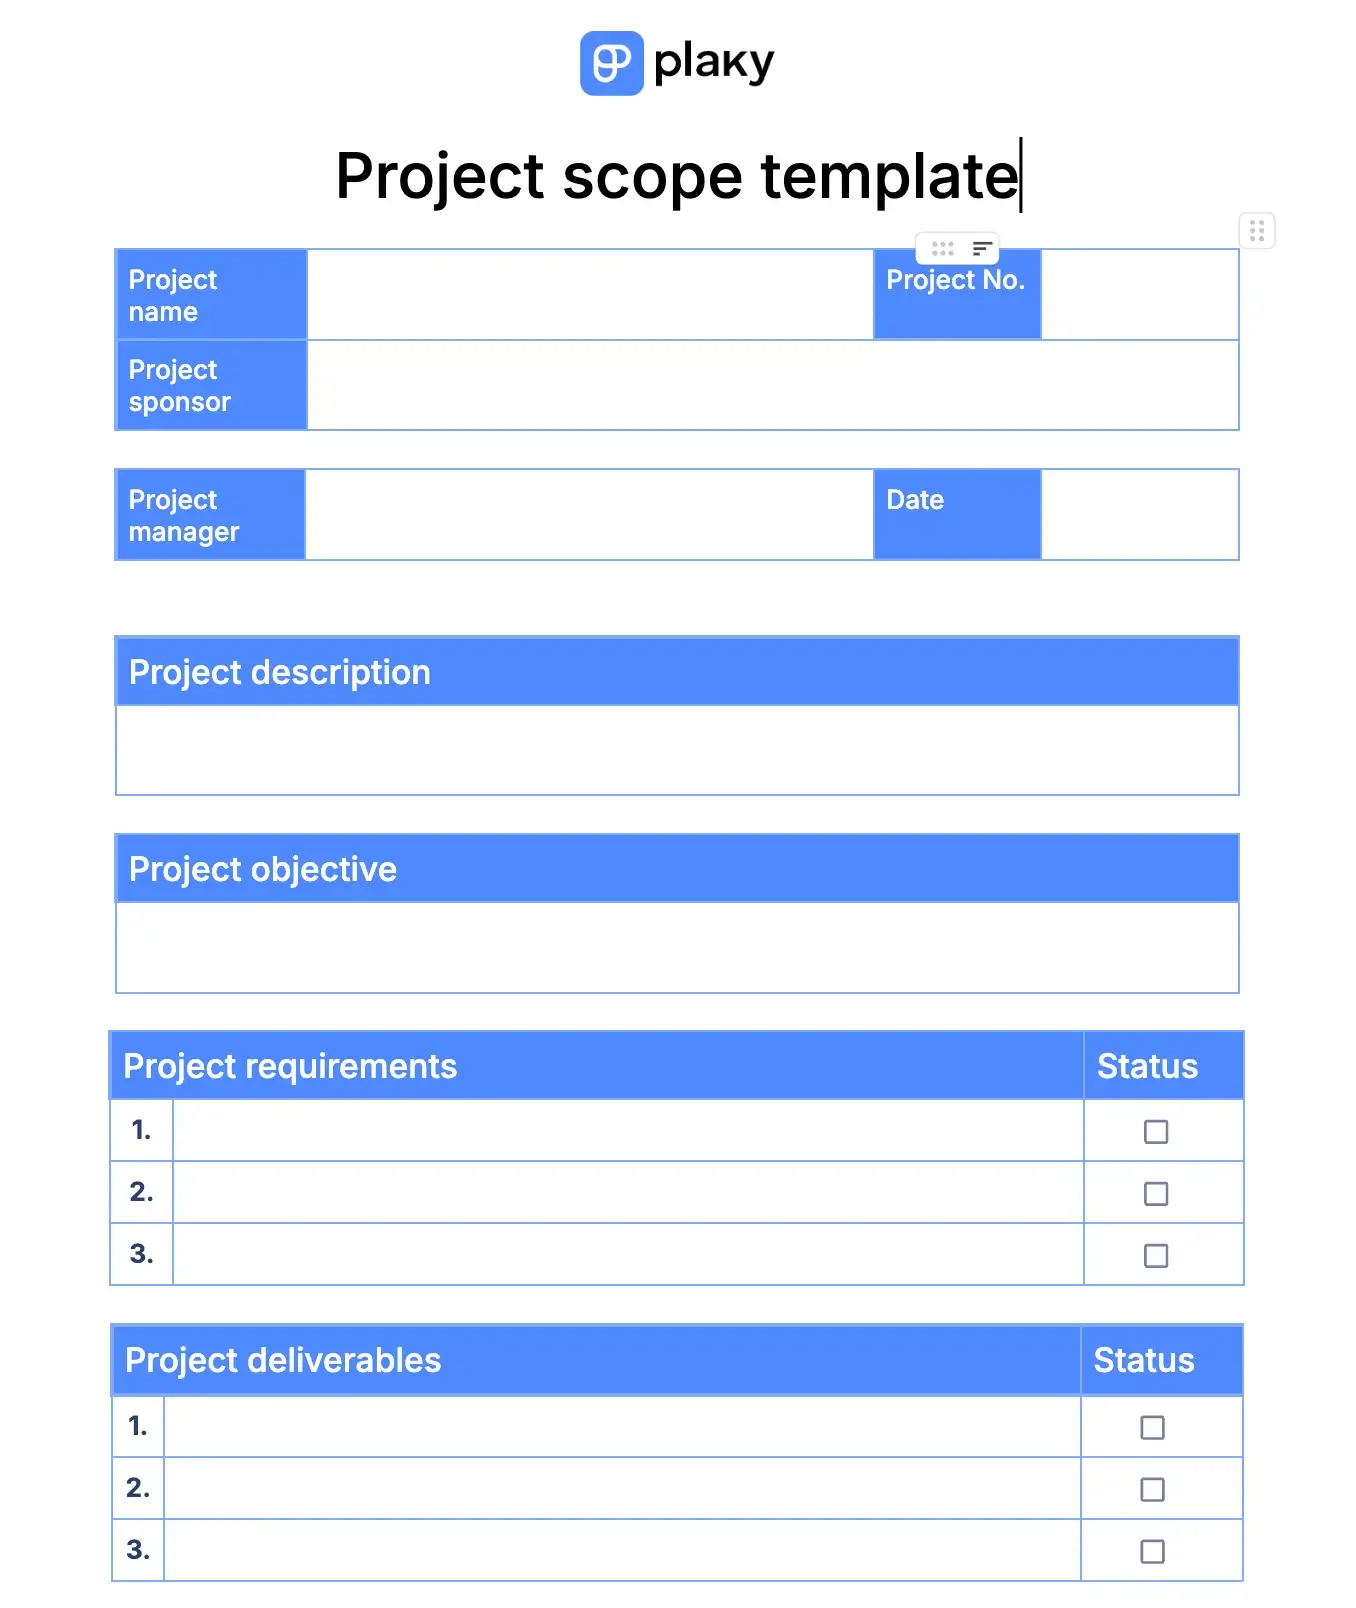
Get free project scope template
#3 Break down work into smaller chunks
Big, lofty goals can seem abstract and unachievable. To make them less daunting, break them down into smaller tasks:
- Define the major deliverables/milestones for each goal,
- Identify the tasks you need to do to complete each of them,
- Mark task dependencies, and
- Prioritize.
In the end, you’ll get a neat work breakdown structure (WBS) dividing your work into bite-sized pieces, as well as an action plan with concrete steps needed to kickstart your project.
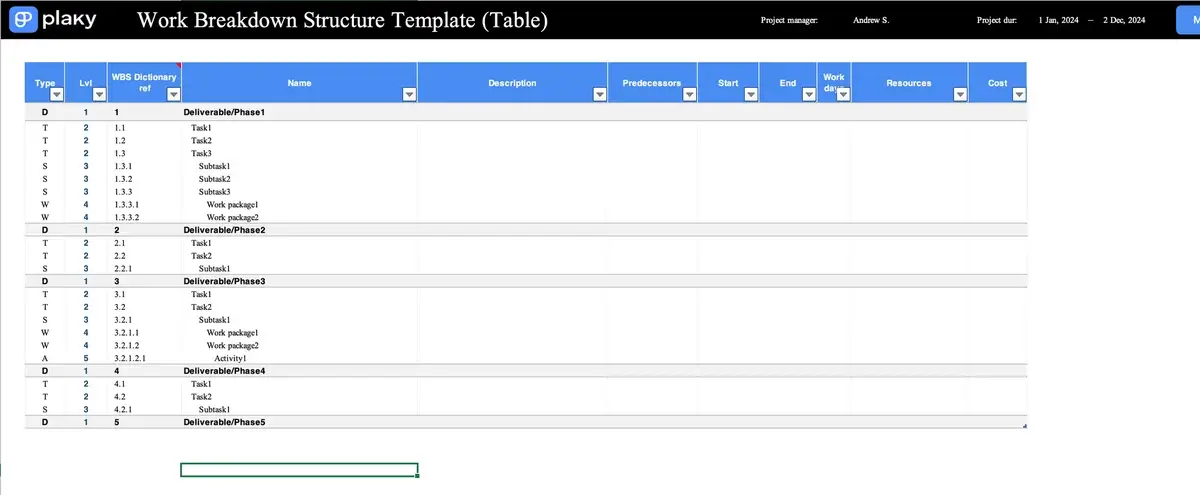
Get free work breakdown structure Excel template
#4 Provide resource estimates
Resources in project management include:
- Time,
- People,
- Budget, and
- Equipment or software.
Use the work breakdown structure you’ve created in the previous step as a basis for resource estimates and allocation:
- Estimate how much of which resource you need for each task.
- Check resource availability before the project officially kicks off. It would be problematic if, for example, you needed a bulldozer for your construction project only to realize too late that the only one you have is already booked for another project.
- Allocate resources according to your estimates. This includes creating tentative schedules, reserving equipment, assigning budgets and people to tasks, and creating a RACI chart to define who is responsible for what.
The optimal way to manage and track project resources is through a dynamic project management tool. This way, you can:
- Assign people to tasks,
- Send reminders and notifications,
- Connect your resources to specific tasks, and
- Automate manual tasks such as notifying a team lead if there are issues with resource acquisition.
If getting started with a project management tool seems daunting, don’t worry, you can just start with a pre-made template.
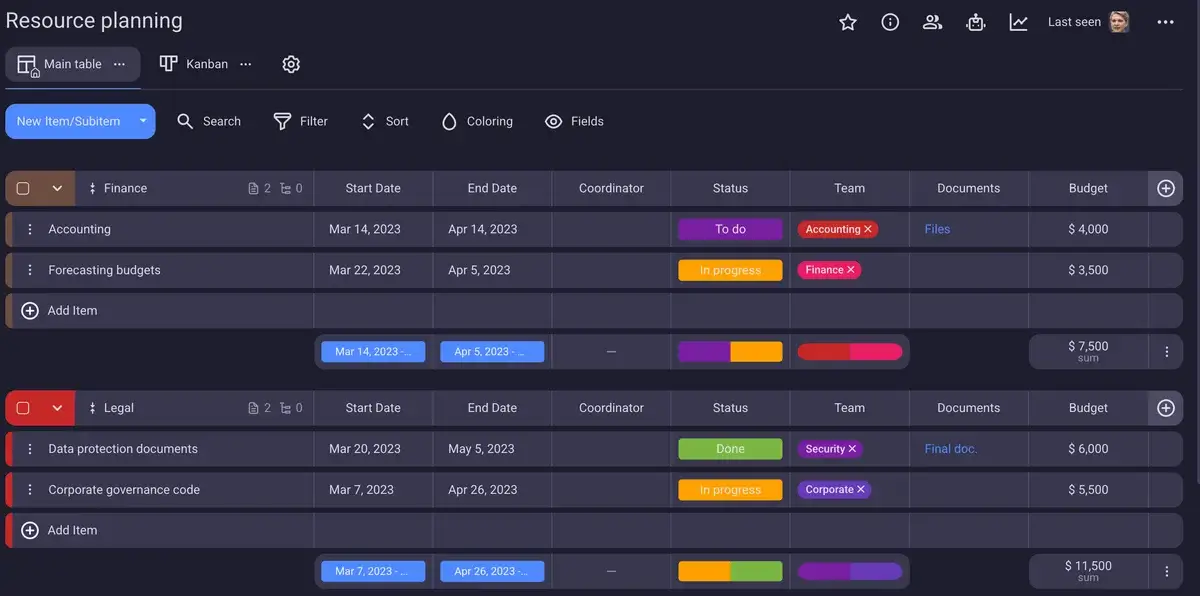
Get Plaky’s resource planning template
💡 PLAKY PRO TIP
If you prefer using spreadsheets to manage your project resources, take a look at our free resource planning templates for Excel and Google Sheets.
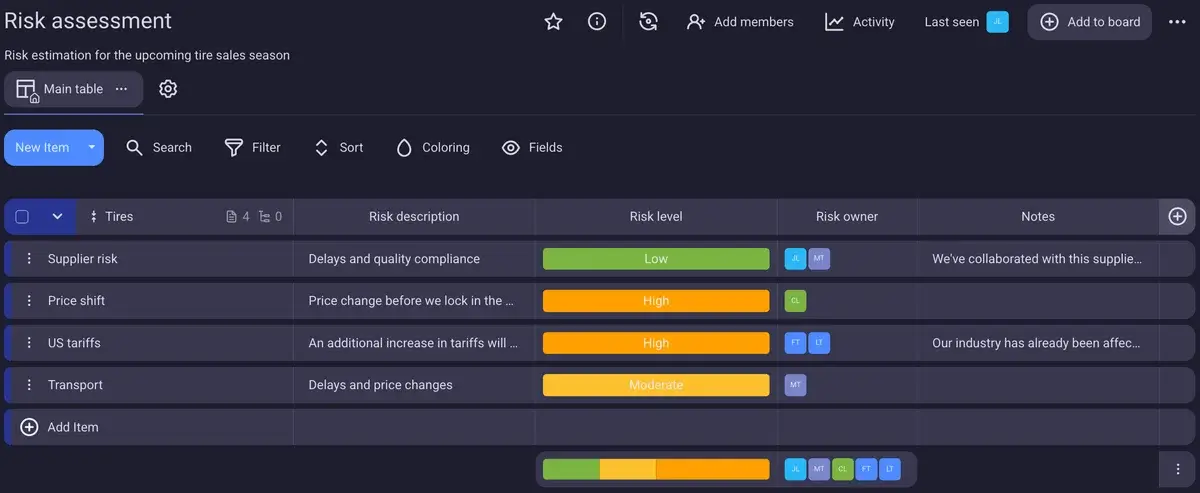
#5 Create a risk register
An important part of managing a project is being prepared in case your project risks come true. This is why you’ll need a risk register to log and track all potential risks and prepare mitigation strategies.
In case you or your company have already worked on similar projects, check to see if there are any lessons learned documents that can give you an idea for what kind of risks you can expect and how they’ve been dealt with in the past.
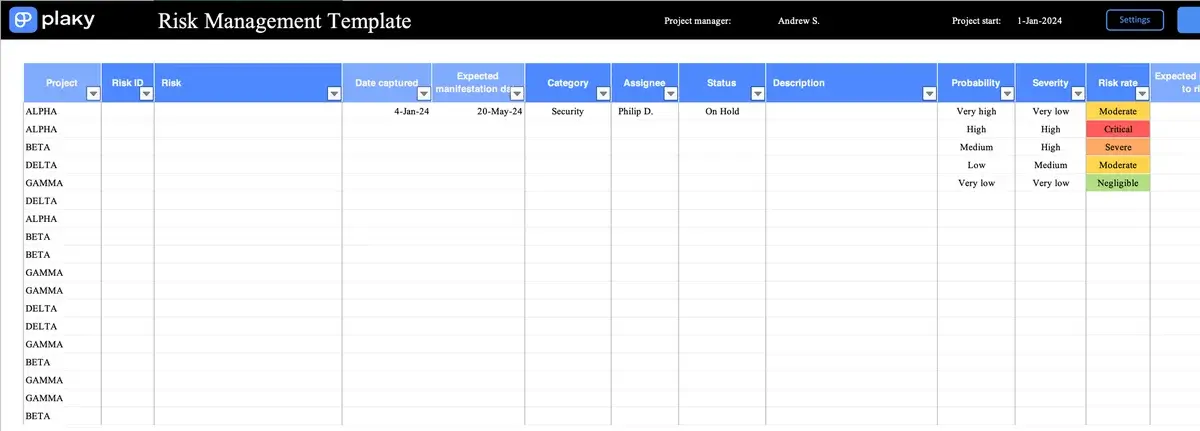
To track project risks, you can use our free Excel risk management template or try Plaky where you can assign risk owners and share updates with relevant people in real time.
💡 PLAKY PRO TIP
Learn how to prepare for every eventuality and deftly manage project risks in just 6 steps.
Bonus tip: monitor the plan
Finally, keep an eye on the plan, and update it periodically. Your project is constantly influenced by external factors, and the work plan needs to reflect this.
Organize regular status report meetings to keep up with the latest developments, or track progress and updates using task management software. Striking color-coded statuses and charts in tools like Plaky make it easy to get a clear overview of your project status without having to ask your team leads to prepare reports every time.
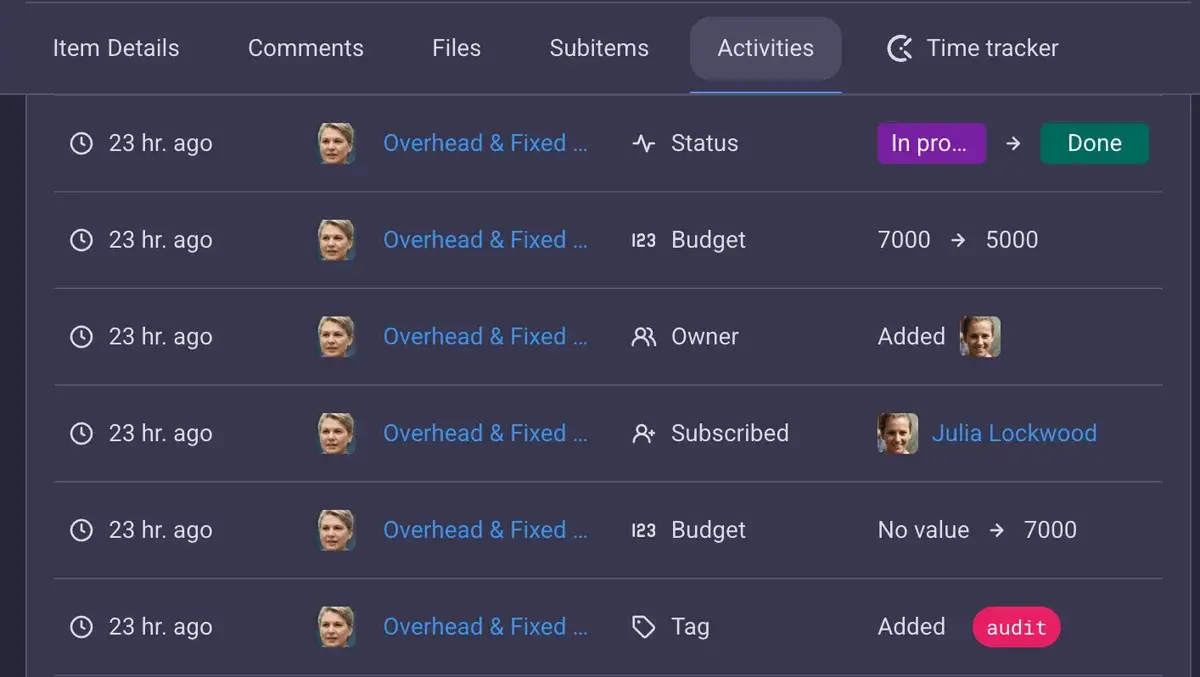
And don’t forget to keep a log of changes made to your project work plan, which includes information on what changes were made, who made them, and when. Having an Activity log that records all these activities for you is another huge perk of using project management software to manage your work plan.
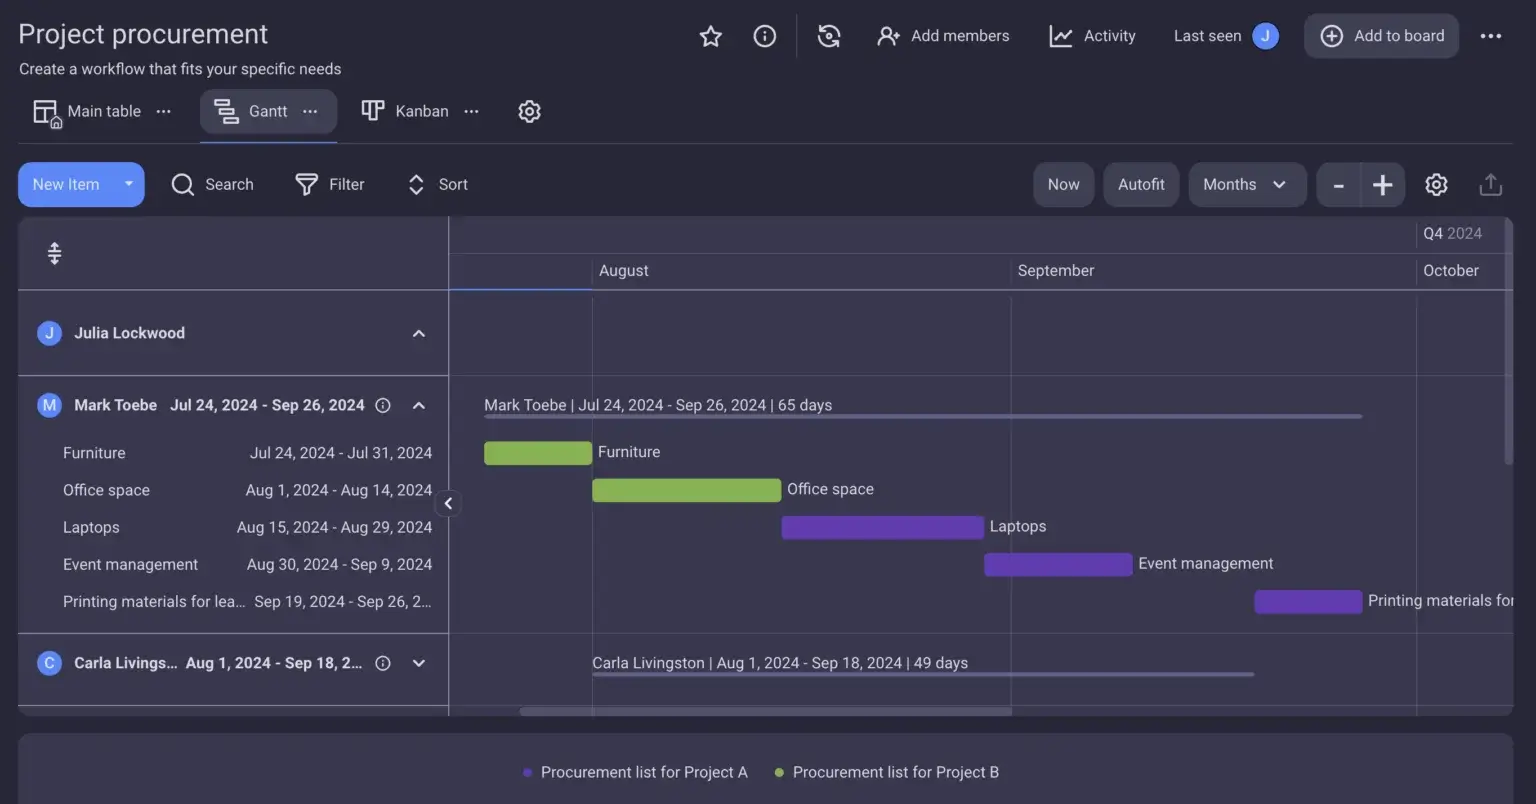
Work plan example in Plaky
Now that you have the step-by-step process for creating a solid work plan, here’s an example of what it would look like neatly organized using project management software.
First, use a simple table view in Plaky to create a clear top-down view of your goals, objectives, and the work you need to do to accomplish them.
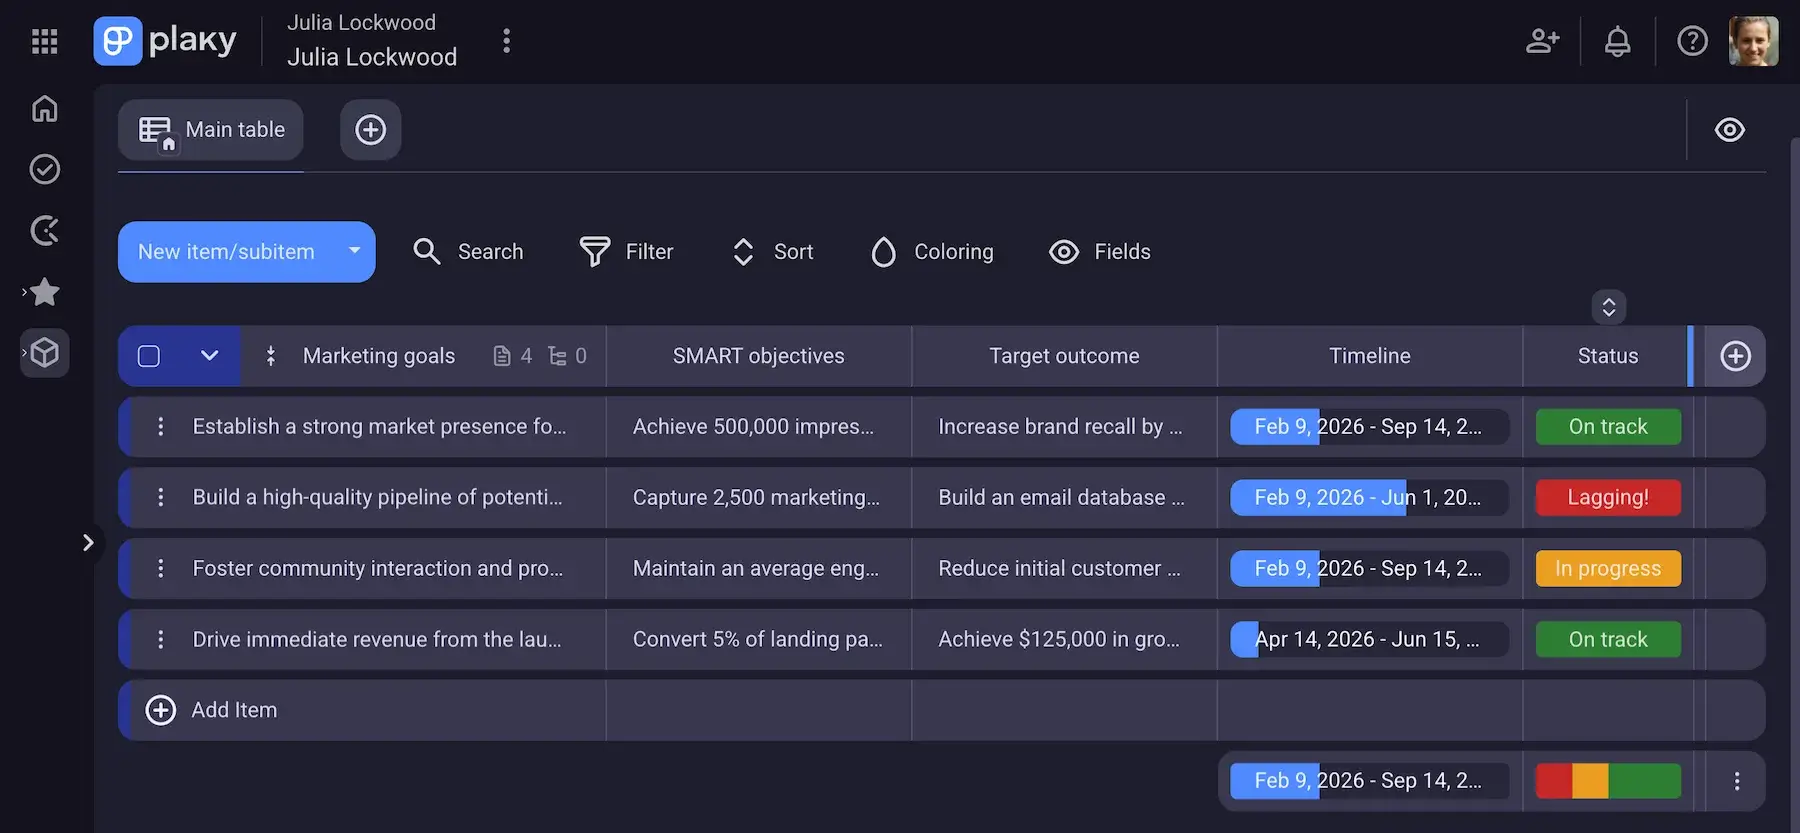
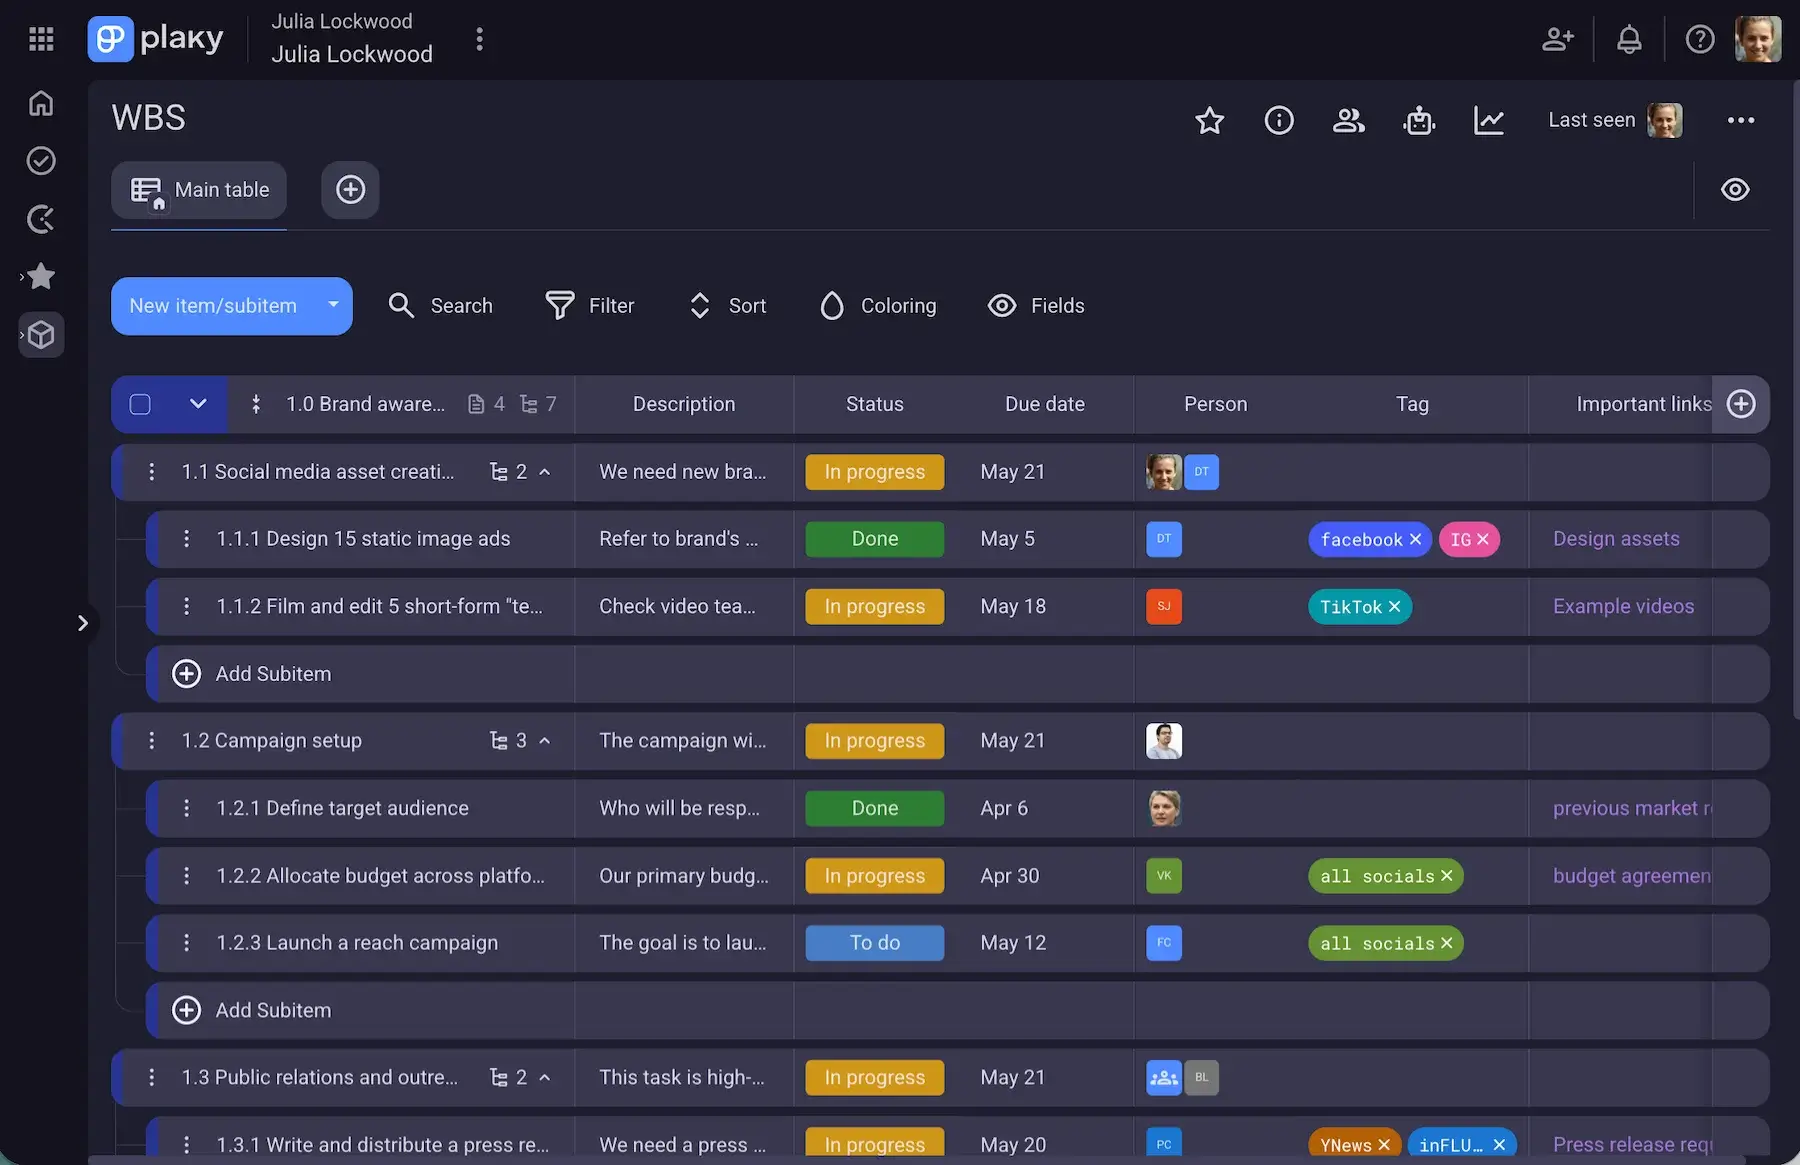
When you have your work laid out, it’s time to break it up into chunks to create a work breakdown structure. This will be the basis for the rest of your work plan.
You can make a WBS using our work breakdown structure Excel template or create one in Plaky where you can adjust board privacy and user roles and permissions so that only relevant people can access it.
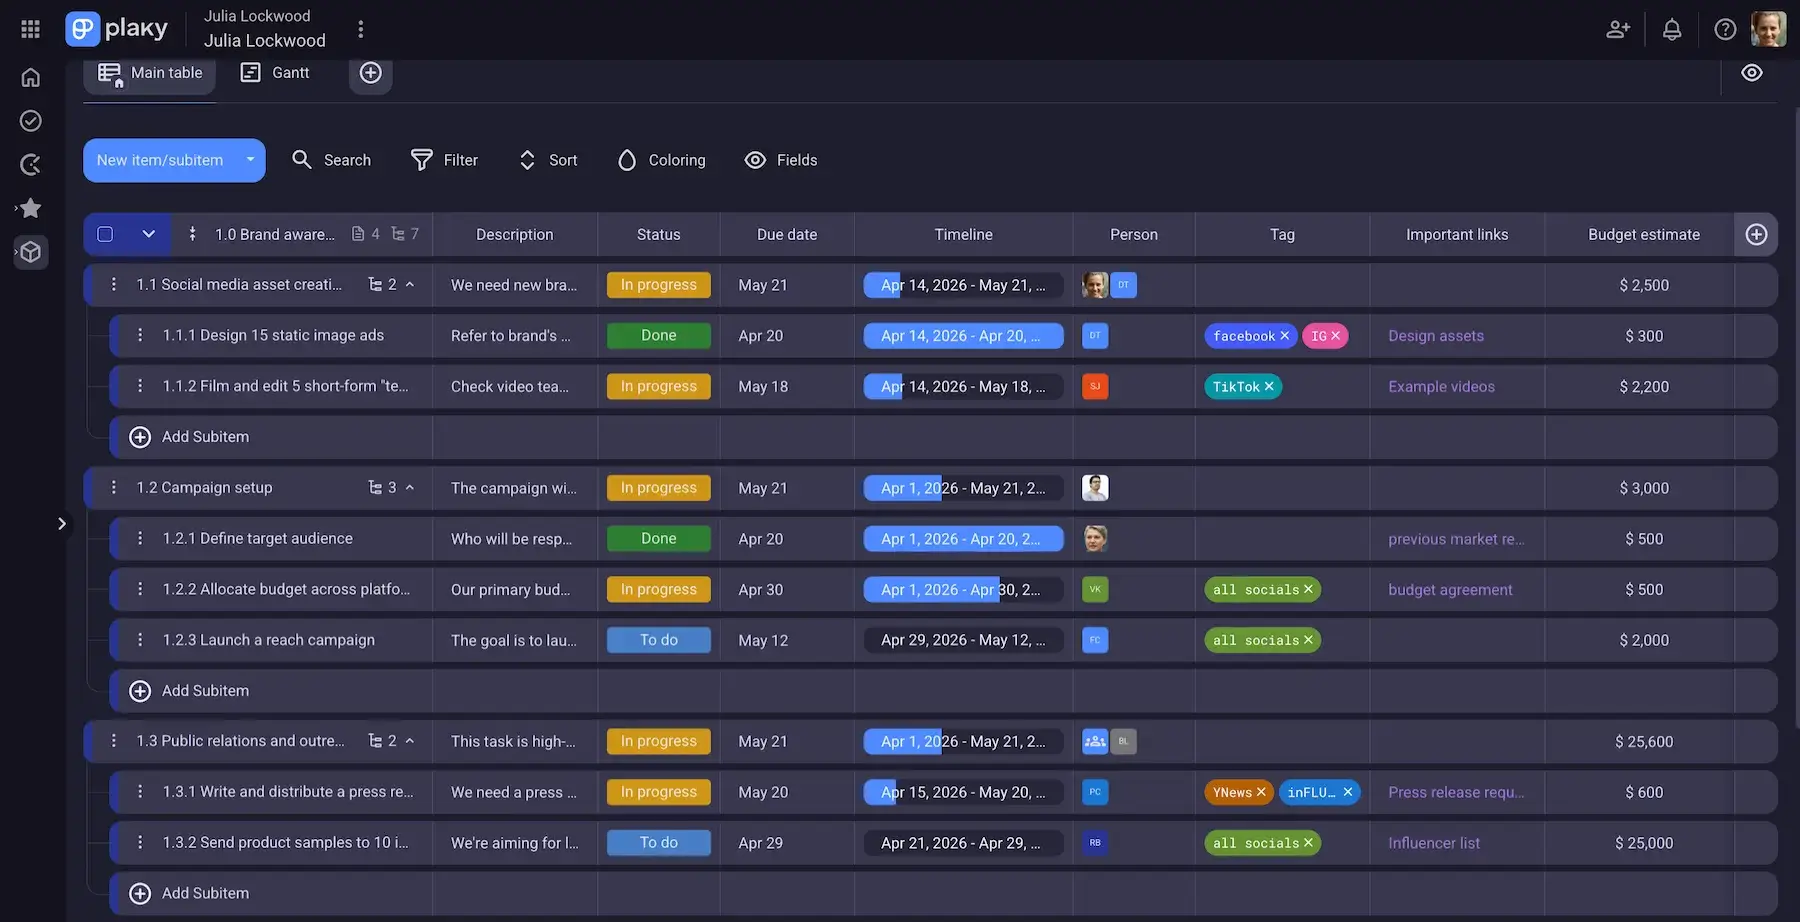
When your work is divided into small increments, it’s easier to estimate the time, budget, equipment, and labor needed to perform each task. So, use the WBS as a base to create your project resource estimates. You can do this in the same table or duplicate your board and add details there using Plaky’s customizable fields, keeping your original WBS board in a clean list.
Another option is to create a new Plaky Board for each category, mark the most relevant ones as favorites, and organize them in folders so you can easily access them and present them to stakeholders in any format they prefer (Table, Kanban, Gantt chart, or Chart view).
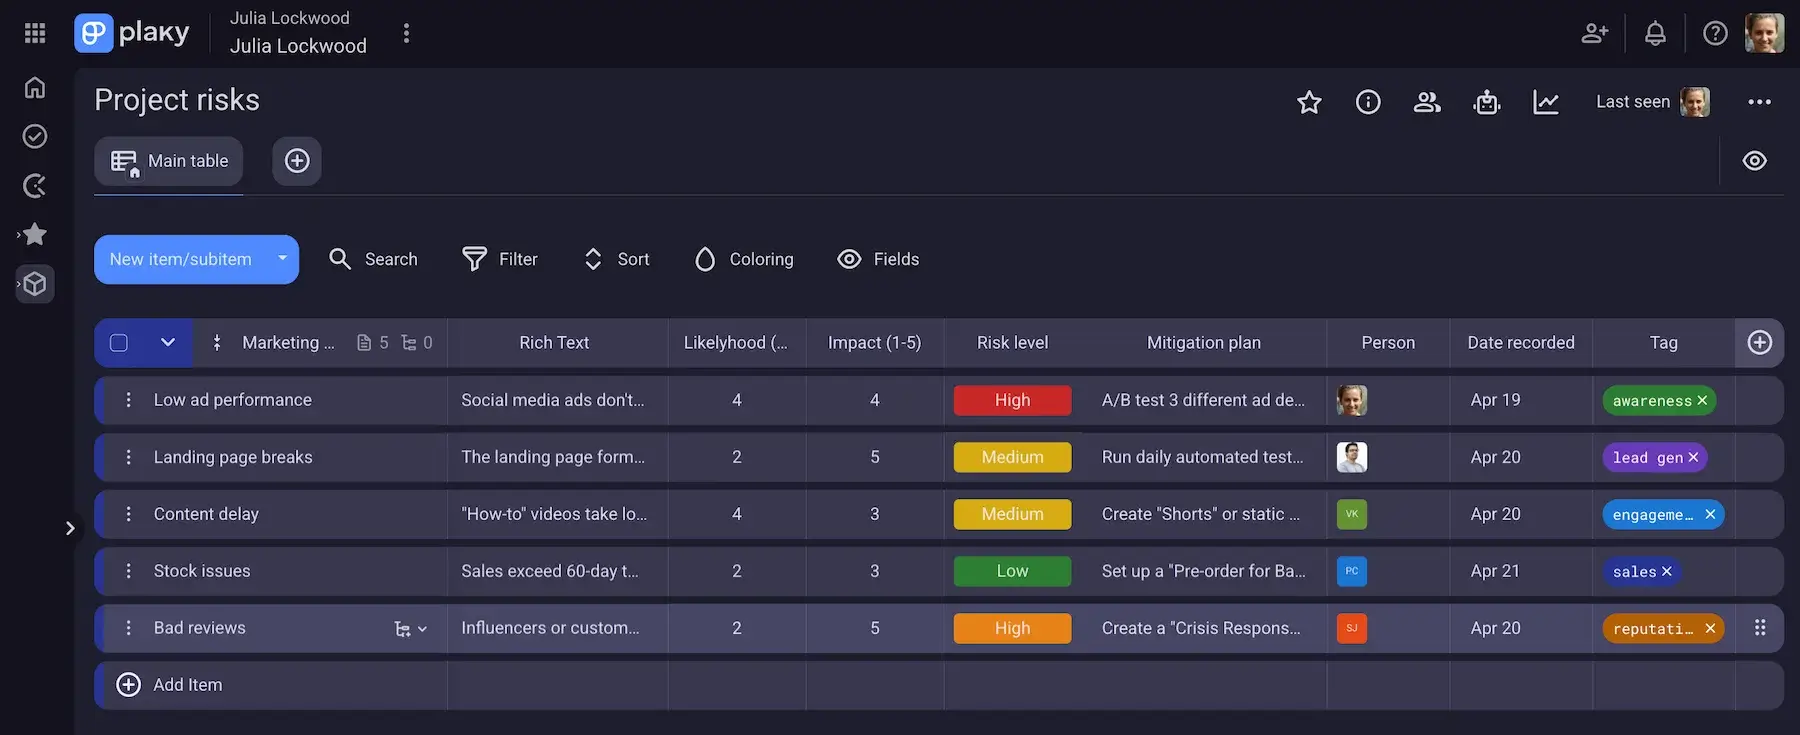
Keep in mind that your project assumptions and estimates won’t all be correct, so you’ll want contingency plans to fall back on when things go wrong. This is why you’ll need a risk register where you’ll record and track project risks.
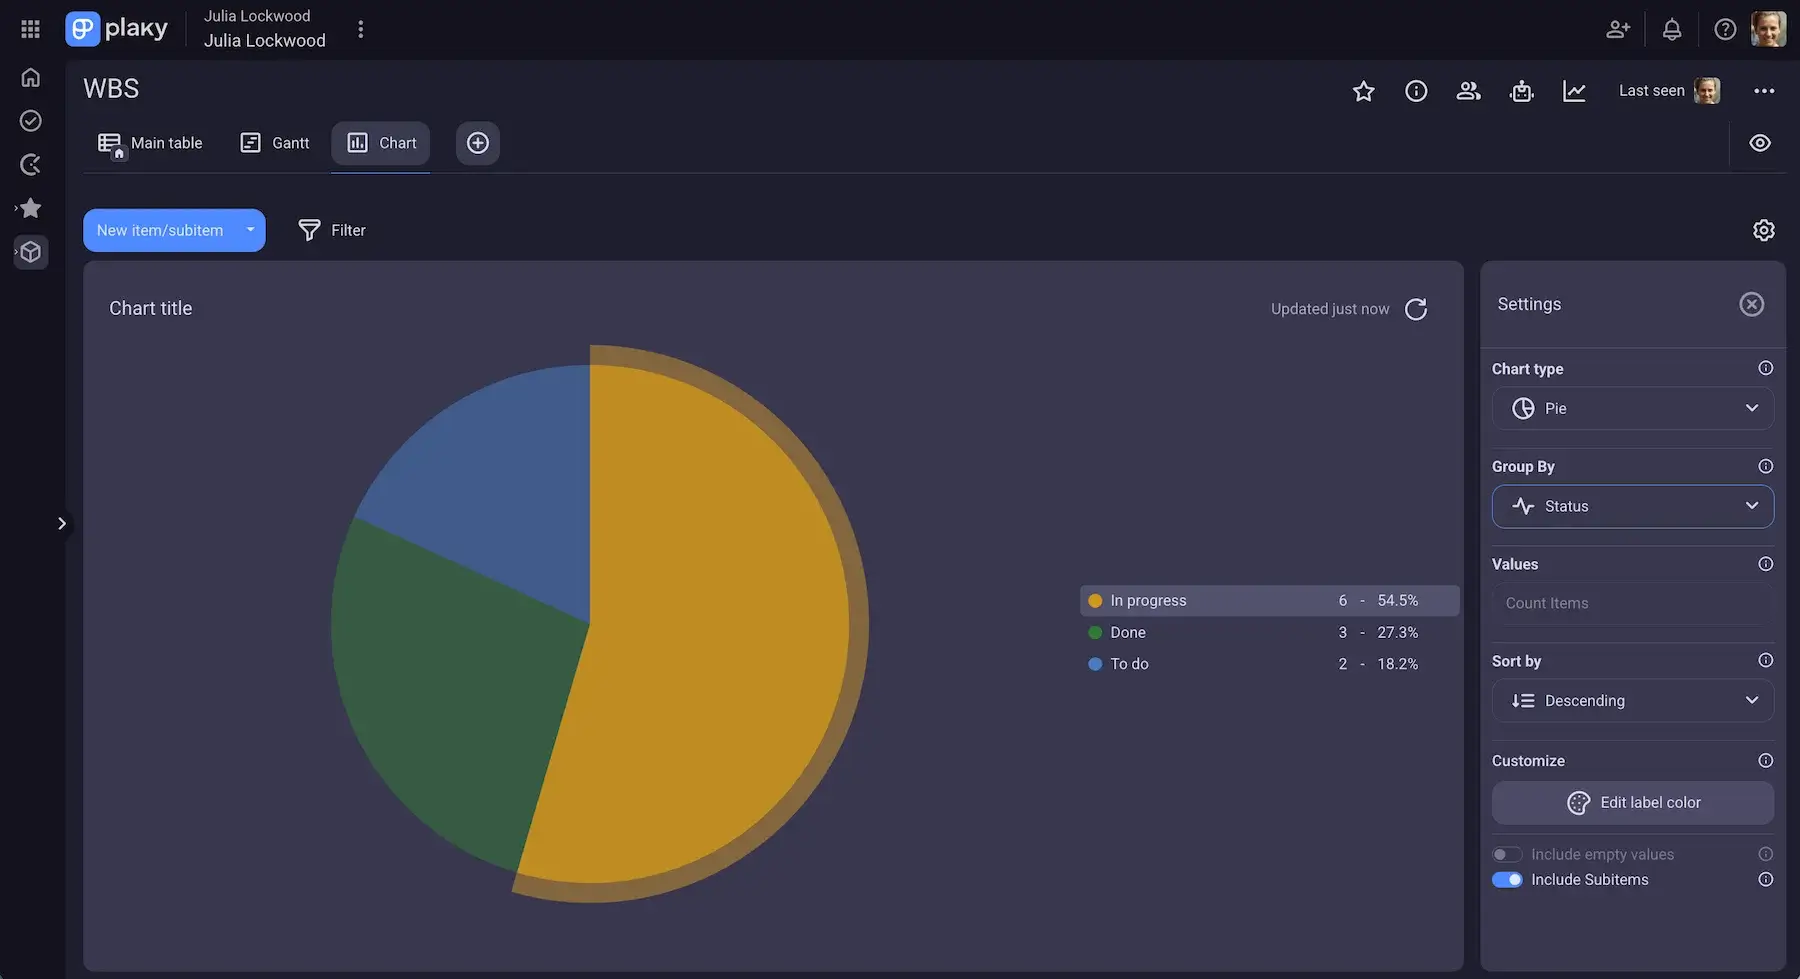
Finally, thanks to Plaky’s Chart view, you’ll be able to easily monitor and update the work plan in the same place where you do your work.
Work plan differences by industry
Regardless of the industry, the elements of a work plan remain the same. The main differences you might notice from industry to industry are the content, the work plan format, and the focus.
For example, linear projects (such as those in the construction industry) that mainly rely on the Waterfall model will have less flexibility and therefore a greater focus on having a precise schedule and budget distribution.
On the other hand, projects that lean toward Agile (such as in the IT and software development industry) will have a greater focus on quality. The timeline and budget will be expected to change and shift throughout the project and therefore won’t require as much detailed planning in these areas.
Easily update and share your work plan using Plaky
The 3 most important things about your work plan are that you can easily update it, record changes, and share it with relevant people, and Plaky is the perfect place to do it.
Plaky connects all your teams and your work in one place. You can create plans, manage people, and track progress in the same app.
A work plan made in Plaky is accessible to everyone who needs to see it. You can share it with your team and stakeholders, allow them to give input and feedback, or just give them viewing permissions to prevent any accidental edits. Alternatively, keep all your plans in closed spaces and private boards so only you can see them.
Play around with different board views and customize fields and colors to your liking to create a personalized and intuitive workspace for everyone involved.
How we reviewed this post: Our writers & editors monitor the posts and update them when new information becomes available, to keep them fresh and relevant.