
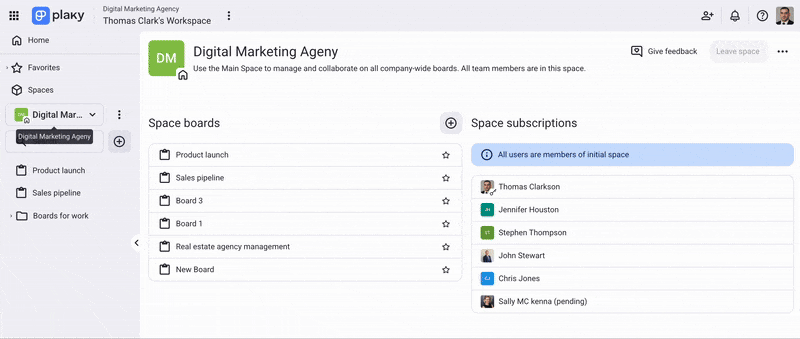
Space overview
With space, you can manage multiple departments, teams, projects, tasks, and all related correspondence with your coworkers in one place. Stay focused on tasks and projects relevant to you and easily navigate through your workspace’s hierarchy.
In this article, we will briefly mention the most relevant functionalities and actions you can perform in your space.
Add new space #
To add new space:
- Select the Space in the left sidebar
- Click the three dots to open the menu
- Choose Add new space form the dropdown
- Enter space name
- Click Create space
Now that you created a new space, you can proceed with other configurations.
Manage team members #
With Plaky, you can manage your team members within your space.
Apart from adjusting your space type as open/closed, you can also add/remove team members within your space, or invite new members to start using Plaky and become members of your space.
Admins can view a closed space only if the owner invites them to it.
Plaky also enables you to define the user type of the newly-invited members. A user can be defined as a member (different access permissions) or a viewer (read-only).
Space members are referred to as space subscribers. All users within one workspace are subscribed to the home (initial) space, and cannot be unsubscribed/removed from it.
Closed space and the viewer user type features are available on Pro and Enterprise plans.
Join or leave space #
As a team member, you can join or leave a space simply by clicking Join next to the space name on the right. To leave the space, click X next to your name in the member’s list and confirm by clicking Unsubscribe, or click on Leave Space button in the top right corner.
Only members can join a space, viewers need to be added by the owner.
Switch between spaces #
If your workspace has multiple spaces, you, as a team member, can be a member of multiple spaces.
If a space is closed, only the owner can add a new member.
To switch between multiple spaces:
- Navigate to the Space you are currently using in the left sidebar
- Click the dropdown arrow
- Choose the space from the list, or find one by entering keywords
- Once you choose the space, you will be redirected to its homepage
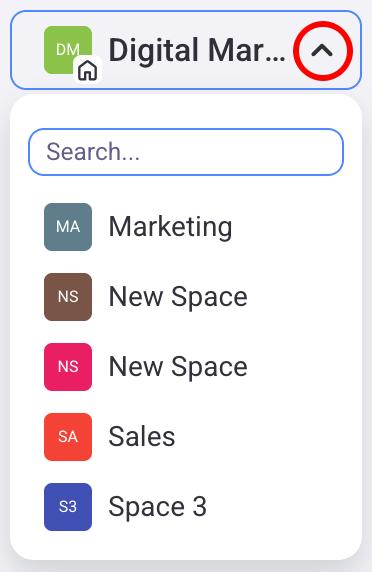
You can switch between the spaces you have access to, back and forth.
Customize your space #
Space can be customized so that it reflects the types of projects, tasks, or team that is in charge. Plaky gives you the opportunity to add a Space description, add a cover photo, and an icon. You can also set the most relevant Space as the default, so it’s the first one you see when you log in to Plaky.
To learn how to set a space as the default, refer to our article.
Manage boards #
Plaky allows you to manage your boards in each space in various ways. You can duplicate the board, move the board to a different space, change the board type, rename it, and delete it. The board can be set to public (by default) or private and marked as a Favorite.
Private board is available on Pro and Enterprise plans.
Folders #
Organize multiple boards into folders. Folders allow you to separate boards according to the criteria of your choice (e.g. Marketing, Sales, Development… etc.).
You can also move the existing boards into the folder you’ve created.