

Project management software is an inseparable part of our work life. Without it, we would be lost in the chaos of projects, tasks, and deadlines.
So, transferring to a different PM tool may be daunting — but there’s no need to worry! Importing your data from Trello into Plaky by CAKE.com couldn’t be simpler.
Just follow the 5 steps outlined in this article, and you’ll be able to see your data presented in a clear and functional Plaky board in no time at all.
- The first step is to export it from Trello in the form of a CSV file.
- Then, import the CSV file into Plaky by creating a new board or by adding items to an existing one.
- Next, you will see the preview of the imported data in Plaky where you can choose which column you want to use as the item name.
- Then, you map your board — you can put all your tasks in a new group, or you can generate task groups according to one of the CSV columns.
- The final step is to click on Finish import to finalize the process and manage your tasks in Plaky.
- There are some import limitations — you can import a maximum of 70 columns, 1,001 rows, 20 item groups, 18 Status field values, with the maximum import size of 10 MB.
#1 Export your Trello board
The first step to getting your data in Plaky is to export it from Trello in the form of a CSV file. To do this, go to the Trello board you want to export, click on Menu, choose Print, export and share, and pick Export as CSV.

Note: You need a Premium account to be able to export Trello boards in CSV form. The Free and Standard plans only support JSON file exporting. Thankfully, Trello offers several Power-Ups (add-ons) on all plans, so you can use a Power-Up to get around this issue and export CSV files even as a free user.
#2 Import the CSV file into Plaky by CAKE.com
Before you import your data, you must first decide whether you want to create a new board for your data or import it into an existing one.
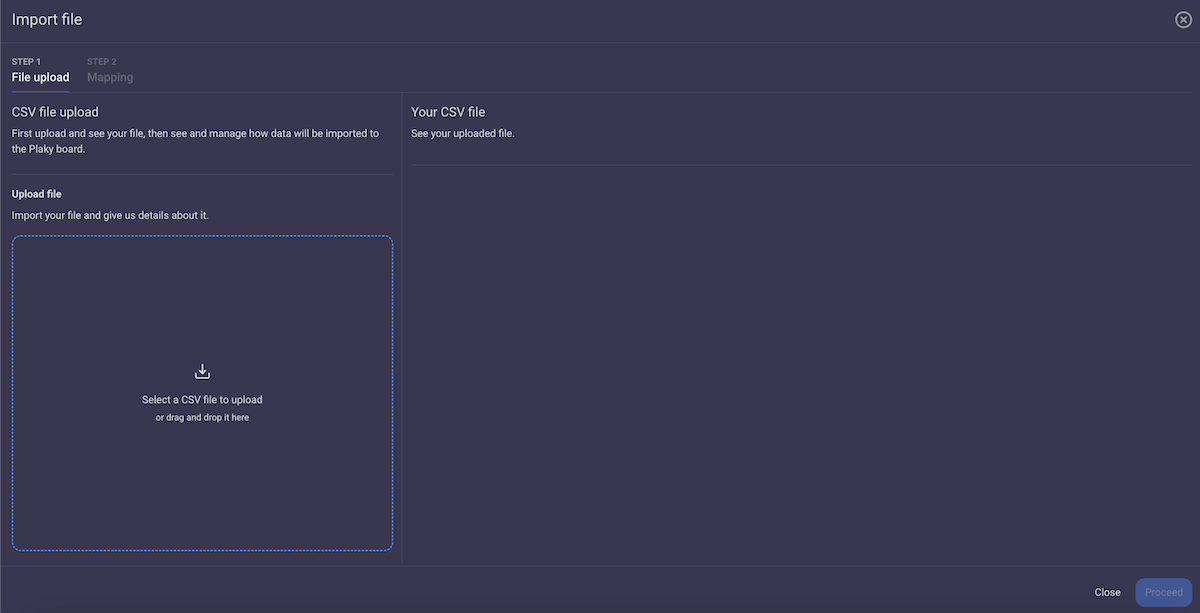
Import into a new board
Here are the steps for creating a board from scratch:
- Click on the + button in the side menu.
- Choose New Board.
- Select Create from file from the dropdown menu.
- Choose the CSV file you want to import.
- Click on Proceed.
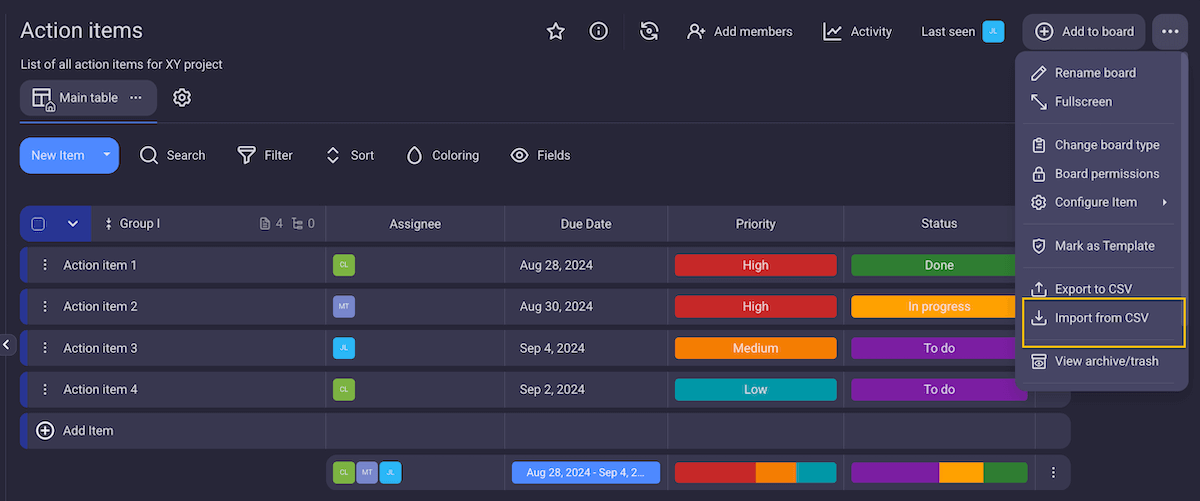
Import into an existing board
Importing a CSV file into an existing board is slightly different, but equally simple:
- Click on the ellipsis in the right-hand corner of the board.
- Select Import from CSV.
- Choose the CSV file you want to import.
- Click on Proceed.
The ability to import into both new and existing boards is very handy if, for example, you have a huge amount of data on your Trello board that needs to be imported as several CSV files.
In that case, simply import the first file into a new board and then continue to import the rest of those files into the same, now existing, board. That way, all your data will stay together.
Note: Keep in mind that there are a few limitations when importing data into Plaky:
- Plaky has an import size limit of 10 MB.
- The maximum number of columns in the CSV file is 70.
- The maximum number of rows in the CSV file is 1001.
- The maximum number of item groups is 20 (any groups after that will be merged with the last group).
- The maximum number of Status field values in the CSV file is 18 (any additional values will be skipped).
#3 Generate the table
Once you’ve imported the file, you will see the preview of the imported data in Plaky. You should check if all the information is there.
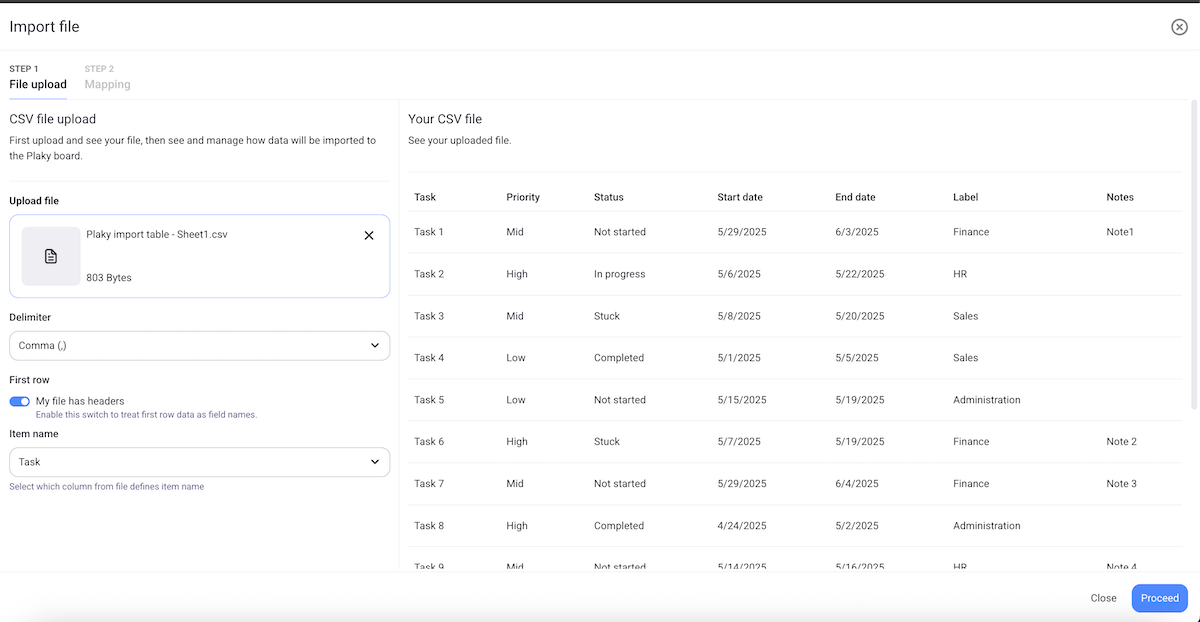
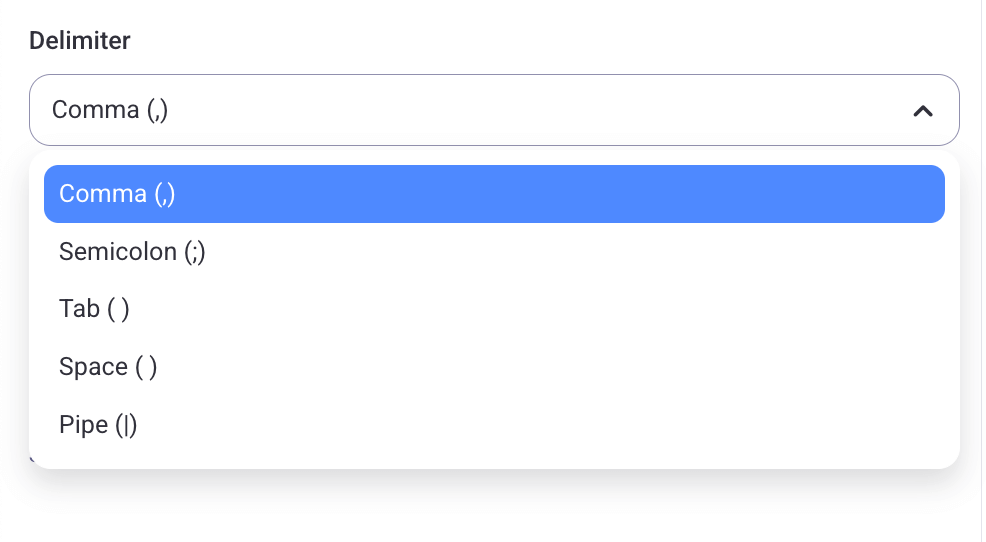
Here, you can choose which column you want to use as the item name, as well as the delimiter. Comma is set as default in Plaky, but you can set it to semicolon, space, pipe, or tab, depending on the type of your CSV file.
#4 Map out the board data
Once the data has been generated, it’s time for board data mapping. You can put all your tasks in a new group, or you can generate task groups according to one of the CSV columns. For example, you can group your data according to status or priority.
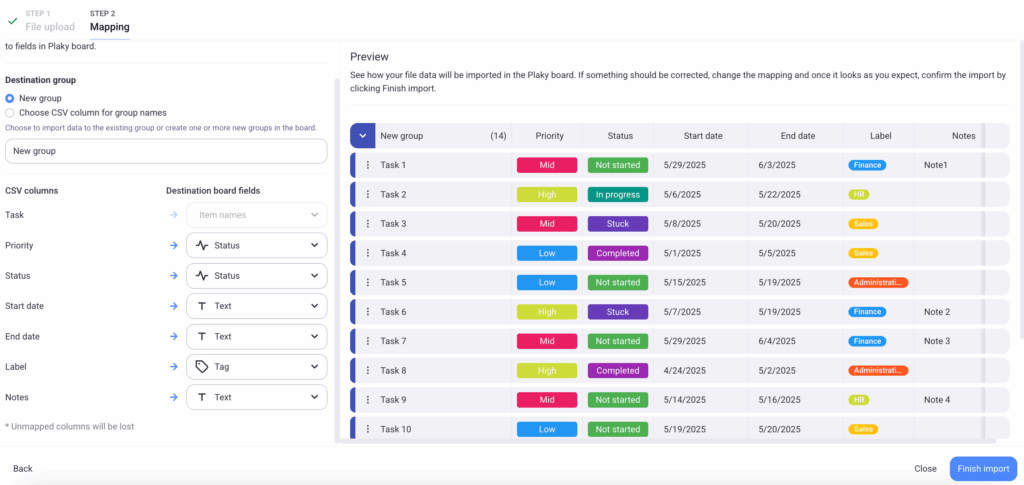
The next step is to choose one of Plaky’s field types for each of the CSV columns (text, number, link, etc.). If Trello’s field types match Plaky’s, Plaky will assign a field type on its own, but you should still check it to confirm it’s the one you want.
Bear in mind that an unmapped CSV column won’t be transferred into the Plaky board, so make sure that you choose a Plaky field for each column.
If you are importing data into an existing board, Plaky will map CSV columns based on the existing fields if possible. However, you will have to choose a field type to add new fields for all CSV column types that aren’t present in the board.

#5 Finish the import
Finally, all that’s left to do is click on Finish import and enjoy all your Trello cards beautifully organized in Plaky by CAKE.com.
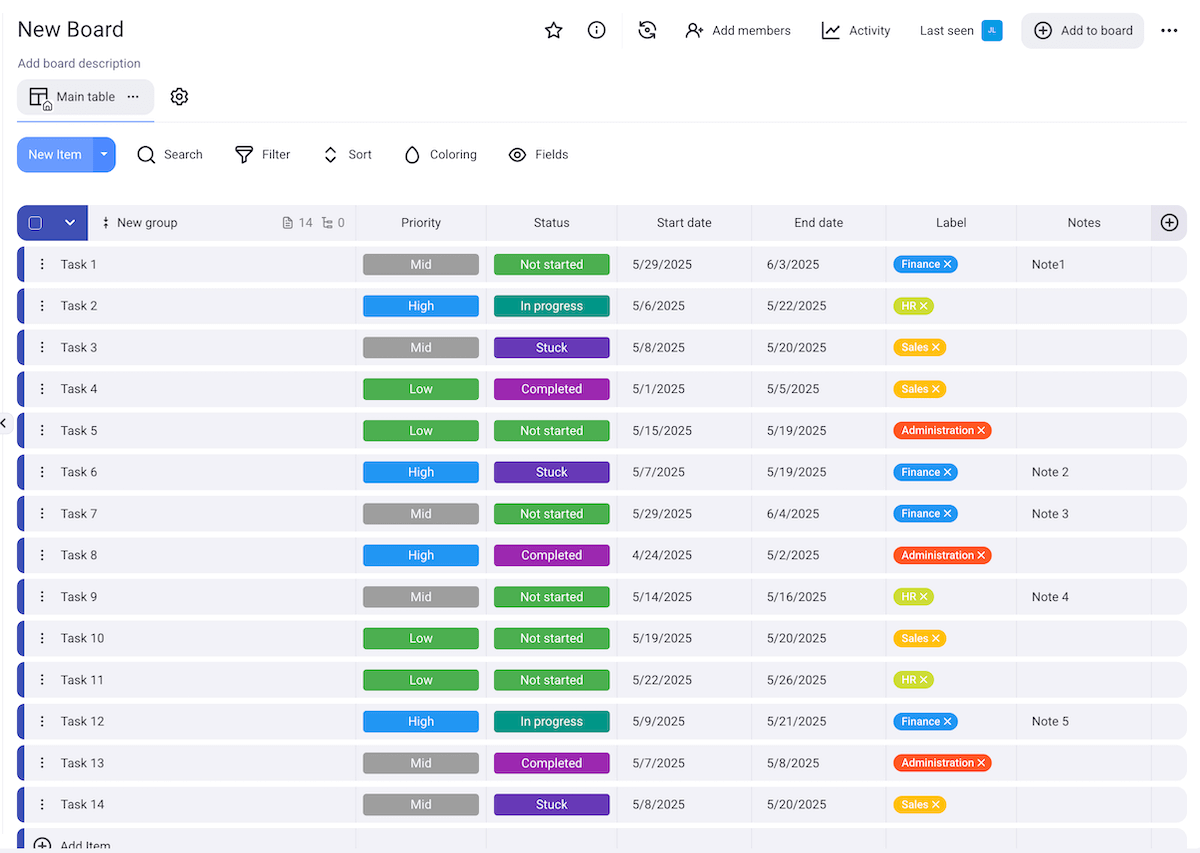
But, this doesn’t mean the board is now set in stone.
If you want to change something after you’ve finished the import, don’t worry — since Plaky is highly customizable, you can re-organize your board and add or delete fields whenever you want. There are even bulk actions to help you make changes faster.
And that’s all — just follow these 5 simple steps, and you’ll transfer your Trello board into Plaky quickly and easily. It might even take you less time than it took to read this article!
Good to know before you begin
Before you start the import process, here are a few things to keep in mind:
- You can only import one board at a time in Plaky.
- Your data must be in the form of a CSV file.
- The content of the file you’re importing doesn’t have to be in English.
- Any member can import a CSV file — you don’t need admin access.
- The length of the import depends on the size of the file, but it’s generally a fairly quick process.
And, most importantly, if you encounter any problems, you can contact Plaky’s customer support, which is available 24/7 via phone, chat, or email.
Transform your CSV files into intricate and colorful boards with ease. Try Plaky today!
Get started with Plaky by CAKE.com
How we reviewed this post: Our writers & editors monitor the posts and update them when new information becomes available, to keep them fresh and relevant.