Updated: May 27, 2025
 monday.com getting too limiting for you? You’ve decided to switch to Plaky by CAKE.com? Good for you!
We’ll walk you through the entire process. Just follow these 6 easy steps, and you’ll smoothly bring your data from monday.com boards to Plaky. After that, handling data is going to be a breeze on our platform!
- Export your monday.com board to Excel by clicking on the menu > more actions > export board to Excel.
- Clean up data and export your Excel file to CSV.
- Upload the CSV file to Plaky by clicking on the menu > import from CSV or create a new board > create from file.
- Map your board data to make sure everything fits your Plaky workflow and you’re done!
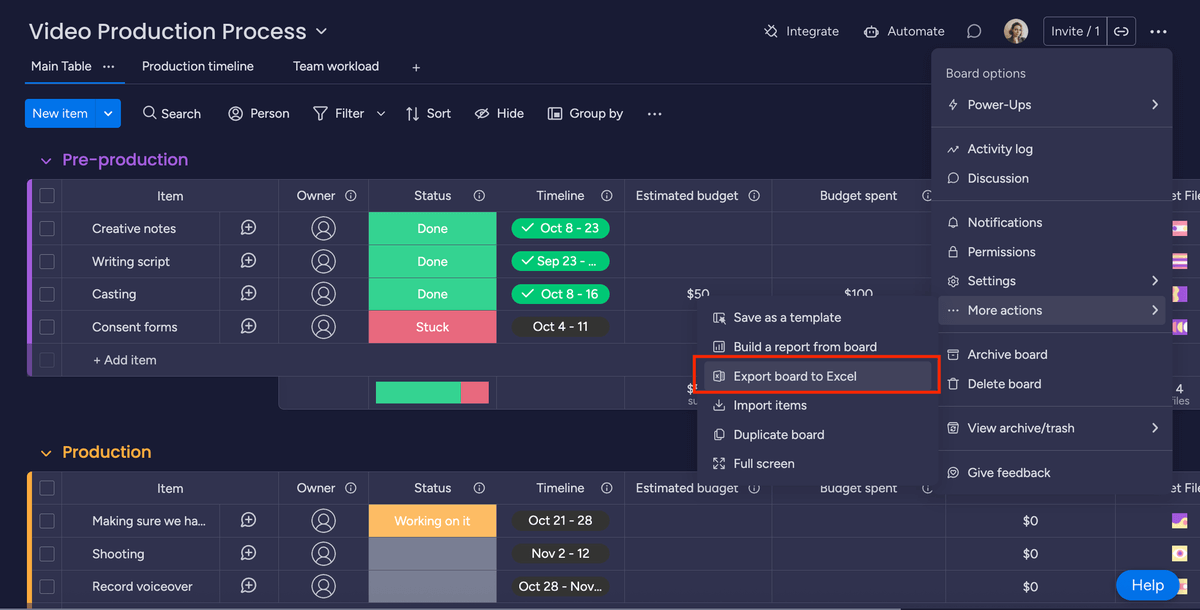
#1 Export your monday.com board to Excel
To export your monday.com board to Excel, just click on the 3 dots in the top right corner, choose More actions, and Export board to Excel.
#2 “Clean up” your data and export your Excel file to CSV
monday.com’s file structure is a bit unconventional — it includes the board title, board description, and group titles in the export. The trouble is, Plaky identifies those headers, so the data display and arrangement appear unusual.
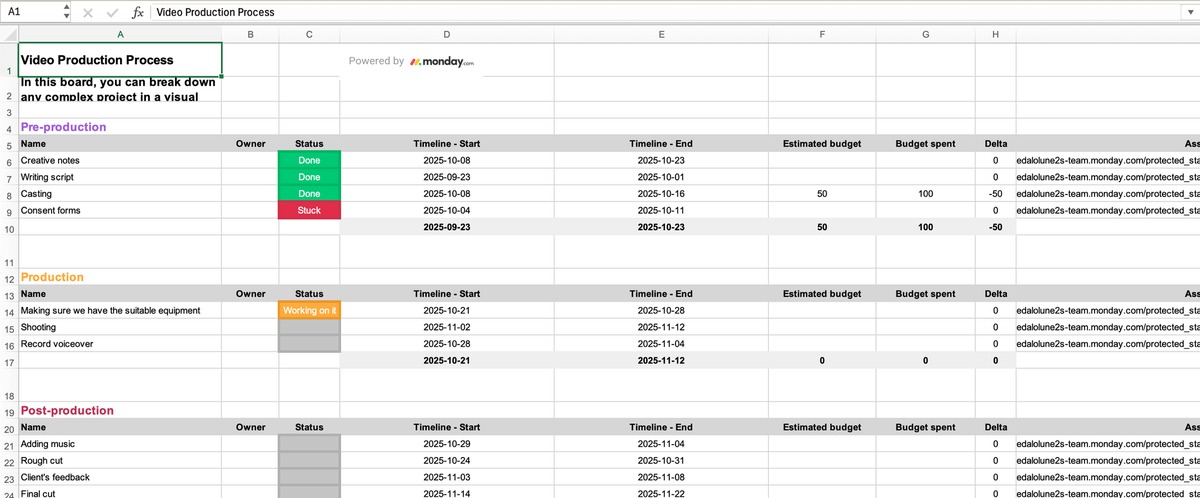
To ensure a standard import appearance, it’s crucial to first remove these elements from the file itself.
So before converting the file, follow these steps:
1. Remove the header from monday.com’s Excel file, including Board title row (which also contains the monday.com logo) and Board description row.
2. Eliminate any empty lines (usually found between the board description and the first group name row + between groups).
3. Get rid of the summary fields that monday.com adds by default for each item group.
4. Eliminate rows containing the item group names.
After completing these cleanup tasks, here’s how the same Excel file should look.

Now you can proceed to save the file as a CSV.
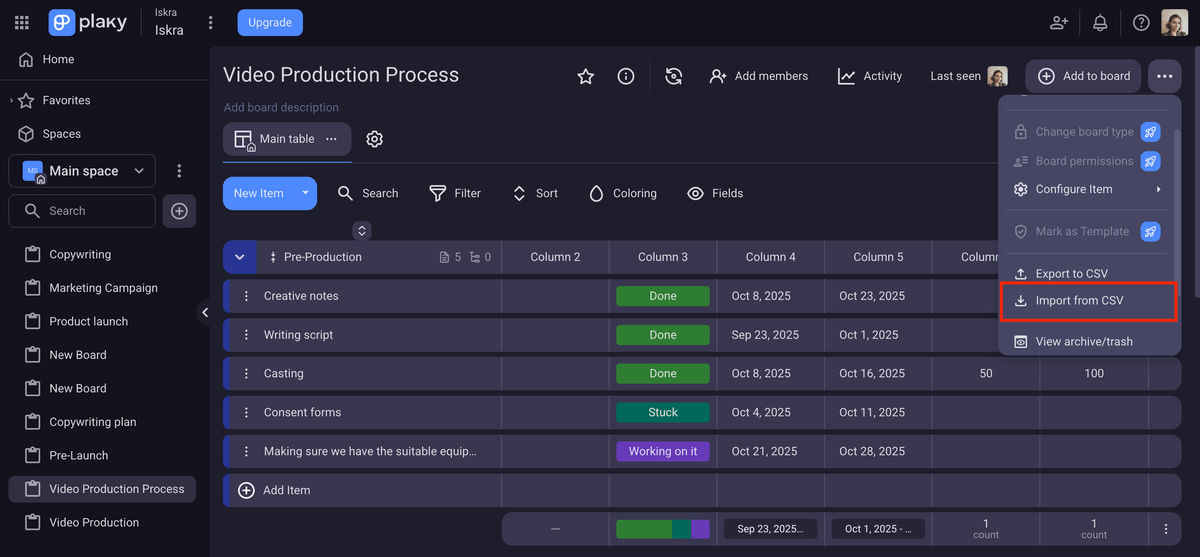
#3 Upload your CSV File
Initially, you need to determine whether you want to import the data into a new board or an existing one.
For a new board:
- Go to the top left corner and find Search (right beneath the Main space).
- Click on + on the right side.
- From the dropdown menu, select New Board.
- Click Create from file.
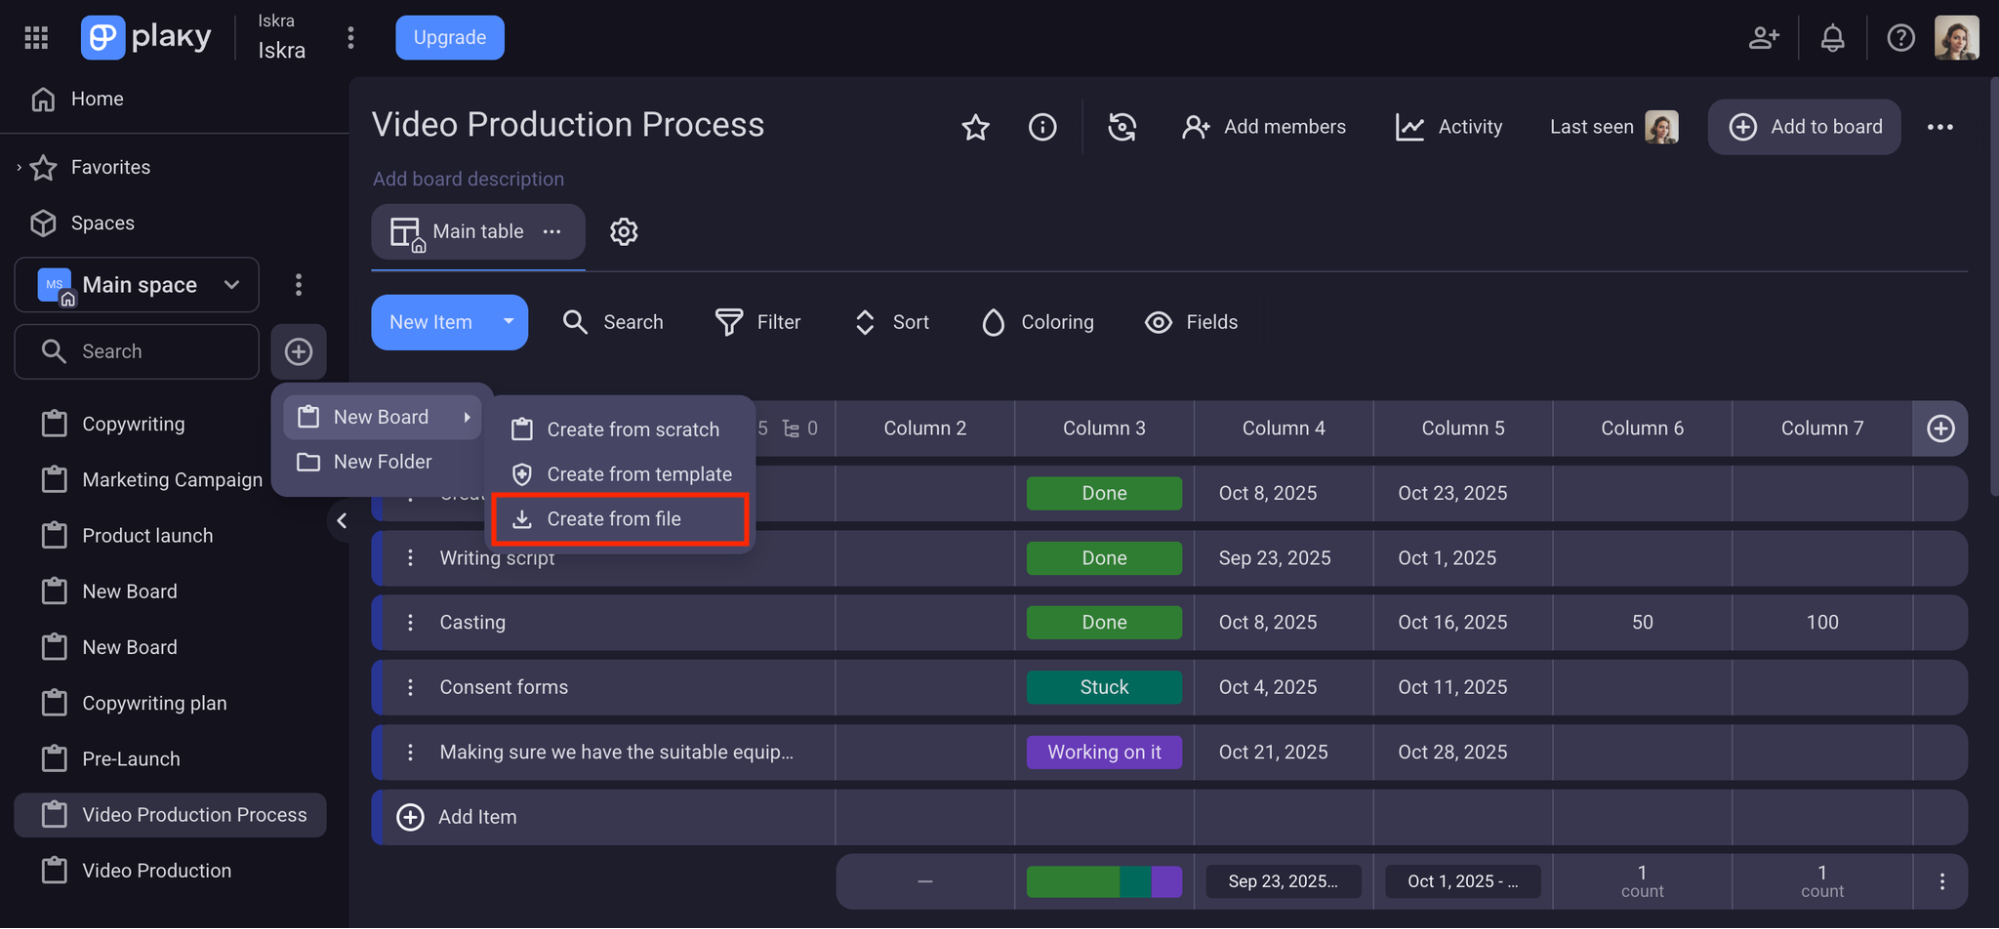
You can now select a CSV file to import. Click Open to upload the file.

For an existing board:
- Click the 3 dots in the top-right corner to open the Board menu.
- Select Import from CSV.
- Select a file to import.
- Click Open to upload the file.
#4 Generate the table
Once you’ve uploaded the file, a table will be generated on the right side of the modal, displaying the contents of the CSV file. Verify that you’ve selected the correct CSV file by checking the contents.
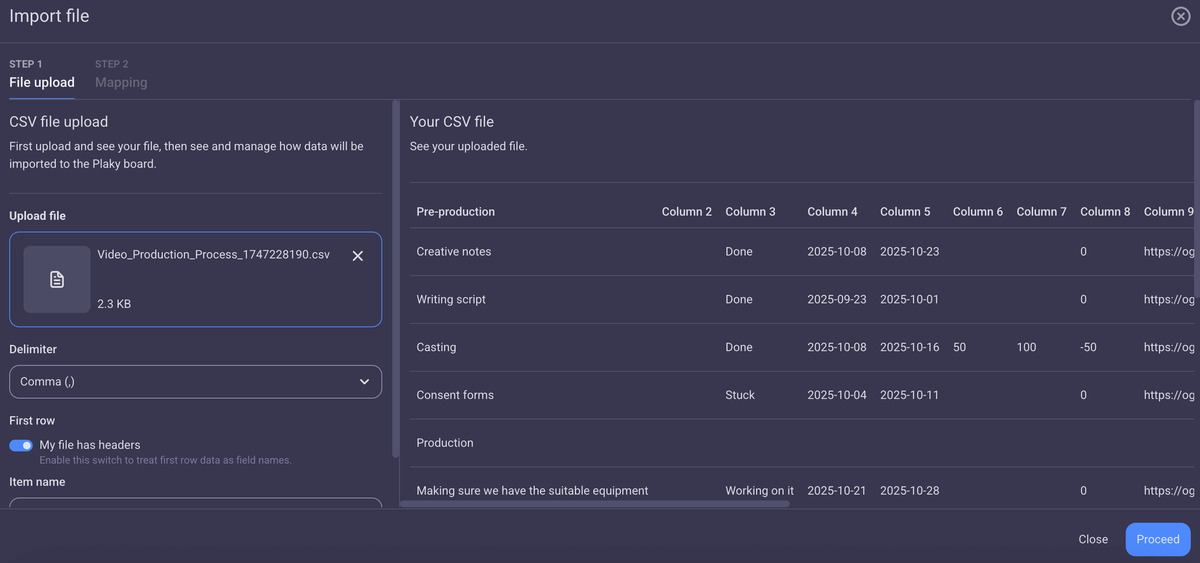
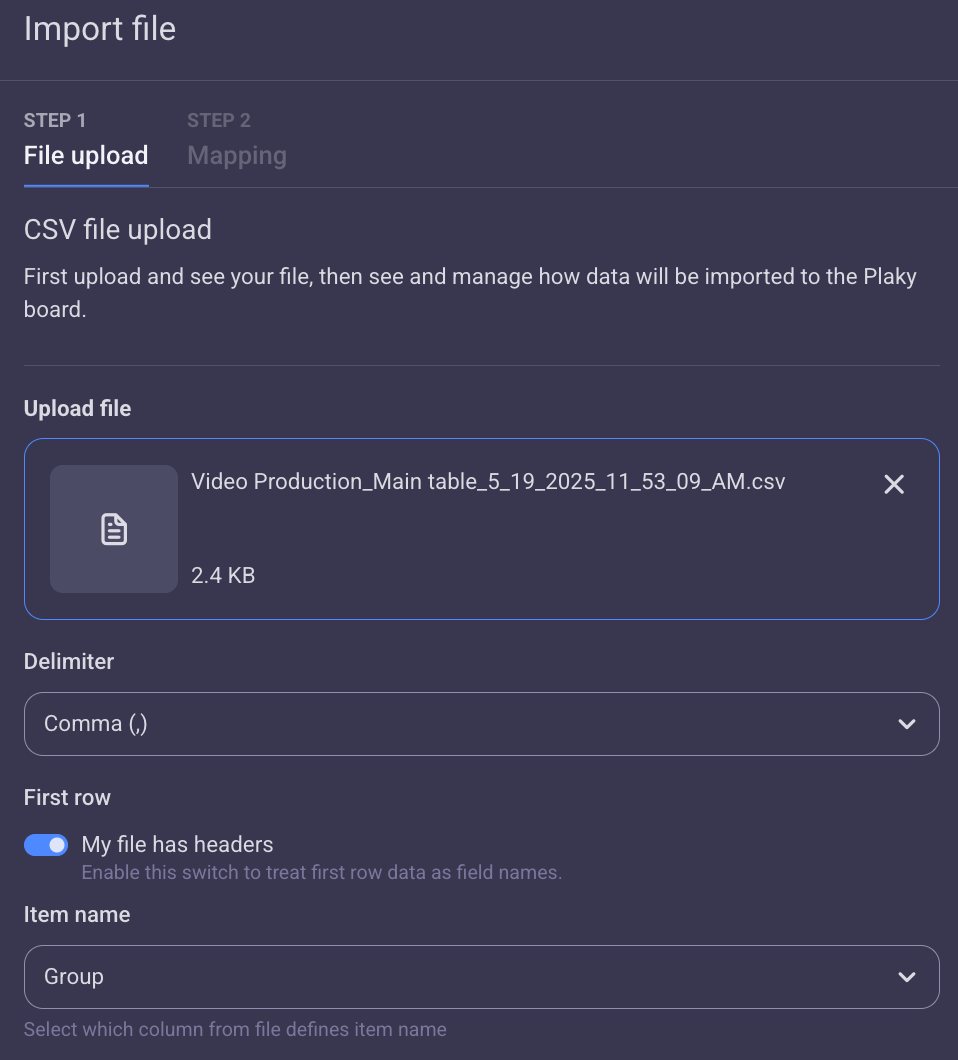
Take note that Plaky uses a comma as the default delimiter, but you can change it to a tab, pipe, space, or semicolon based on how your CSV file was created.
You can also:
- Pick the delimiter from the dropdown menu,
- Indicate if there are headers in the file, and
- Select the column that defines the item name.
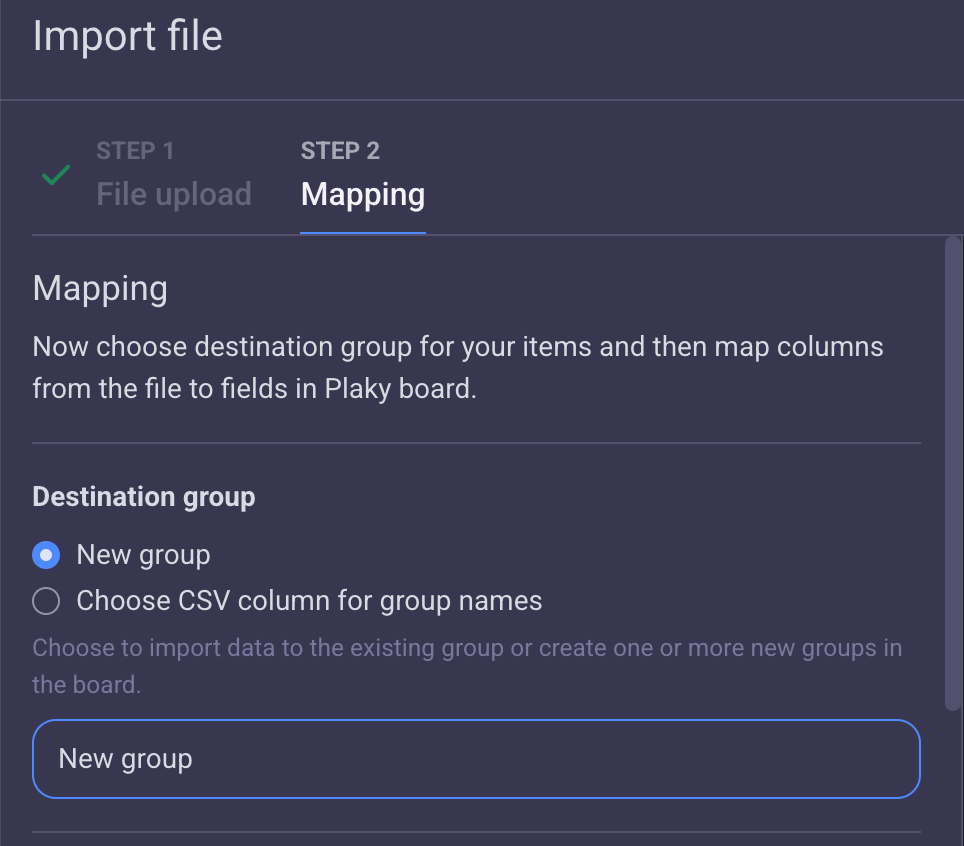
#5 Map your board data
Now, choose where your items will go and match the columns from the file to the fields in your Plaky board.
Select the desired destination group:
- A new group (enter the name) or
- CSV column for group names.
It’s time to define the item names. To do that, you have to specify the field from the CSV file that defines them.
For every CSV column, choose the corresponding board field type from the dropdown menu.
You can:
- Select an existing field,
- Create a new one, or
- Opt not to map the column at all.
Once you are sure you’ve defined the basic info about your CSV, you can move to the next step, which is to finish the import.
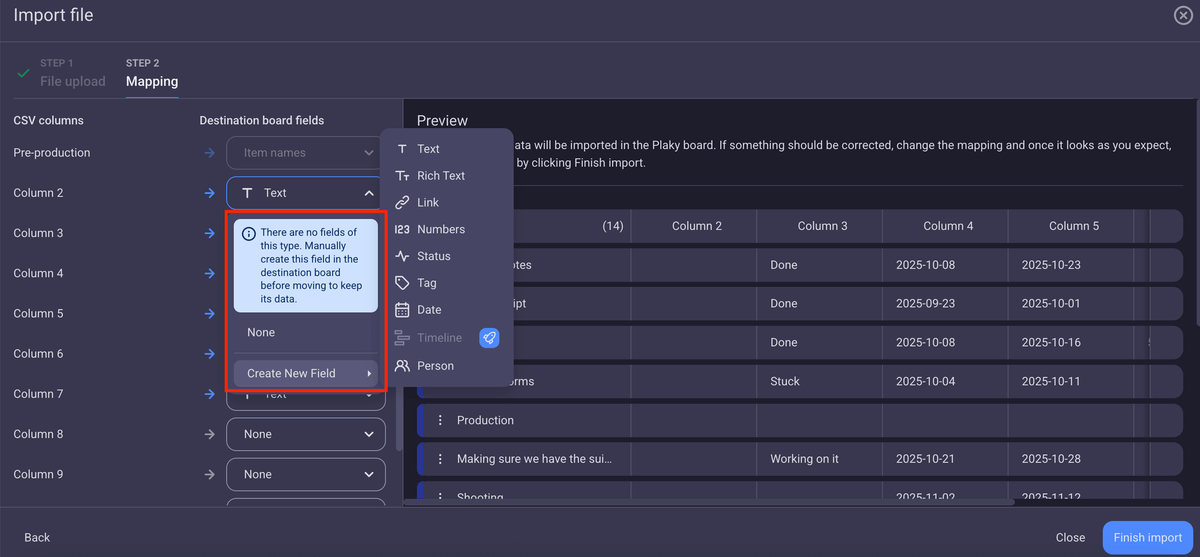
Note: Unmapped columns will be lost, and the mapping for columns used for task name and group name cannot be changed.
If the CSV file contains more columns than the limit allows, the initial set of columns will be mapped by default. Additional columns will be disabled until their destination field is changed to None.
#6 Finalize the import
Review the mapped columns and ensure all necessary configurations are in place. Then, click Finish import to complete the data import.
Customize fields to fit your needs
Tip: If you’re done with your import and are ready to move stuff around, take advantage of our bulk actions and save some time.
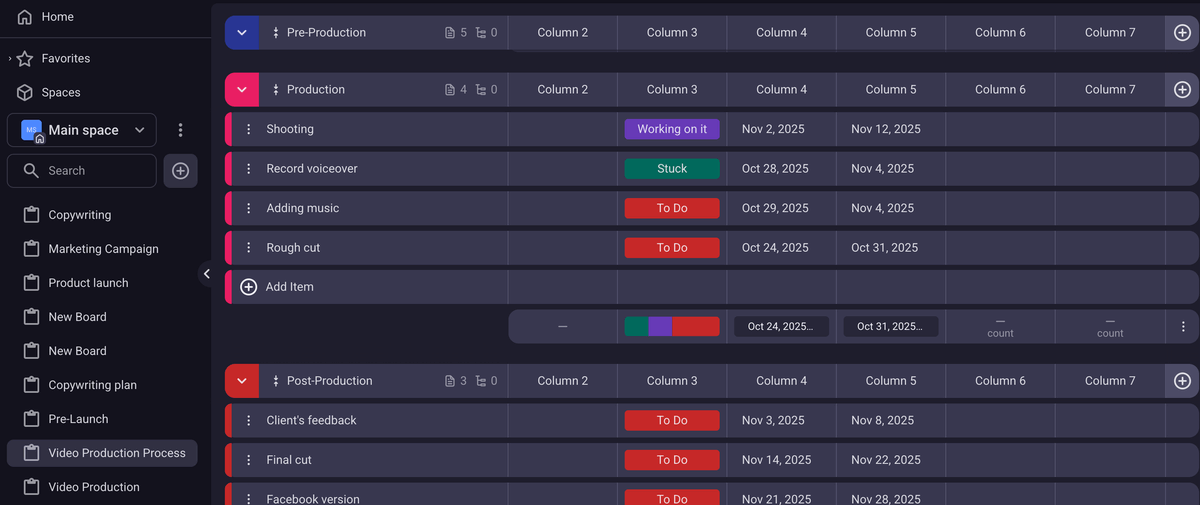
Job done! After 6 easy steps, your once monday.com board is now a Plaky board.
Good to know before you begin
Before you begin, there are a few things you should know about migrating your monday.com data to Plaky by CAKE.com:
- Depending on the volume of data stored in your monday.com account, the total import process typically may last from 1 minute to an hour or more.
- You can only transfer 1 board at a time.
- monday.com doesn’t provide the option to export to CSV. So, you’ll need to export the board you want to migrate to xlsx format and then convert it to CSV.
Note: If you happen to encounter any issues, or you simply need support, don’t hesitate to reach out to the Plaky Help team (available 24/7).

Break free of any limitations & get unlimited users, spaces, boards, and items for FREE. Try Plaky!
Get started with Plaky by CAKE.com
How we reviewed this post: Our writers & editors monitor the posts and update them when new information becomes available, to keep them fresh and relevant.