Table View
Table View lets you organize projects and tasks by using a spreadsheet. This gives you a clean overview of your tasks and their details.
In this article, we will show you how you can use Table View in Plaky.
Create a new Table View #
Table View is the default view you will see when you create a new Board.
Here’s how you can add a new Table View:
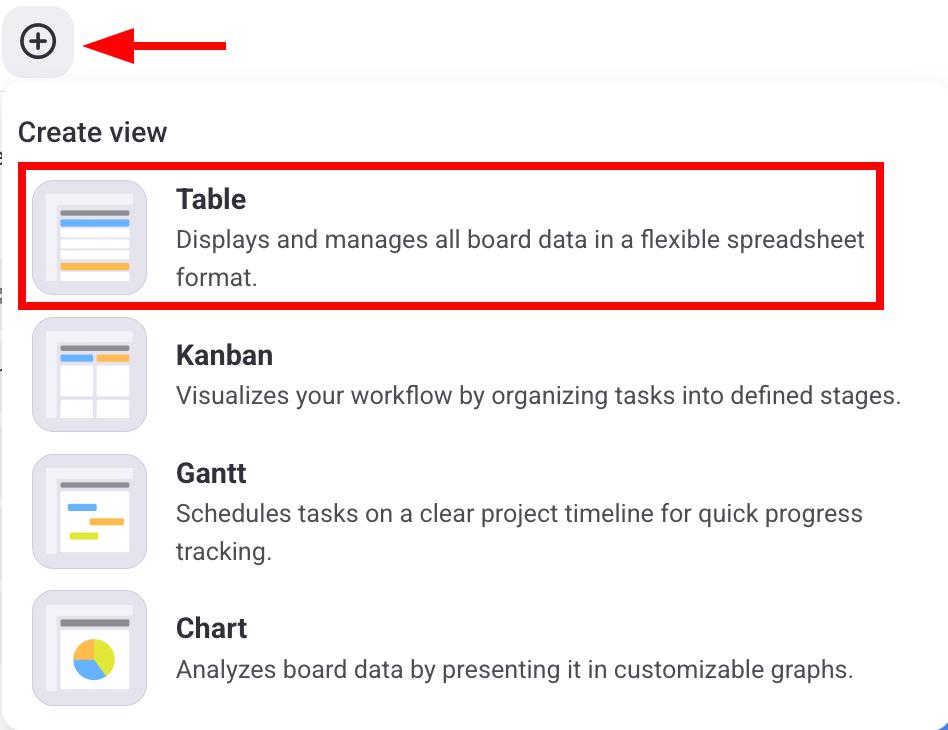
- Click on the + button
- Select Table
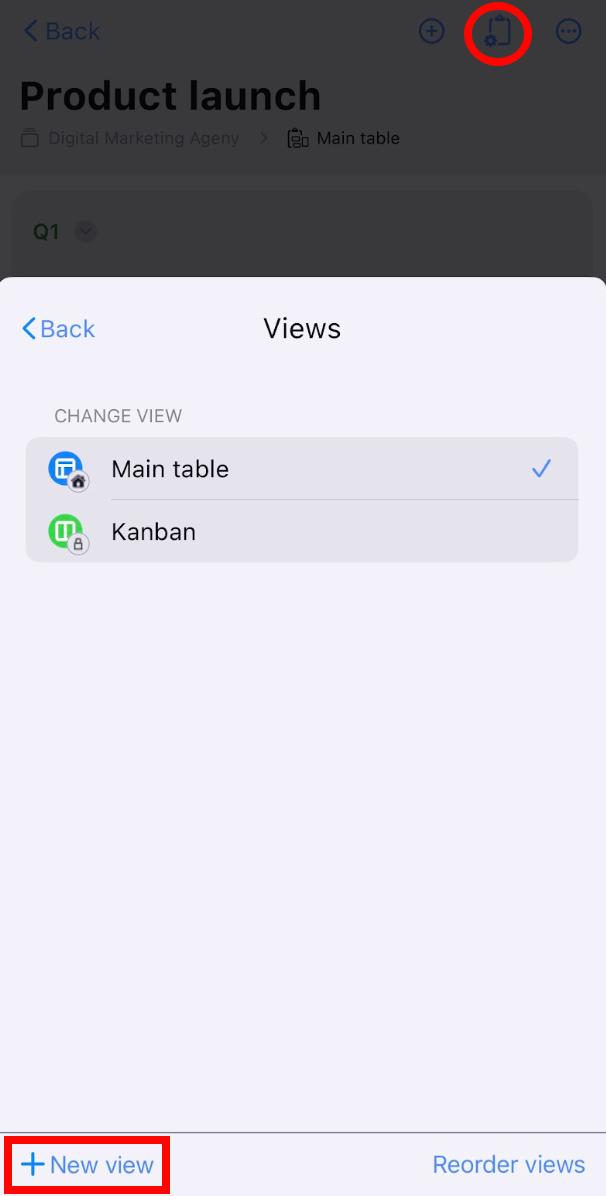
- Tap on Board view configuration in the top right corner
- Tap on Views
- Select + New view
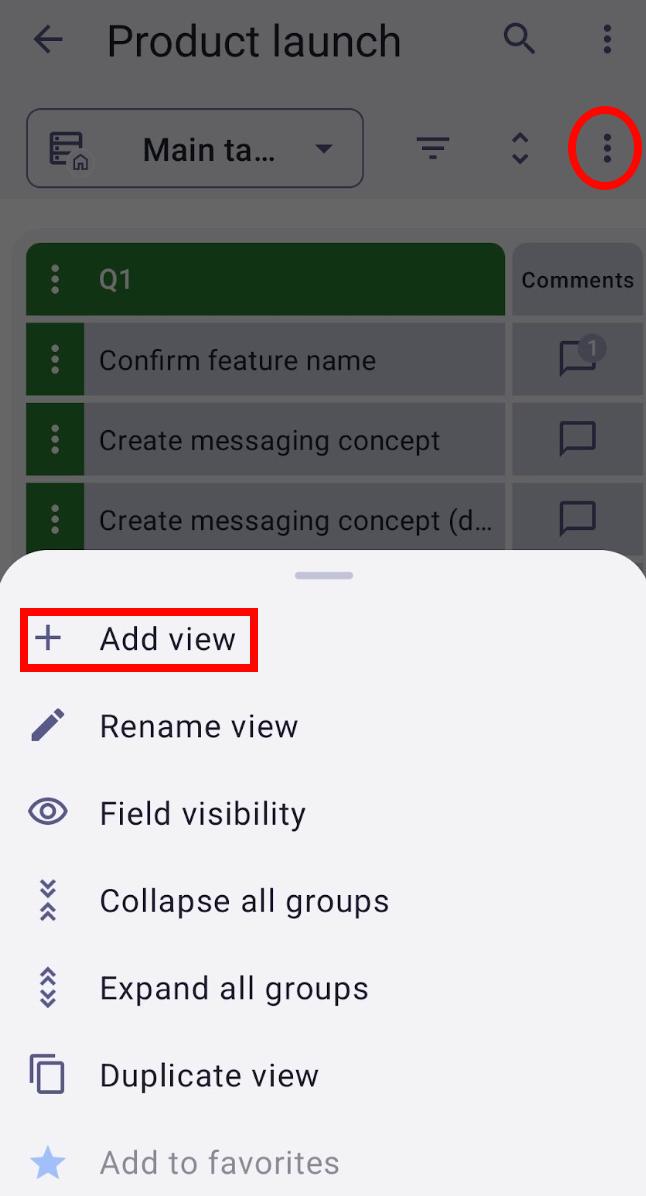
- Tap on the three dots in the top right corner
- Select + Add view
- Enter View Name
- Select Table under View type
- Check if you want the View to be private
- Tap on Create to complete the action
Organize Item groups #
Items on your Table View are grouped in Item groups. Each Item group has its own color, making it easier for users to divide them visually. For example, Item groups can represent a specific phase of a project (e.g., backlog, to-do, in progress).
Here’s how you can create an Item group:
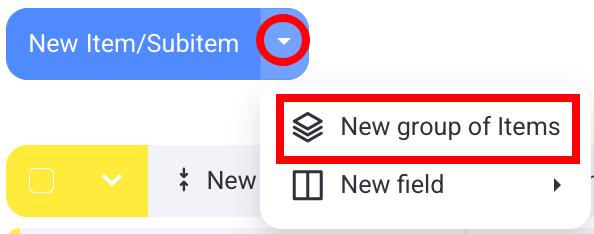
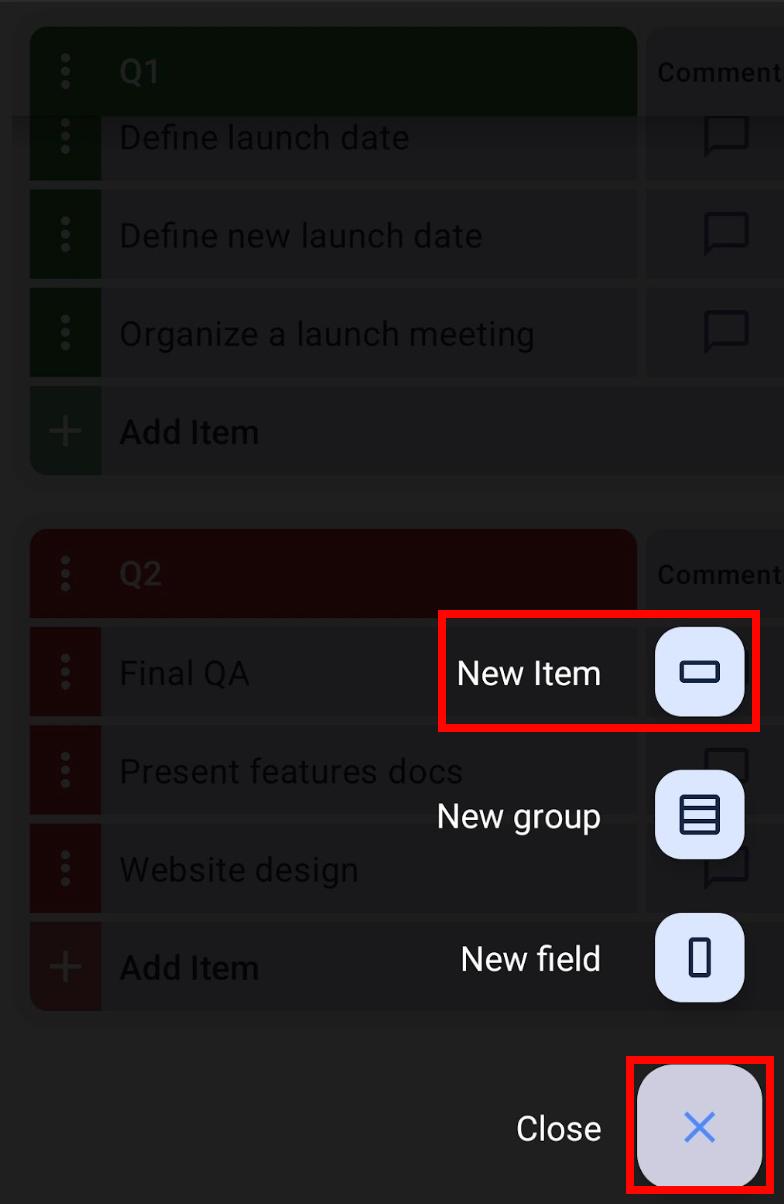
- Click on the dropdown arrow next to New Item/Subitem
- Click on New group of Items
- Write the Item group name
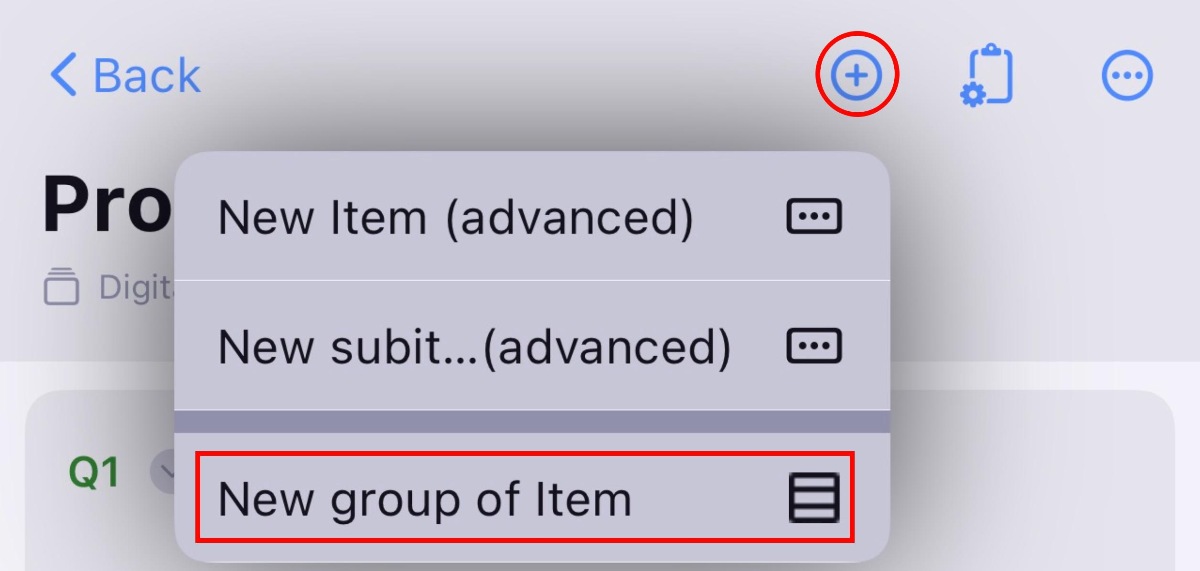
- Tap on the + icon
- Select New group of Items
- Add group title
- Tap Save to complete the action
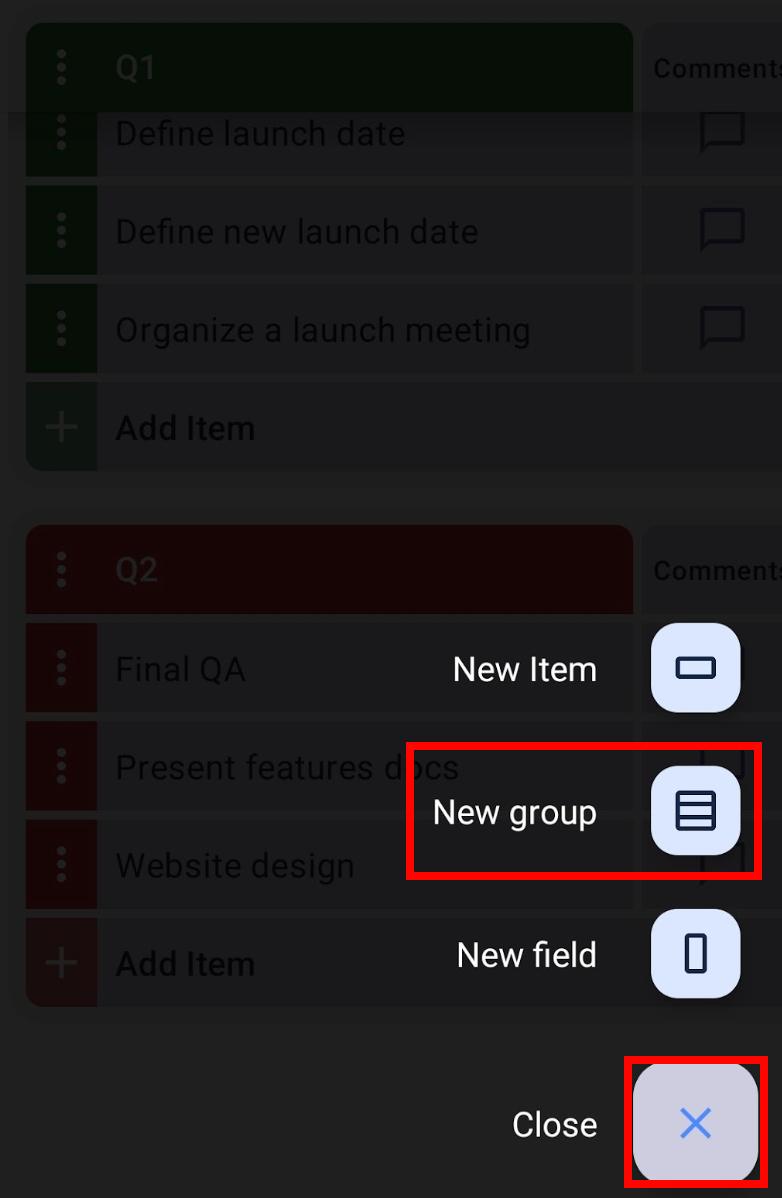
- Tap on the + button in the bottom right corner
- Select New group
- Enter Item group name
- Tap Create to complete the action
To learn more about Item groups, read our article.
Add Board Fields #
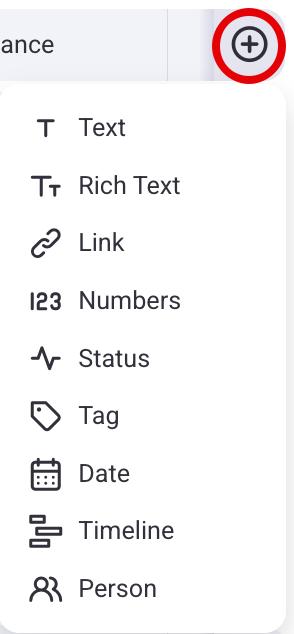
Board Fields let you add information about Items. This information helps users better understand what an Item is about. You can add the following Board Fields in Plaky:
- Text
- Rich text
- Link
- Numbers
- Status
- Tag
- Date
- Timeline
- Person
Here’s how you can add a Board Field:
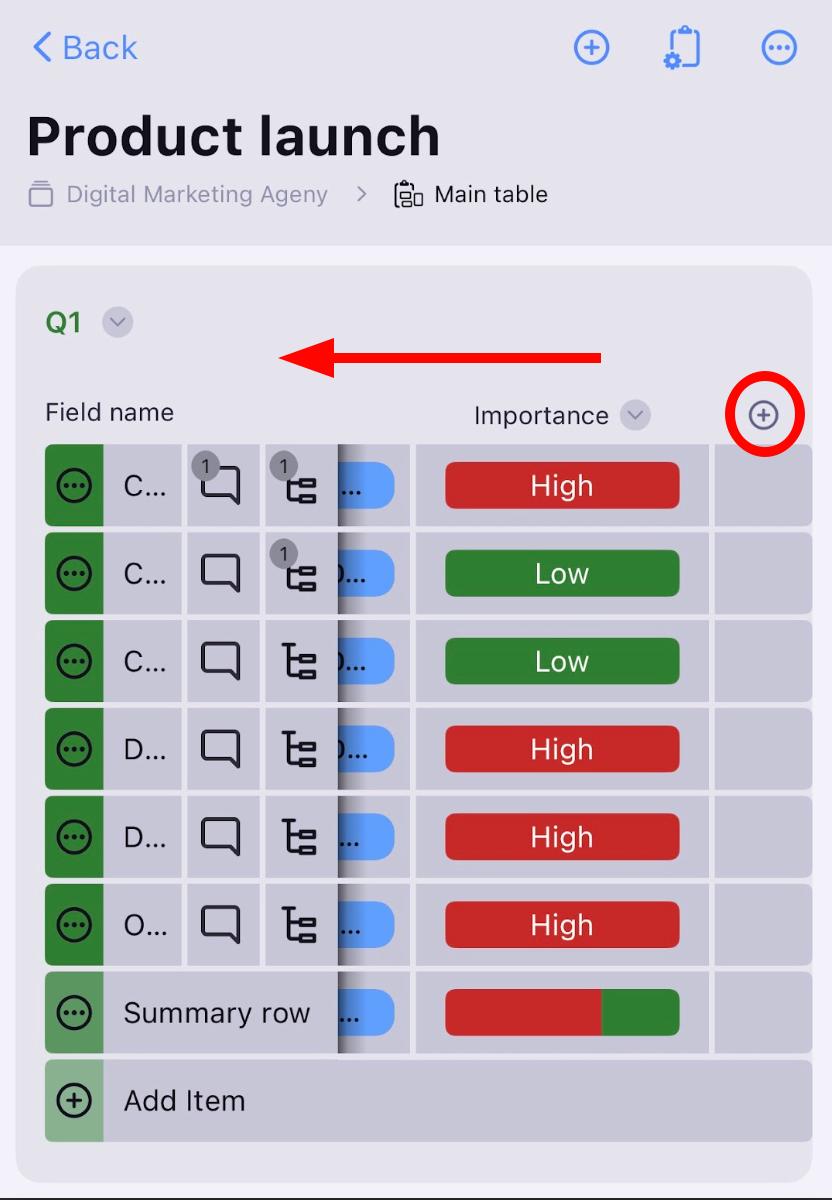
- Click on the + button on the far right
- Select Board Field type
- Swipe left to see the last field
- Tap on the + icon
- Choose field type
- Tap Add to complete the action
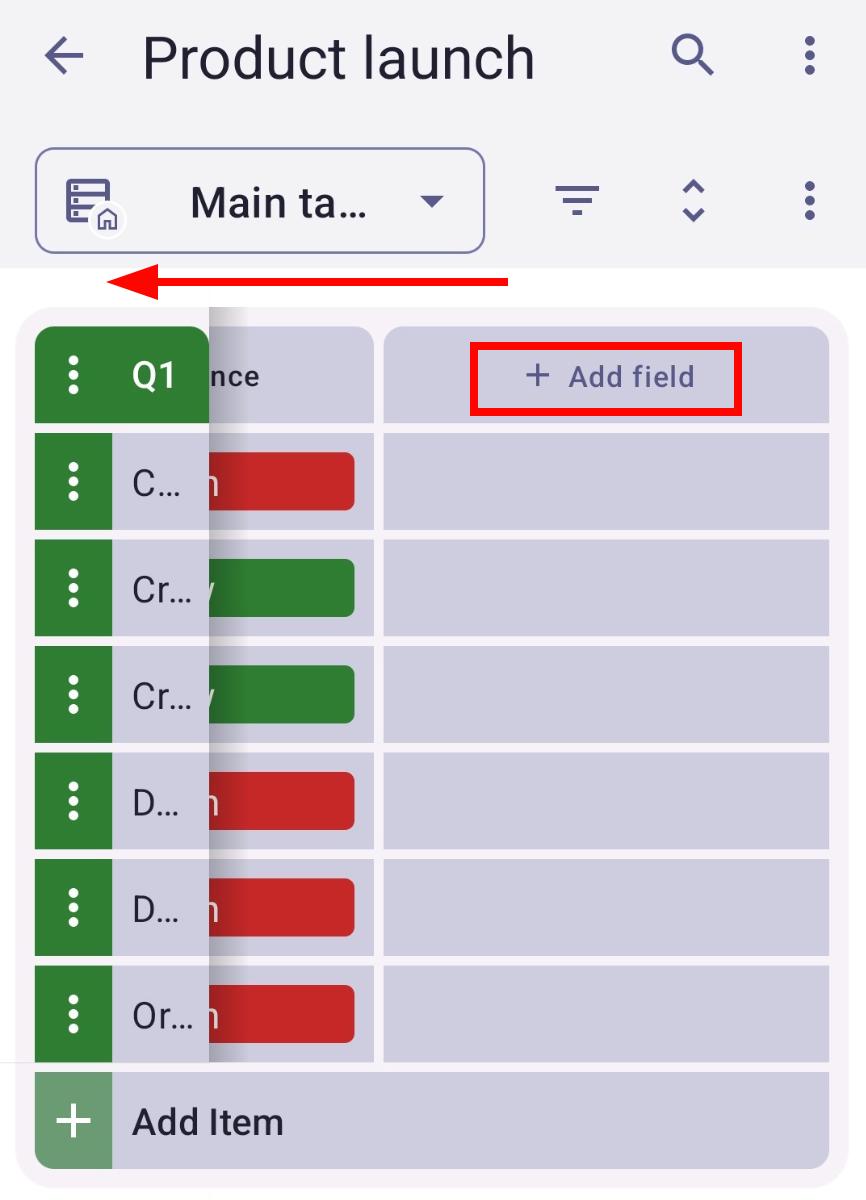
- Swipe left to the last Board field
- Tap on + Add field
- Select Field type
To learn more about Board Fields, read our article.
Create Items and Subitems #
Items/Subitems represent any unit, notion, or any other building part of your project (e.g., task or client). Here’s how you can create Items/Subitems in the Table View.
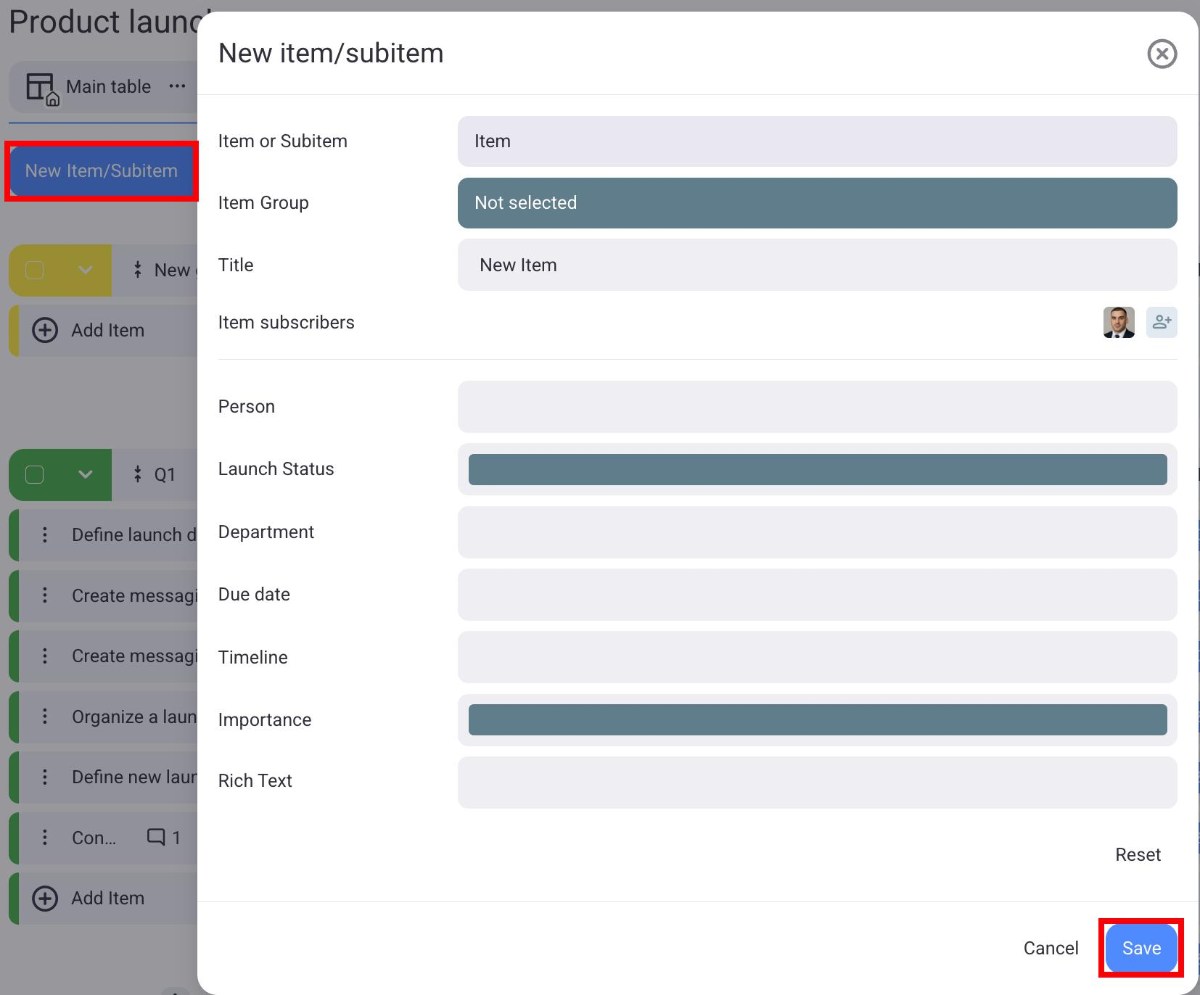
- Click on New Item/Subitem
- Fill out the Item/Subitem creation modal
- Click Save to complete the action
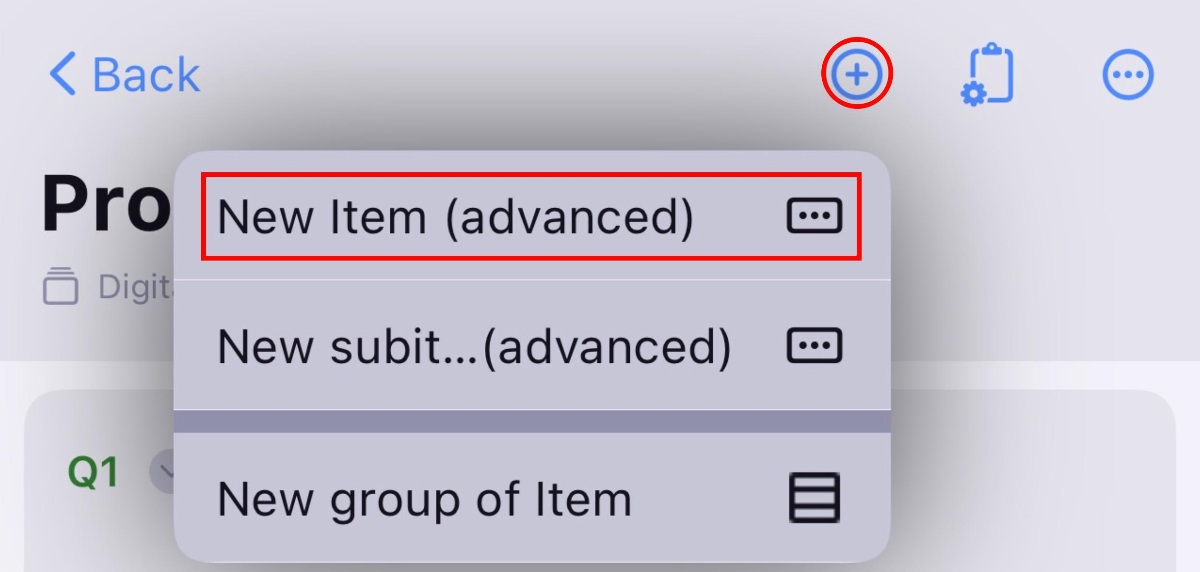
- Tap on the + icon in the top right corner
- Select New Item/Subitem
- Add Item/Subitem details
- Tap on Create to complete the action
- Tap on the + button in the bottom right corner
- Select New Item
- Enter Item name
- Select Item group
- Tap Create to complete the action
To learn more about creating Items, check our article.
To learn more about creating Subitems, check our article.
Manage Field visibility #
In Table View, you can select which Board Fields will be displayed on the View. Here’s how you can do this:
- Click on the Fields button
- Check which Fields you want to be visible

- Tap on Board view configuration in the top right corner
- Tap on Show/hide fields
- Check the fields you want to show
- Tap Save to complete the action

- Tap on the three dots in the top right corner
- Select Field visibility
- Check the Fields you want to see
- Tap Save to complete the action

Sort View #
You can change how Items/Subitems will be sorted in your Table View by using the Sort option. Items/Subitems can be sorted in an ascending or descending order. Here’s how you can do this:
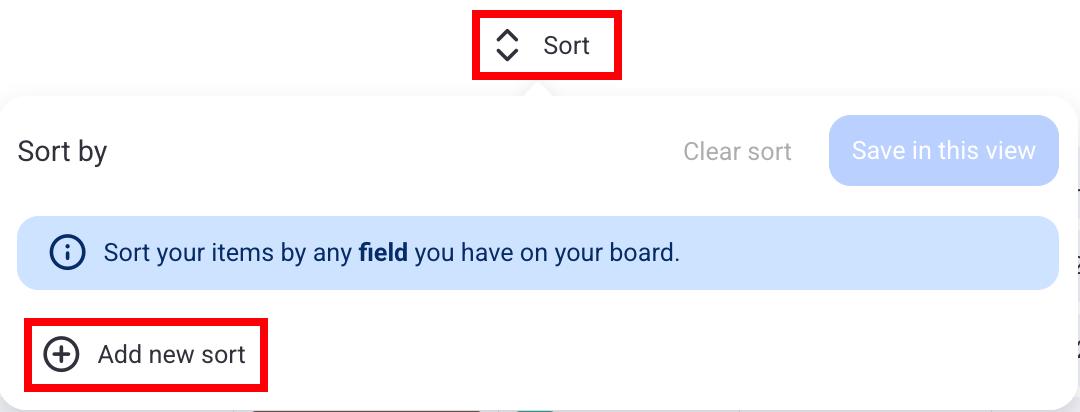
- Click on the Sort button
- Click on + Add new sort
- Select the sort criteria
- Choose whether the sort is ascending or descending
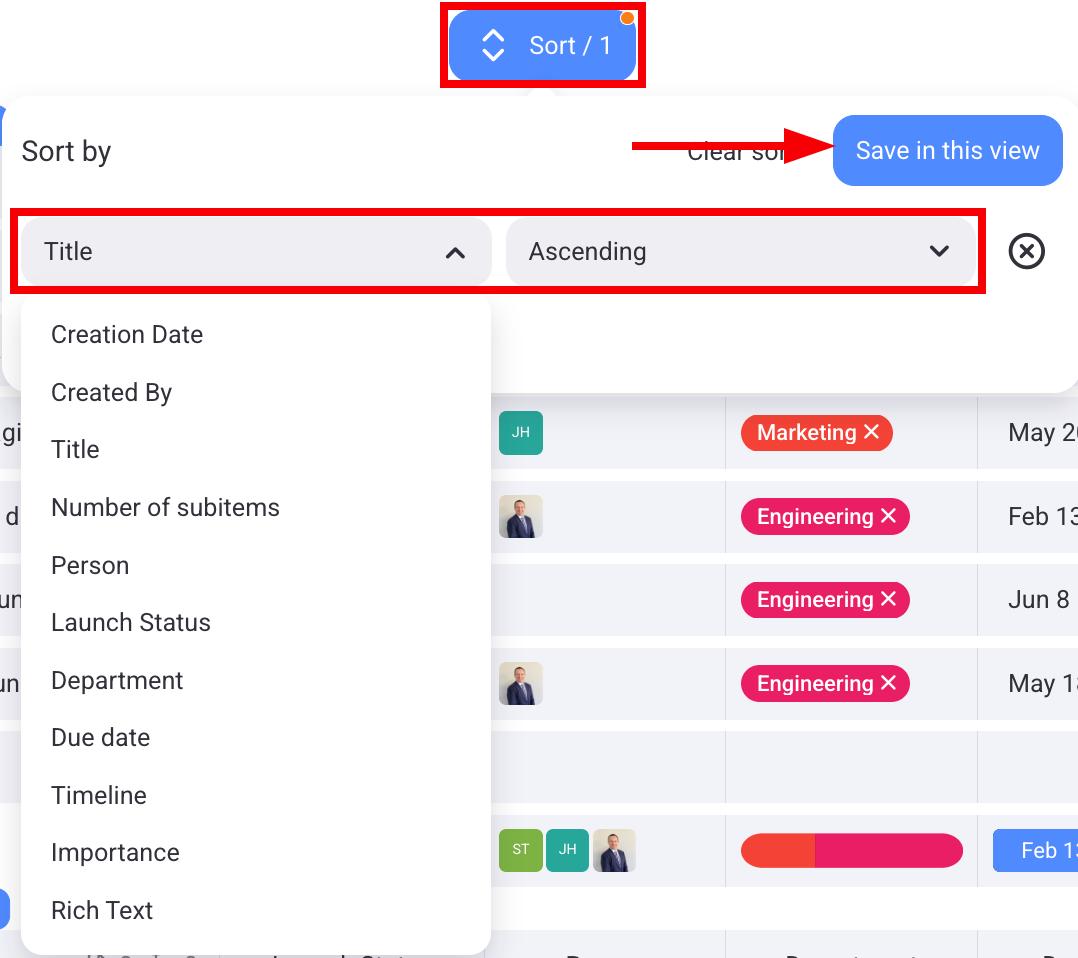
- Click Save in this view to complete the action
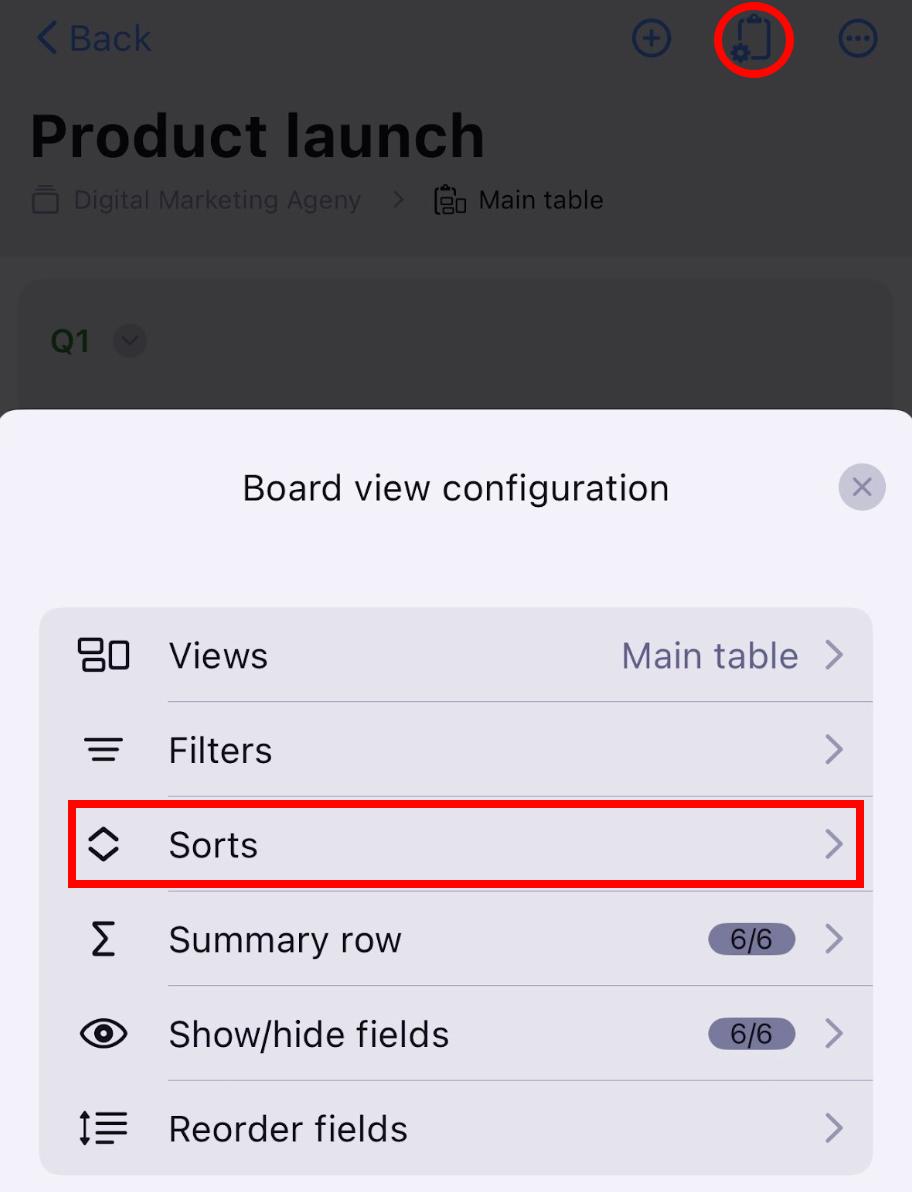
- Tap on Board view configuration in the top right corner
- Tap on Sorts
- Select + New sort
- Tap on Sort by and choose the sort criteria
- Choose ascending or descending order
- Tap Save to complete the action
- Tap on the Sort button
- Select sorting criteria
- Tap Save to complete the action