Board Fields
Fields represent information that is relevant to the Item (project or task) on the Board. For example, fields can show the current status of the task or its deadline date. Fields are created and managed on a Board level, and any modification (add, edit, delete) affects all Items/Item Groups on the Board.
Fields on your Board fall into 2 categories:
- Predefined Fields: Status, Assignee, and Due Date. These Fields power key Plaky features, such as My Tasks and Kanban View. A Board can have only one of each.
- Custom Fields: All other Field types. Add as many as you need to track the information your team works with.
New Boards created from scratch come with all 3 predefined Fields.
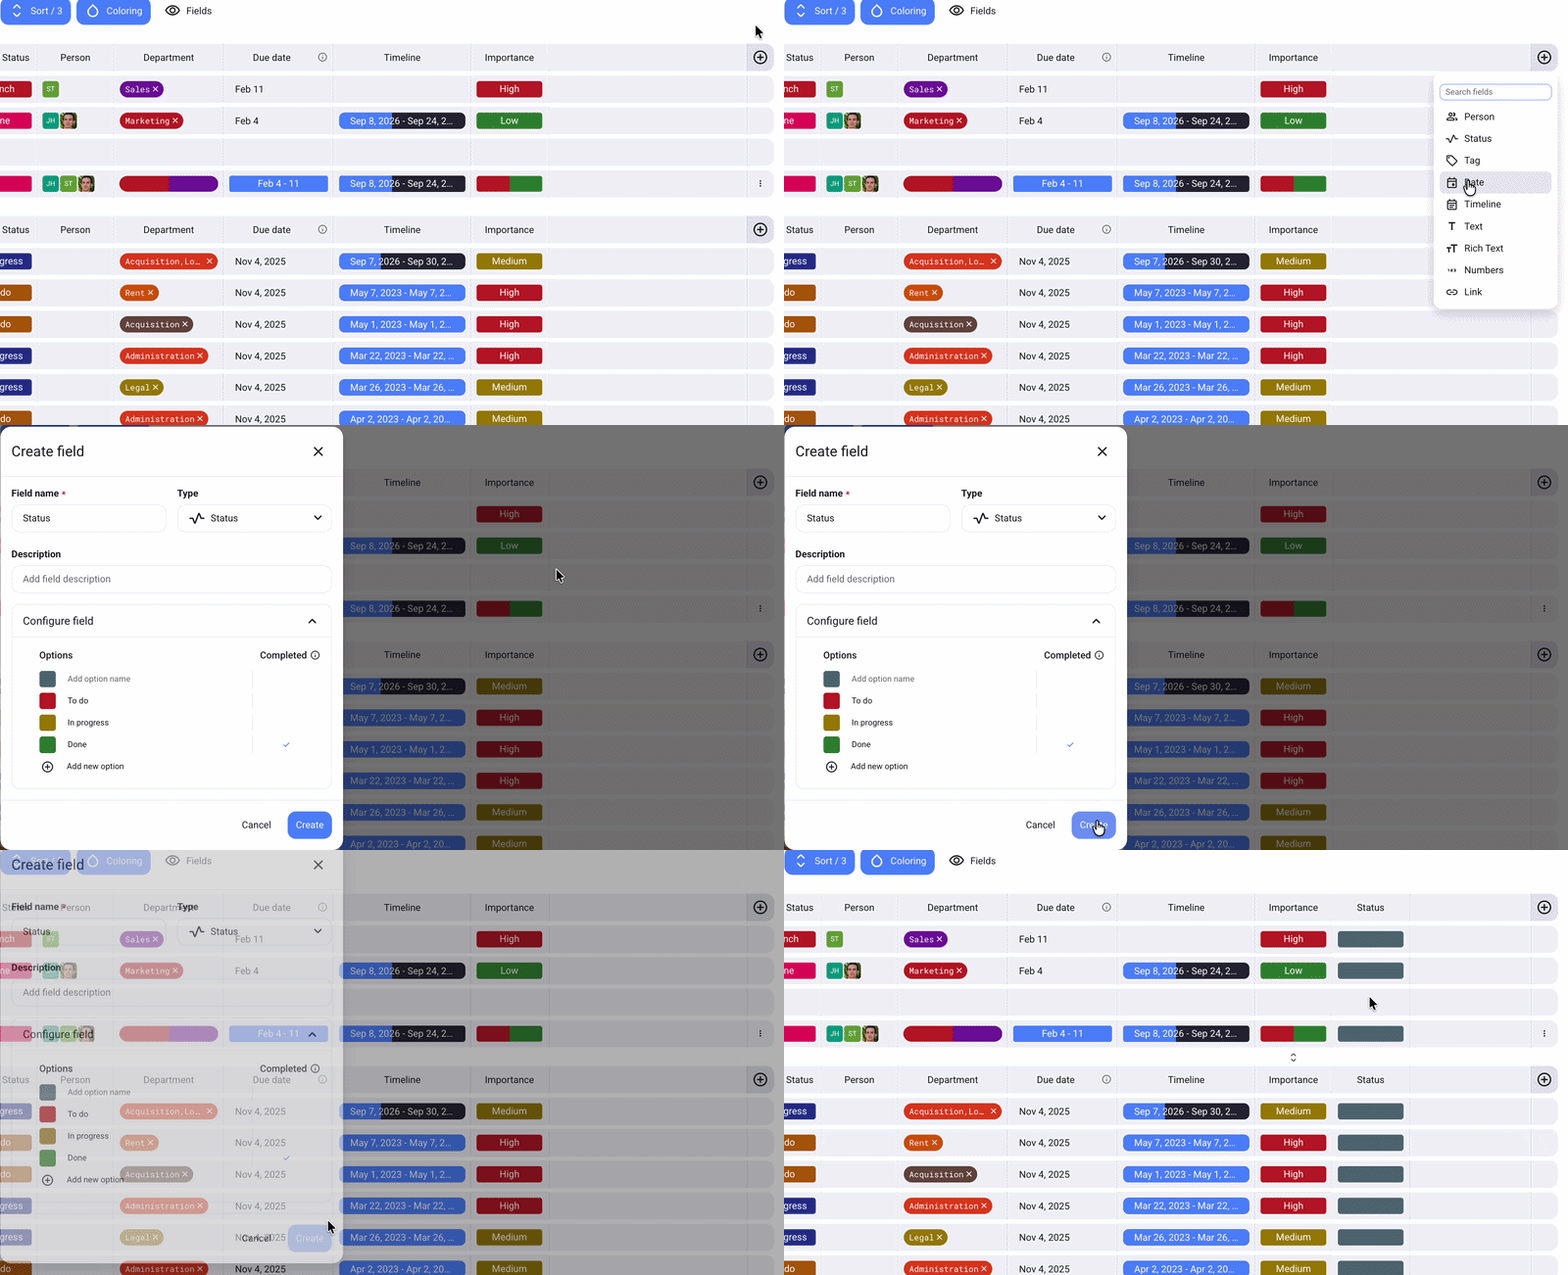
Here’s how you can add a new Field:
- Open your Board
- Click on the + icon on the right side
- Select the type of Field
- Enter Field name
- Add Field description (optional)
- Click on the Configure Field dropdown
- Configure the Field
- Click Create to complete the action
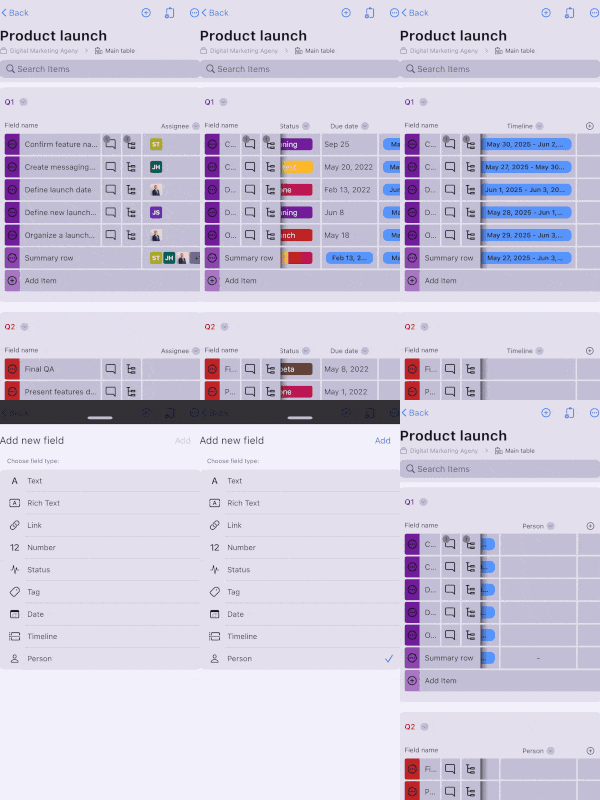
- Swipe left to see the last field
- Tap on the + icon
- Select the type of Field
- Tap Add to complete the action
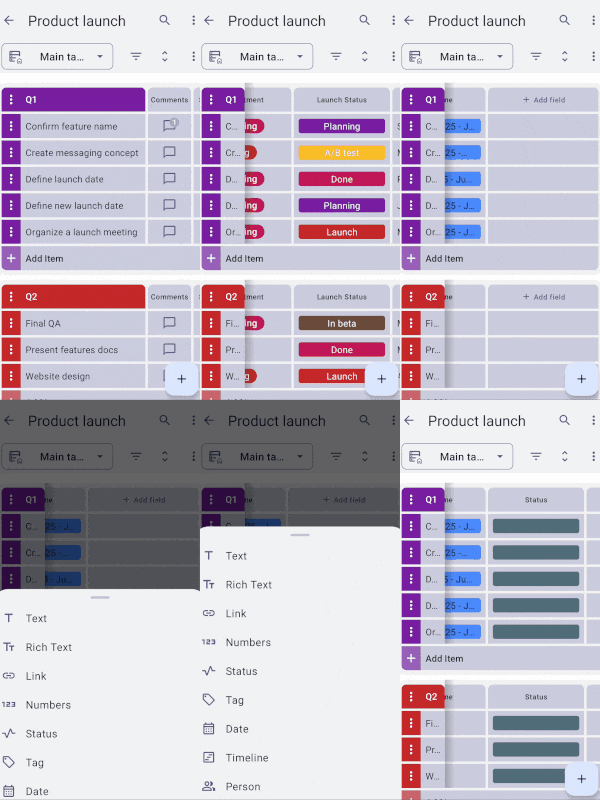
- Swipe left to see the last field
- Tap on +Add field
- Select the type of Field
Info: Each Predefined Field (Status, Assignee, and Due Date) can be added only once per Board. If a predefined Field is already on your Board, it’s disabled in the list of Fields. If you delete a predefined Field, you can add it again from the same list.
Predefined Fields #
Predefined Fields drive the core logic of your Board. A Board can have only one of each Predefined Field, but they aren’t mandatory. You can delete them and add them back at any time.
Status #
The Status field represents the current status of your project or task. For example, you can mark Items according to their progress (e.g., To do, In progress, Done). Additionally, you can utilize the Status field to indicate the task’s priority (e.g., Low, Medium, High).
A Board can have only one Status Field. To label Items by priority, type, or category, use the Dropdown Field.
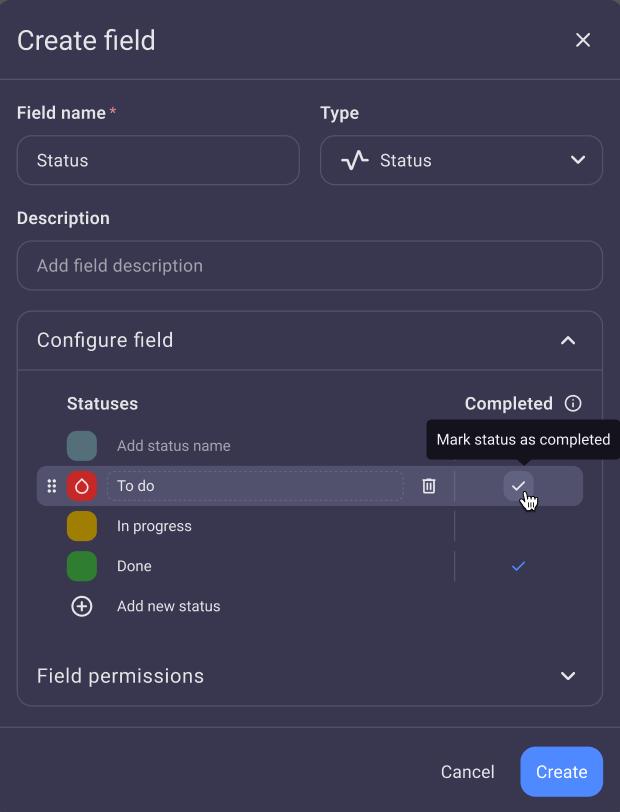
For more information on the Status Field and its labels, check out the article: Configure Status Field.
Assignee #
The Assignee Field shows who is responsible for completing an Item. To assign an Item, click the Assignee Field and select the Team Members you want to assign.
Items appear on the My Tasks page of everyone in the Assignee Field, and assigned users get a notification that they were assigned to the Item. A Board can have only one Assignee Field.
You can limit the number of assigned users by configuring the Assignee Field.
Due Date #
The Due Date Field sets the deadline for an Item. To set a due date, click the Due Date Field and select a date in the calendar.
A Board can have only one Due Date Field. The My Tasks page uses it by default to group your tasks by date.
Custom Fields #
Custom Fields let you track any other information your team needs. You can add as many custom Fields as your plan allows.
Dropdown #
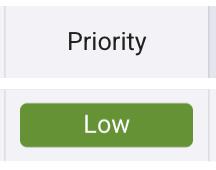
The Dropdown Field lets you label Items with options you define, such as priority, type, or category. It works like the Status Field but doesn’t have a completed status, so it doesn’t affect progress tracking.
New Dropdown Fields come with 3 options: Empty, Option 1, and Option 2. You can rename them, change their colors, and add new ones.
Text #
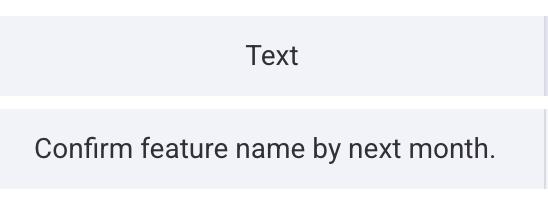
The text field lets you add textual information about a specific task or project. For example, if you are writing an article, you can add the outline in the text field.
Rich text #
With the rich text field, you can add text files and transfer them to different text editors, between different processors and operating systems. If you’d like to take more time creating the text file, you can save it as a draft and return to it later.
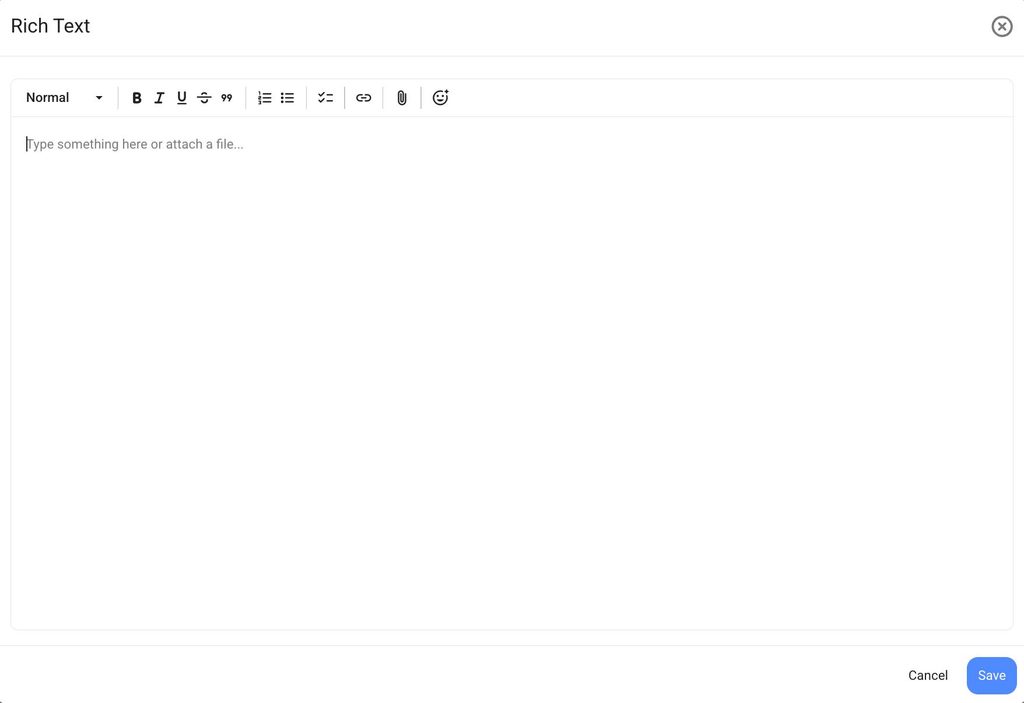
In addition, you can use the rich text field to mention other users or teams. Here’s how you can do this:
- Open the rich text editor
- Type @ and write the name of the team or user you want to mention
- Click Save
Once you’ve done that, the user or team that you mentioned will get a notification. The notification will display the content and the link to the rich text field.
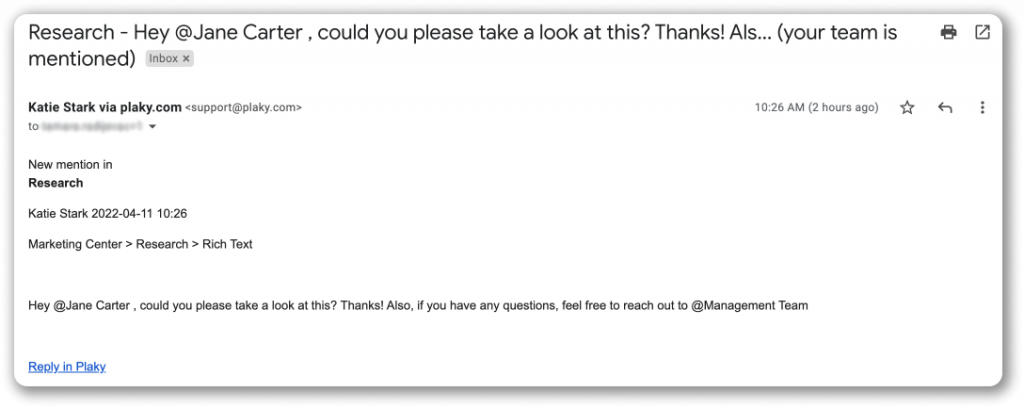
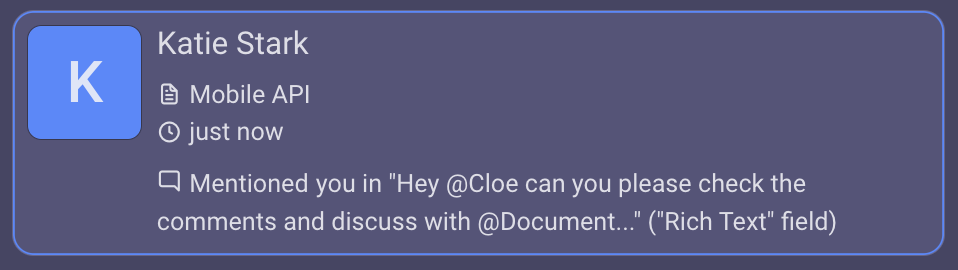
Also, you can add files in the rich text editor by clicking on the Attach files icon and selecting the file, dragging and dropping a file into the rich text editor, or by using the copy/paste actions.

Link #
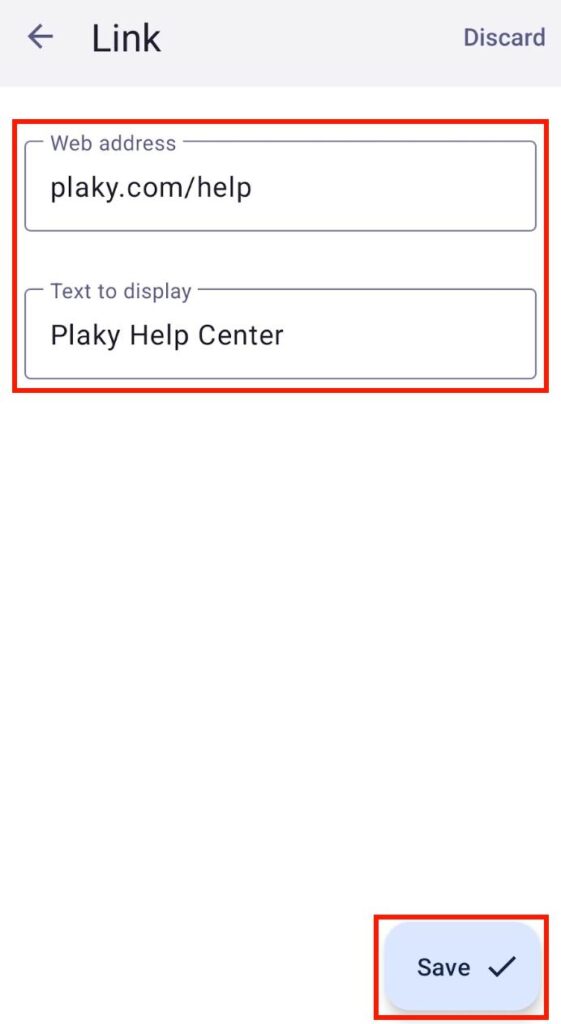
The Link Field allows you to link any website to an Item. This way, you can customize each Item with the specific web address and the text that will be displayed in the Field.
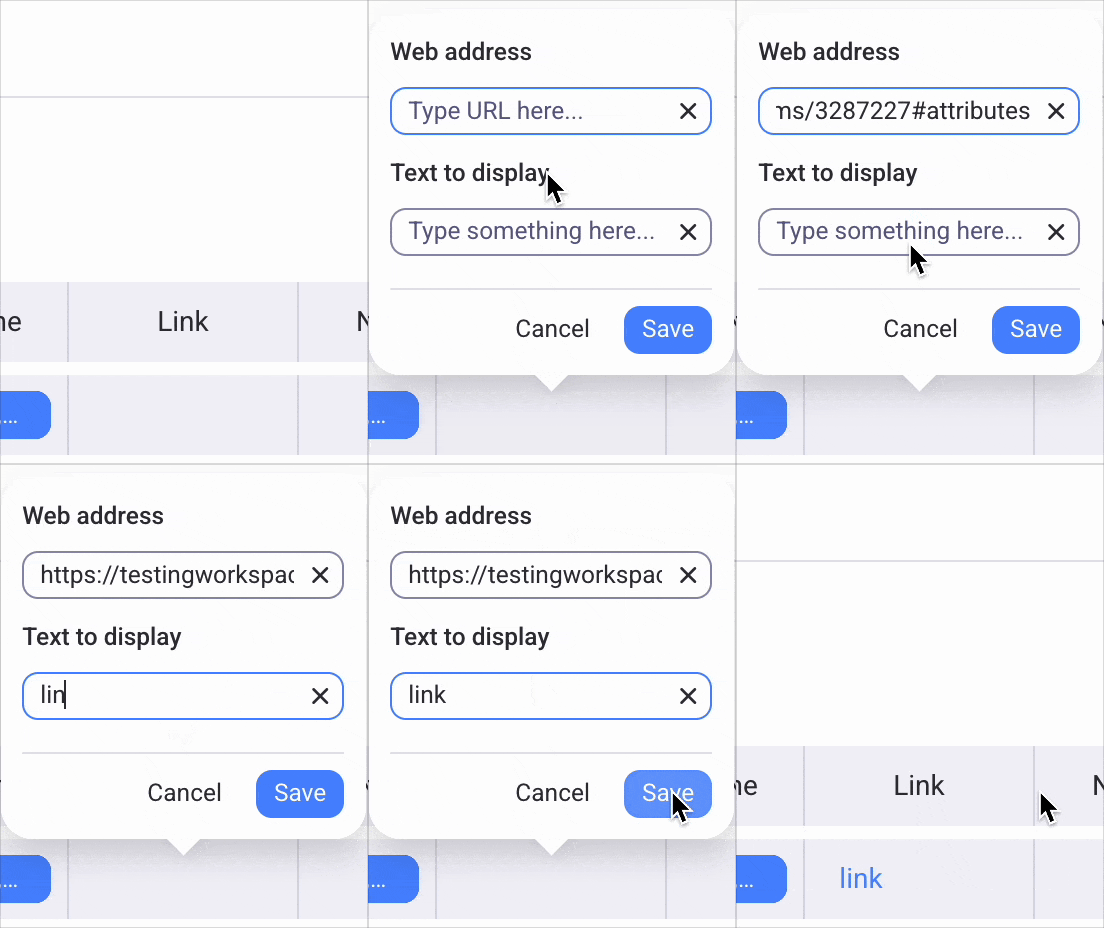
Here’s how you can add links:
- Hover over the link field
- Click on the + icon
- Enter the Web address and Text to display in the modal that appears
- Click Save to complete the process
- Tap on the link field
- Enter the Web address and Text to display in the modal that appears
- Tap Save to complete the process
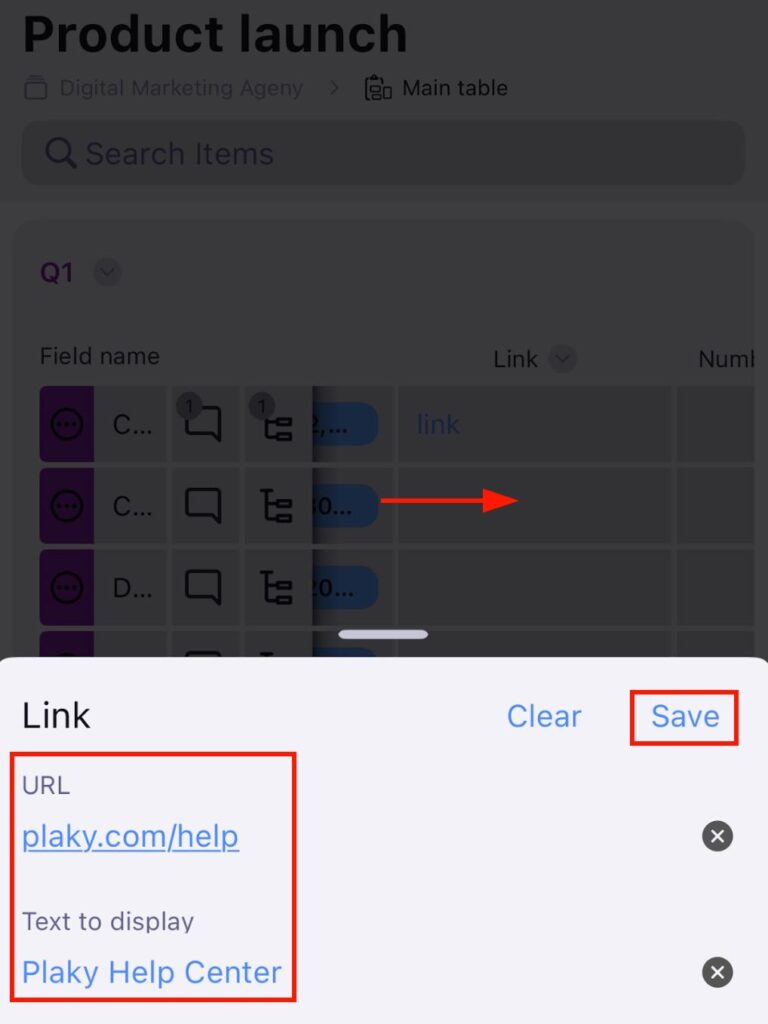
- Tap on the Link field
- Enter the Web address and Text to display in the modal that appears
- Tap Save to complete the process
Numbers #
The Number field lets you add numbers that are related to your project or task. For example, you can add the number of work hours or the amount of money spent on the project.
When you add the Number field, you can configure what unit will be shown in the field. Here’s how to do it:
- Click on the arrow next to the Number field
- Select the Field settings
- Select the Unit, Unit position, and Alignment
- Click outside of the designated area to complete the action
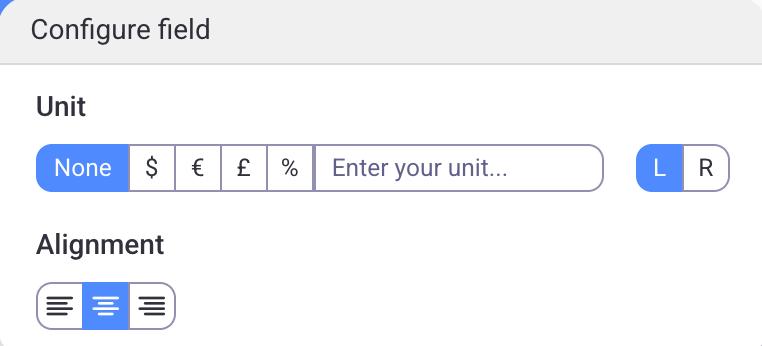
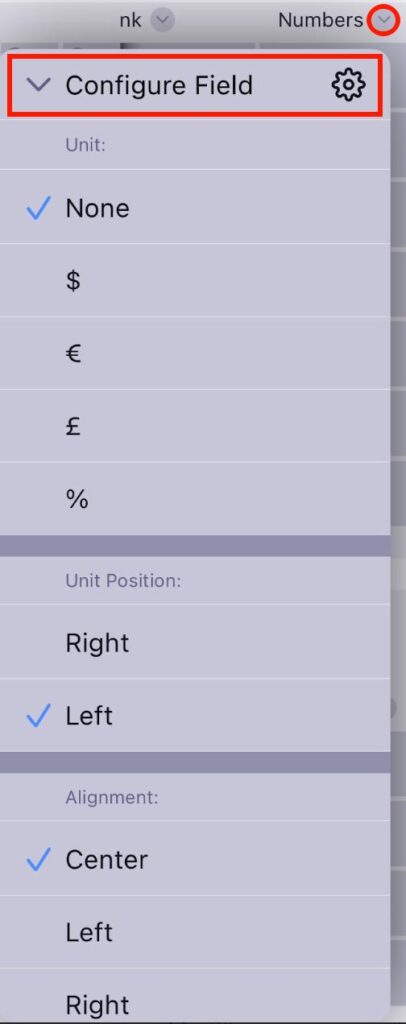
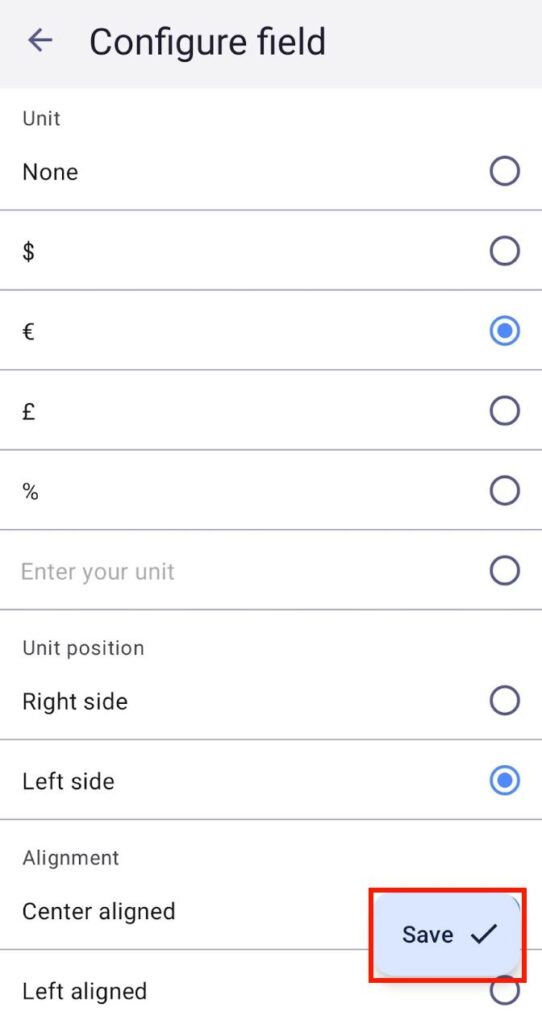
For example, if the Item field should represent a sum of money, the unit can be defined as a currency symbol: $, €, or £. If it doesn’t match any of the listed options, a custom unit can be entered in the designated field.
Additionally, you can adjust the alignment and position the unit value to the left or right.
- Tap on the arrow next to the Number field
- Tap Configure Field
- Select the Unit, Unit position, and Alignment
- Tap outside of the designated area to complete the action
- Tap on the field name (e.g., number)
- Tap Configure field
- Select the Unit, Unit position, and Alignment
- Tap on Save to complete the action
Tag #
The Tag field lets you add important keywords to an Item. These words can indicate the main topics covered by a task or project, a list of the most essential concepts, or any other notion that you find crucial for the task in question.
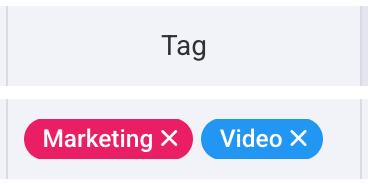
For more information on Tag Field, check out the article: Configure Tags.
Date #
The Date Field lets you add any date to an Item, such as a start date, a review date, or the date an Item was requested. To set the deadline for an Item, use the Due Date Field instead.
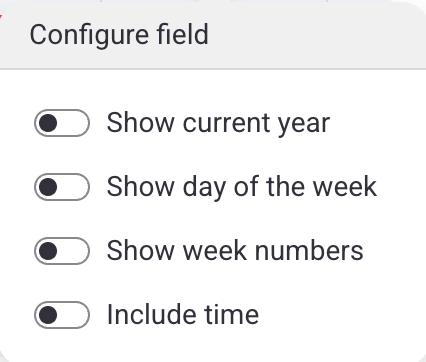
Here’s how you can configure the Date field:
- Click on the arrow next to the Date field
- Click on Field settings
- Toggle the options you want
- Click outside of the designated area to complete the action
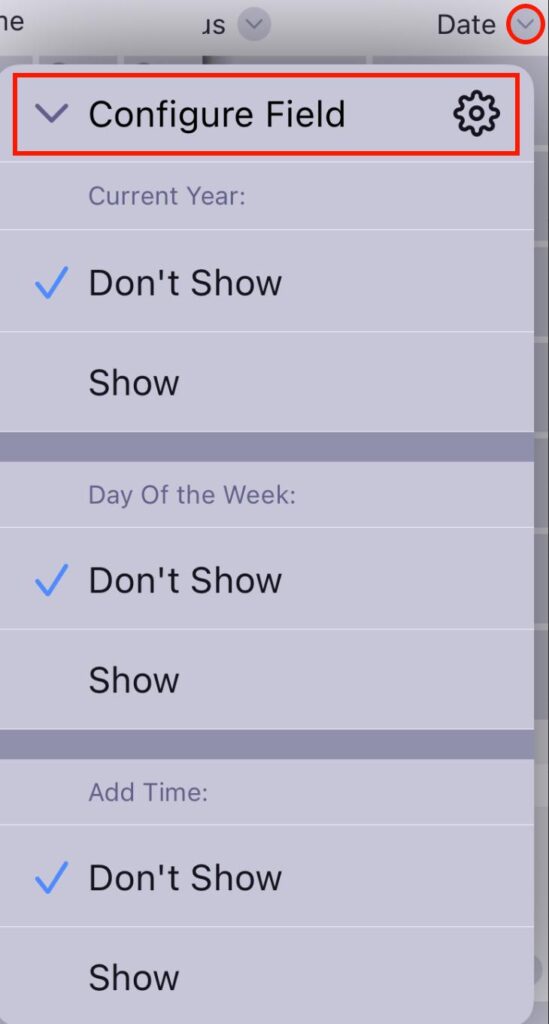
- Tap on the arrow next to the Date field
- Tap Configure Field
- Tap Show for the options you want to see
- Tap outside of the designated area to complete the action
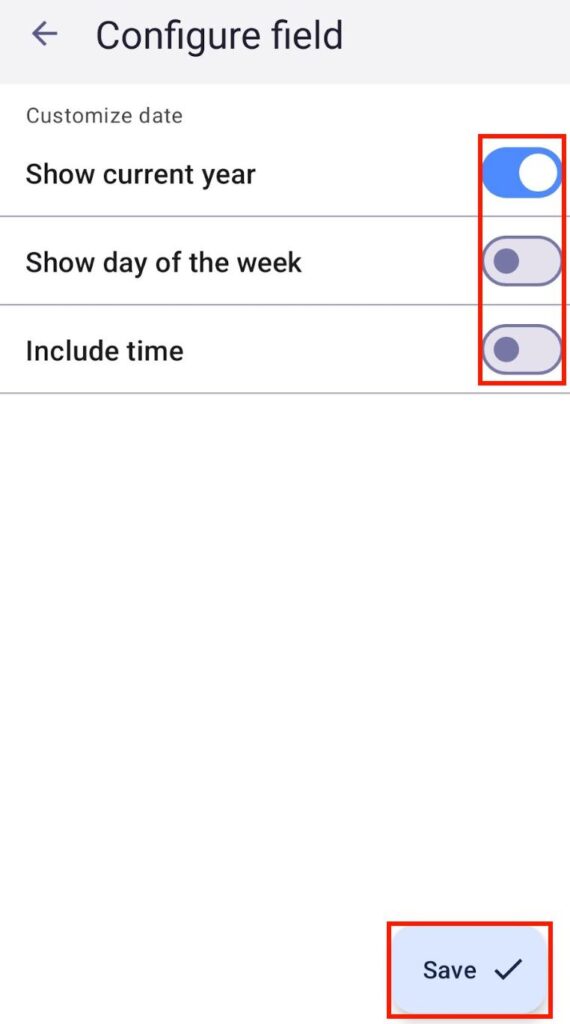
- Tap on the field name (e.g., date)
- Tap on Configure field
- Toggle the options you want
- Tap on Save to complete the action
Person #
The Person Field lets you add Team Members to an Item in a supporting role, such as reviewer, reporter, or QA tester. To add someone, click the Person Field and select the team member.
Adding someone to a Person Field doesn’t assign the Item to them. The Item doesn’t appear on their My Tasks page, and they get a notification that they were added to the Item. To assign an Item, use the Assignee Field.
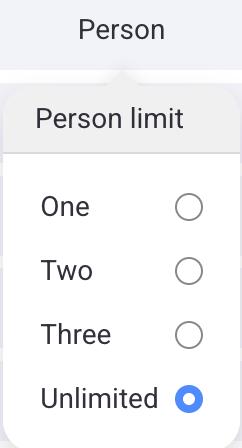
You can limit the number of assigned users by configuring the Person field. Here’s how to do it:
- Click on the arrow next to the Person field
- Click on Field settings
- Select the option you want
- Click outside of the designated area to complete the action
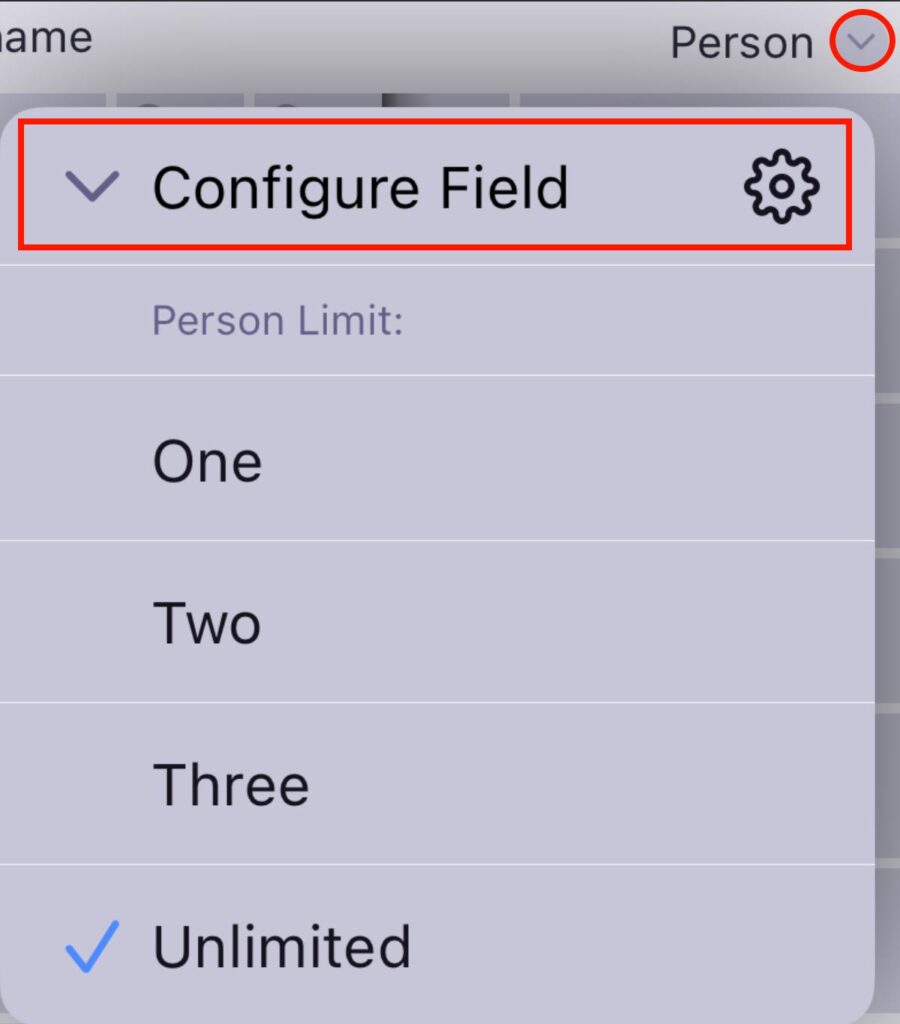
- Tap on the arrow next to the Person field
- Tap Configure field
- Select the Person limit
- Tap anywhere outside of the modal to save the changes
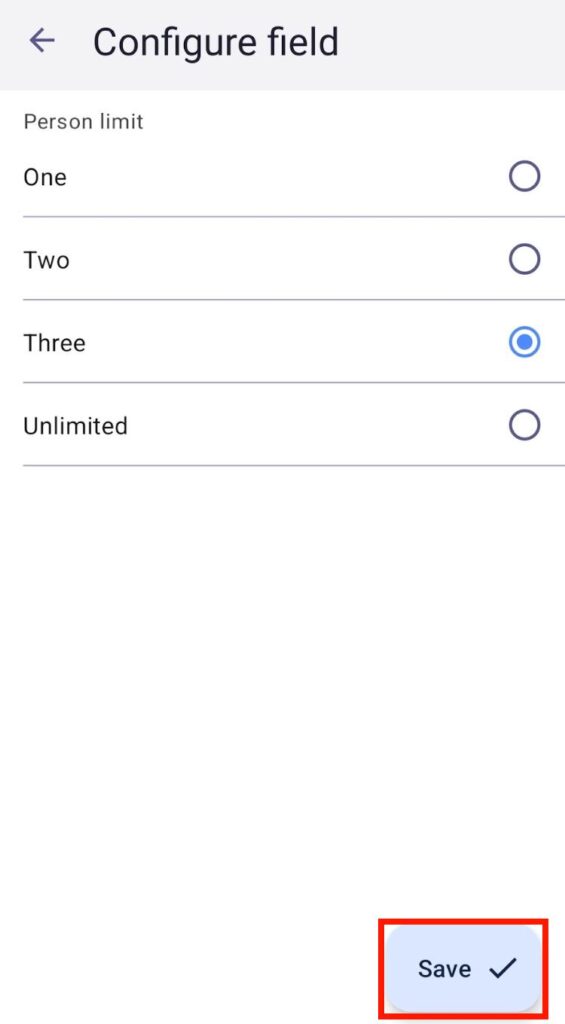
- Tap on the field name (e.g., person)
- Tap Configure field
- Select the person limit
- Tap on Save to complete the action
Timeline #
This feature is available only on paid plans.
With the Timeline field, you can input and track time periods using two date pickers. To do it, add a Timeline field, click on the added Field and select the year and two dates from the calendar, or manually type the start and end date.
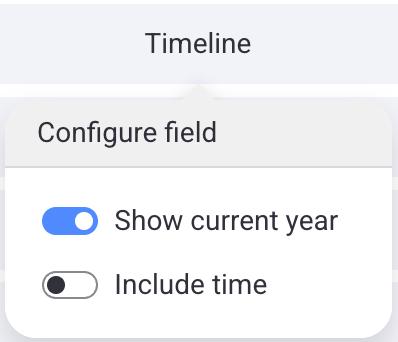
Here’s how you can configure the Timeline field:
- Click on the arrow next to the Timeline field
- Click on Field settings
- Toggle the options you want
- Click outside of the designated area to complete the action
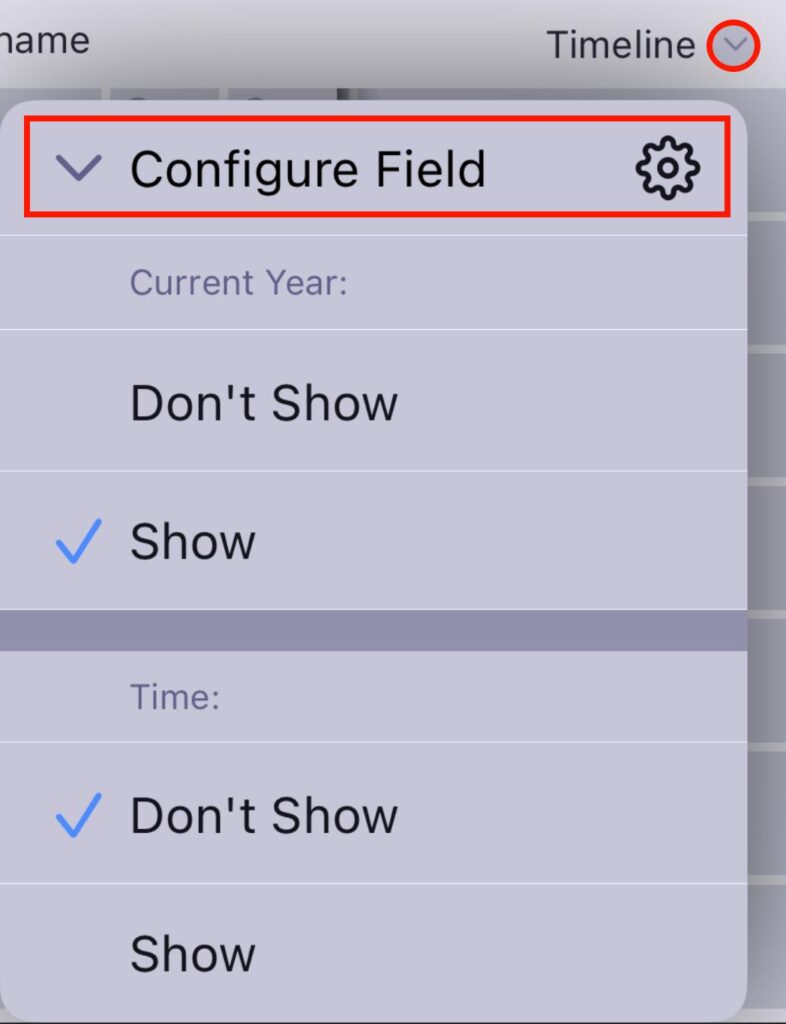
- Tap on the arrow next to the Timeline field
- Tap Configure field
- Tap Show for the options you want to see
- Tap anywhere outside of the modal to save the changes
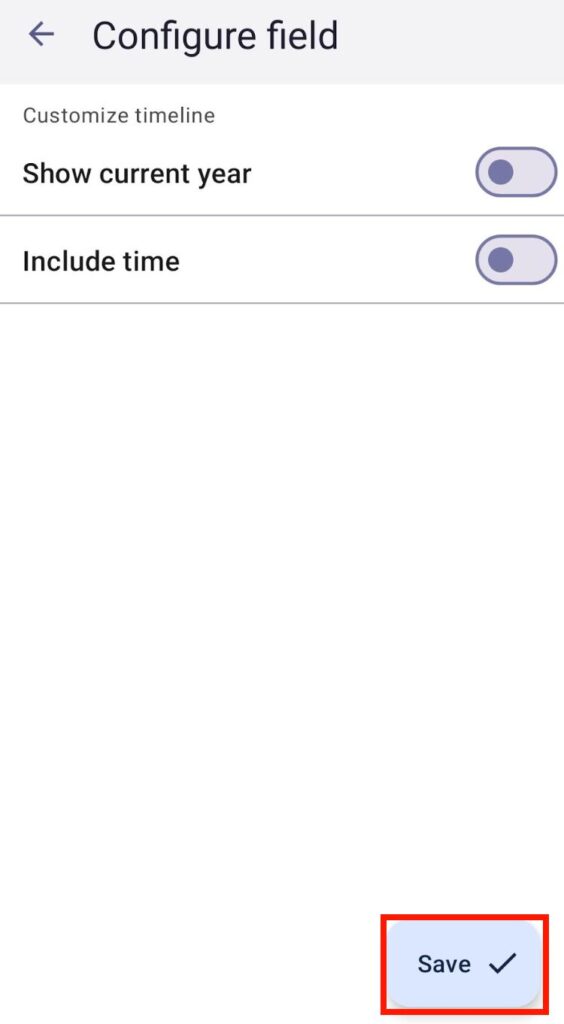
- Tap on the field name (e.g., timeline)
- Tap Configure field
- Select the person limit
- Tap on Save to complete the action
Add Field description #
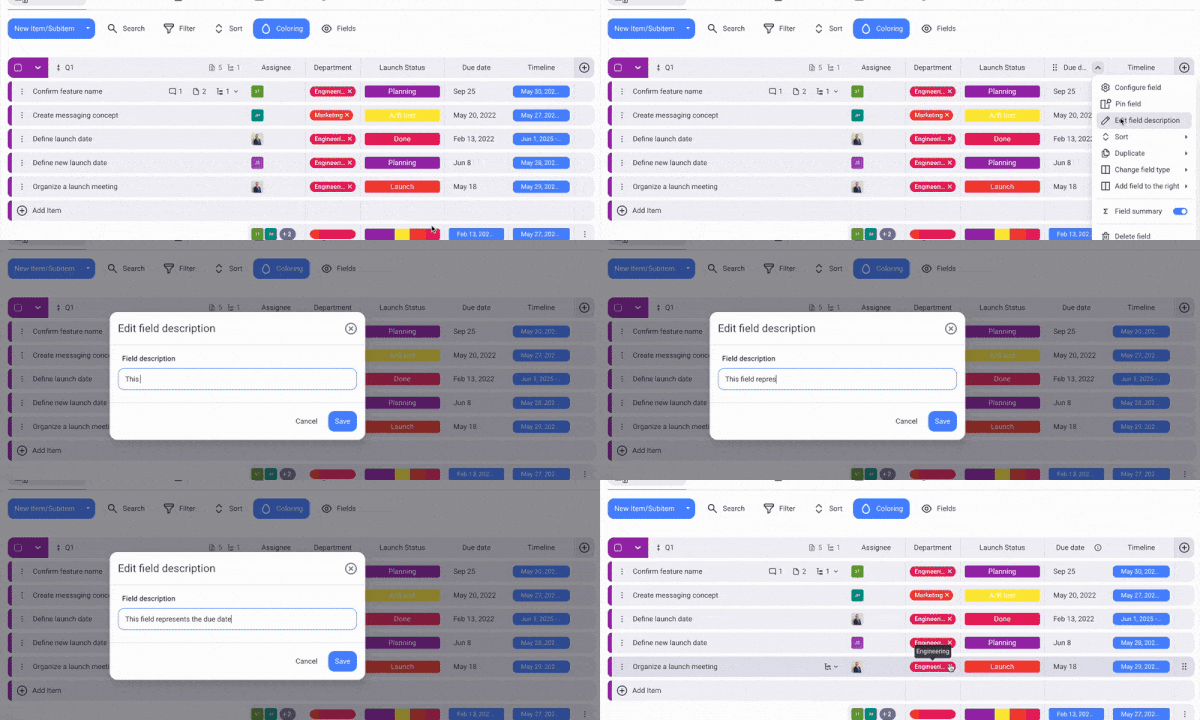
To help other team members understand what the field is about, you can add a field description. Here’s how you can add this:
- Click on the arrow next to the Field name
- Select Edit field description
- Enter the description
- Click Save to complete the action
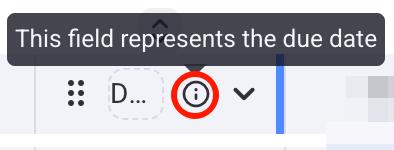
To view the Field description, click on the information icon next to the Field name.
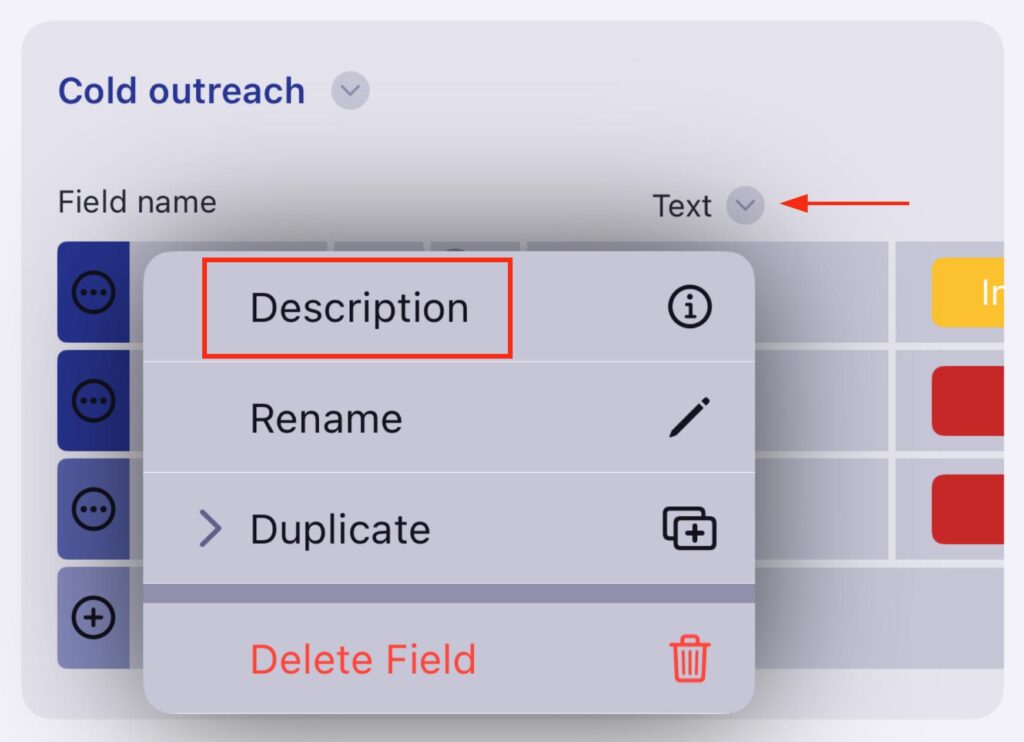
- Tap on the arrow next to the field name
- Select Description
- Enter the field description
- Tap Save to complete the action
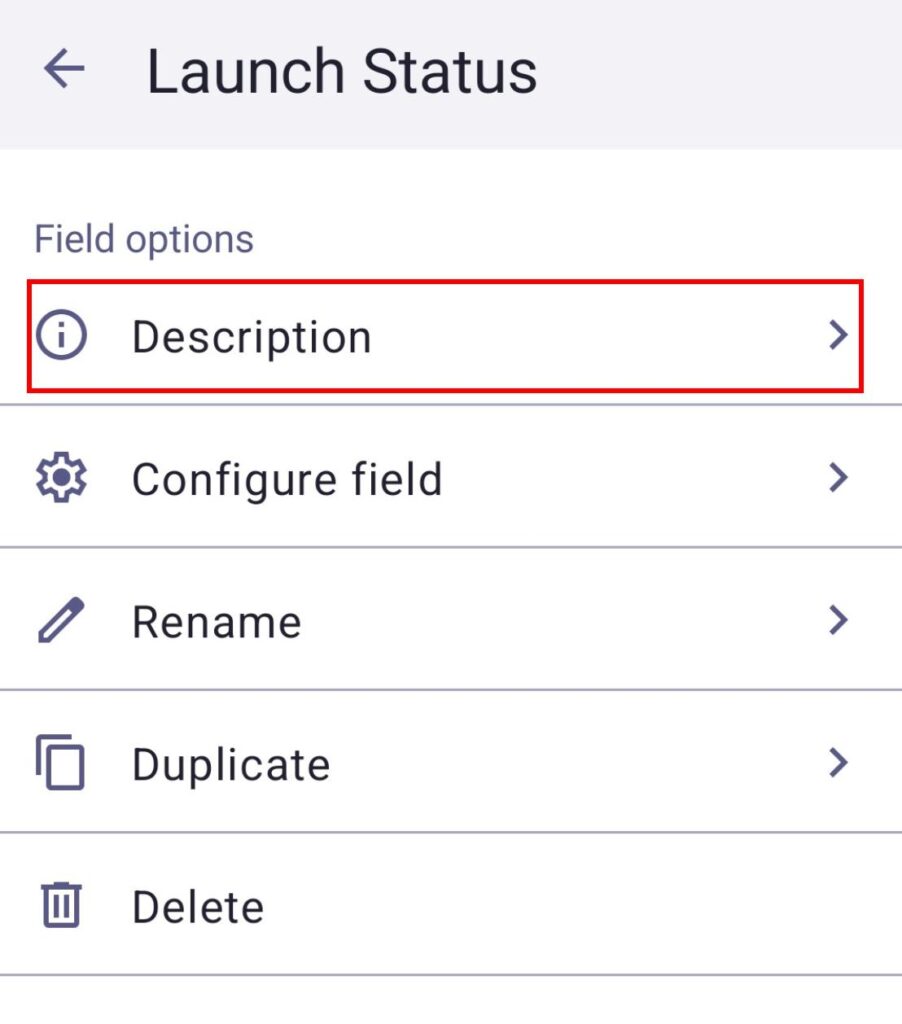
- Tap on the field name (e.g., timeline)
- Tap Description
- Write the description
- Tap on Save to complete the action
Pin Field #
This feature is available only in the table view. Each pinned Field is placed after the last pinned Field.
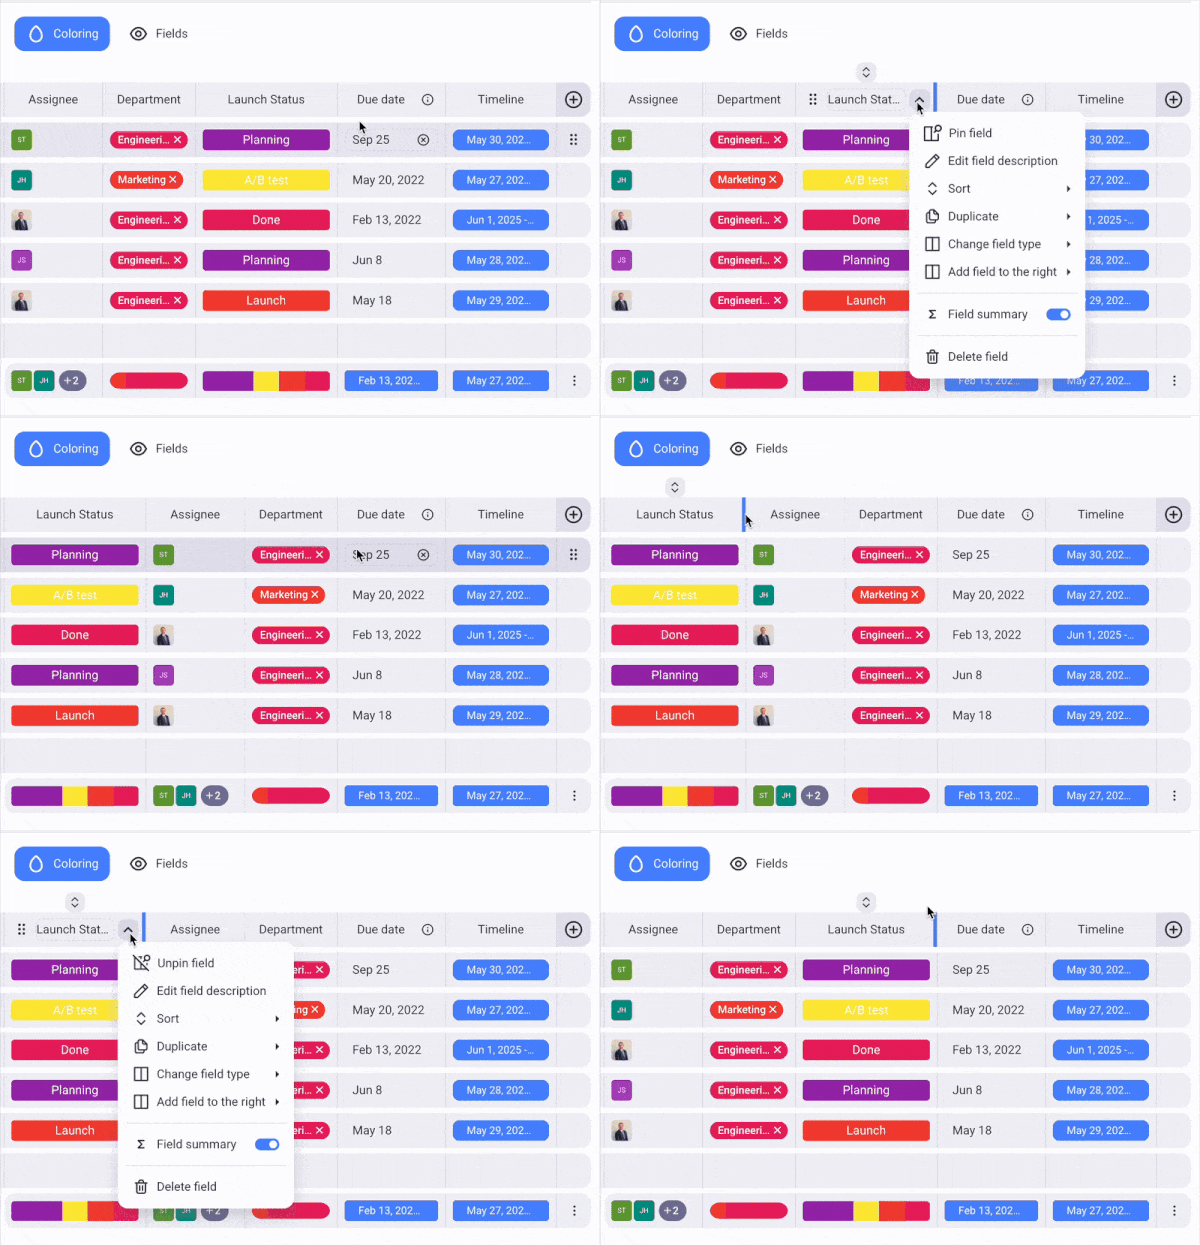
By choosing to pin a specific field, you can prioritize its visibility, since the pinned field will be shown first.
To pin/unpin a Field:
- Click on the arrow next to the Field name
- Select the Pin/Unpin field to complete the action
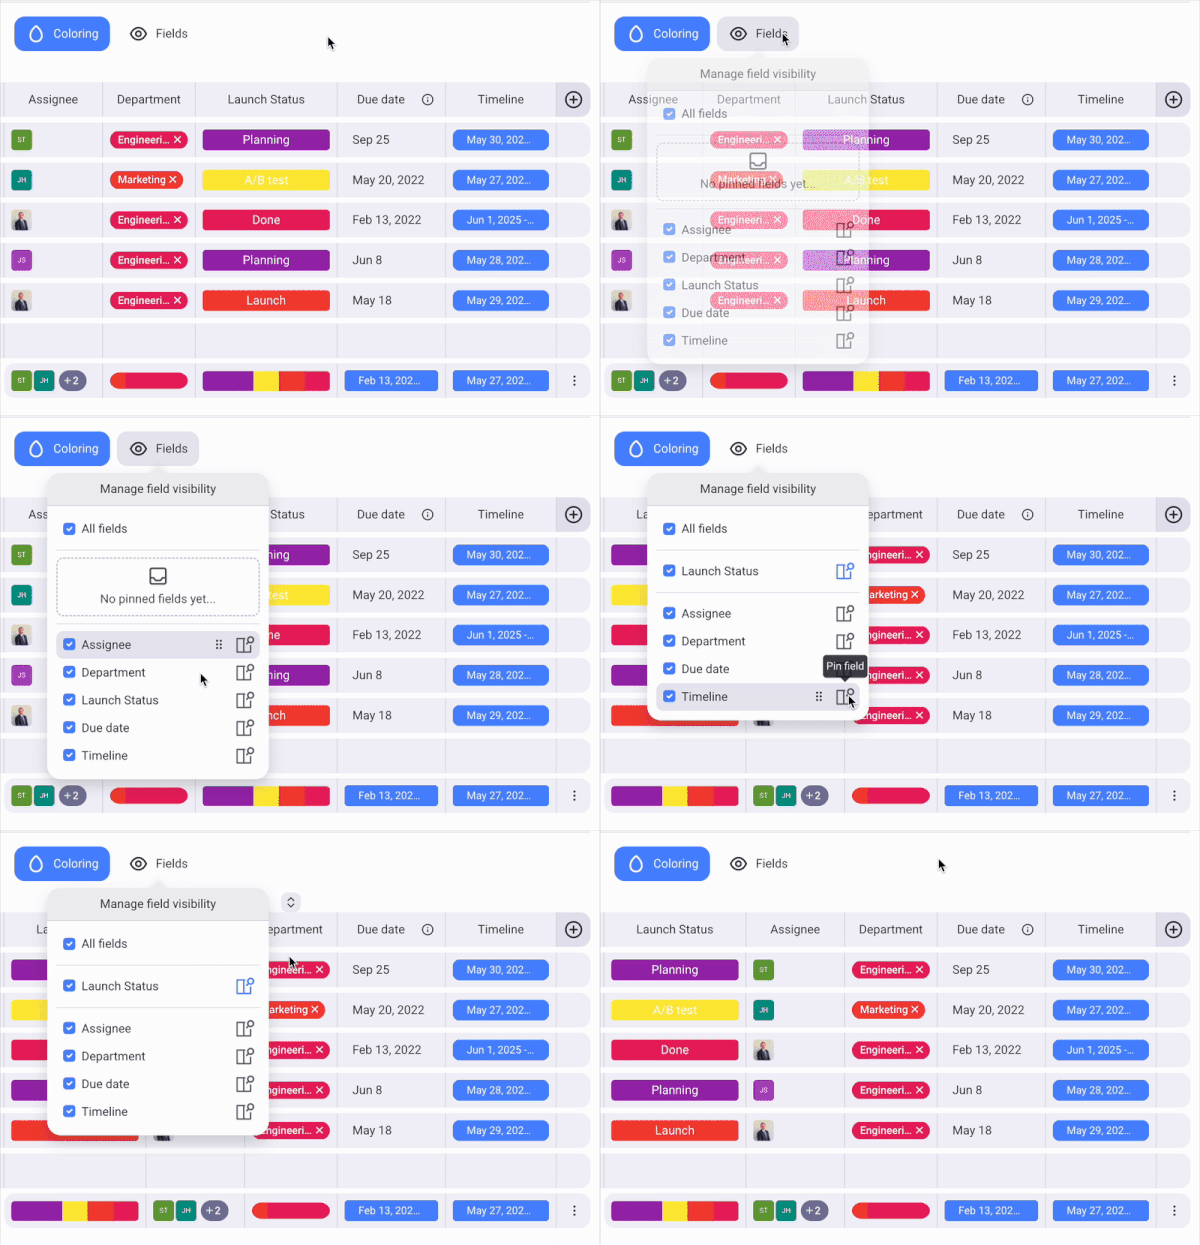
Or
- Click on the Fields visibility icon
- Select the Fields to display
- Click on the pin/unpin icon
Rename Field #
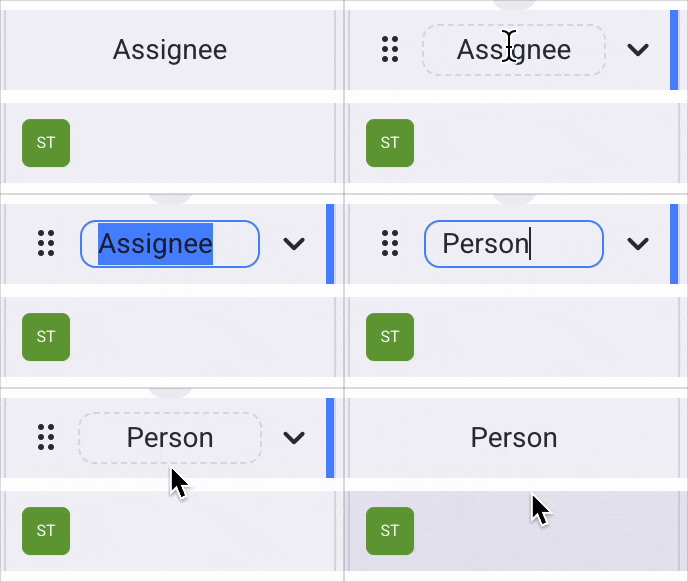
You can rename Fields according to your preferences. Here’s how you can do that:
- Click on the Field name (e.g., status)
- Enter new Field name
- Press Enter or click outside the designated area to complete the action
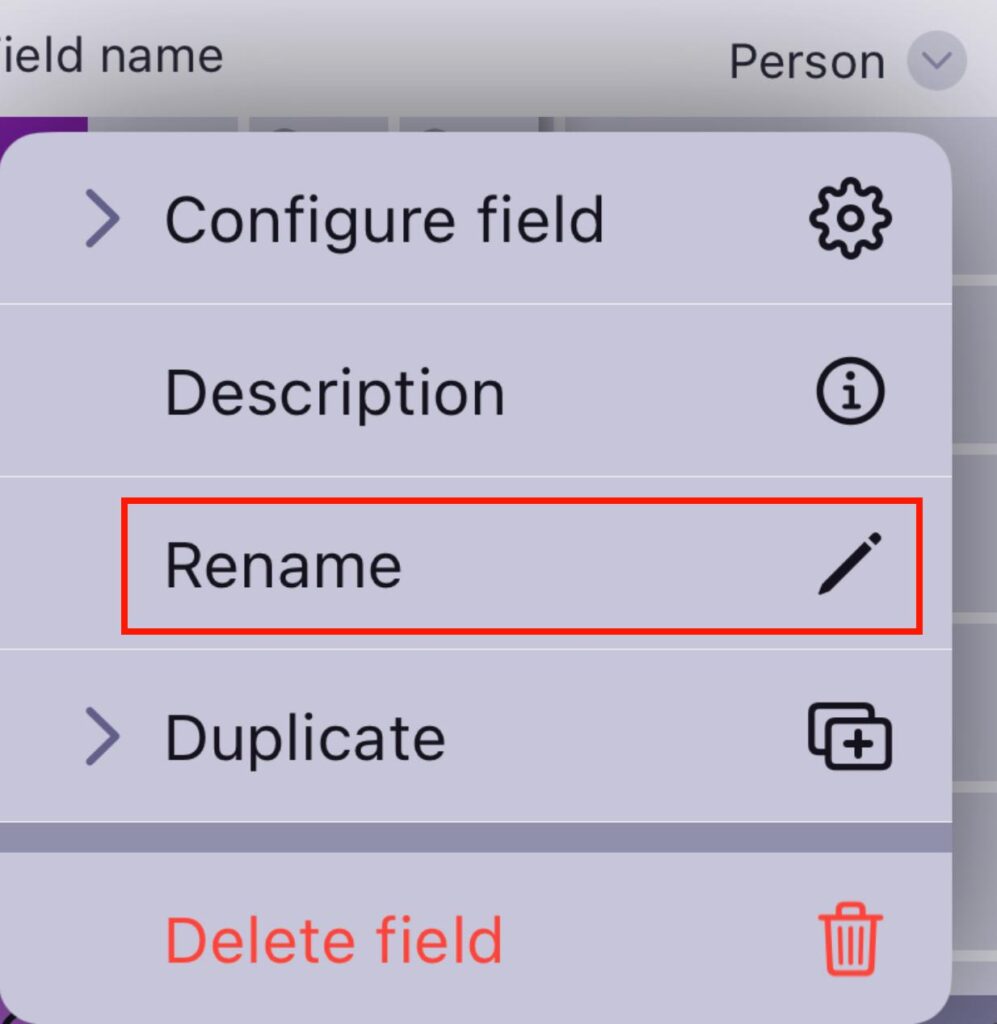
- Tap on the arrow next to the field name
- Select Rename
- Enter new Field name
- Tap Save to complete the action
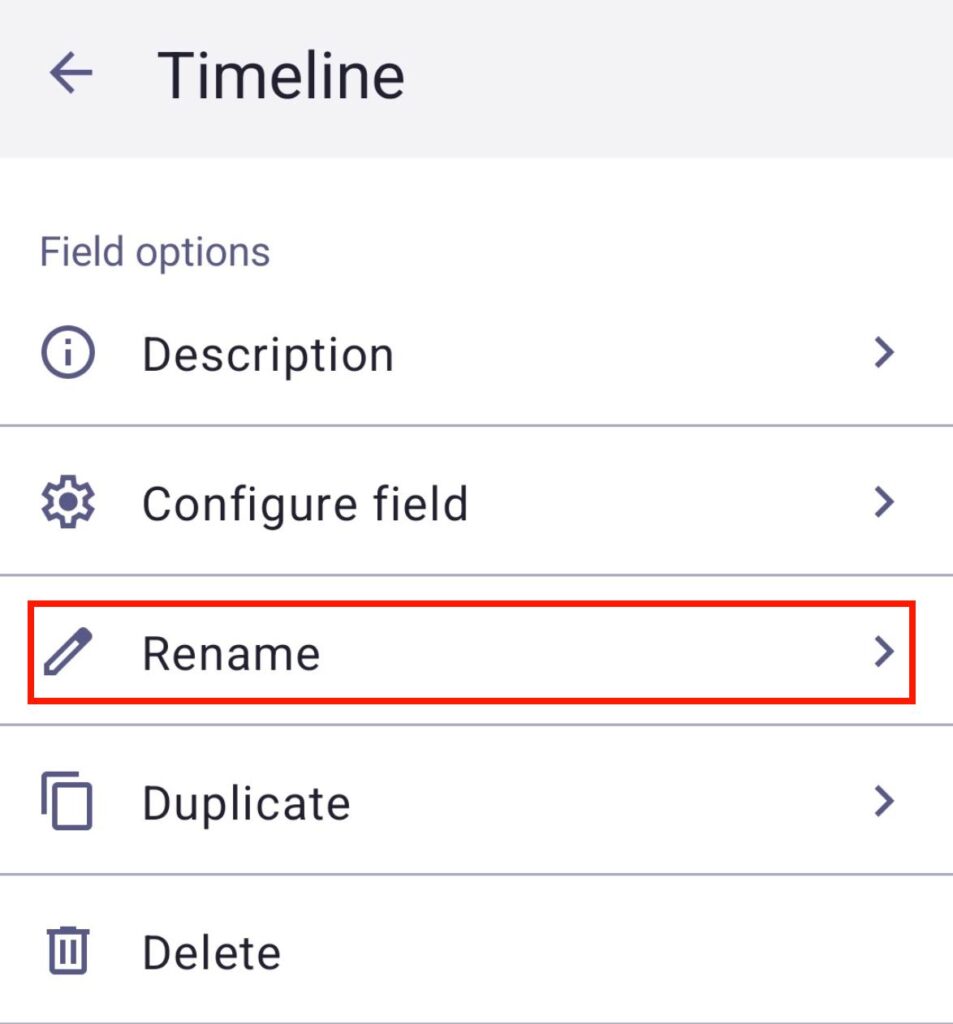
- Tap on the field name (e.g., timeline)
- Tap Rename
- Enter new Field name
- Tap on Save to complete the action
Duplicate Field #
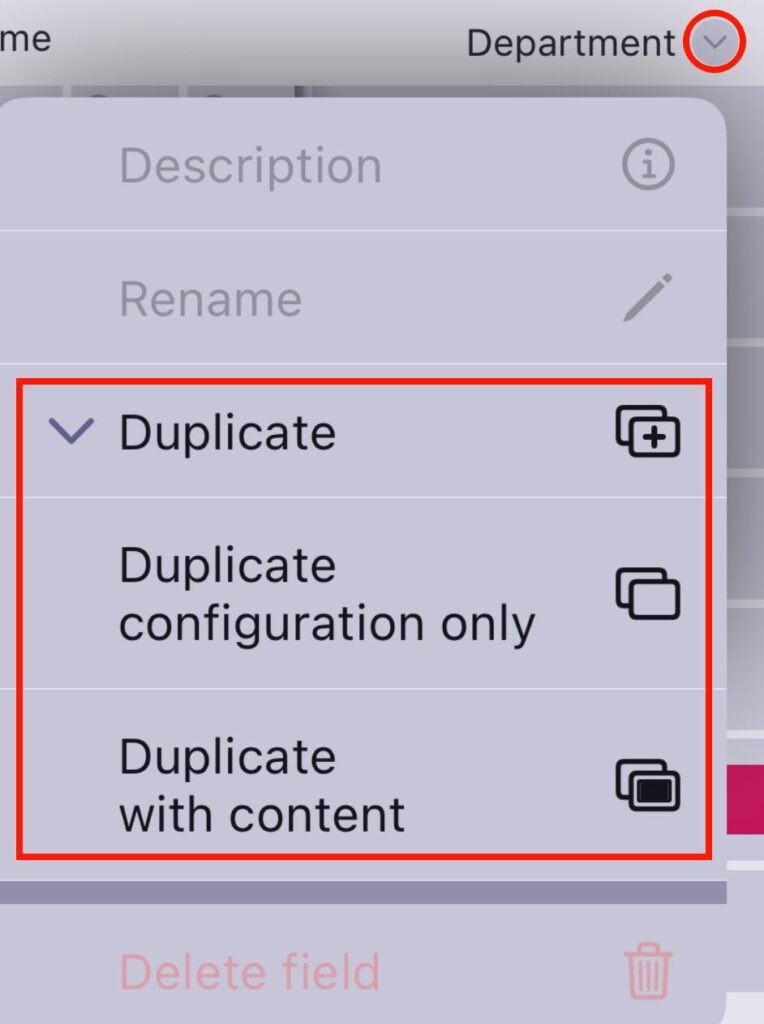
Duplicate Field lets you create an identical Field to the one you have on your Board. Here’s how you can duplicate a Field:
- Click on the arrow next to the Field name (e.g., status)
- Hover over Duplicate
- Select one of the 2 options:
- Duplicate configuration only
- Duplicate with content
- Tap on the arrow next to the field name
- Select Duplicate
- Select one of the 2 options:
- Duplicate configuration only
- Duplicate with content
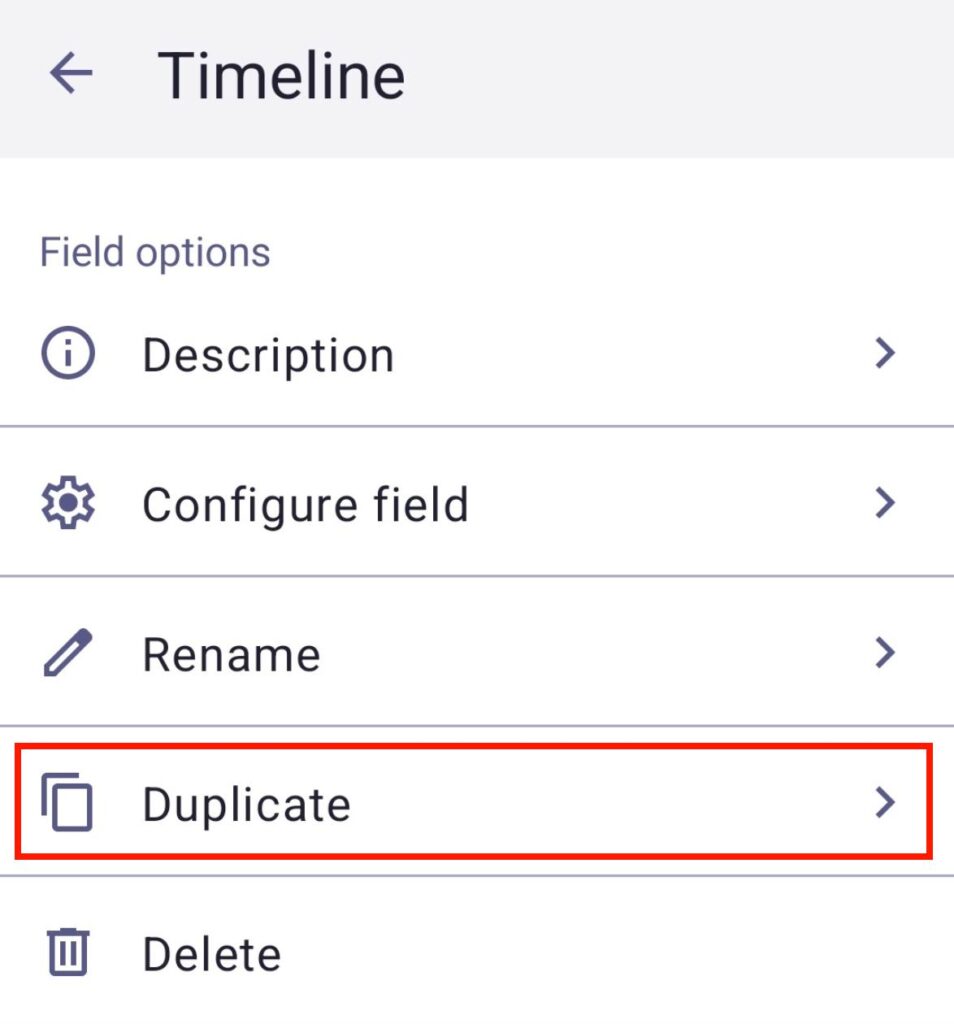
- Tap on the field name (e.g., timeline)
- Tap Duplicate
- Select one of the 2 options:
- Duplicate configuration only
- Duplicate with content
- Tap on Duplicate to complete the action
Change Field type #
The Change Field type action lets you convert a field from one type to another.
Board Owners can always change the Field type. Board Members can only change the Field type if their board permission is set to Edit everything.
To change Field type:
- Click the arrow next to the field you want to change
- Hover over Change Field type
- Choose the Field type you’d like to convert to
- Review the Field type changes
- Click on Convert to complete the action
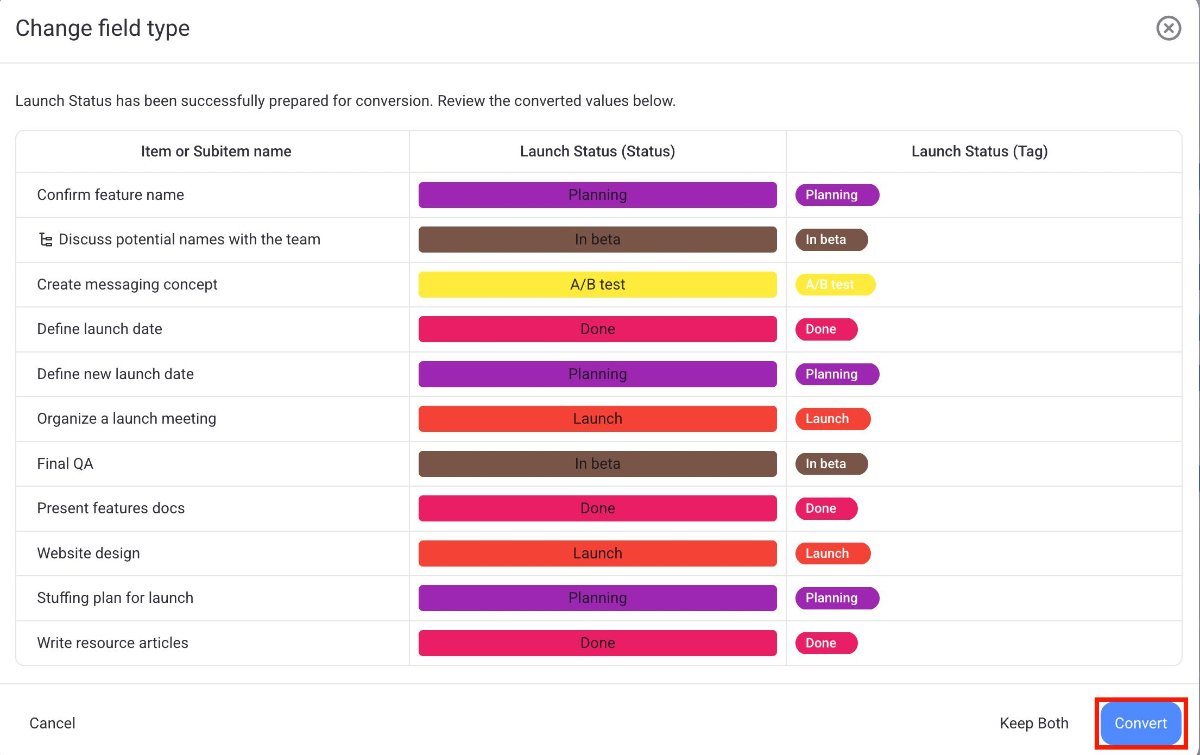
You can’t modify any field values directly within this conversion window.
To proceed:
- Keep both: This option will keep both the original and new field types for that field on your board
- Convert: This will execute the conversion, changing the field type as shown
- Cancel: This will stop the action, and no changes will be made
Convert predefined and custom Fields #
You can convert a custom Field to a predefined Field and vice versa. The types you can choose depend on the Field you’re converting:
| Predefined Field | Can be converted to and from |
| Status | Dropdown, Person, Tag, Text, Rich text, Numbers, Assignee |
| Assignee | Person, Dropdown, Tag, Text, Rich text, Status |
| Due Date | Date, Timeline, Text, Rich text |
If your Board doesn’t have the predefined Field you’re converting to, the Field is converted right away.
If your Board already has that predefined Field, a banner in the modal lets you know that the existing Field will be converted too, since a Board can have only one of each predefined Field:
- Status: The existing Status Field becomes a Dropdown Field.
- Assignee: The existing Assignee Field becomes a Person Field.
- Due Date: The existing Due Date Field becomes a Date Field.
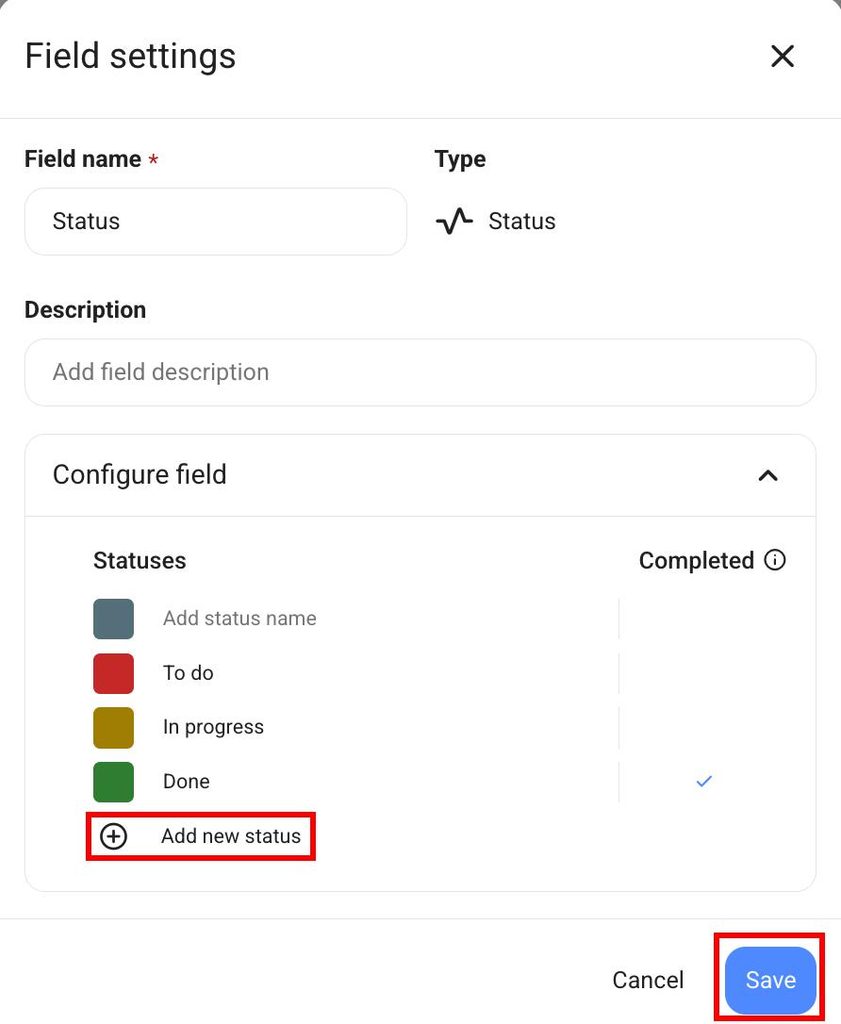
When you convert a Field to Status, the Field configuration opens in the box. Set up your statuses and choose which status marks an Item as completed.
Delete Field #
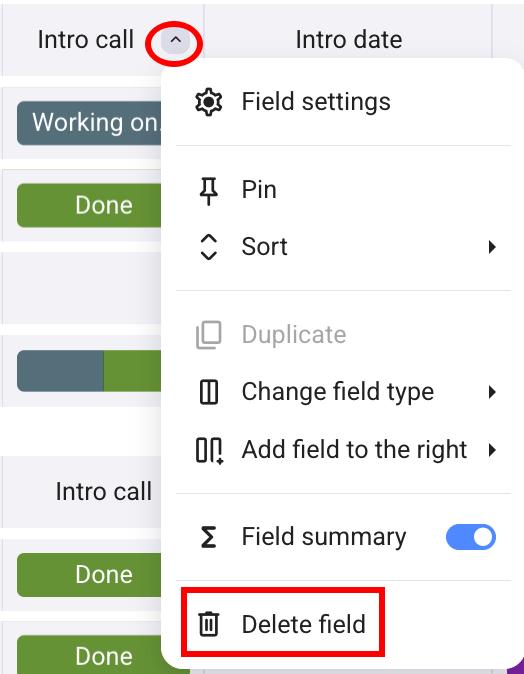
To remove a Field from your Board, you can delete it. Here’s how:
- Click on the arrow next to the field name (e.g., tag)
- Select Delete
- Click Delete on the confirmation modal to complete the action
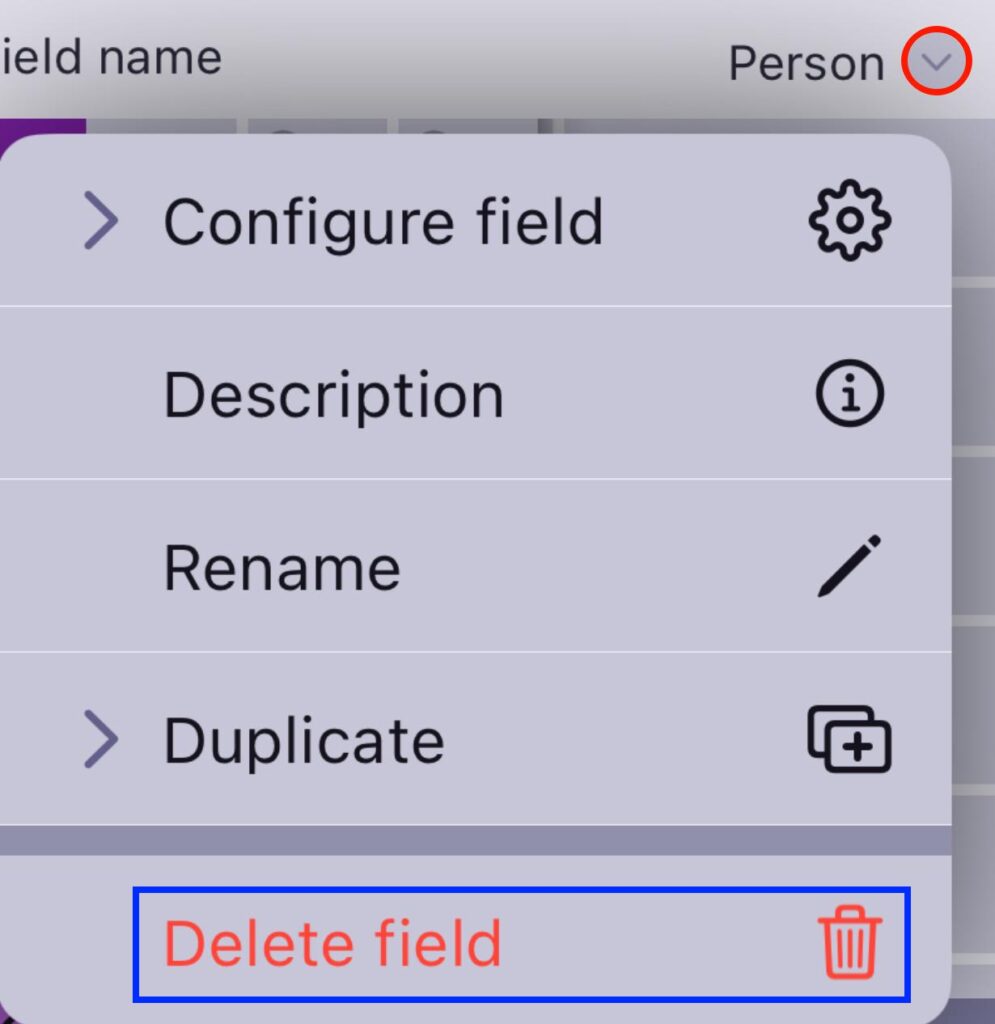
- Tap on the arrow next to the field name
- Select Delete field
- Tap Delete in the modal to complete the action
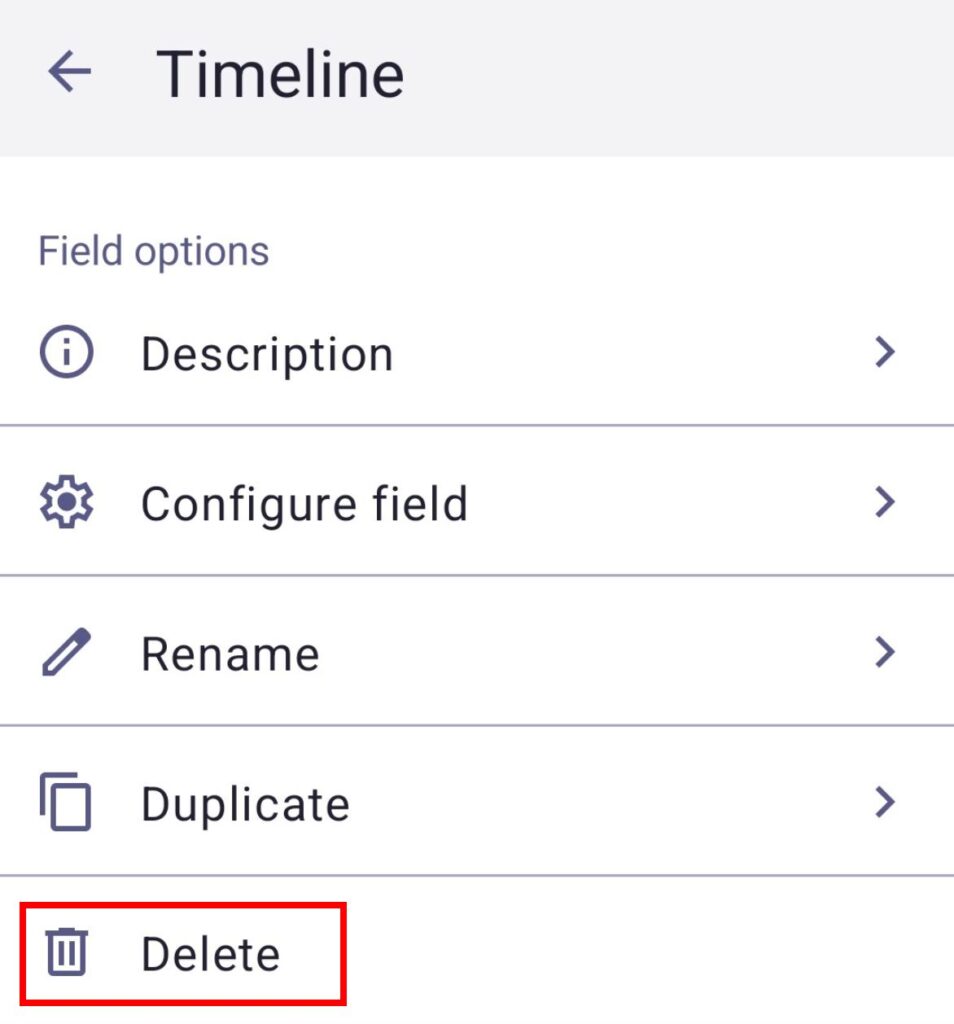
- Tap on the field name (e.g., timeline)
- Tap Delete
- Tap on Delete again to complete the action