 Published: October 13, 2025
 Frustrated with Asana’s high prices and over-the-top features?
No problem! You can quickly and painlessly transfer all your tasks and projects into Plaky — a straightforward and more affordable alternative to Asana.
No technical skills required; just follow these 5 simple steps, and you’ll have your tasks organized in a neat and user-friendly platform.
So, let’s start!

#1 Export tasks from Asana
The first step is to export your tasks to a CSV file. Luckily, CSV files are available on all Asana’s plans, including the free plan, so there are no additional costs or steps to take here.
There are 2 types of data you can export from Asana: projects (entire project boards) and your tasks (the whole My tasks board).
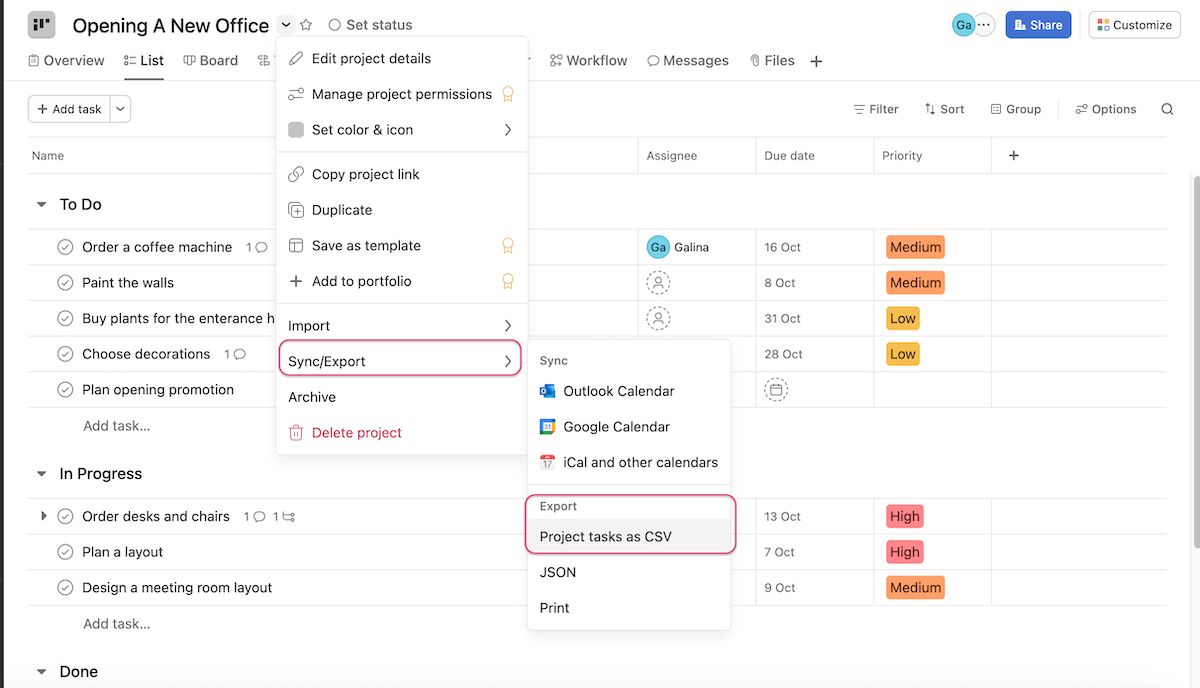
Export projects from Asana
You can export an entire project from Asana in a few steps:
- Click on the arrow next to the project’s name.
- Choose Sync/Export from the dropdown menu.
- Click on Project tasks as CSV.
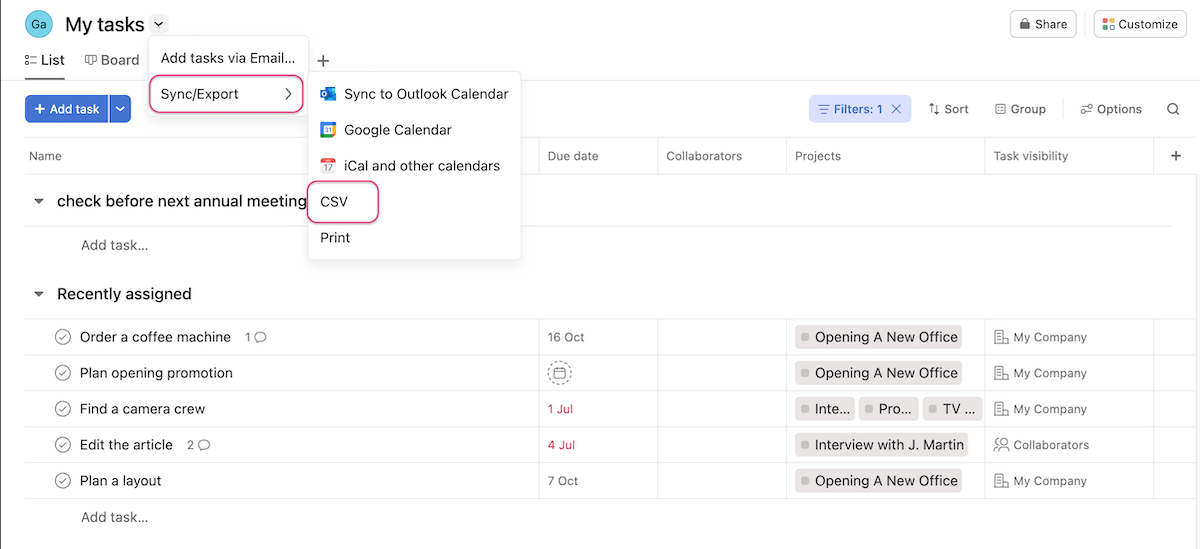
Export My tasks from Asana
If you want to export your tasks only, and not entire projects, you can export just the My tasks board.
Similarly to projects, you can export this board in 3 steps:
- Click on the arrow in the board’s title in the upper-left corner.
- Choose Sync/Export from the dropdown menu.
- Select CSV.
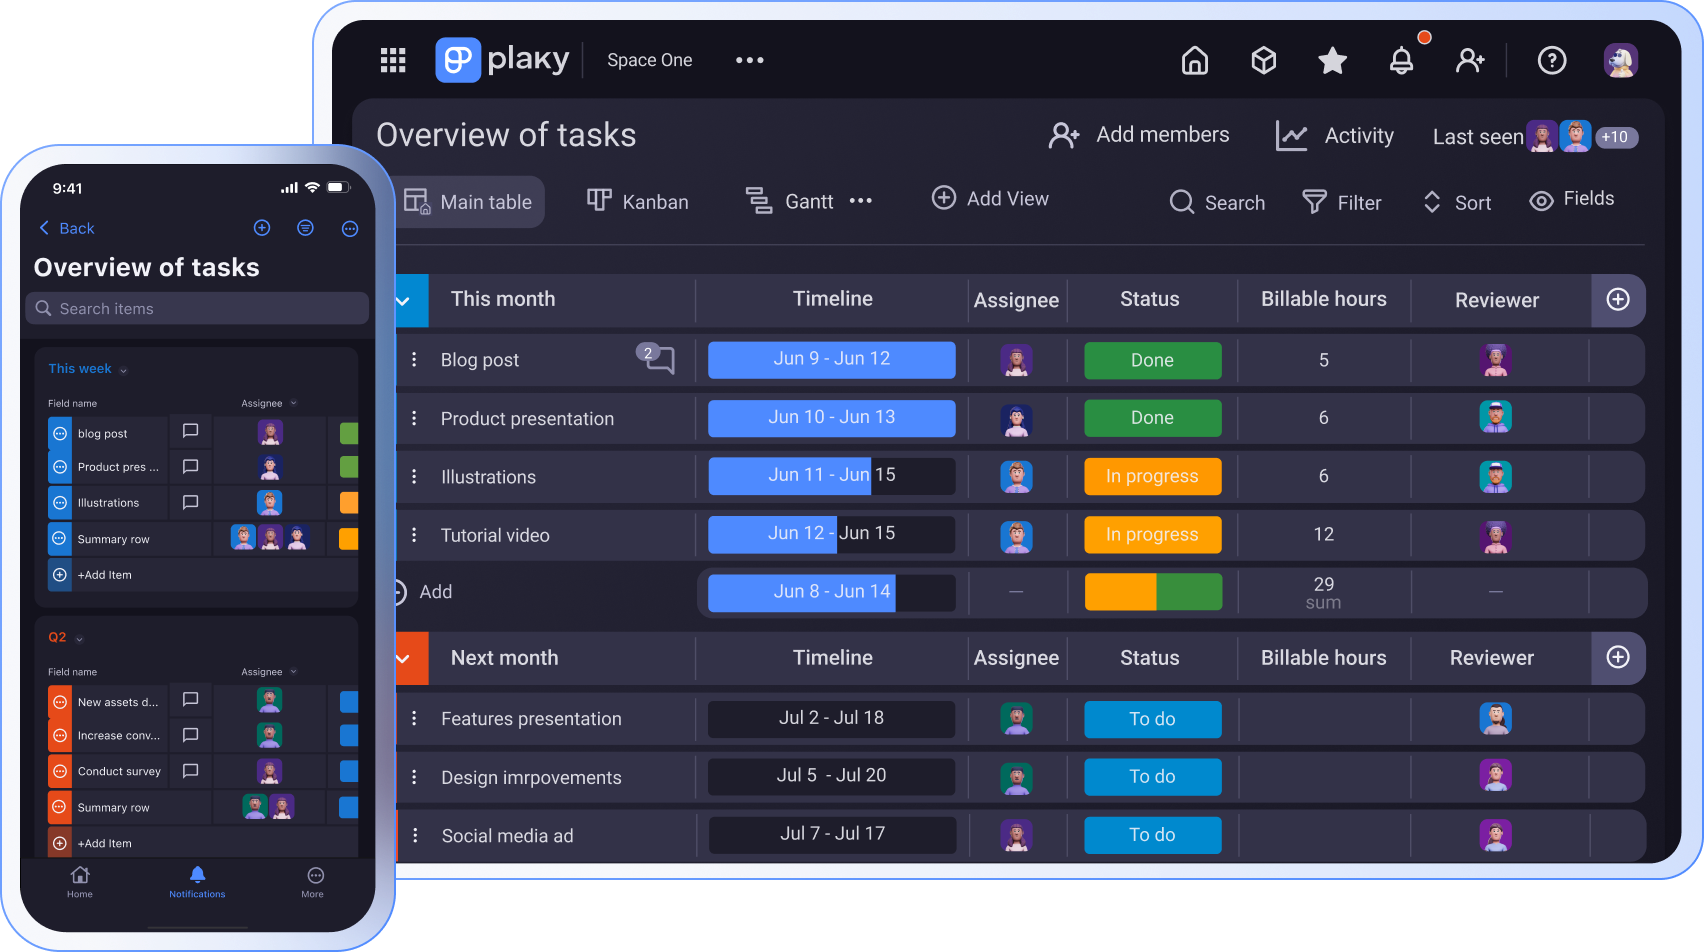
Manage all your tasks in Plaky
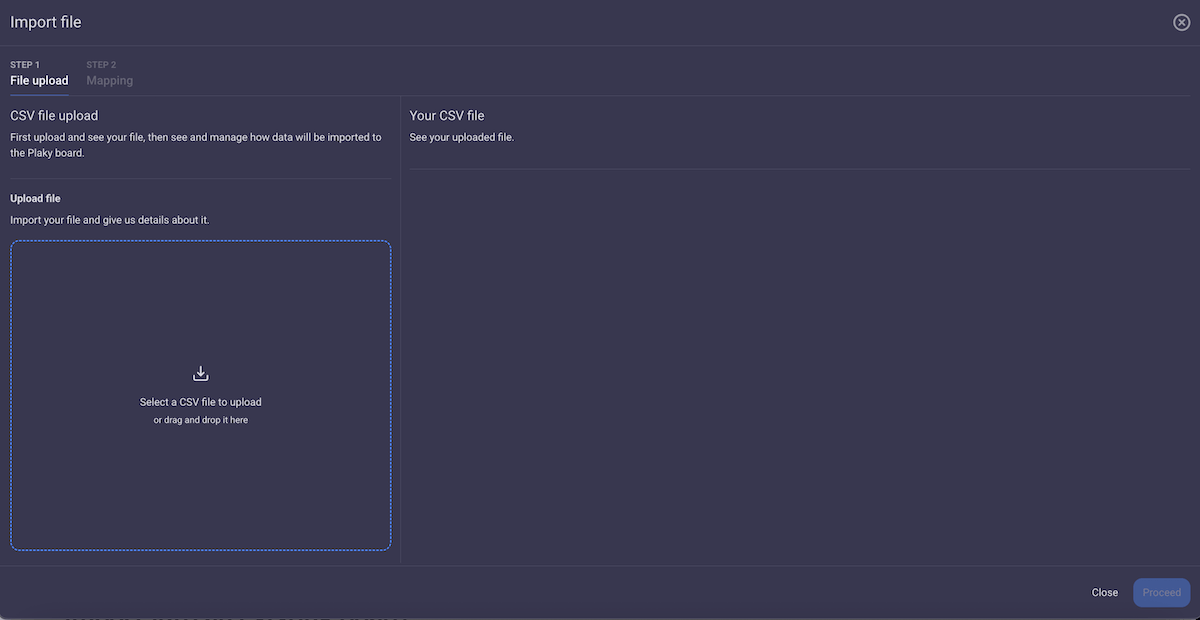
#2 Import the CSV file into Plaky
You can choose whether you want to import data from Asana into a brand new board or transfer it all into an already existing one in Plaky.
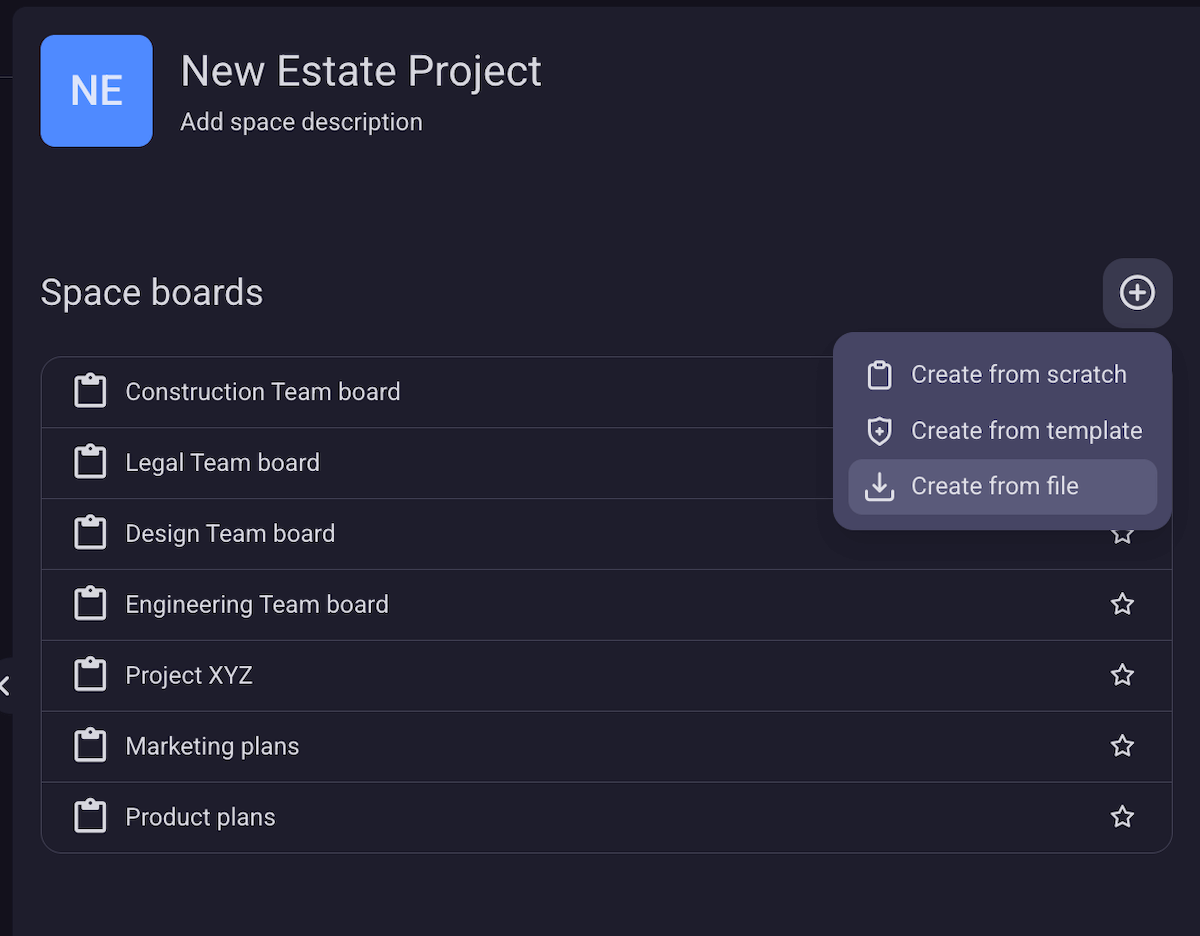
Import into a new board
Here’s how to import a CSV file into a new Plaky board:
- Navigate to the Space where you want to create the board.
- Click on the + button.
- Choose Create from file.
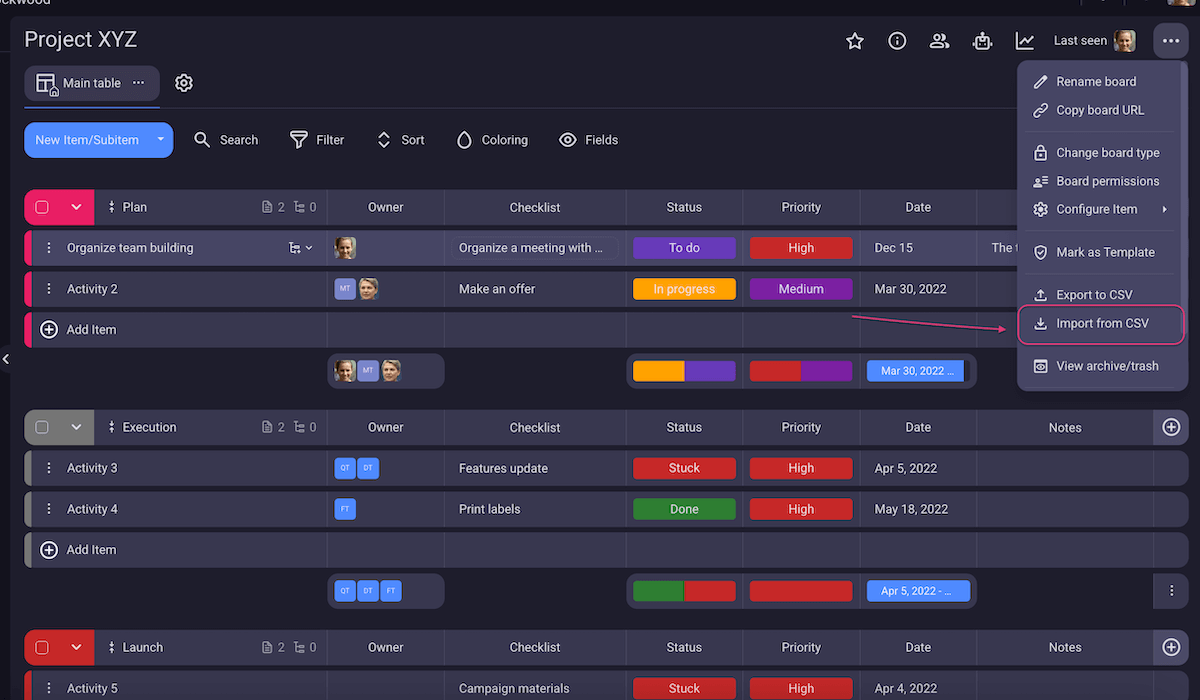
Import the CSV file into an existing board
If you’re already using Plaky and want to import data into one of your boards, you need to:
- Go to the board you want.
- Click on the 3 dots in the upper-right corner.
- Choose Import from CSV.
This option is also useful if you want to merge several of your Asana projects into a single board in Plaky. Simply import the first one to a new board, and then just add other projects to it.
Both options will lead you to the Import file window.
Keep in mind that there are some limitations when it comes to importing files into Plaky:
- Plaky has an import size limit of 10 MB.
- The maximum number of rows you can import is 1,001.
- The maximum number of columns in the CSV file is 70.
- The maximum number of item groups is 20 (any groups over that number will be merged with the last group).
- The maximum number of Status field values in the CSV file is 18 (any additional values will be skipped).
#3 Generate the table
Once you’ve added the CSV file, you’ll see your data uploaded into Plaky. Be sure to check if all information is there.
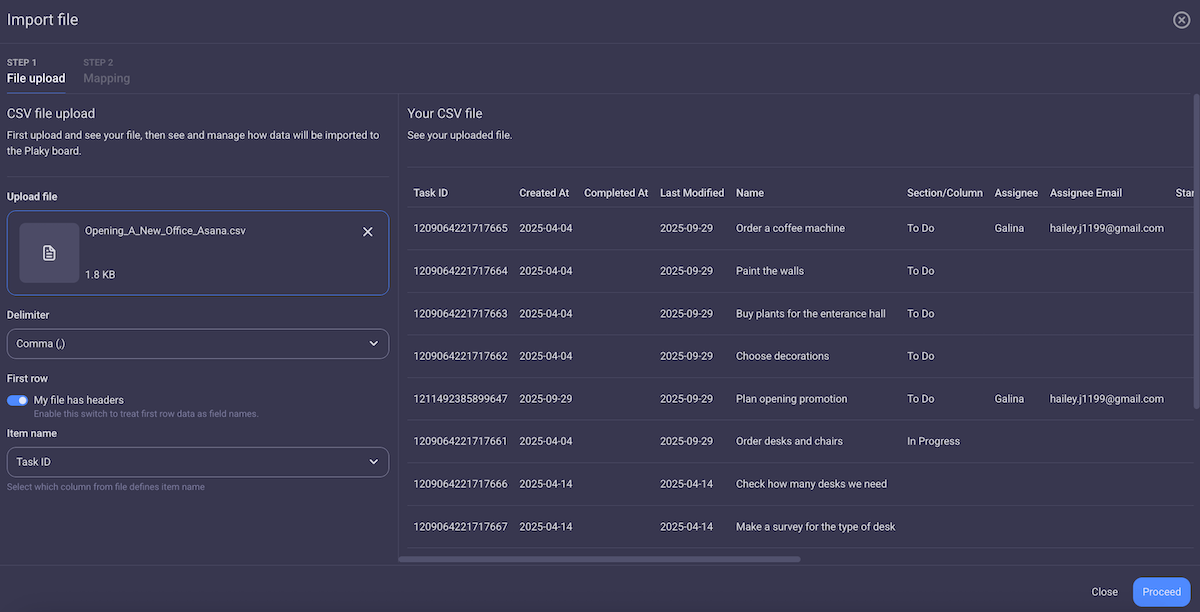
At this point you can:
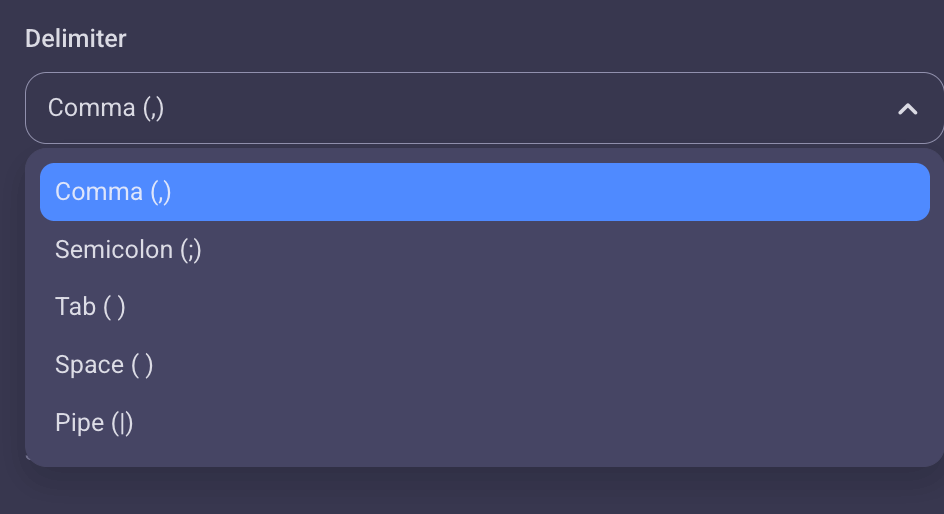
- Pick the delimiter you want: comma, semicolon, tab, space, or pipe. However, for imports from Asana, you can leave the comma, which is set as default.
- Choose the column for the item name. Task ID will be set as default, but you can switch it to whichever column you want.
- Toggle on My file has headers button to have the first row of your CSV columns serve as field names.
Once you are satisfied with your choices, click on Proceed.
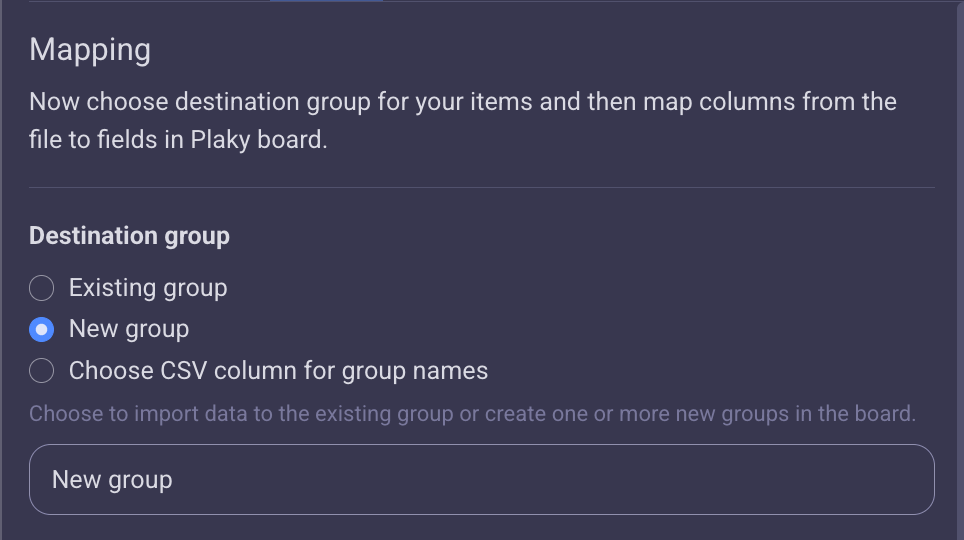
#4 Map the board data
When mapping the data, you need to choose the destination group for your items first. You can put all items into a brand new group or generate groups according to a column from your CSV file, such as status or priority.
If you’re adding files to an existing board, there’s also an option to add tasks to one of the groups on the said board.
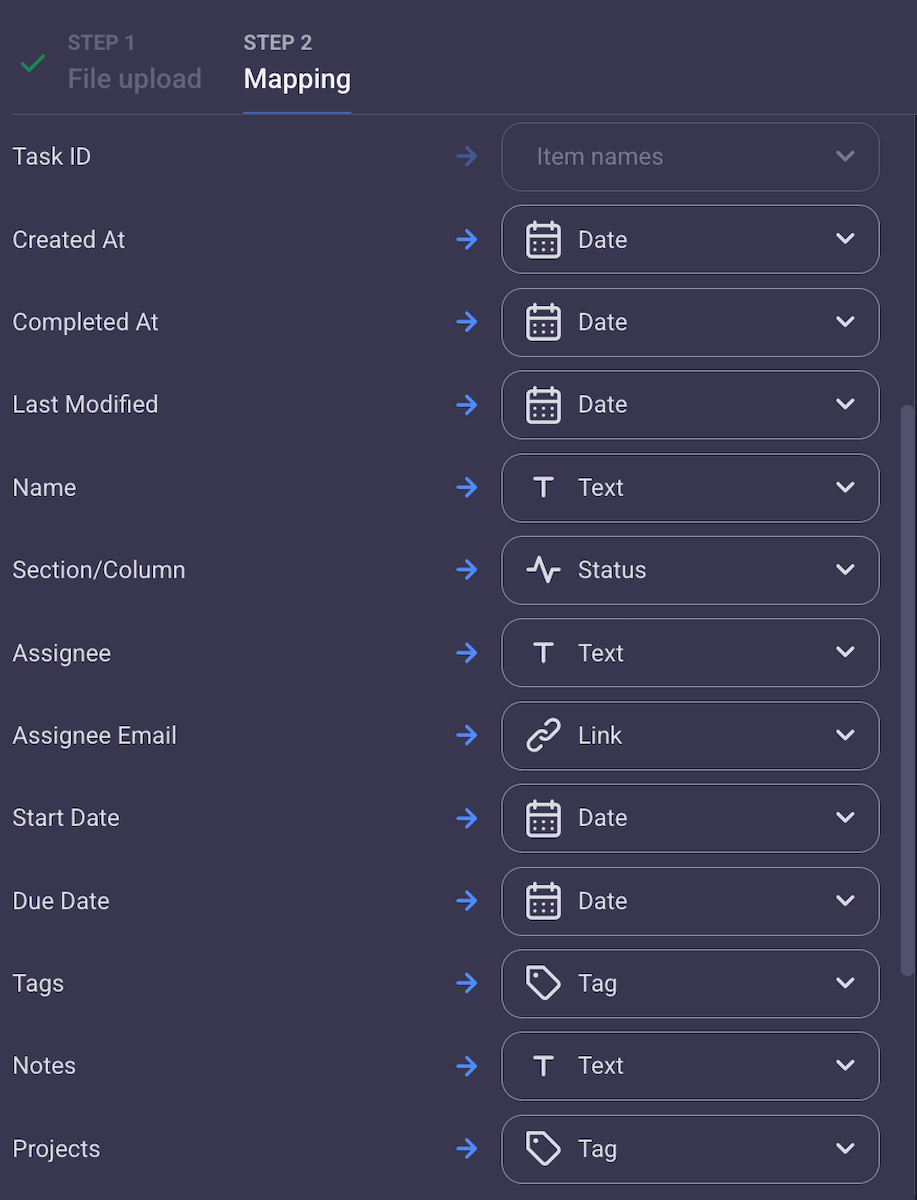
Next, you must pick the field type for each column from the file. If Asana’s field matches a field type in Plaky, it will automatically assign a field type to that column. Still, you should check if it’s the one you want.
Note: CSV columns that don’t have a field assigned to them won’t be transferred to the Plaky board. So, double-check everything before you proceed.
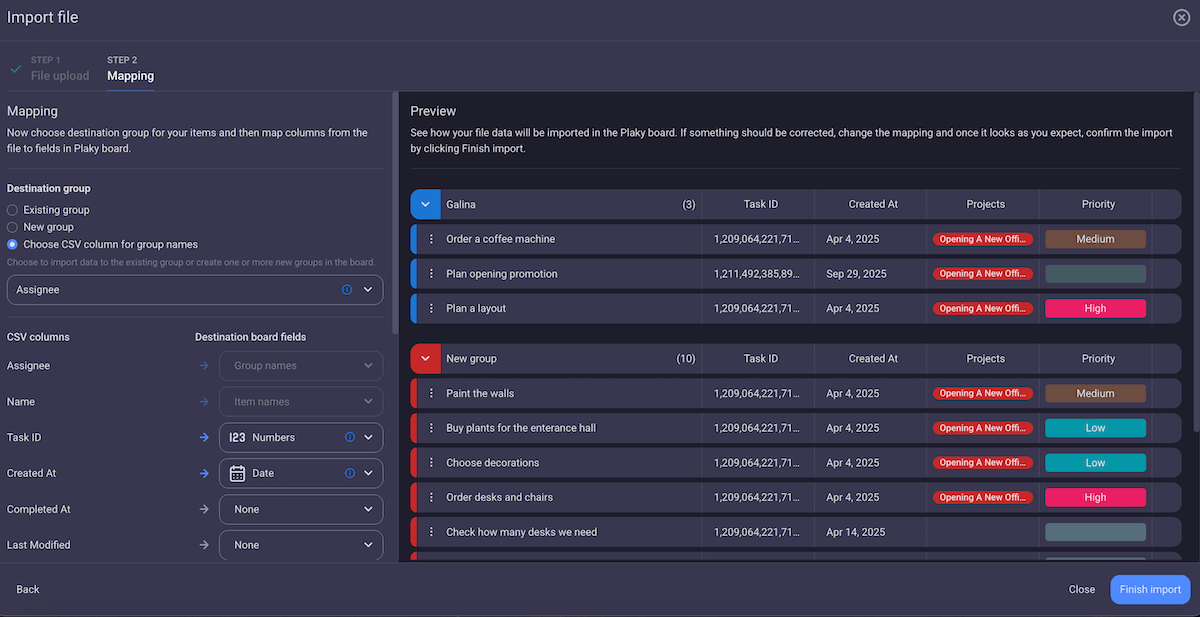
There’s a preview of your board during the mapping process, so you can see how your data will be organized on the Plaky board.

#5 Finish the import process
And that’s it! Your projects and tasks are waiting safely for you in Plaky, so you can now delete your Asana account without worrying about losing any data.
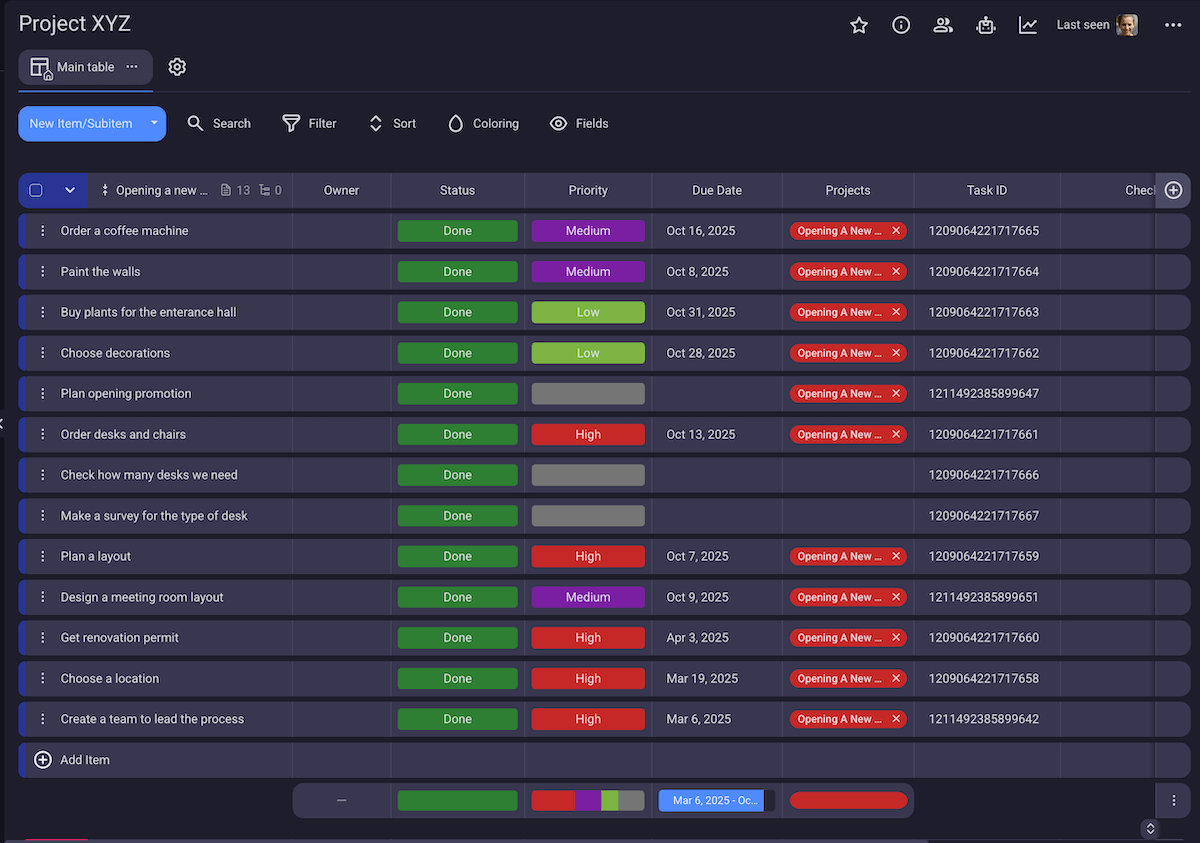
Once you’ve imported your data into Plaky, you can organize it however it suits you. Plaky is highly customizable, so you can arrange your board to fit your workflow perfectly.
You can:
- Group tasks (e.g., according to status or priority),
- Sort tasks (e.g., by start or due date), and
- Filter tasks (e.g., see tasks from just one team member).
Tip: To save time and effort, use bulk actions to move items across the board.
Good to know before you begin
Before you start importing Asana projects into Plaky, here are a few things to keep in mind:
- Plaky only supports CSV files for import.
- You can import only one board at a time.
- Any member can import files into Plaky — you don’t have to be an admin.
- The content of the file doesn’t need to be in English.
- The length of the import depends on the size of the file, but it’s generally quick.

Transfer your projects from Asana to Plaky and enjoy effortless project management!
How we reviewed this post: Our writers & editors monitor the posts and update them when new information becomes available, to keep them fresh and relevant.