
Onboarding Guide for Workspace Owners and Admins
In this onboarding guide, you will learn how to create a Plaky workspace, organize your Boards and Spaces, and invite team members.
If you are new to Plaky, check out our article on how to get started using Plaky!
Register and create a workspace #
The first step in creating a workspace is to register on Plaky.
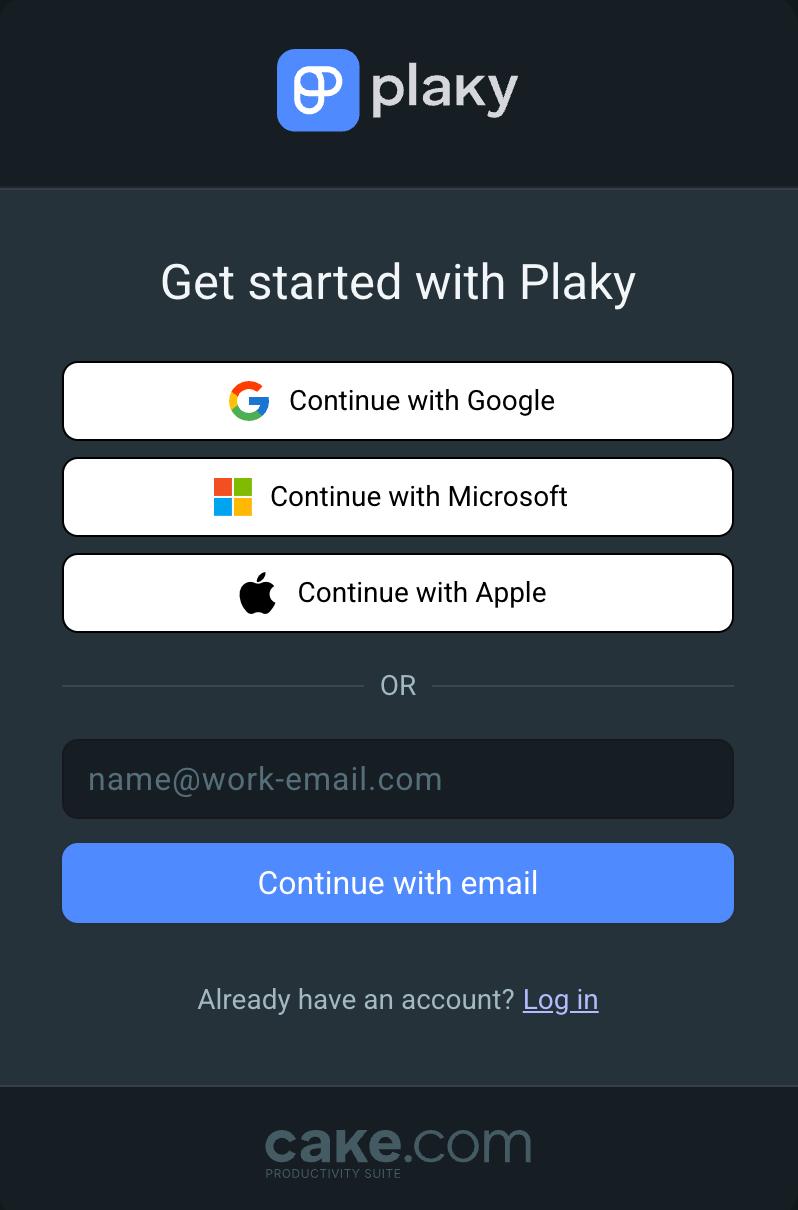
- Open the Plaky sign-up page
- Continue with Google/Apple/Microsoft/email
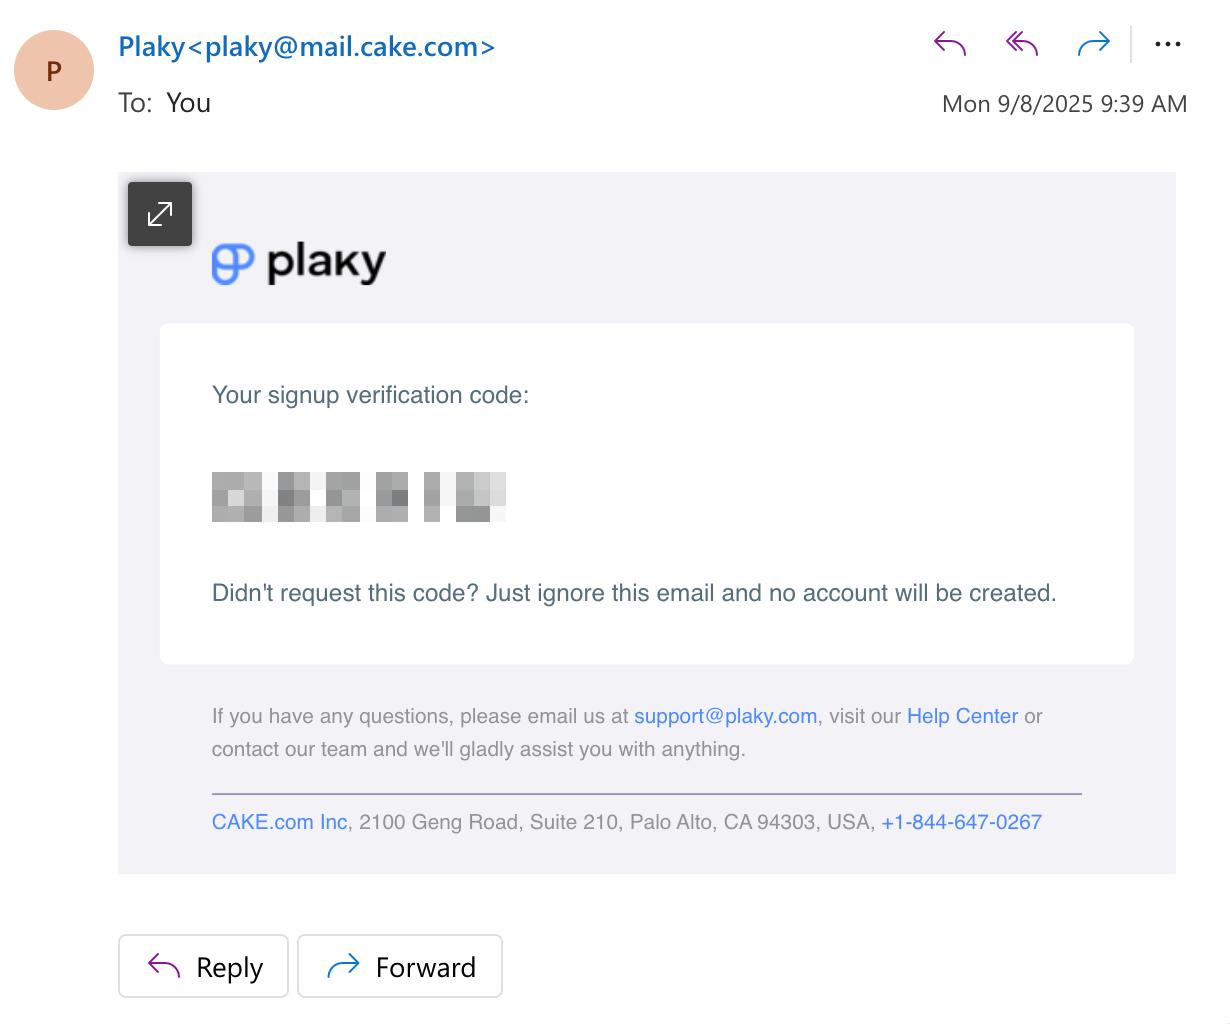
- Enter the verification code sent to your email
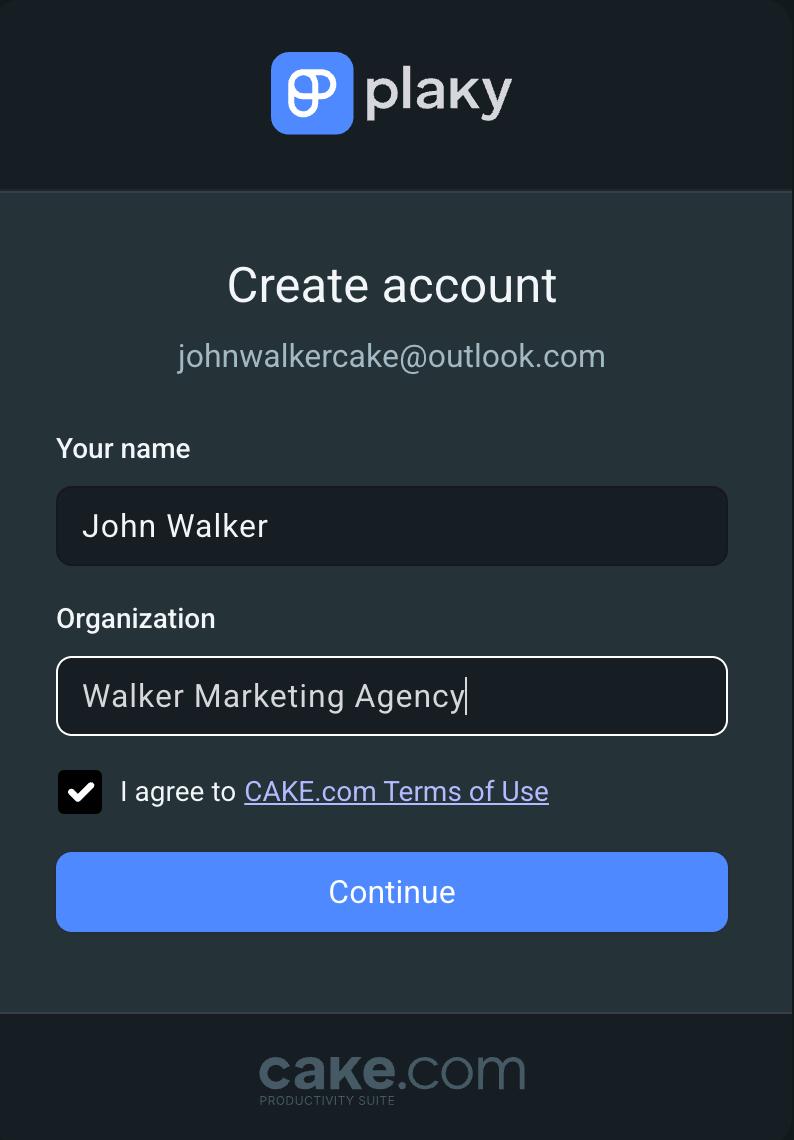
- Enter your name
- Enter your Organization name (this name will be used for your workspace)
- Agree to CAKE.com Terms of Use
- Click Continue to complete the registration
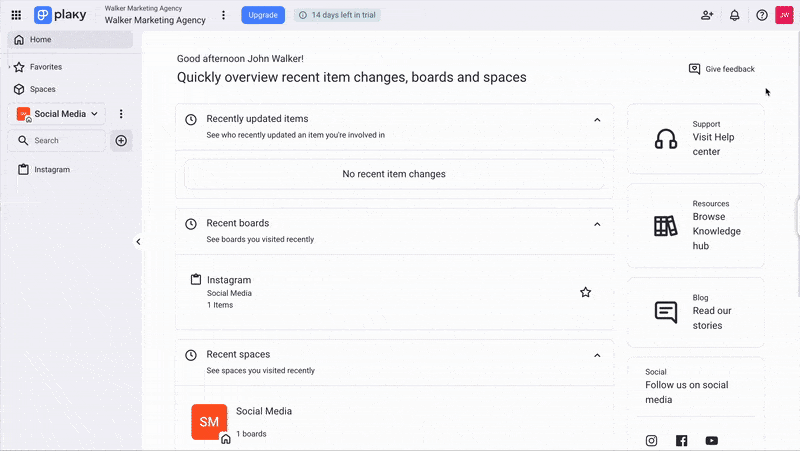
Once you have registered and created a workspace, you can proceed to invite team members.
Invite members to your workspace #
With Plaky, you can easily invite team members to join your workspace and collaborate with them. Here’s one way to invite team members:
- Click on the Invite members button in the top right corner
- Write down the email you want to invite
- Select Member or Viewer role
- Click on Invite
Once you have invited a new member, they will receive an invitation email. When a new user opens the invitation email, they can use it to register on Plaky and join the workspace.
The invitation link expires after 7 days, so remember to notify your users when you send them an invitation.
Manage Spaces #
Space is a central place where you can create projects and tasks. Every Space has at least one Board, which includes Items in it. You can manage a Space by accessing the menu and clicking on the three dots next to the Space.
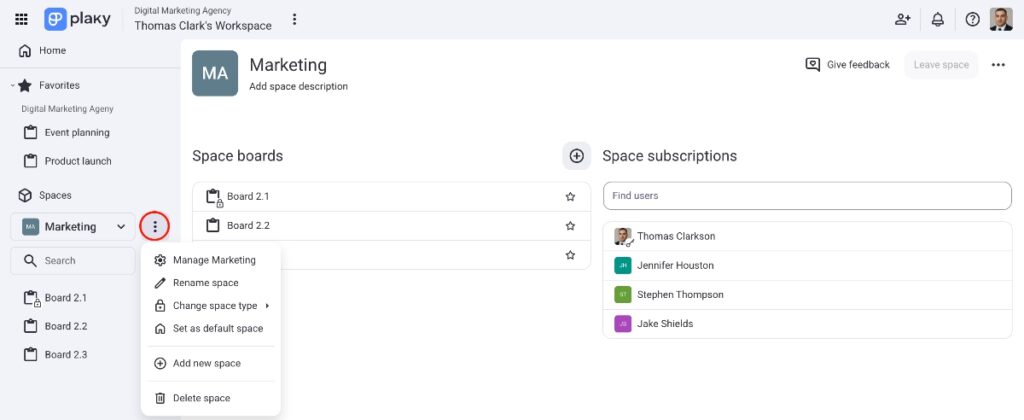
Here’s what you can do:
You can subscribe members to a Space by writing their name in the Space subscription field. Space subscribers are recognized as members and can access Boards and Items within that Space.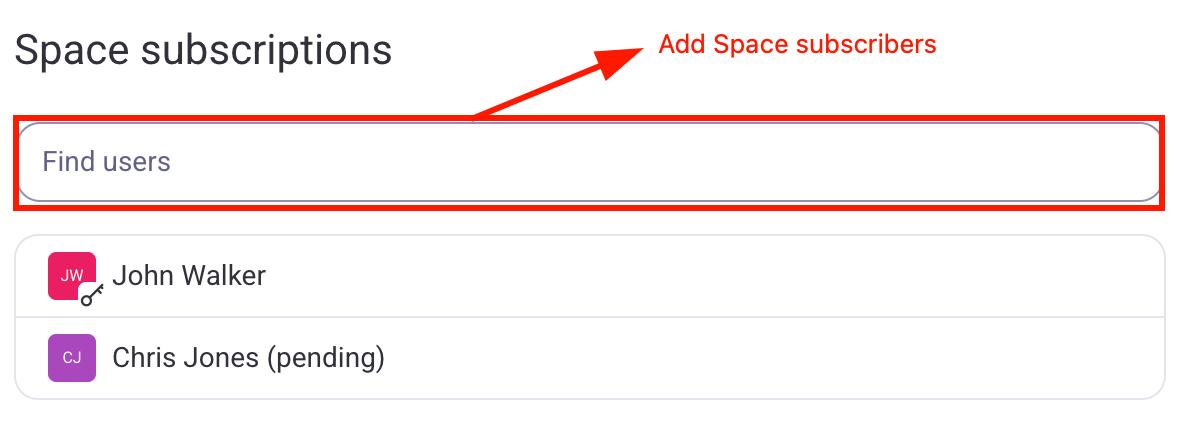
If you want to learn more about Space permissions, check our article.
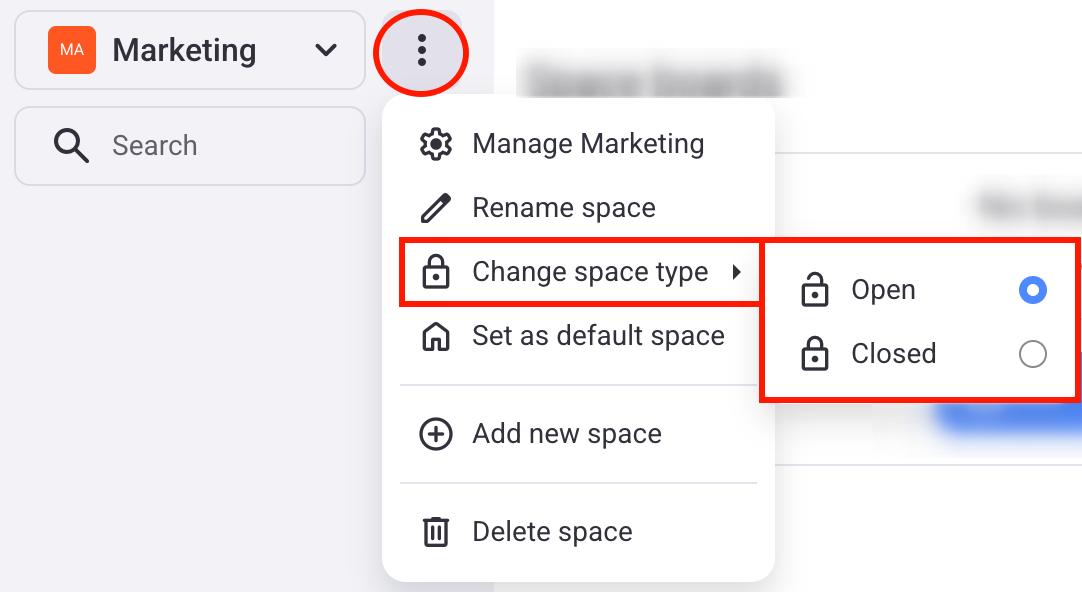
A space can be open or closed. Open space can be accessed by all members of the workspace, while a closed space is available only if a member is invited to it. Here’s how to change a space type:
- Click on the three dots next to the space name
- Hover over Change space type
- Select if you want Open/Closed
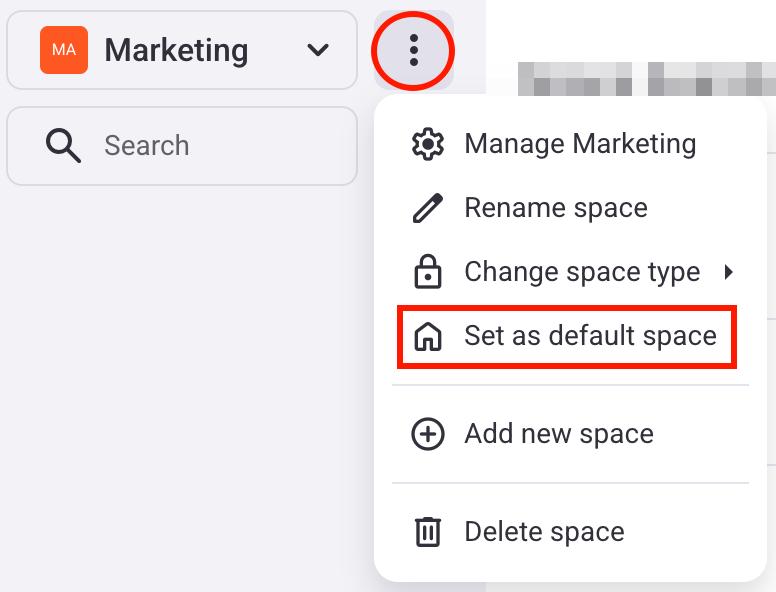
When you log into Plaky, the first space you will see is the default space. You can change which space will be the default by following these steps:
- Choose a space
- Click on the three dots next to the space name
- Click on Set as default space
Add a Board and invite Board members #
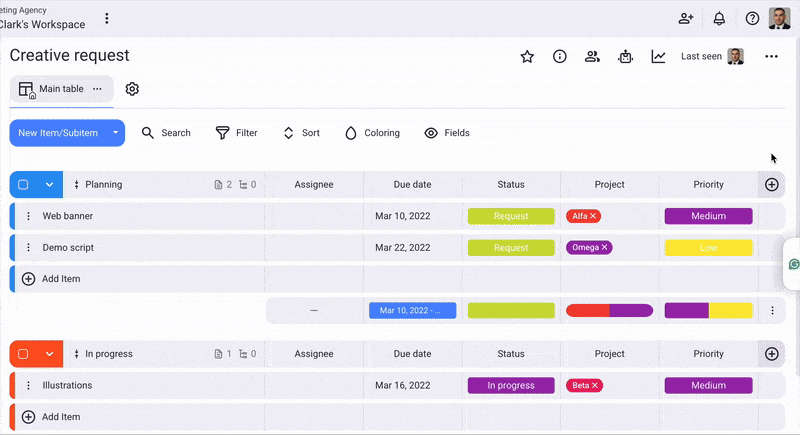
Boards are an integral part of every Space, and they contain multiple Items and Subitems, which are organized into Item groups. Imagine a Board being a larger project that you and your team are working on. For example, if you have a Space dedicated to marketing, you can have a Board for your social media tasks.
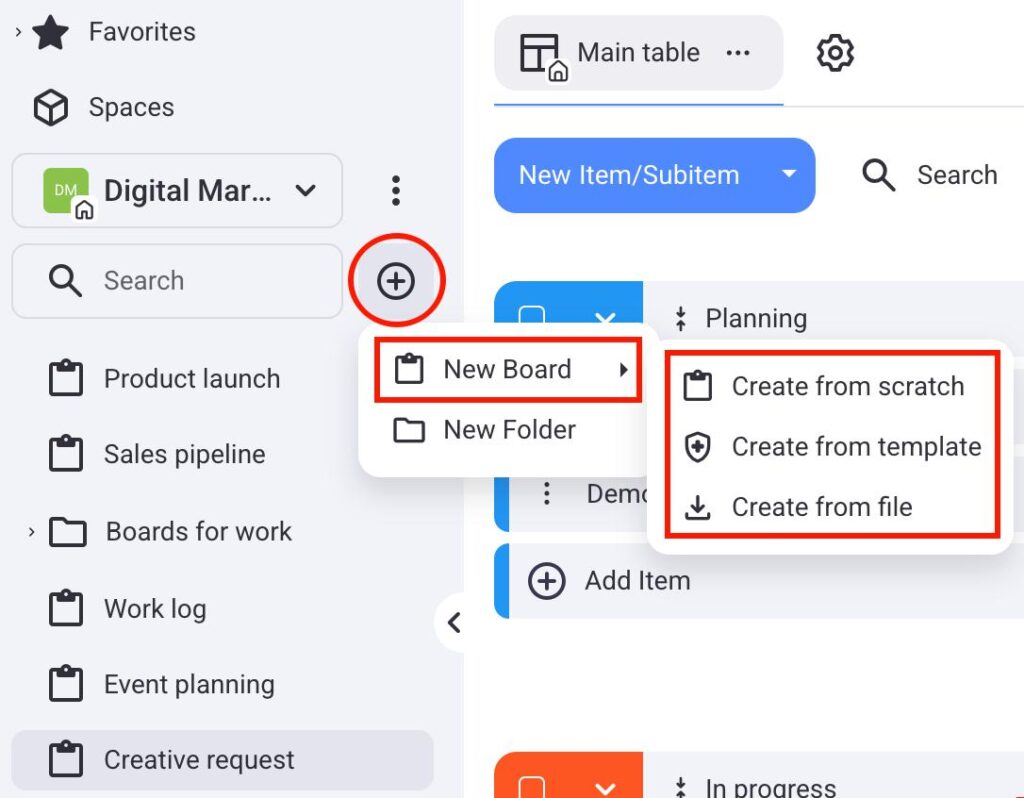
To add a new Board, click the + icon below your Space and then hover over New board. You can create a new Board in 3 ways:
- Create from scratch — creates a Board with no Items and Item groups
- Create from template — lets you select a predefined Board template
- Create from file — lets you upload a Board as a CSV file
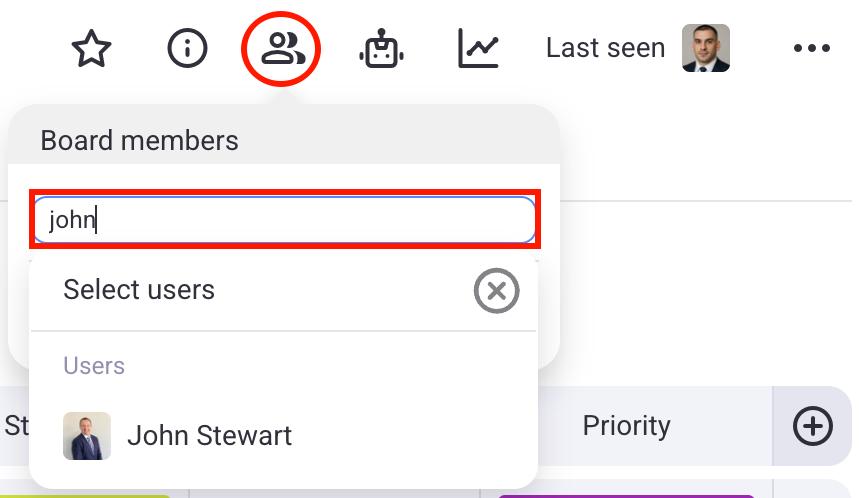
Once you have created a Board, you can add board members by clicking on the board members icon and then typing their names into the field.
Set Board permissions #
Members of your workspace can interact with Boards depending on the permissions you select. Plaky offers 3 different types of board permissions you can select:
- Edit everything — allows members to add/edit/delete private and public views, groups, fields, items and subitems, field values, comments, and files
- Edit content — allows members to add/edit/delete private views, items and subitems, field values, comments, and files
- Add comments and files — allows members to add/edit/delete private views, comments, and files
Here’s how you can change board permissions:
- Click on the three dots in the top right corner
- Click on Board permissions
- Select which board permissions you want
- Click Save to complete the action
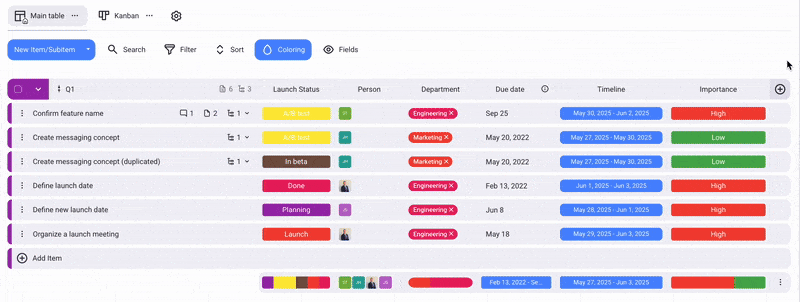
Create board fields #
With Plaky, you can add fields to your Items. Each field represents some type of information that users can add to their Items. For example, fields can represent Item status, due date, or people assigned to the Item.
Here’s how you can add a field:
- Click on the + icon on the right side
- Select field type
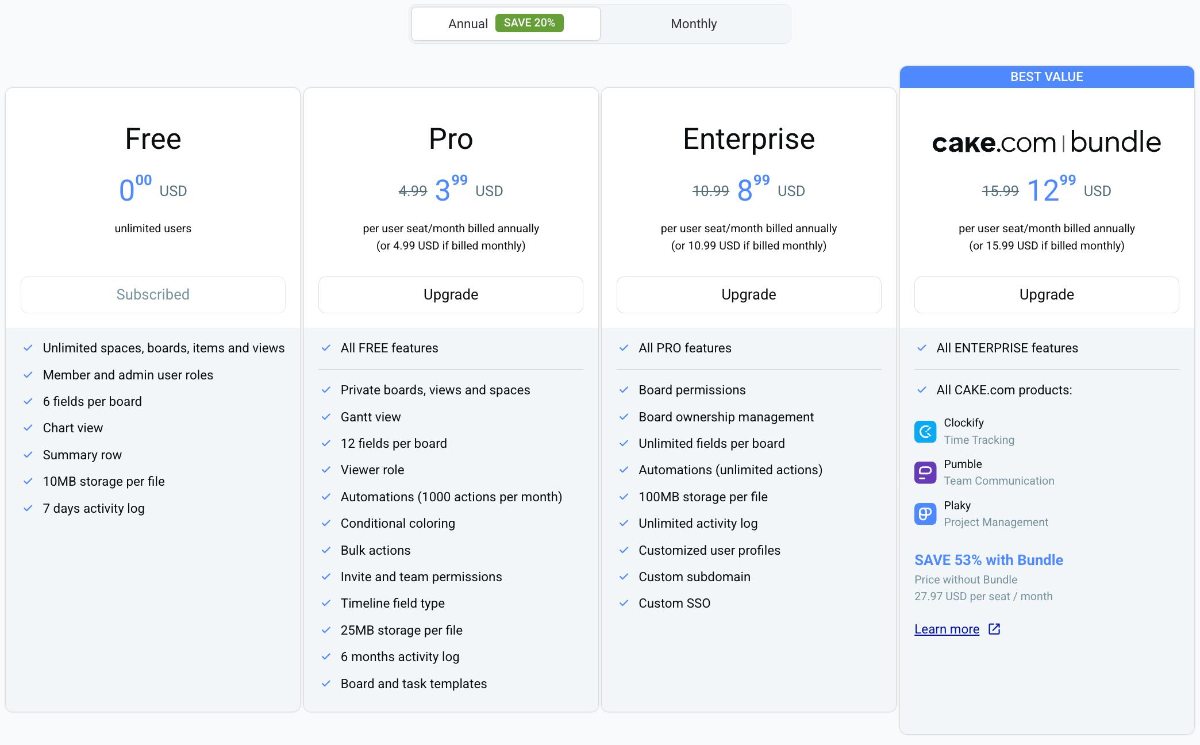
Select a subscription plan #
Although Plaky comes with a lot of features on its FREE plan, choosing a subscription plan can unlock additional features for you and your team.
Here’s how you can upgrade your subscription:
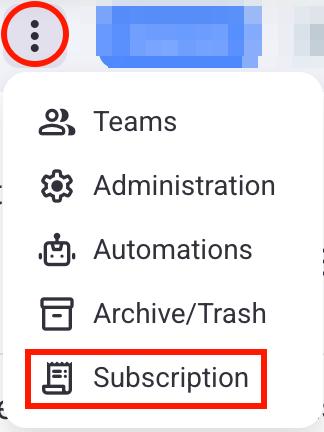
- Click on the three dots next to your workspace name
- Click on Subscription
- Open the Plans tab
- Click Upgrade on your preferred plan
- Enter customer, invoice, and payment info
- Click on Finish payment to complete the process
For more information on Plaky subscription plans, visit our pricing page.