Board members, permissions, and activity logs
In this article
This article covers how you can add members to your Board, how you can set Board permissions, and what you can see in the activity log.
Add or remove members from a Board #
If your Project requires you to grant or revoke access to your Team Members on your Board, you can do so by making your Board Private (available on paid plans only) and adding or removing Users. When someone is added to a Board, they are subscribed to it and will receive notifications about activity on Items they’re watching, and those Items will appear in assignment fields.
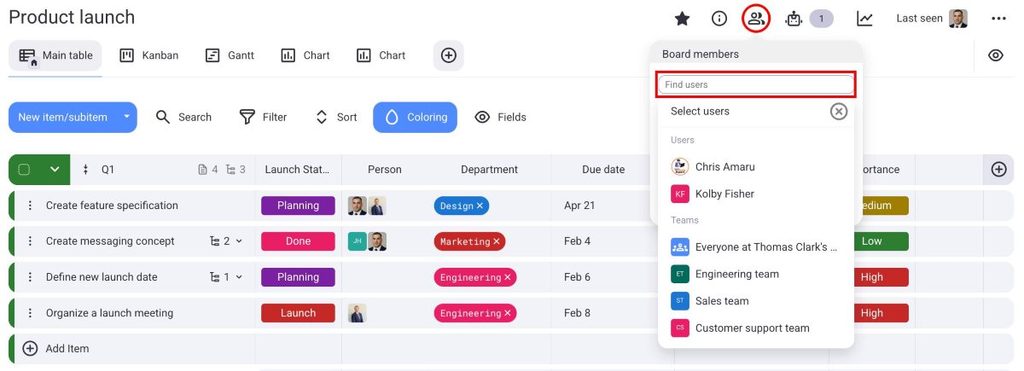
To add members to a Board:
- Navigate to the Board members button at the top
- Search for members in the Board members dialog box
- Choose the member you’d like to add
To remove members from a Board:
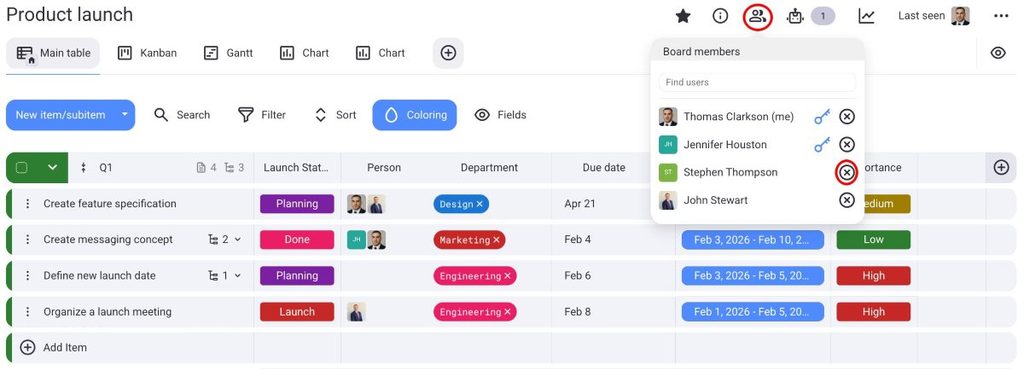
- Navigate to the Board members button at the top
- Click X next to the member you’d like to remove
Board Permissions #
The default Board Permission (Edit everything) applies to all Boards. To change to another type of Permission, you need an Enterprise subscription plan.
Board Permissions in Plaky allow Board Owners to control the level of access and editing rights granted to individuals or user groups for a specific Board. Changing Board permissions is a paid feature available only on the Enterprise plan.
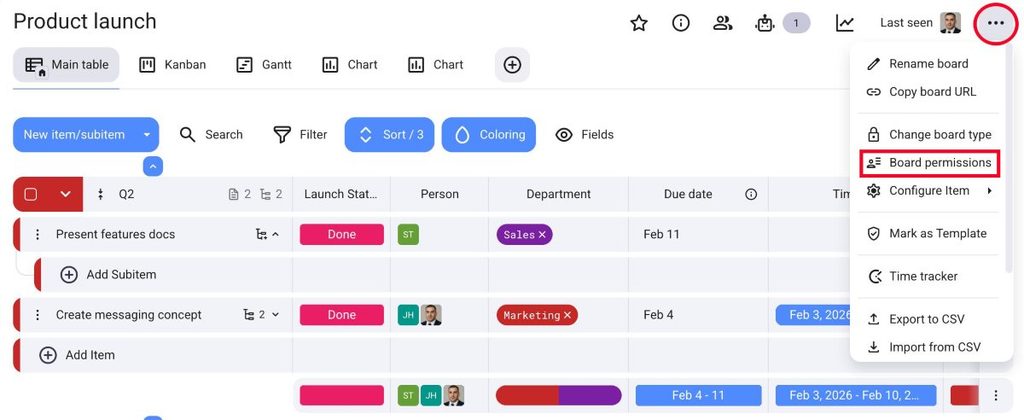
If you want to change Board permissions, follow these steps:
- Click on the three dots in the top-right corner to open the Board menu
- Select Board permissions
- Choose one of the options
- Click Save to complete the action
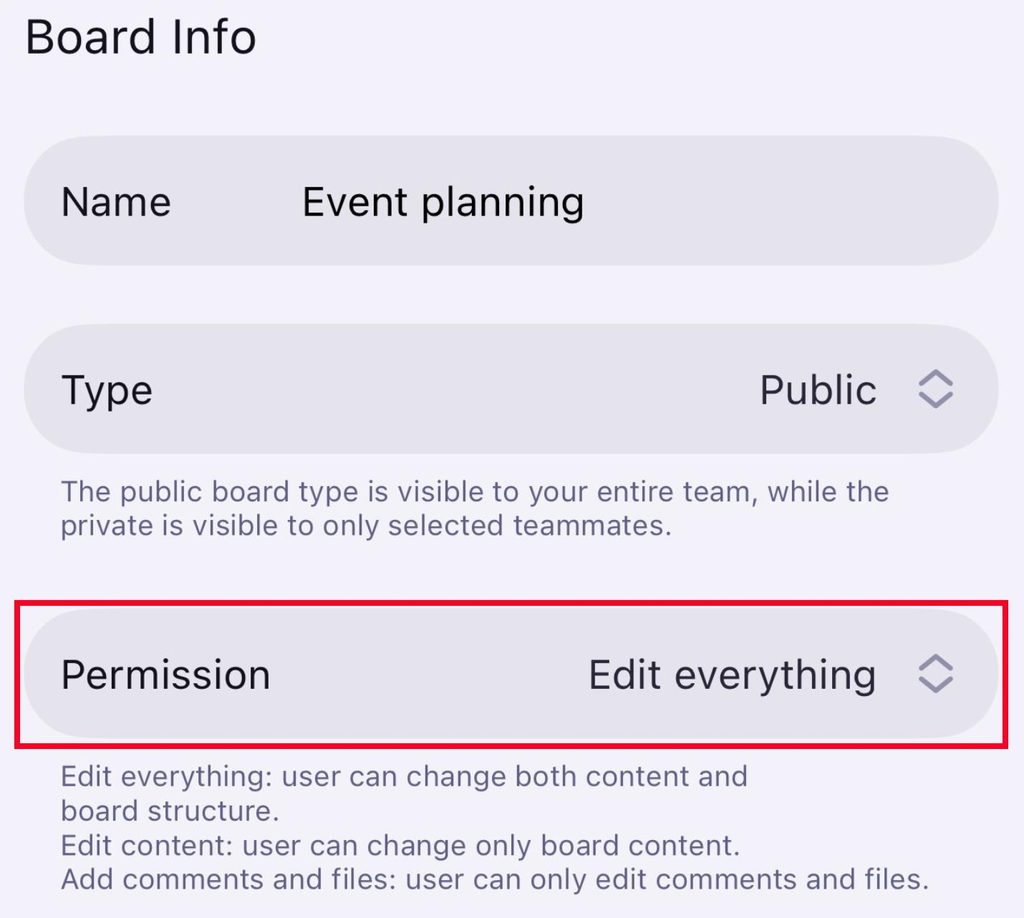
- Tap on the three dots in the top right corner
- Tap on Board info
- Select Permission
- Choose Permission type
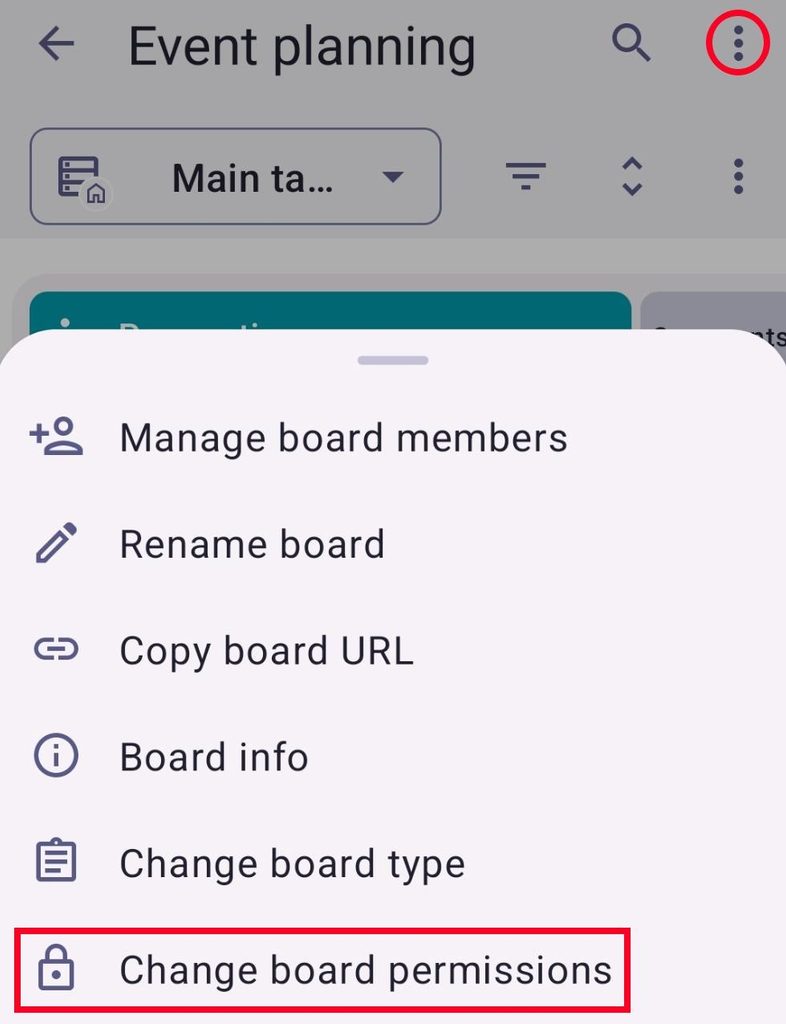
- Tap on the three dots in the top right corner
- Tap on Change board permissions
- Choose which Permissions apply
- Tap Save to complete the action
In Plaky, there are three distinct types of Board permissions:
Edit everything #
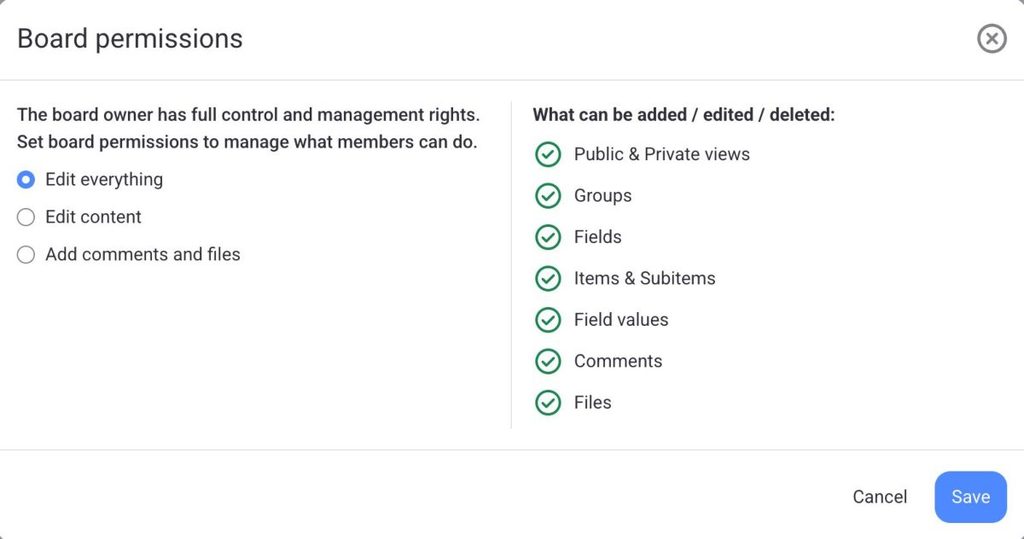
Edit everything permission is the default Board permission, and it grants users the highest level of access and editing rights on a Board. Users can change both content and Board structure, and they can add, edit, and delete the following:
- Items
- Subitems
- Board Fields
- Views
- Comments
- Files
- Groups
- Field values
Moreover, users can organize the Board by using Filter, Summary Row, Rename Board, Sort, and other functionalities.
Edit content #
Edit content permission allows users (Admins and Members who are not Board owners) to change Board content and lets them add, edit, and delete the following:
- Items
- Subitems
- Comments
- Files
- Private Views
- Field values
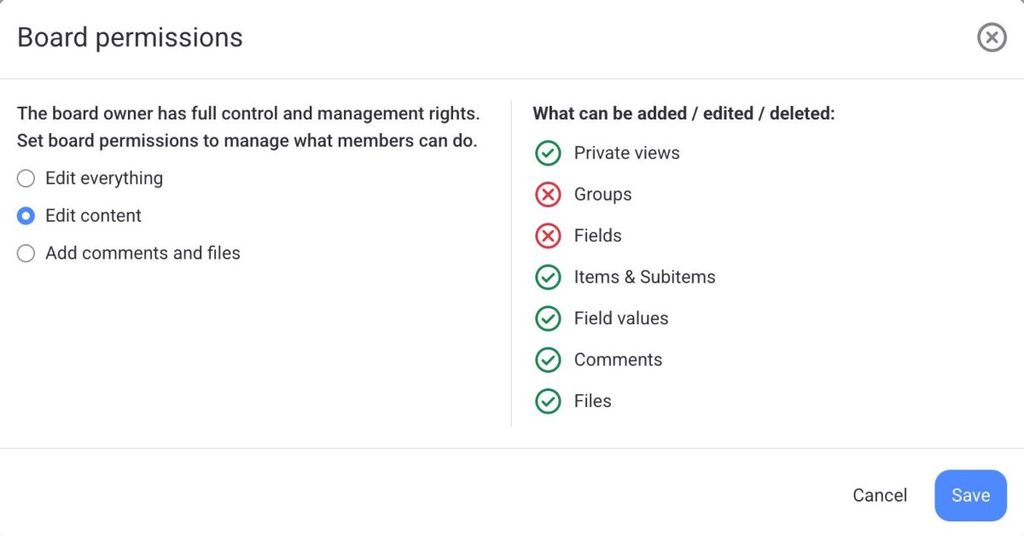
However, users with this permission can’t modify the Board’s structure, views, or settings.
Add comments and files #
Add comments and files permission limits users’ editing rights to adding comments and files only. With this permission set, users (Admins and Members) can view all of the Board’s content but can only add, edit, or delete their own:
- Comments
- Files
- Private Views
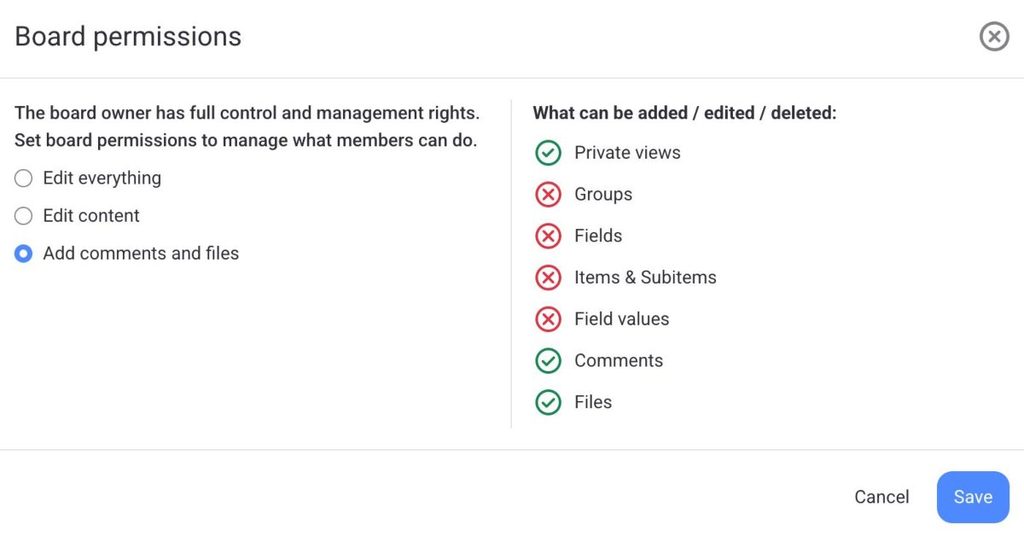
This type of permission is particularly useful for fostering collaborative discussions and resource sharing while maintaining control over the Board’s core content.
Activity log #
With Activity Log, you can track your Team’s tasks and keep up with the activities on the Board or Item.
There are 2 types of activity logs available in Plaky:
- Board Activity Log
- Item Activity Log
You can access the history depending on your plan. The Free plan lets you access history for the past 7 days, the Pro plan for the past 6 months, and the Enterprise plan provides an unlimited record of all past activities.
Board activity log #
The Board Activity Log displays all past activities on the Board, including status changes and updates, Item deletions, and Team Member assignments.
To check the Activity log for Boards, click the Activity log button at the top of the Board.

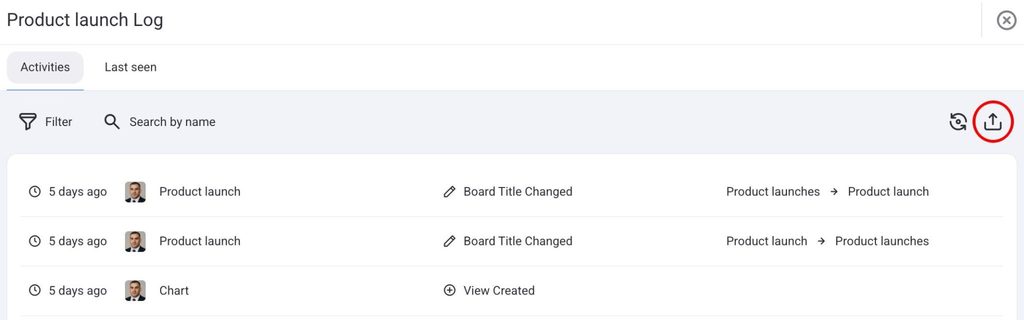
The panel opens up with the list of all past Board activities. Each entry contains the following information: time of change, author of the change, name of the Board/View/Field/Group or Item to which the change was made, and how it looked prior to and after the change.
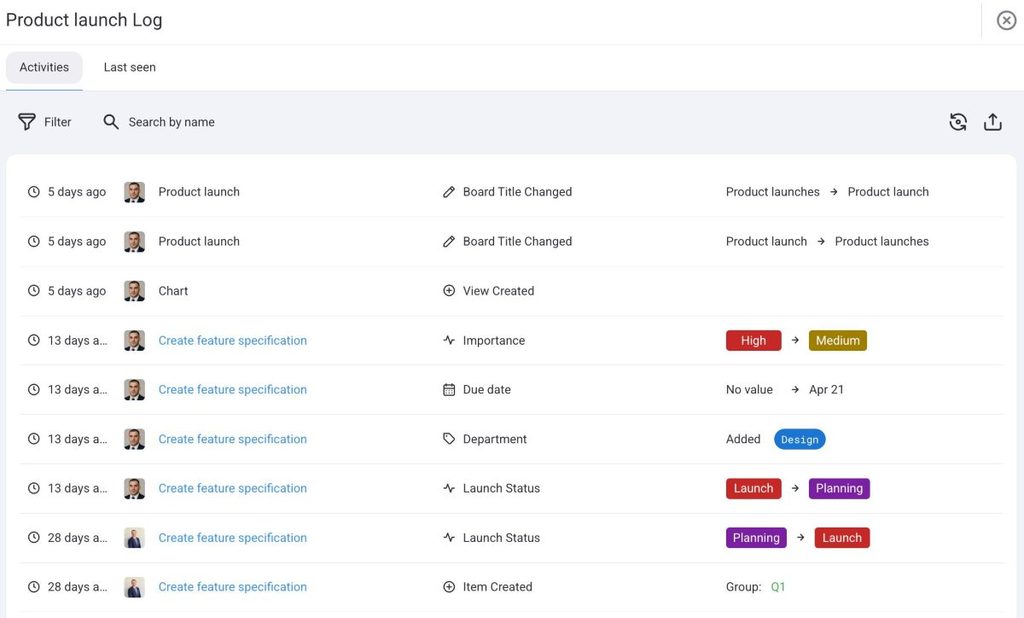
Use the Filter button to narrow entries by time period, Item group, Field type, person, or event type. Use Search by name to find all changes made by a specific useItem activity log
Each Item has its own activity log that tracks every change made to that Item. It tracks field value updates, status changes, comment additions, and more. Entries are ordered with the oldest at the bottom and the newest at the top.
To view the Item activity log, follow these steps:
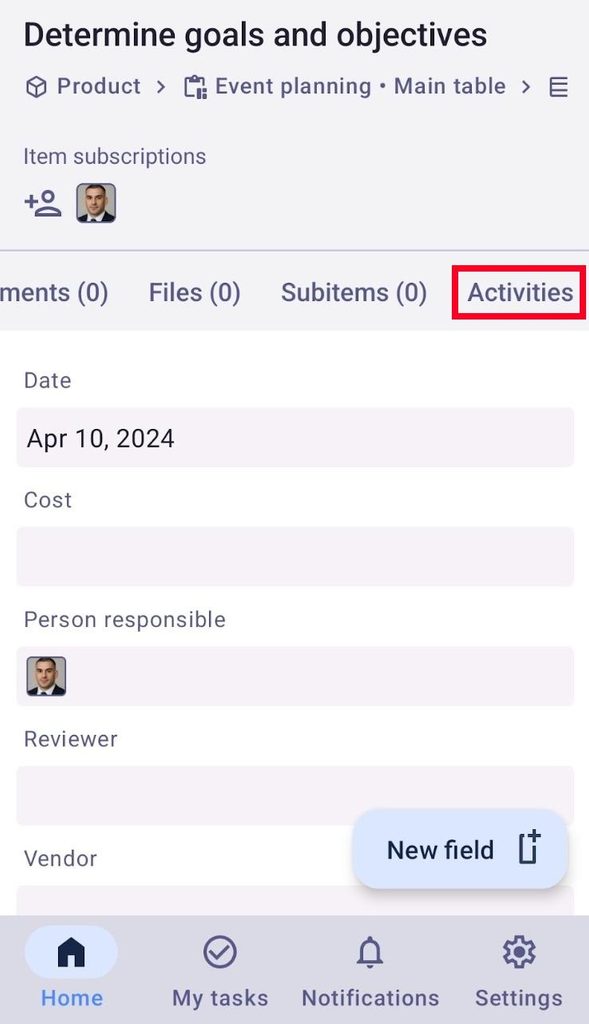
- Open an Item
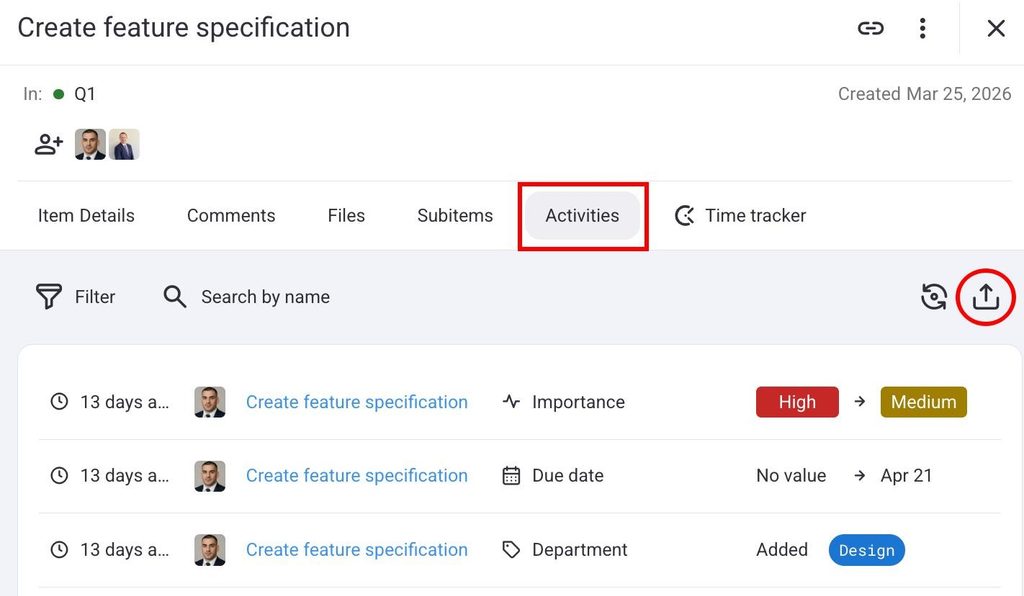
- Open the Activities tab
The tab opens with the list of all Item activities. Each entry contains the following information:
- time of change
- author of the change
- name of the Item where the change was made
- activity name
- previous value
- new value
You can filter out the activities in the Filter log and Filter by name search bar according to the same parameters as those listed in the Board activity log.
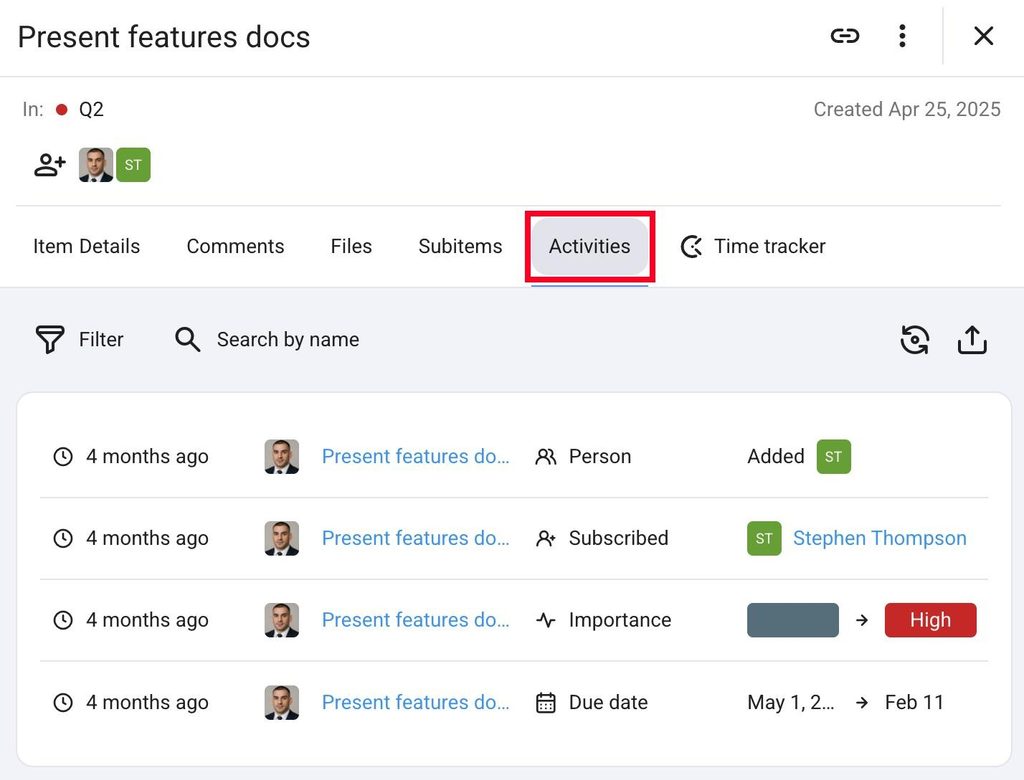
- Open an Item
- Tap on the Activities tab
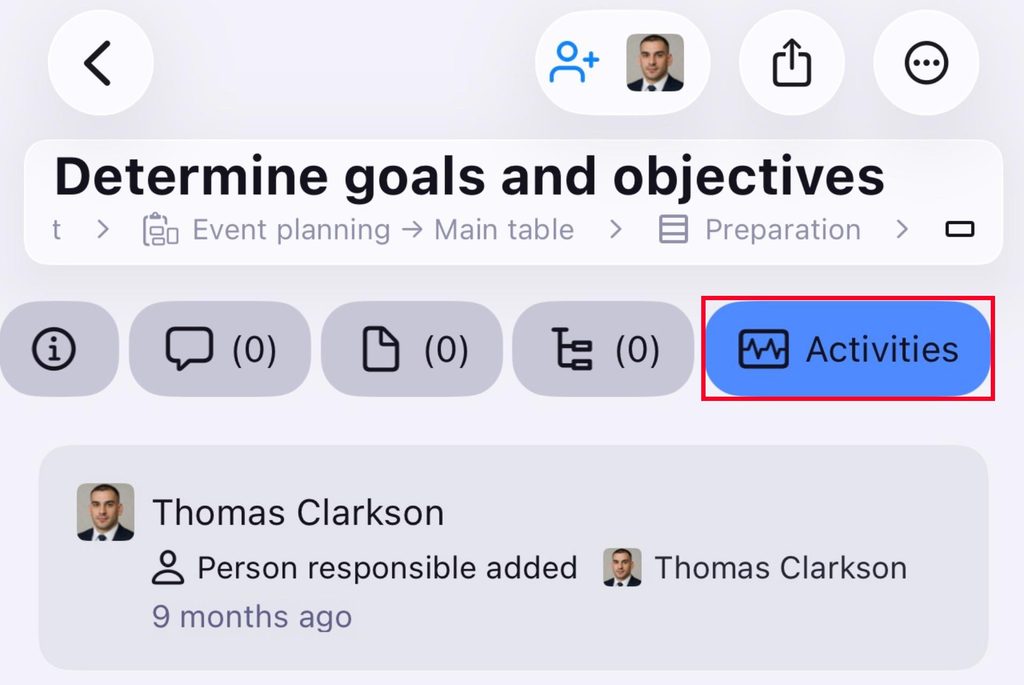
- Open an Item
- Tap on the Activities tab
Last seen #
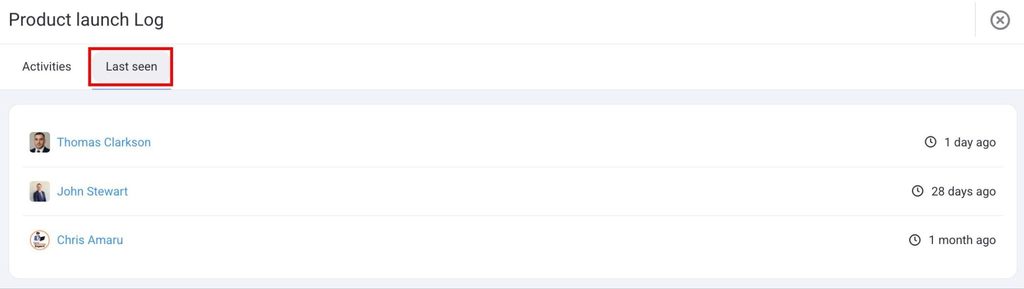
The Last seen tab sits alongside the Activity tab. It shows when each Board member last opened the Board. This is useful for understanding engagement and whether teammates are keeping up with the project updates.
Here’s how to open the Last seen tab:
- Click on the Activity button in the top right corner
- Select the Last seen tab
Events displayed in activity logs include the following:
| Board Events | Item Events |
|---|---|
| Create and delete Board | Create and delete Item |
| Create and delete Board View | Create and delete Item group |
| Update Board view filter/sort/visibility/field | Create and delete Item attribute |
| Subscribe/unsubscribe user/team from/to Board | Change Item attribute name |
| Change Board permissions | Change Item attribute value |
| Change title, type, change and edit Board description | Change Item title |
| Move Item to another Board | Change Item group title and color |
| Added ownership | Move Item from and to group |
| Added ownership (by Admin) | Move Item to another Board |
| Removed ownership | Subscribe/unsubscribe user/team from/to Item |
| Removed ownership (by Admin) | Added ownership |
| Removed ownership |
Export Activity log #
Both the Board activity log and the Item activity log can be exported to CSV. If you’ve applied filters, only the entries that match them are included in the export.
Here’s how to export the Activity log:
- Open a Board
- Click on the Activity log
- Click on the Export button
- Open an Item
- Click on the Activities tab
- Click on the Export button