Published: September 5, 2025
 Has Jira become too cumbersome for your team’s needs?
You’d like to switch to a different and simpler tool but you’re afraid of losing all your valuable project data?
No need to worry — data transferring becomes a walk in the park with Plaky!
The entire process has 5 simple steps, so just follow them to bring your data from Jira into Plaky in a jiffy.

#1 Export your Jira board
To start data transmission, the first step is to export data from Jira in the form of a CSV file. To do this, click the Export button in the top-right corner available at the All work board view, and choose one of the Export CSV options.
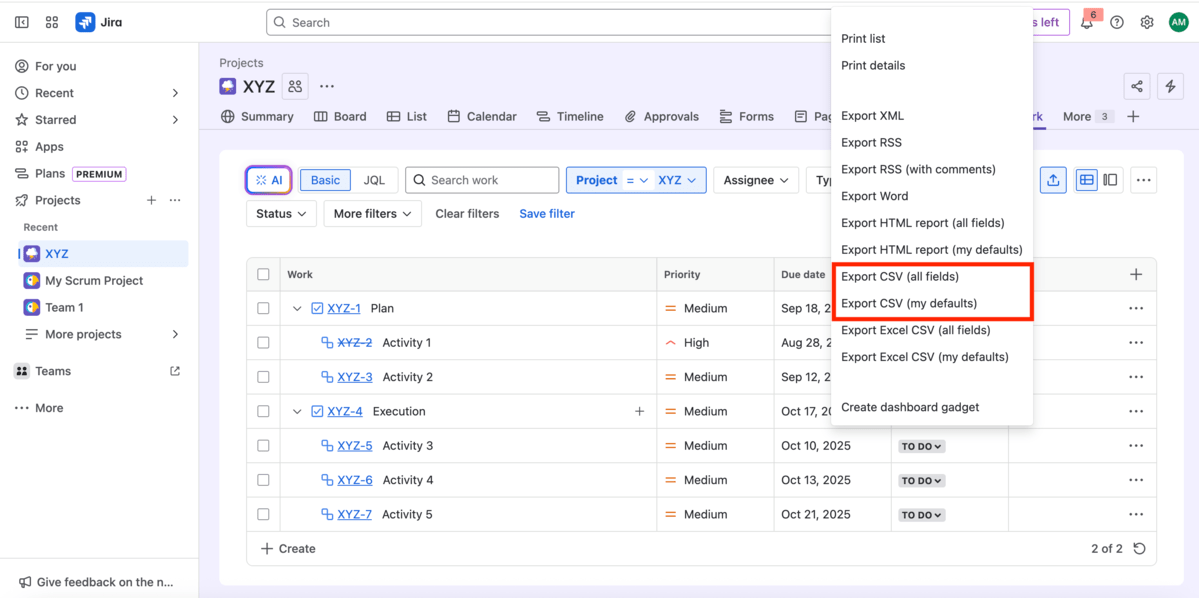
Note: Jira has a built-in feature that allows you to export data. You can use filters or Jira Query Language (JQL) to select the issues you want to export.
#2 Import the CSV file into Plaky
Before you start the import process, you need to determine whether you want to create a new board for your Jira data or import data into an existing Plaky board.
Import into a new board
Here are the steps to set up a new Plaky board for your data from Jira:
- Click on the + button in the side menu (right next to the Search box).
- From the dropdown menu, choose New Board.
- Choose Create from file option.
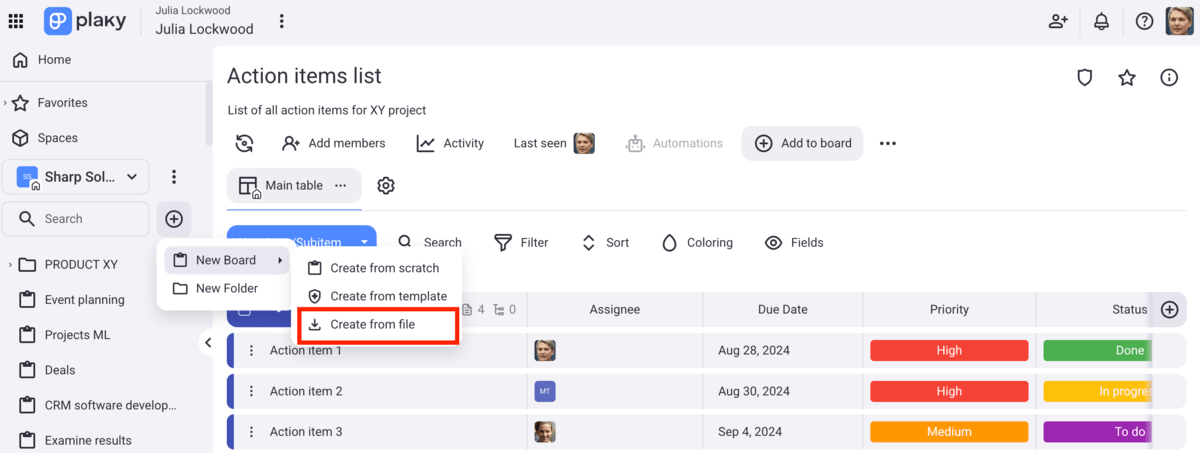
- Choose the CSV file you want to import into Plaky.
- Click to Proceed.
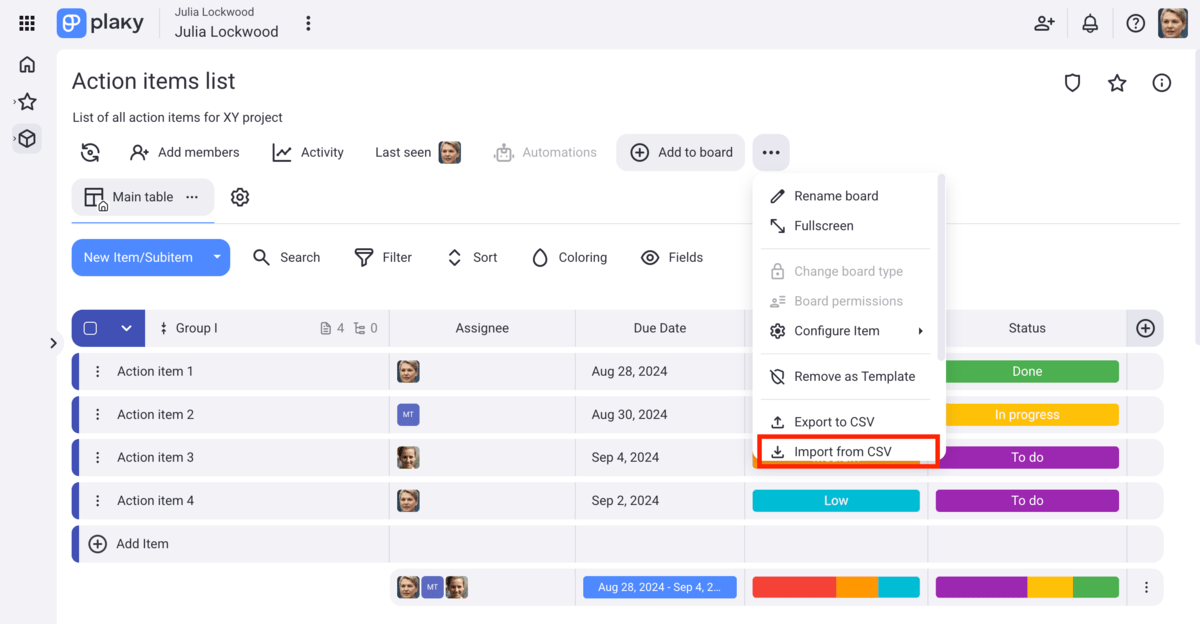
Import into an existing board
Importing data from Jira into an existing Plaky board is a bit different, but just as easy:
- Click the 3 dots in the top-right corner to open the Board menu.
- Select Import from CSV.
- Choose the CSV file you want to import.
- Click on Proceed.
Keep in mind that if you have a large file, with lots of rows, you should divide it so it doesn’t exceed the limit of 10 MB as mentioned above.
Note:
- The maximum number of item groups to import is 20. In case you have more groups, they will be mapped to the last item group on the board.
- Your CSV file can contain up to 18 values for the Status field. Additional values will be skipped during the import process.
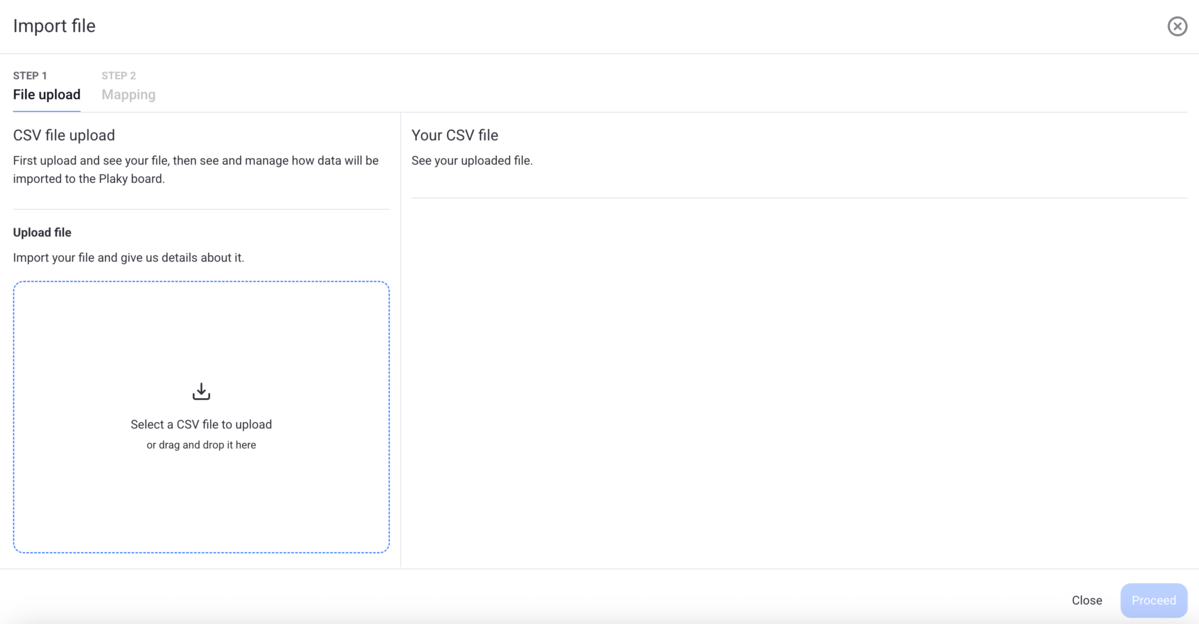
#3 Generate the table
Once you’ve imported the chosen CSV file, a table will be generated, and you’ll see the contents of the file displayed on the right side of the modal. Make sure you’ve selected the right file by checking the contents.
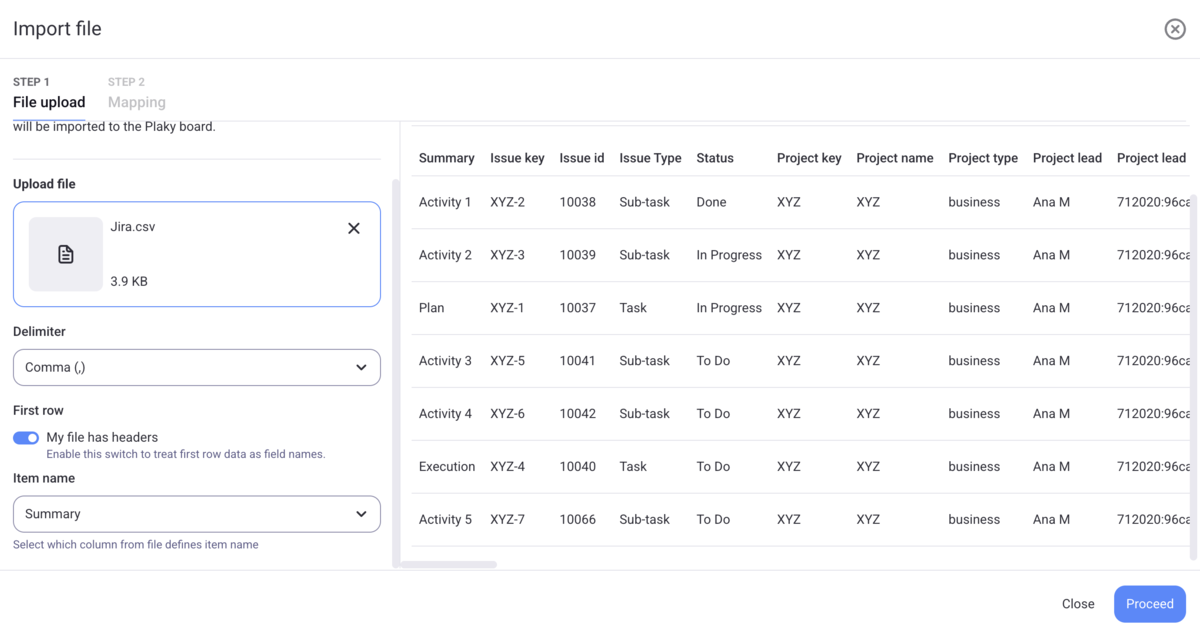
At this point, you can:
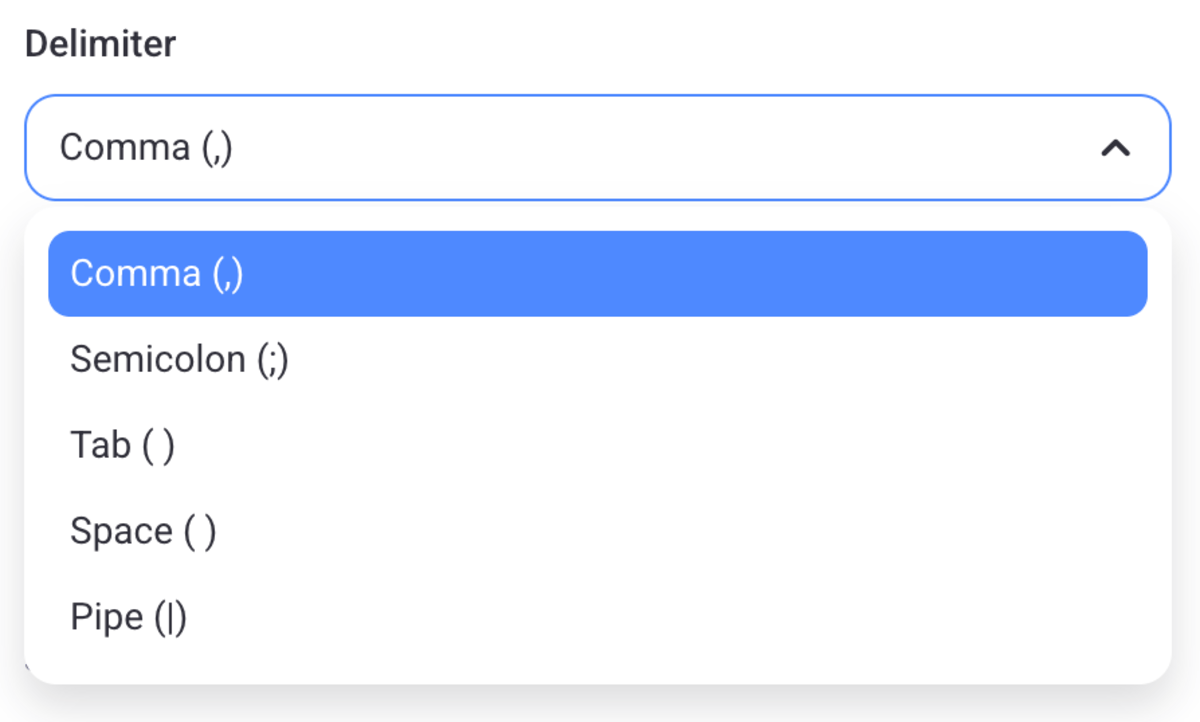
- Pick the delimiter from the dropdown menu (comma is the default, but you can opt for semicolon, tab, space, or pipe, depending on the type of your CSV file),
- Mark if there are headers in the file (if you indicate yes, first row will be taken as field names),
- Select the column that will define the item name (the first column from the CSV is taken for the item name by default).
When you are done, just click the Proceed button in the bottom-right corner.
#4 Map your board data
Now that your data has been generated properly, you can start mapping your board. You should first select the destination group for your items and choose between:
- A new group (enter the name),
- CSV column for group names.
If you’re moving your Jira data to an existing Plaky board, you get an additional option — the Existing group as your destination group.
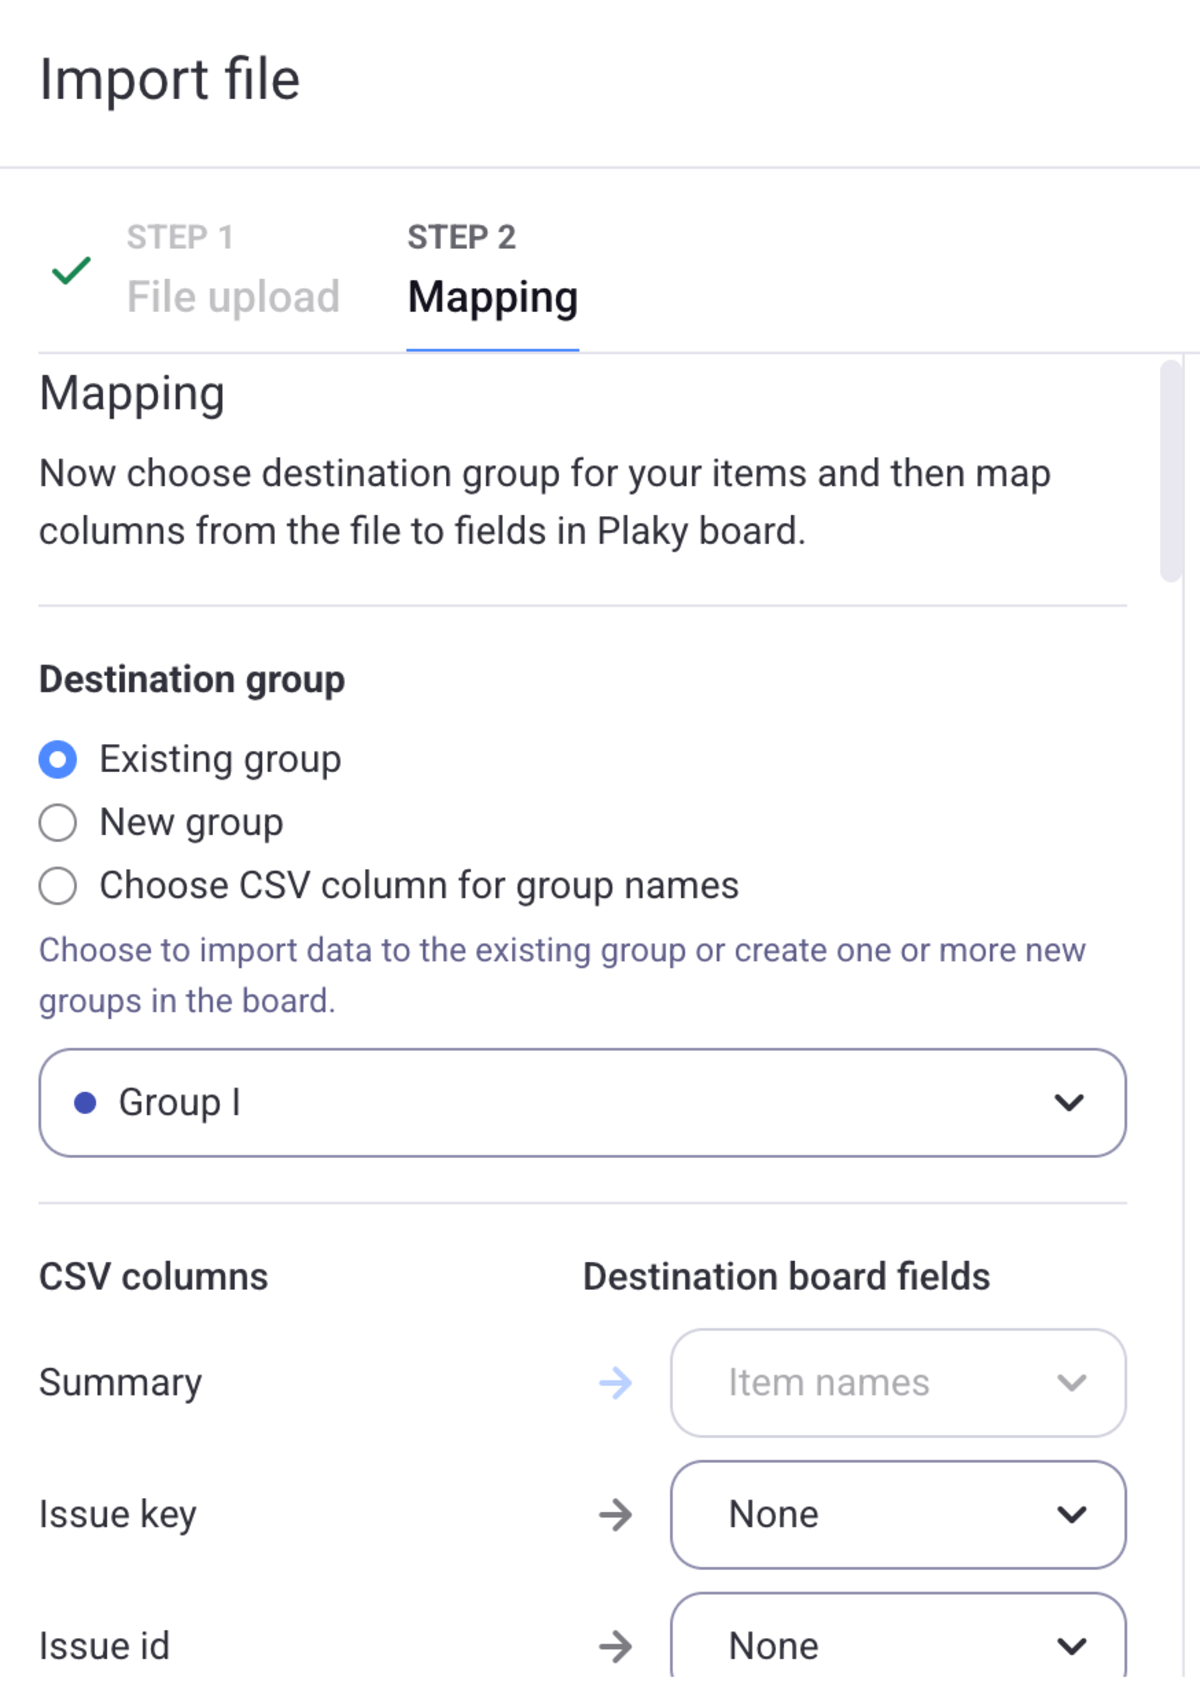
Next, you need to match the CSV column to the corresponding board field type in Plaky (text, number, link, etc). To do this, you can:
- Select the existing field (Plaky will assign a field type on its own if it matched that of Jira’s),
- Create a new one from the given list, or
- Choose None (if you don’t want to import data from a particular CSV column).
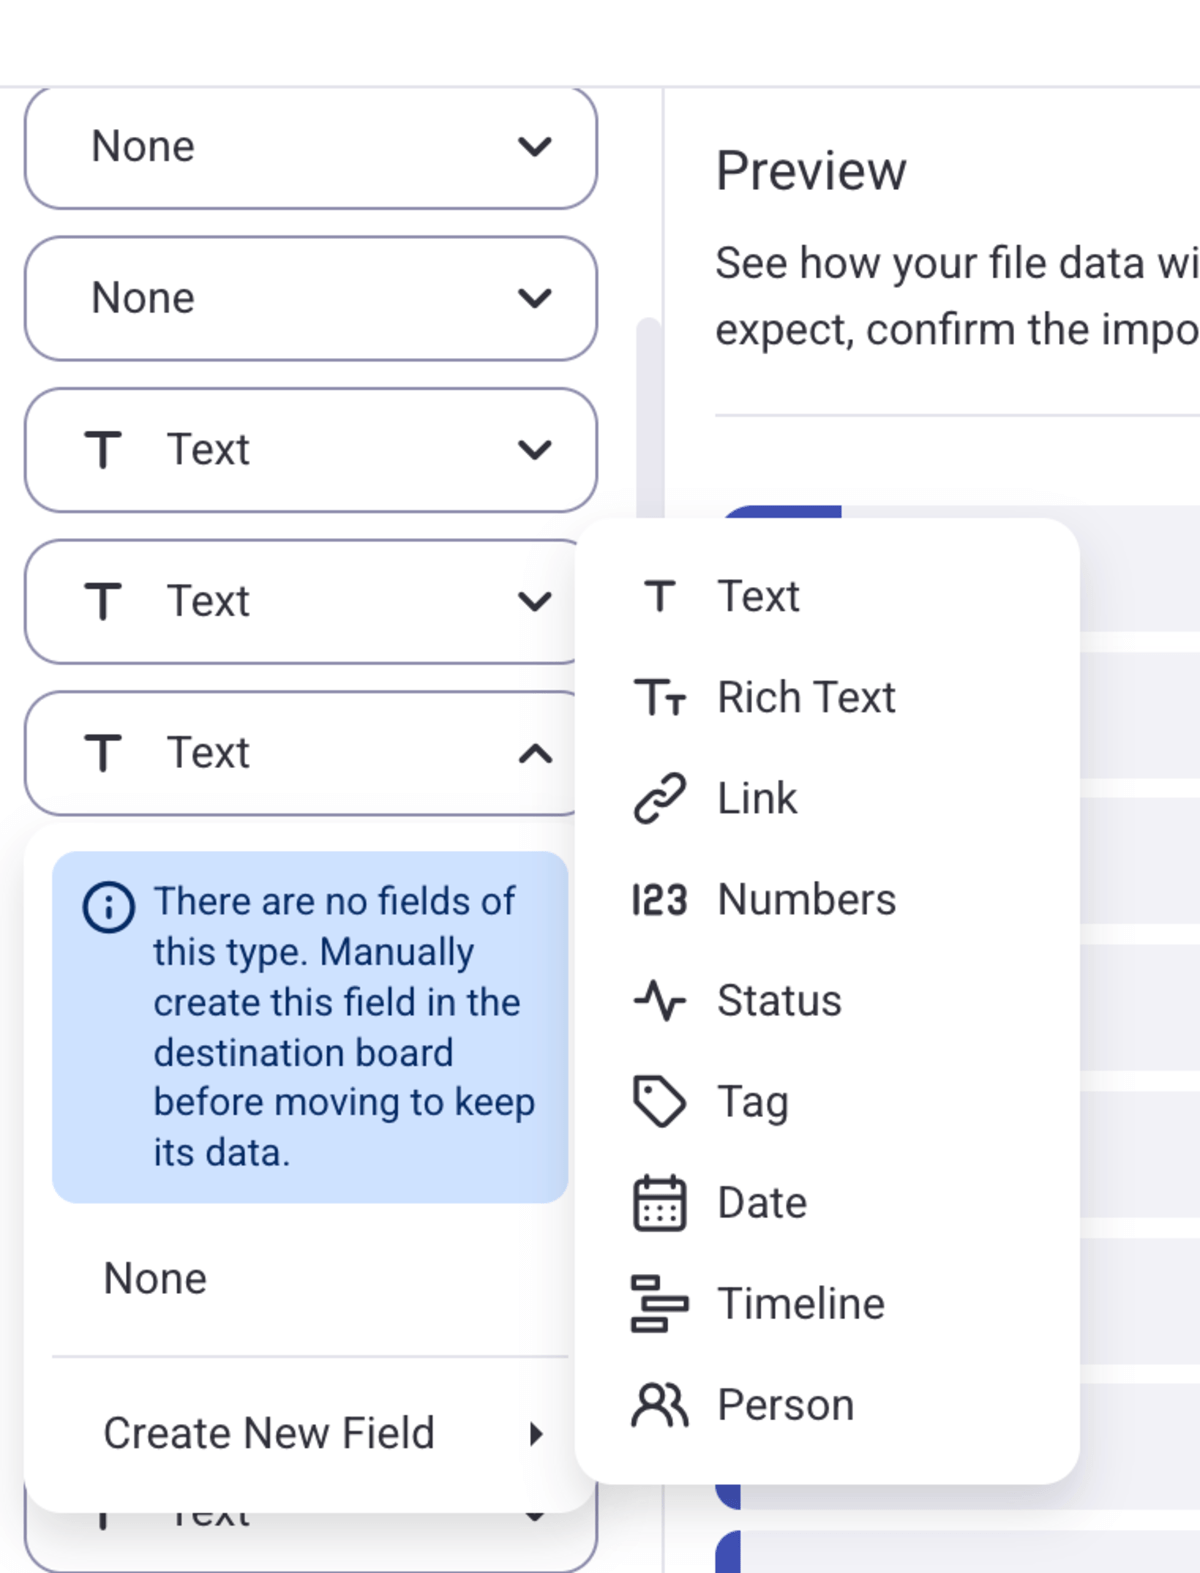
Keep in mind that an unmapped CSV column won’t be transferred to Plaky i.e., it will be lost. So, it’s highly recommended to check twice if you have mapped them all.
Also, you should know that any CSV column containing letters or numbers should be mapped to a textual field so that it can be properly imported.
During the mapping process, the preview on the right will show the way your imported data will look like in your future Plaky board.
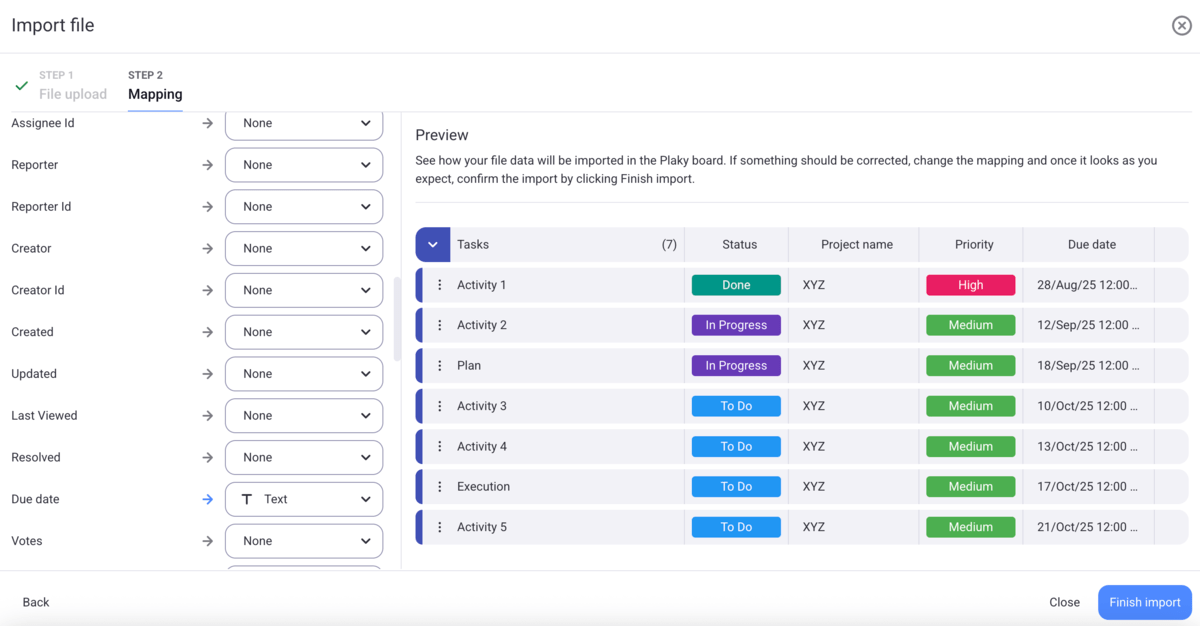
#5 Finish the import process
Finally, you can review the mapped columns once more to ensure everything is just the way you wanted. When you are ready, click on Finish import to complete the transfer process.
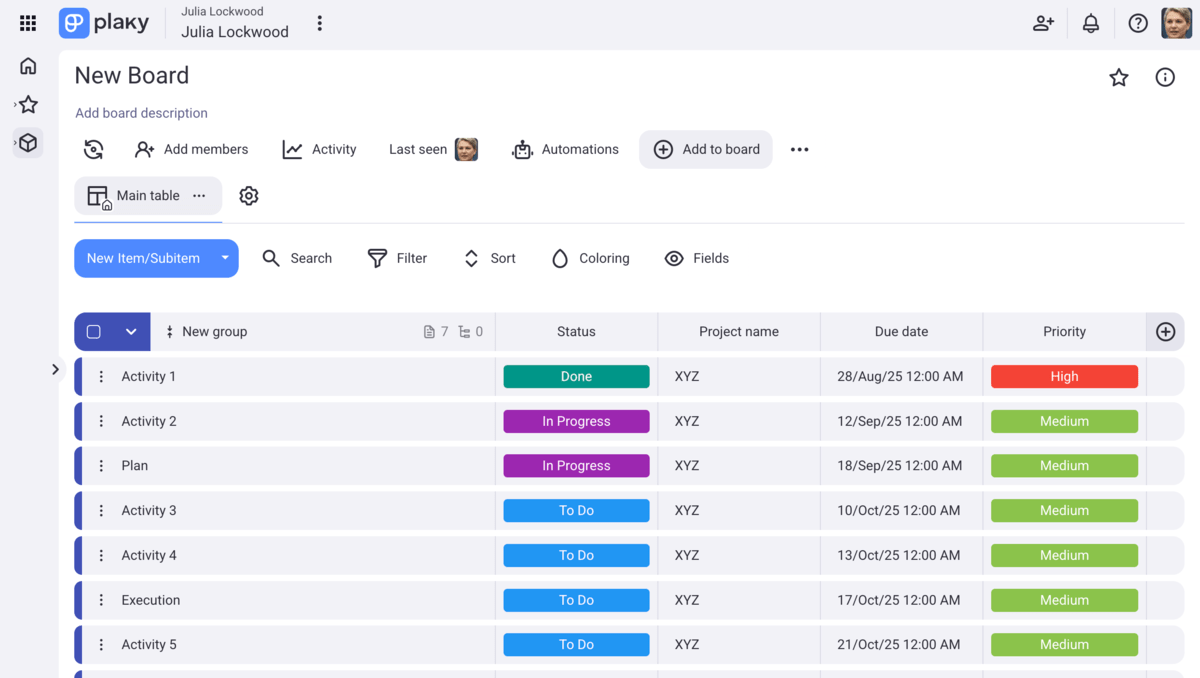
Now that you have all the information well-set in your Plaky board, you can consider the job done.
If you still feel like you need to make adjustments, don’t worry. Plaky is highly customizable so you can re-organize your board and adapt it to your needs in just a few clicks. You can also apply our bulk actions to make changes faster and speed up the board organization process.
And that’s it! With only 5 simple steps, you can transfer your data from Jira into Plaky without any fuss.
Good to know before you begin
There are a few things to keep in mind before you start the import process:
- Your data must be in the form of a CSV file.
- The content of the CSV file doesn’t need to be in English.
- You can only migrate one board at a time.
- The duration of the import process depends on the file size, but it is a relatively swift process.
- The maximum CSV file size allowed for import is 10 MB.
- The maximum number of columns in your CSV file is 70.
- The maximum number of rows in your CSV file is 1,001.
Most importantly, in case you experience any problems, or need support, you can contact Plaky Help team, which is available 24/7 via phone, chat, or email.
Keep your data safe and well-organized in Plaky’s unlimited boards. Try Plaky today!
How we reviewed this post: Our writers & editors monitor the posts and update them when new information becomes available, to keep them fresh and relevant.