Create and manage Items
In this article
Items are the individual units of a Plaky Board. An Item can be a notion, unit, or any other building part of your project that makes sense to you (e.g., task, location, client, time determinant…).
Was ist ein Element? #
An Item is a unit of work you want to track on your Board. It can represent a task, a client, a location, a project phase, or anything that makes sense for your workflow. Each Item lives inside an Item group and carries its own set of field values, comments, files, and activity history.
Every Item has the following tabs:
- Item details — the main tab that contains all Fields for the Item, such as status, assignee, due date, and any other custom field.
- Comments — let’s you add text updates about the item and mention team members.
- Activities — shows all Item activities, such as status and due date changes.
- Files — upload preview, rename, describe, and delete files attached to the Item. Supports documents, images, video, and audio.
- Subitems — shows all Subitems associated with the Item.
- Time tracker — displays the Clockify time tracker.
Create an Item #
There are two ways to create an Item. The quick add method is fastest for adding Items fast, while the advanced method lets you fill in all Fields before an Item is saved.
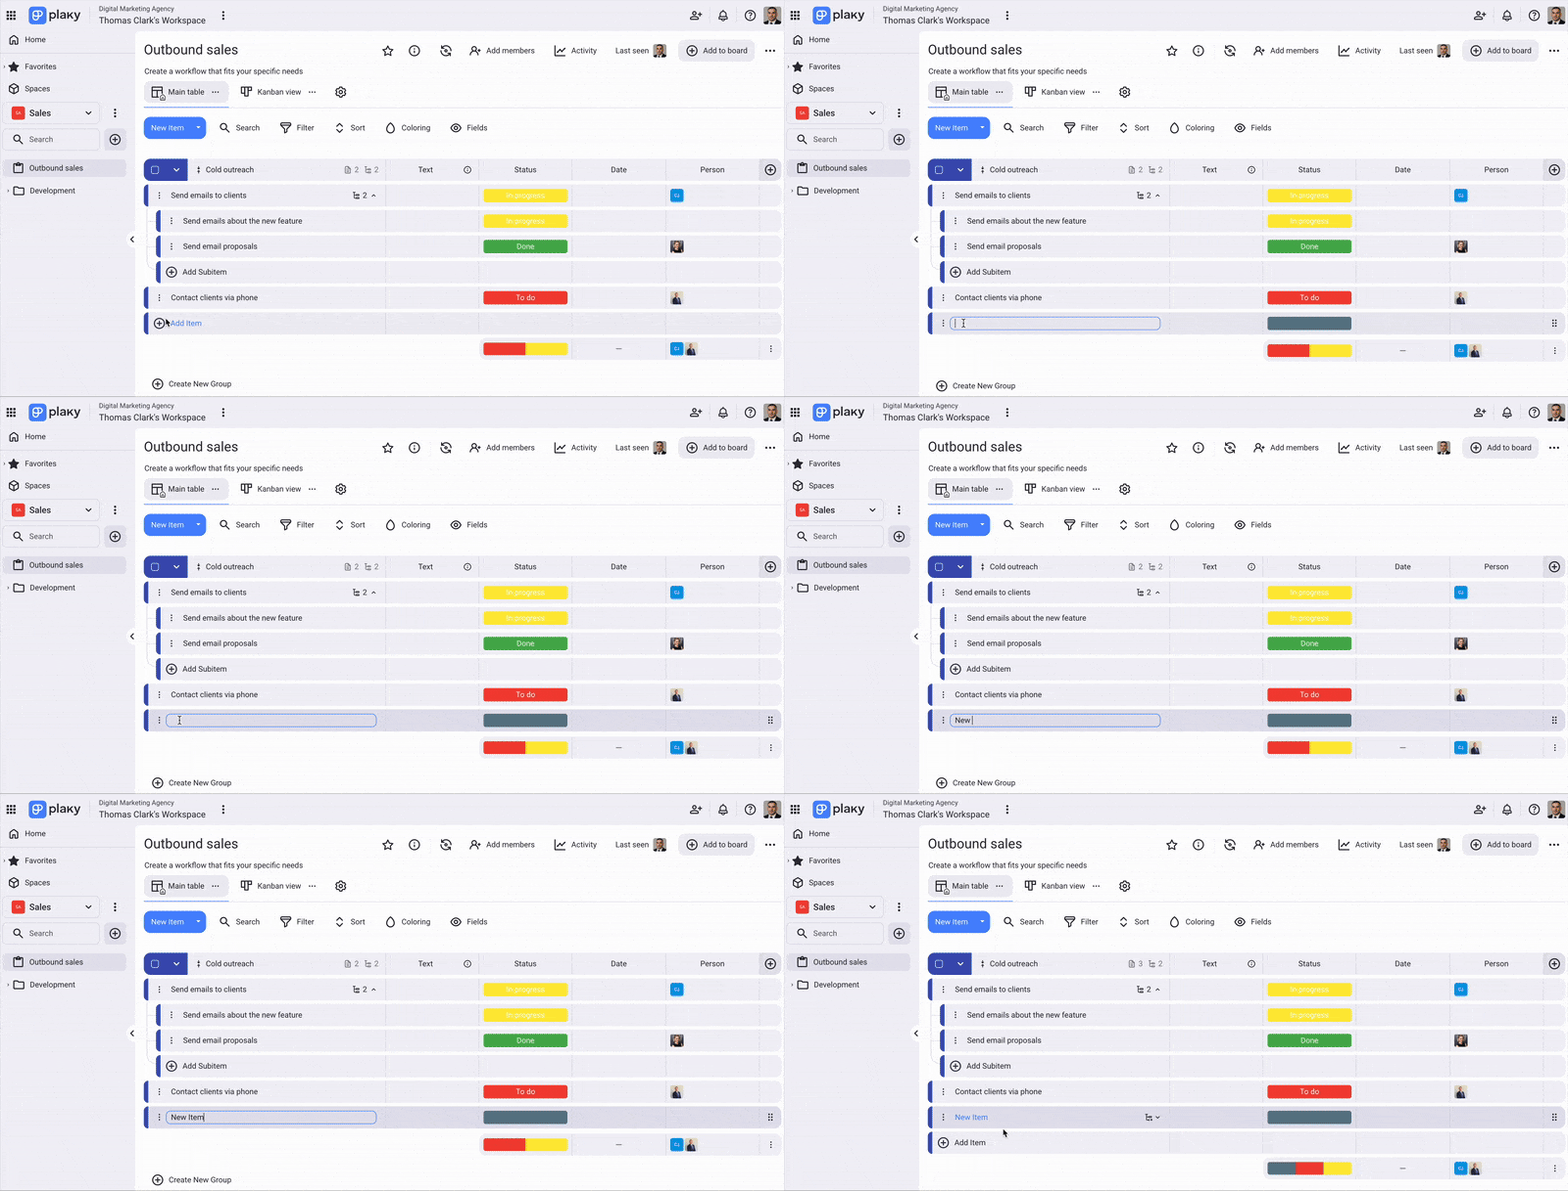
Quick add method #
- Click on + Add Item
- Enter the new Item name
- Press Enter/Return on the keyboard
- Fülle weitere Felder aus
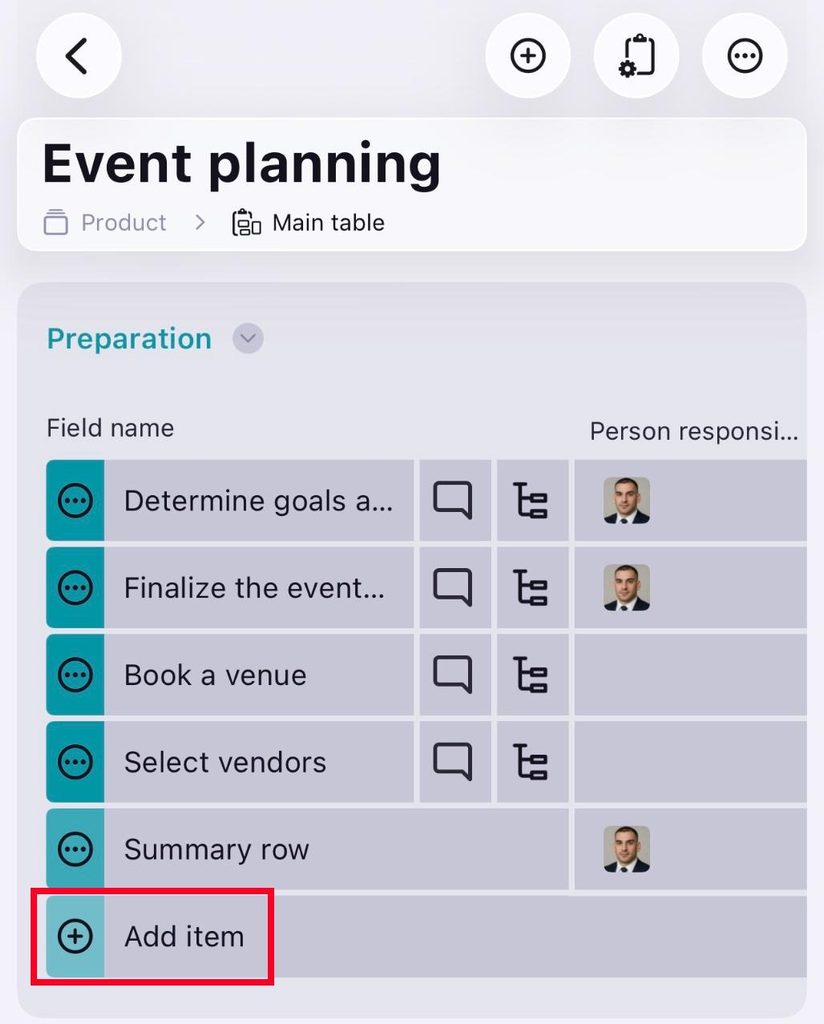
- Tap on the + Add item button
- Enter Item title
- Tap on ✔️
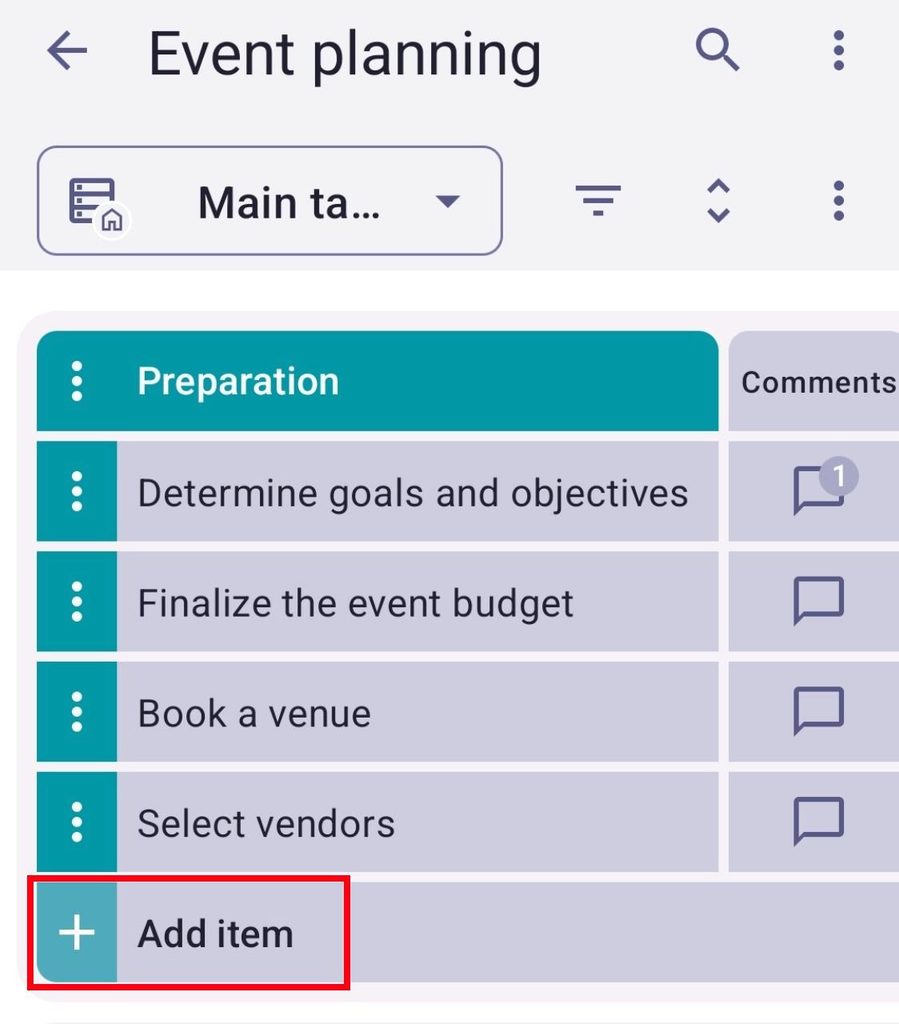
- Tap on the + Add item
- Enter Item title
- Select the Item group from the dropdown
- Tippe auf Erstellen, um die Aktion abzuschließen
Advanced method #
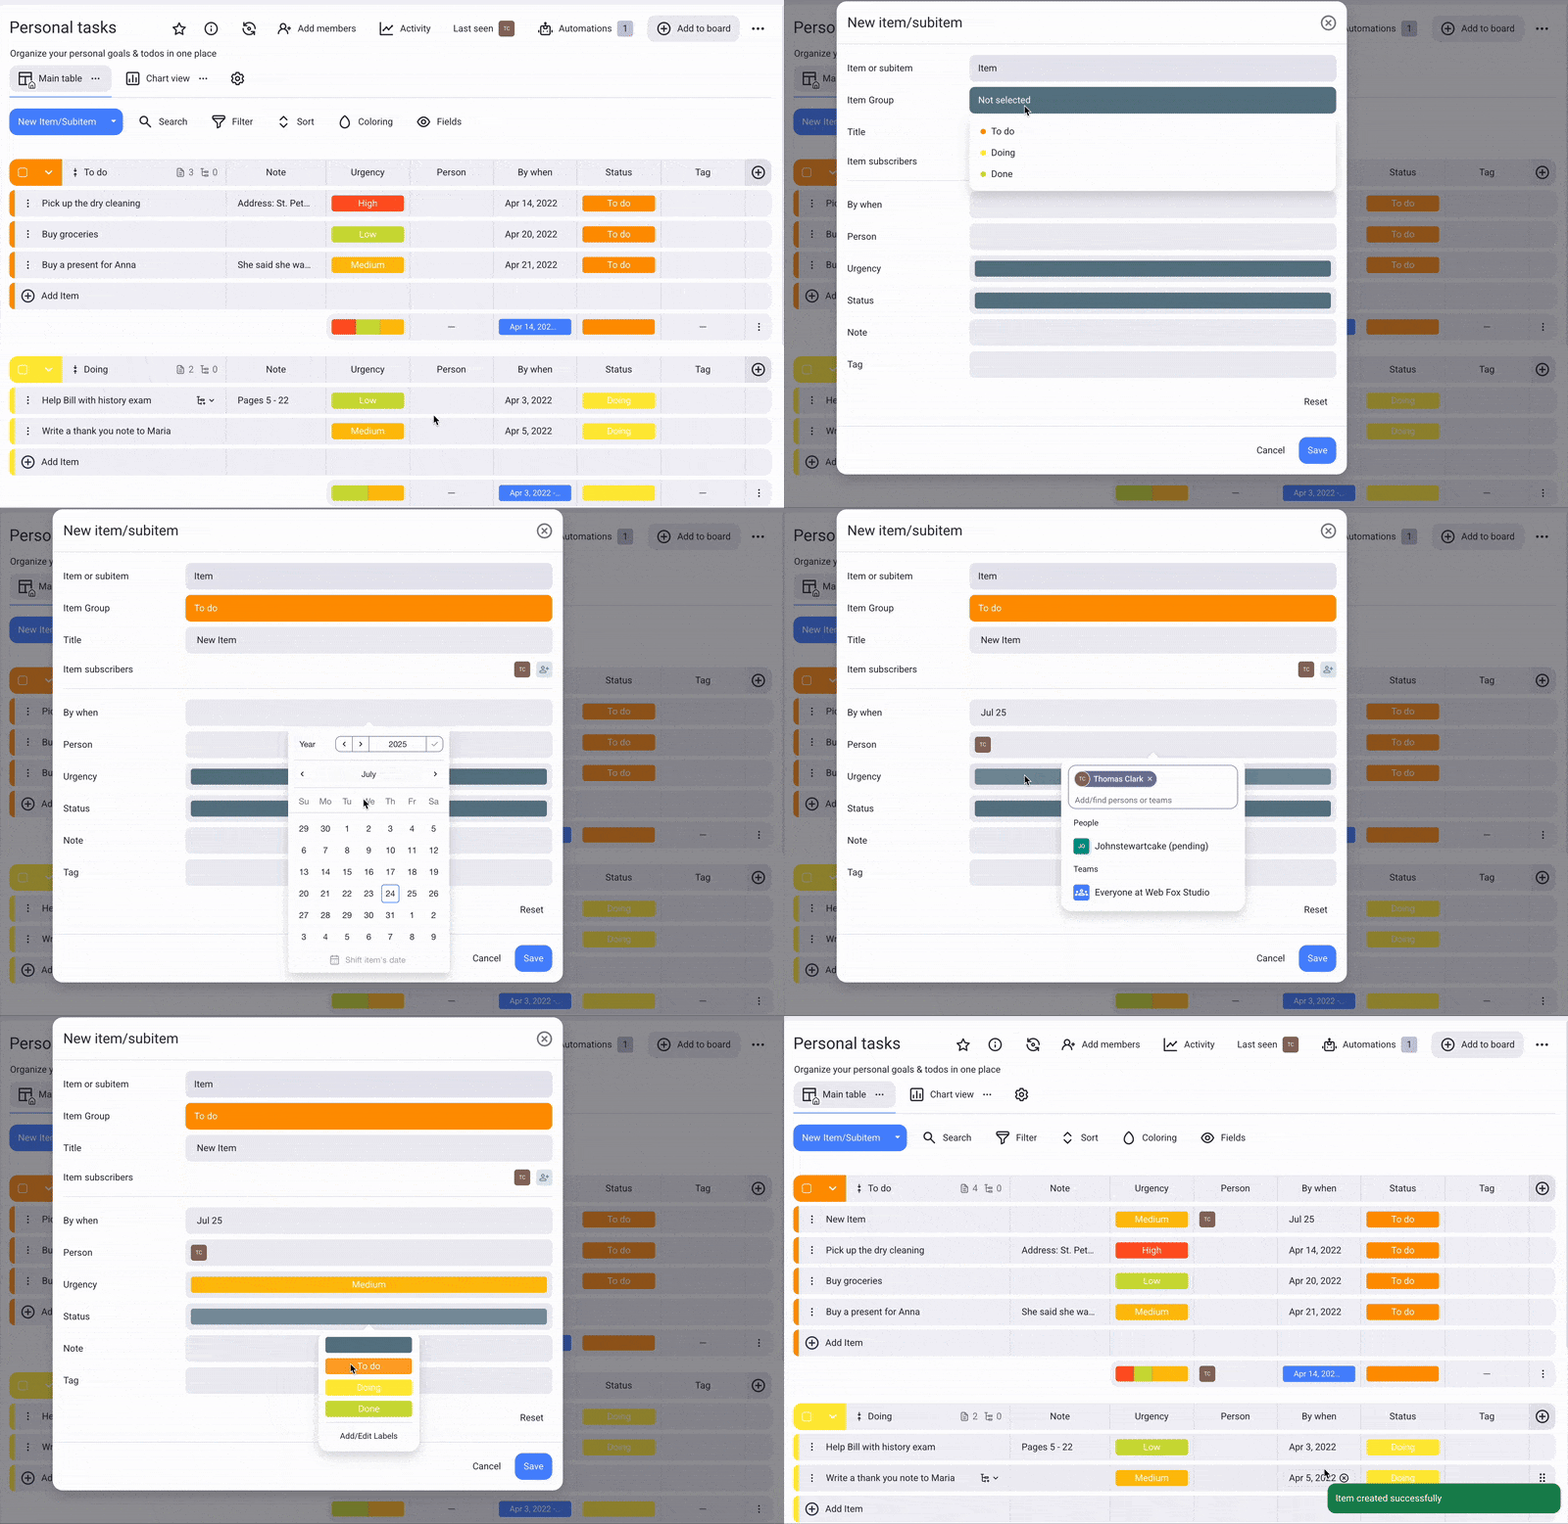
- Klicke auf den Button Neues Element/Unterelement
- Populate the Create new item dialog box with the information you need
- Klicke auf Speichern, um die Aktion abzuschließen
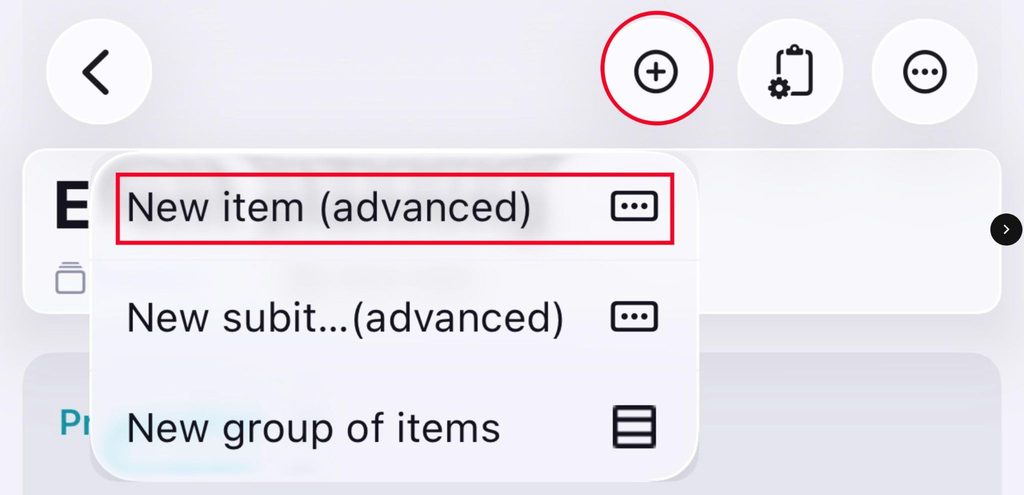
- Tippe auf die Schaltfläche + in der oberen rechten Ecke
- Tap on New item (advanced)
- Fill out the Item details
- Tap on ✔️ to complete the action
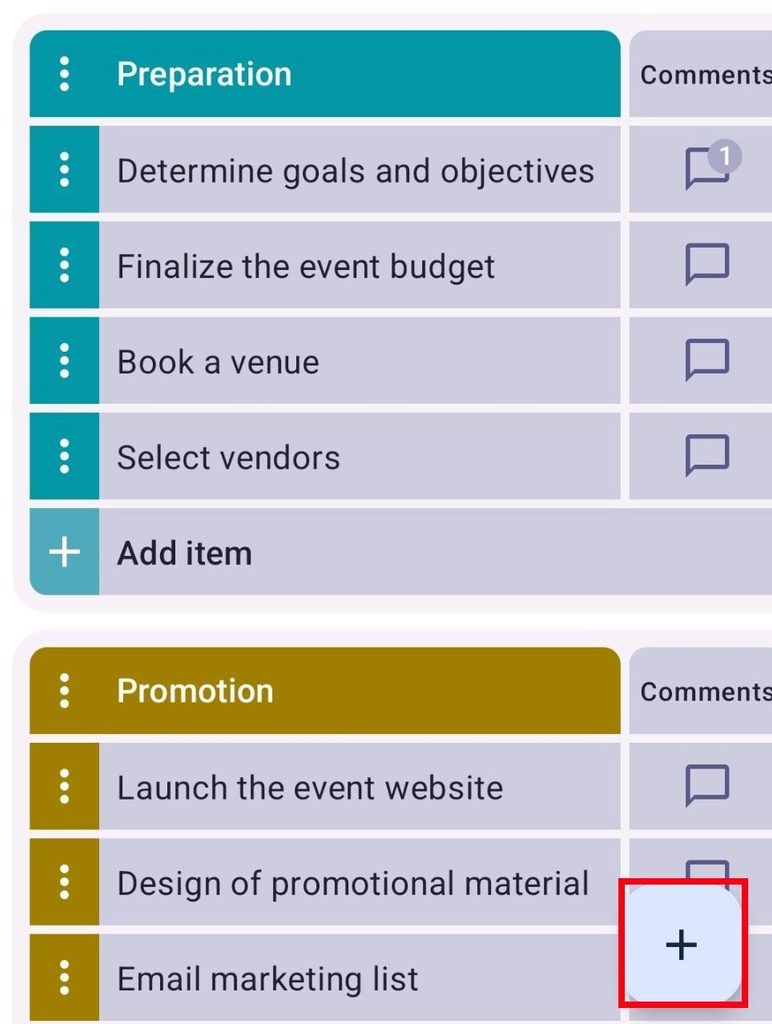
- Tap on the + button in the bottom right corner
- Tap on New item
- Gib den Elementnamen ein
- Wähle die Elementgruppe aus
- Tippe auf Erstellen, um die Aktion abzuschließen
Element-Karte #
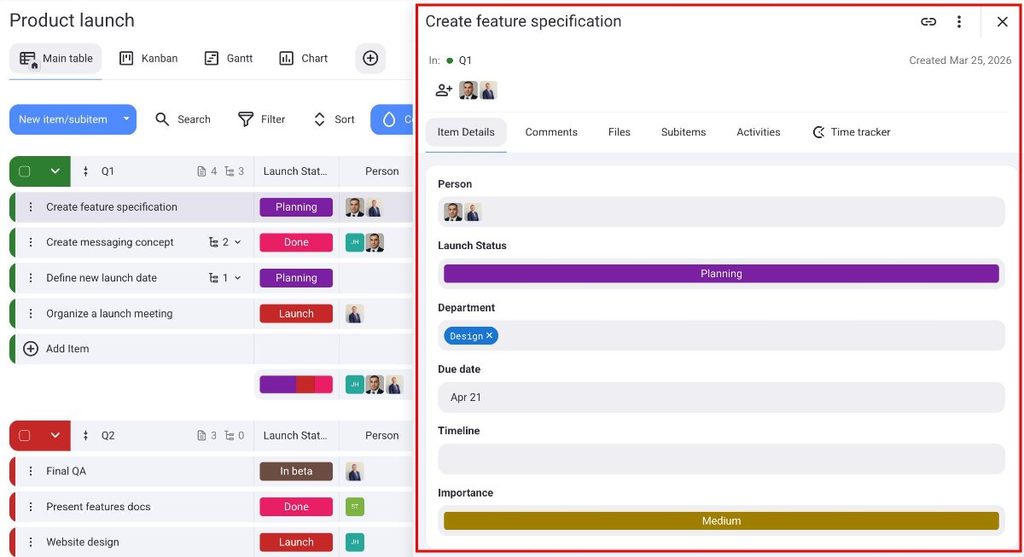
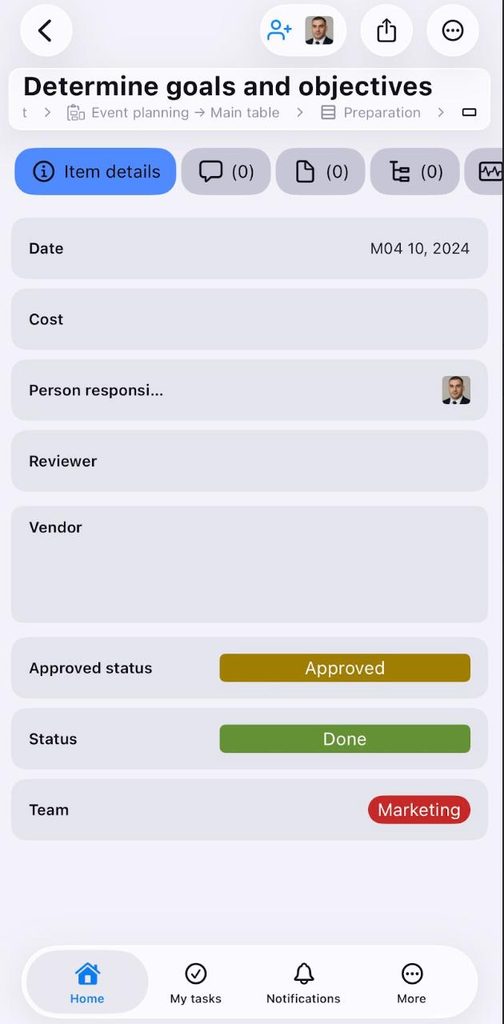
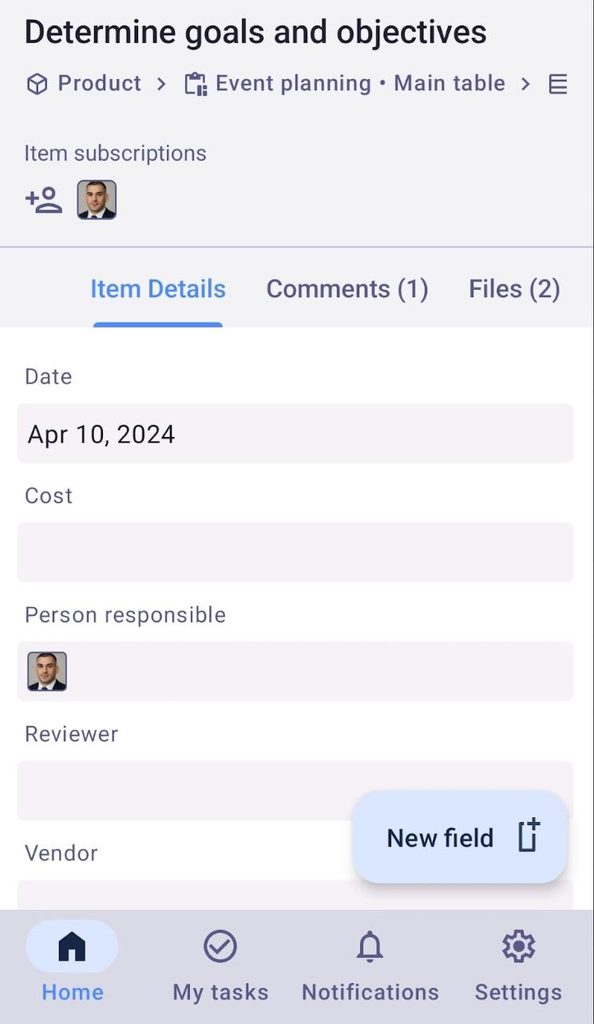
Open any Item by clicking it. The Item card is active by default and shows all configured Fields for the Item, which you can edit by clicking on them.
The Item card also shows the Item’s subscribers who receive notifications for changes on the Item. The Item creator is subscribed automatically, and any user assigned to the Person Field is subscribed as well.
Kommentare #
The Comments tab is where team discussion on an Item lives. You can add text updates, link to other Items, mention teammates, or mention a whole team at once.
Add a comment #
Here’s how to add a comment on an Item:
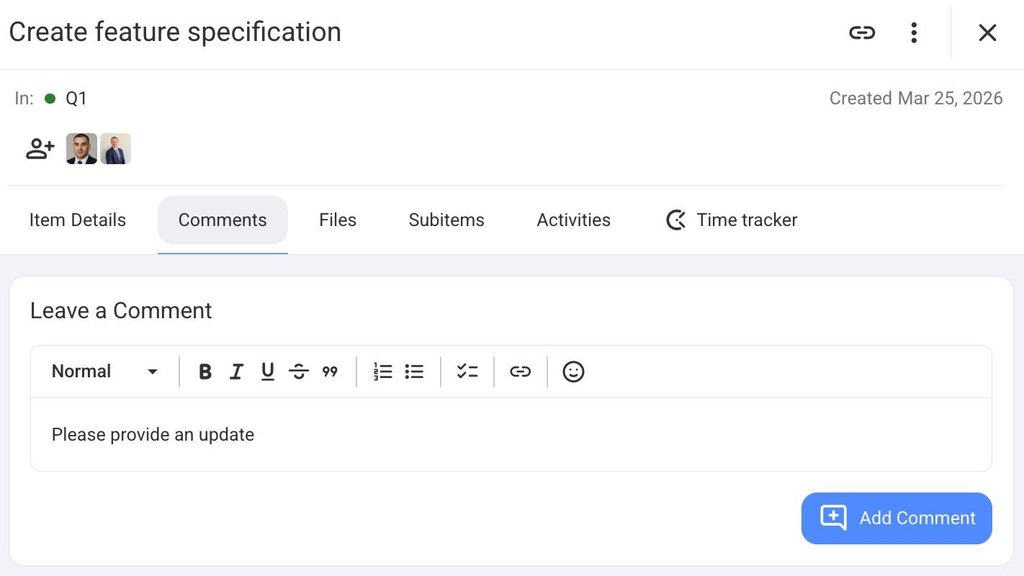
- Open the Comments tab on an Item
- Write the comment in the field
- Click on Add comment to complete the action
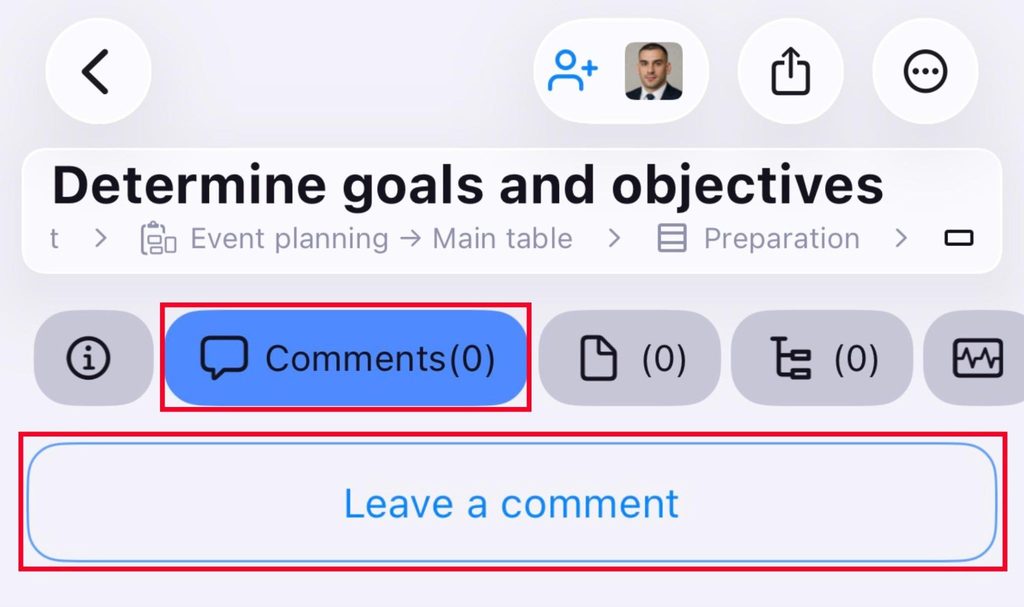
- Tap on the Comments tab on an Item
- Tap on Leave a comment
- Write your comment
- Tap on ✔️ to complete the process
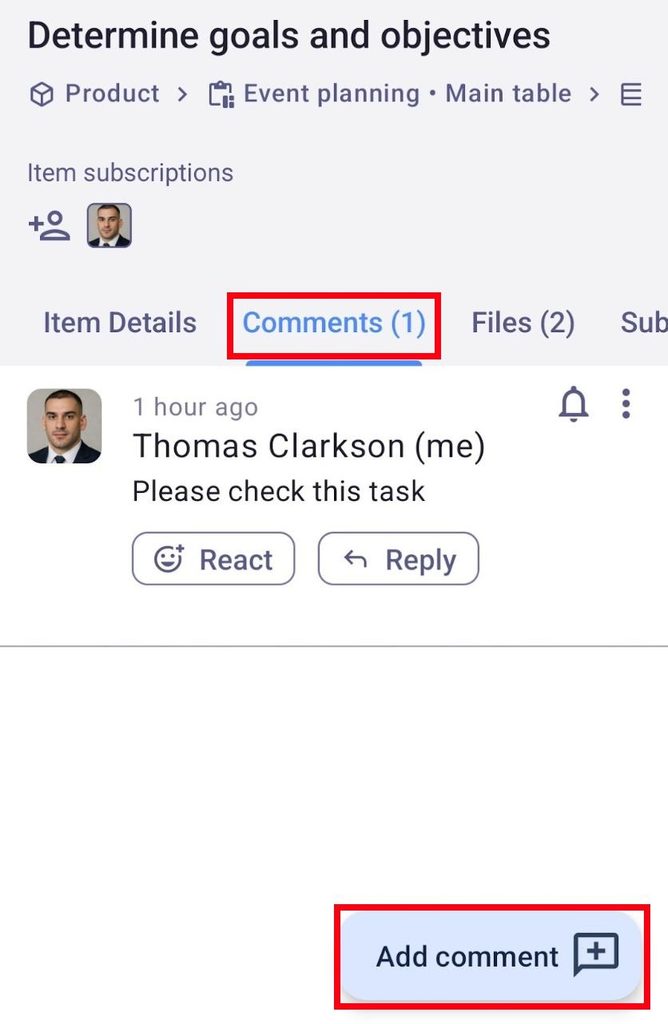
- Tap on the Comments tab
- Tap on Add comment
- Write your comment
- Tippe auf Senden, um die Aktion abzuschließen
Pin/Unpin comment #
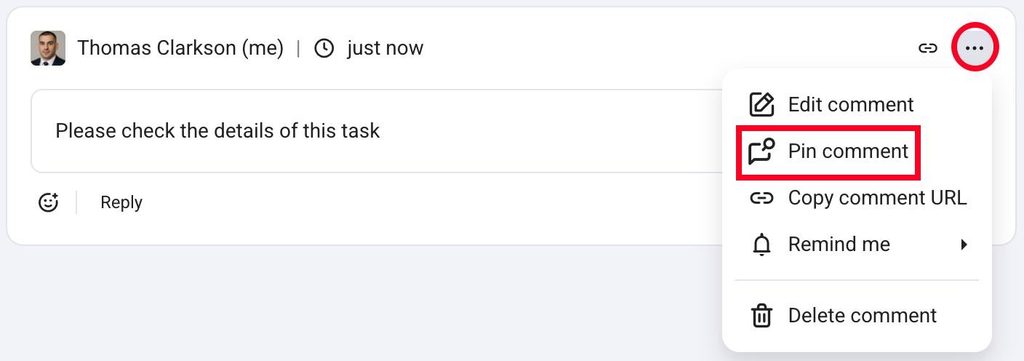
Pinned comments are displayed on top and are visible to everyone. After duplicating or moving an Item to another Board, any comments that are duplicated or moved remain pinned.
To pin/unpin a comment:
- Click on three dots to open the Comment dropdown menu
- Click Pin comment/Unpin comment to complete the action
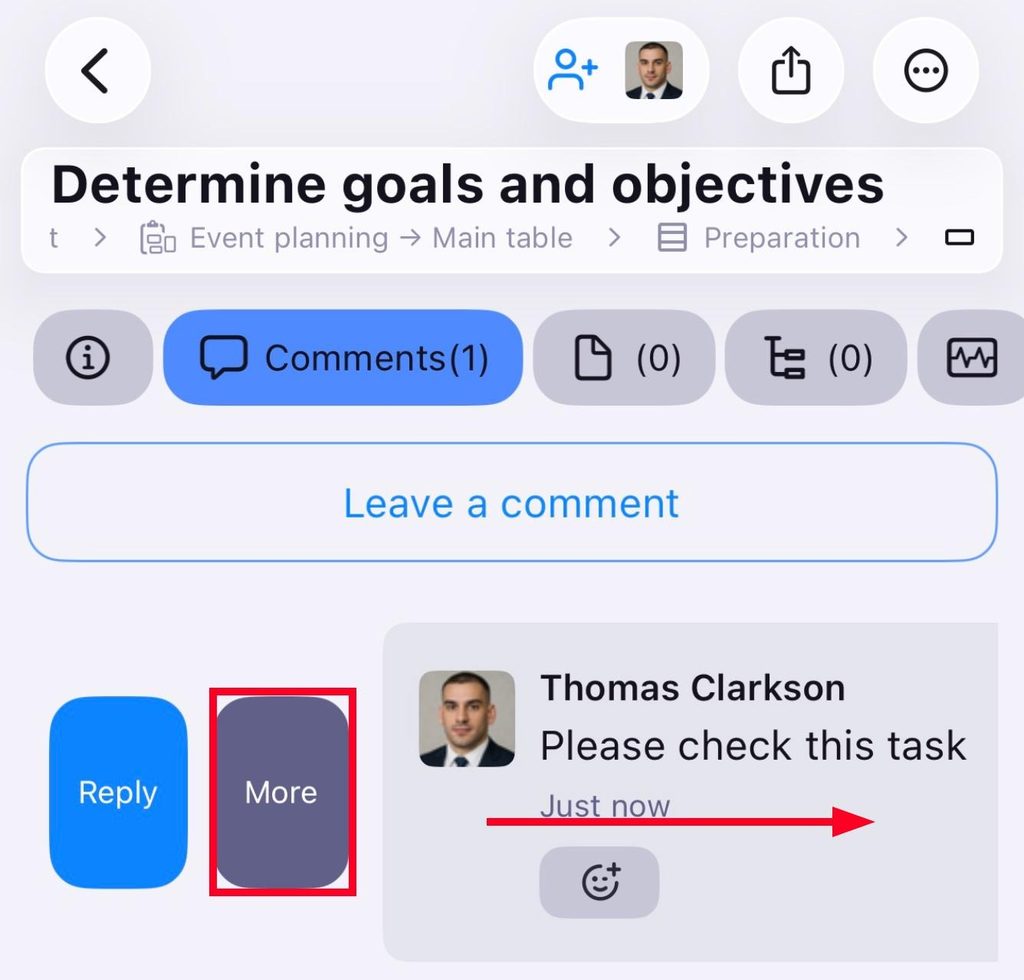
- Wische auf einem Kommentar nach rechts
- Tippe auf Mehr
- Select Pin/Unpin
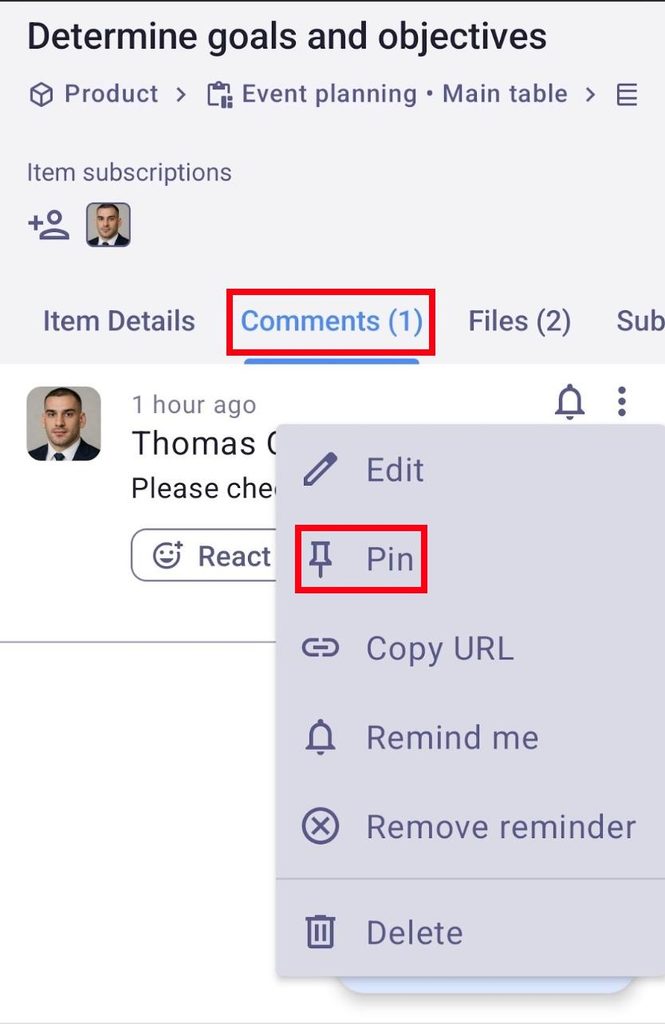
- Tap on the three dots next to a comment
- Tap Pin/Unpin
Mentions #
With mentions, you can ensure that Team members easily keep up with the project’s development, Items, and other tasks relevant to them.
To mention someone:
- Navigate to the Comments section of the Item you’d like to add the mention in
- Enter @ and choose the Team/Member you’d like to mention
- Click Add Comment to complete the action
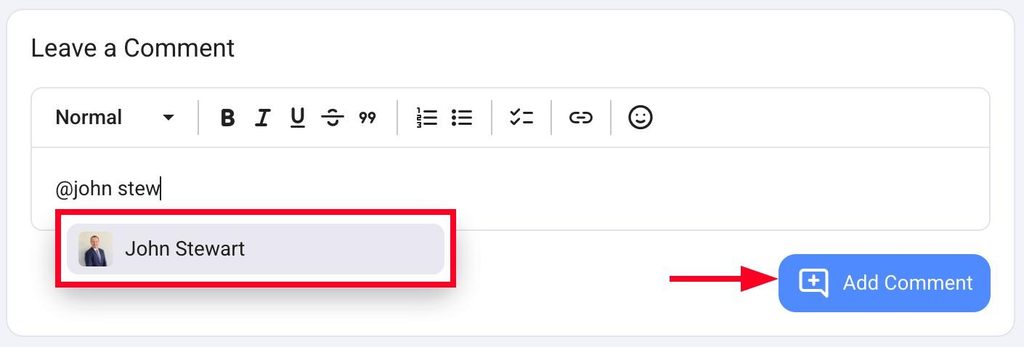
Once you’ve done that, the mentioned User/Team will get email and bell notifications. Both types of Notifications display the content and the link to jump to that Comment in the app.
You can also mention in the Rich-Text Field. It works and looks the same as in the Comments section described above.
Kommentar-URL kopieren #
Share a link to the Item with your teammates by copying the Item URL.
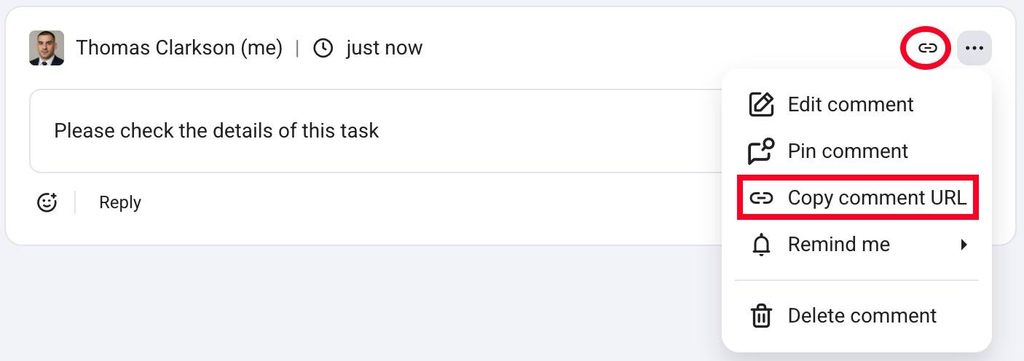
To copy the comment URL:
- Click on the three dots in the top right corner of the comment
- Klicke auf Kommentar-URL kopieren
Oder klicke direkt auf den Button Kommentar-URL kopieren.
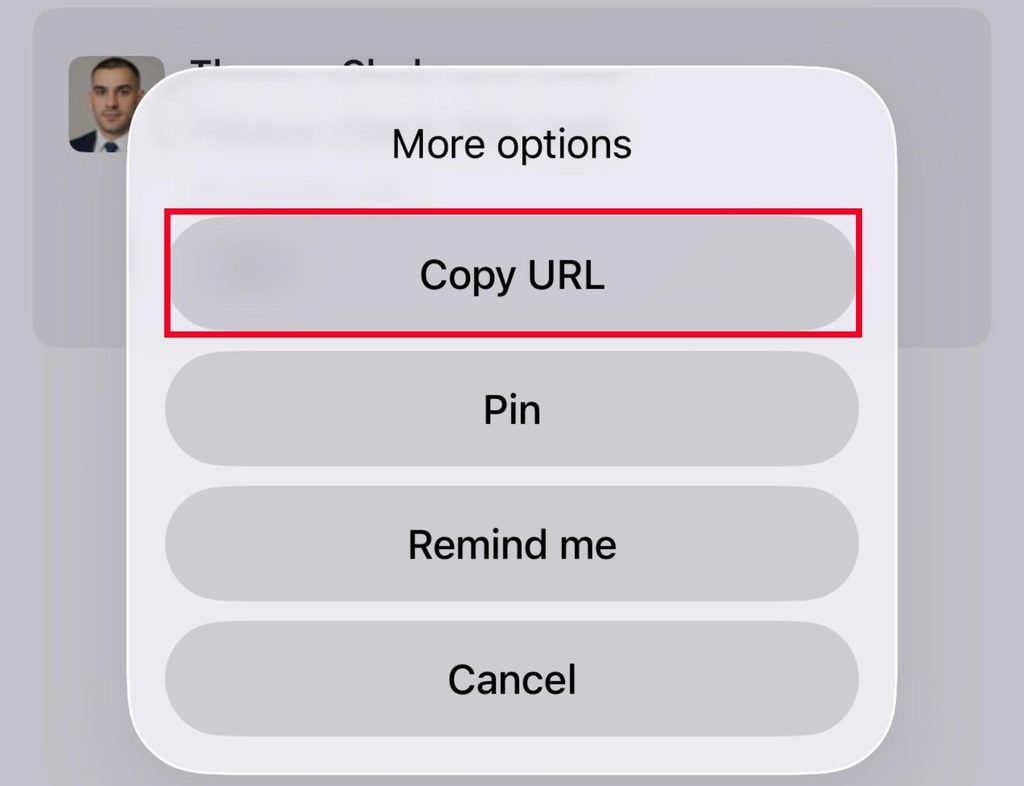
- Wische auf einem Kommentar nach rechts
- Tippe auf Mehr
- Select Copy URL
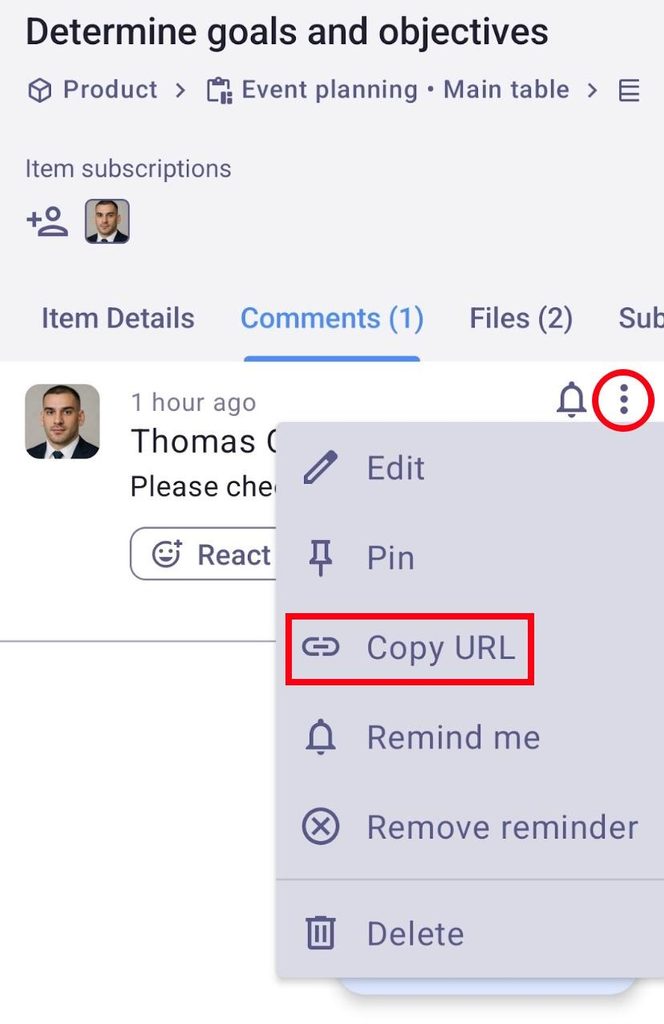
- Tap on the three dots next to a comment
- Tap on Copy URL
Kommentar bearbeiten #
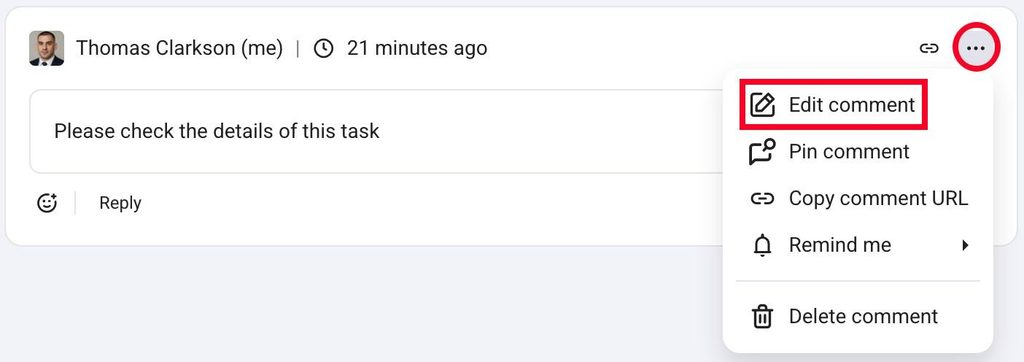
To edit a comment:
- Click on the three dots in the top right corner of the comment
- Wähle Kommentar bearbeiten
- Nimm Änderungen am Kommentar vor
- Klicke auf Speichern, um die Aktion abzuschließen
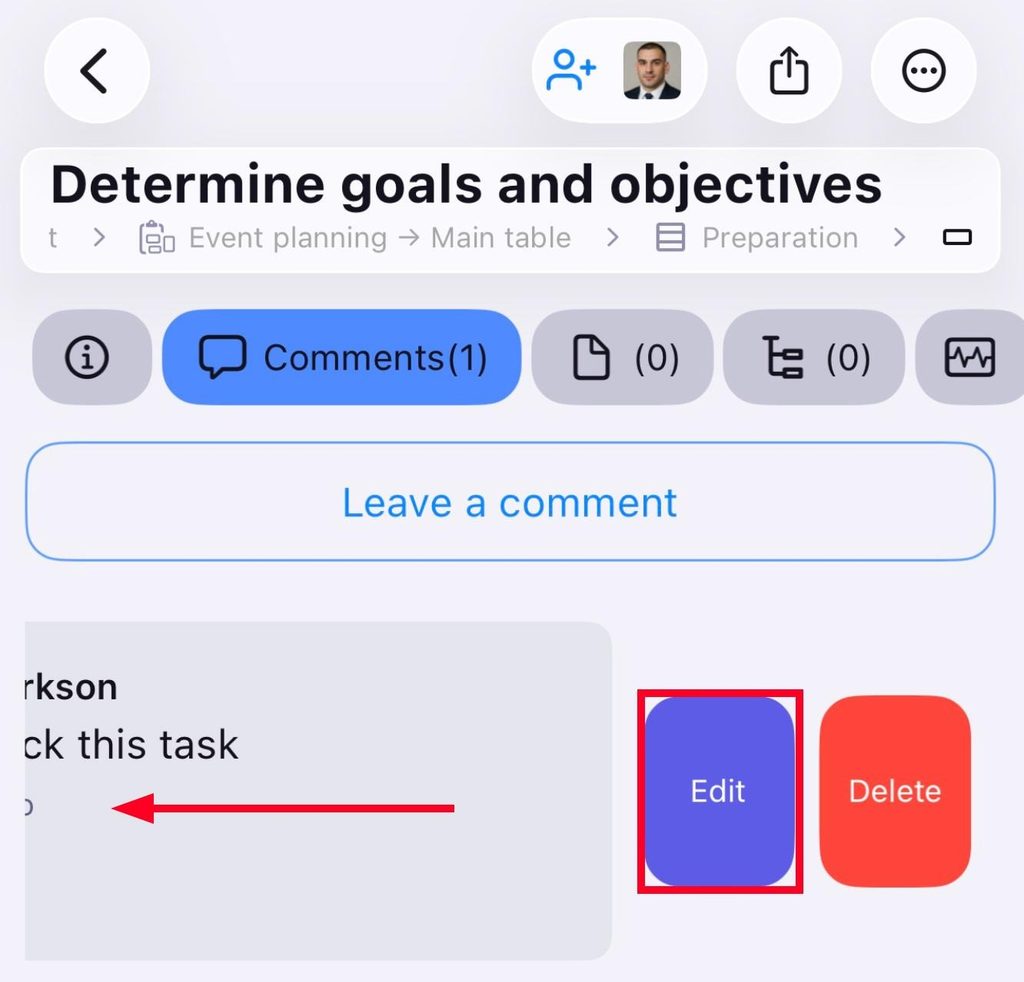
- Swipe left on an Item
- Tippe auf Bearbeiten
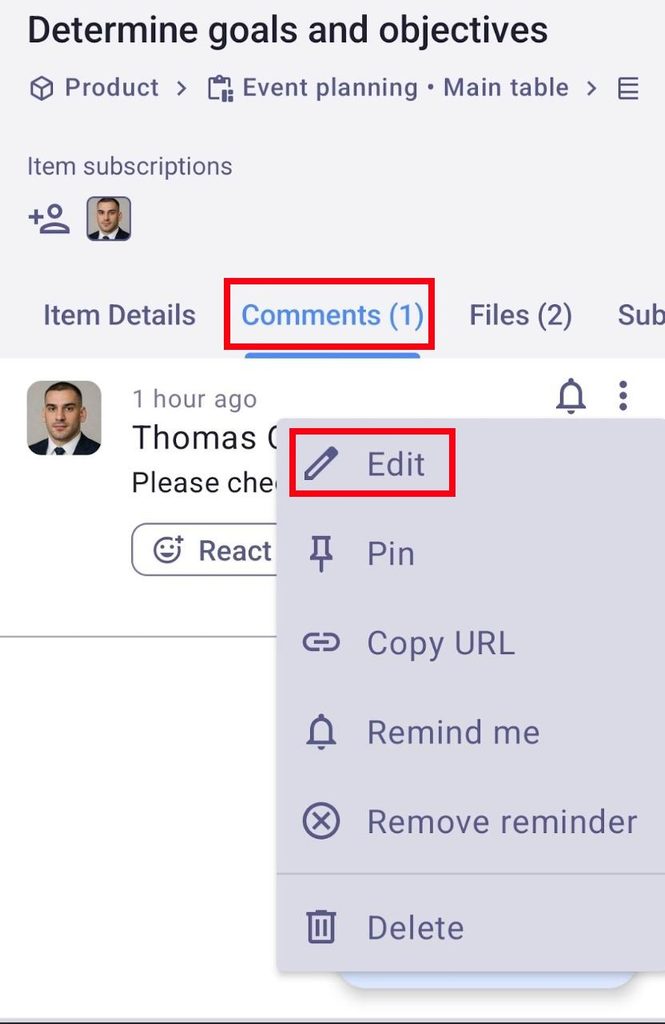
- Tippe auf die drei Punkte neben dem Element
- Tippe auf Bearbeiten
- Edit the comment
- Tippe auf Speichern, um die Aktion abzuschließen
Kommentare sortieren #
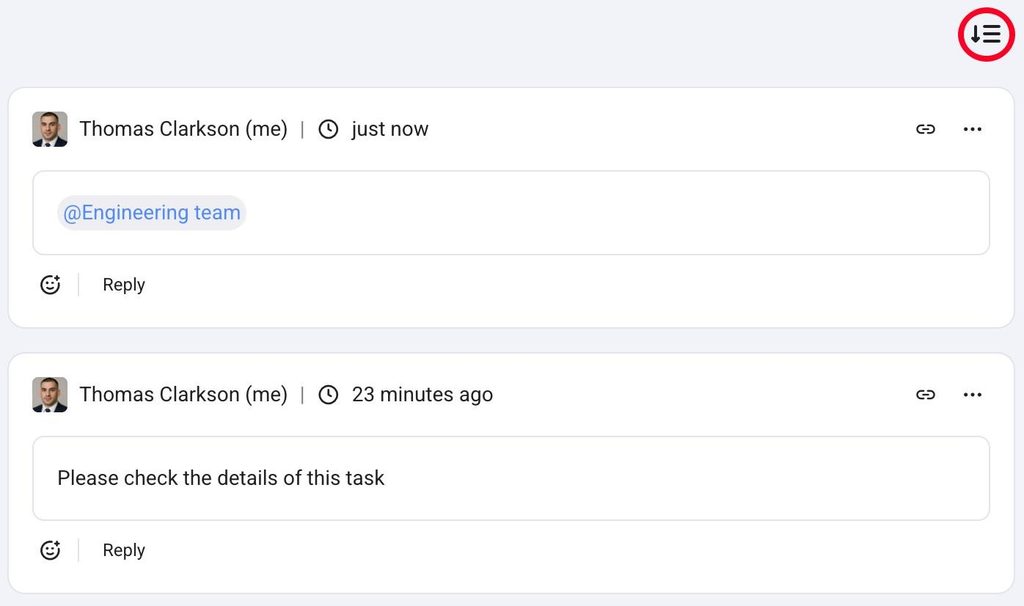
If there are at least two comments that are not pinned on the Item, you can choose to sort comments by creation date in ascending or descending order. The change will be applied to all comments on all items in the Workspace, but it will be visible only to the user who selected the sort. To do it, just click the icon to change the sort in the comments section, and the arrow on the icon will change to reflect the new sorting order.
Auf Kommentare antworten und reagieren #
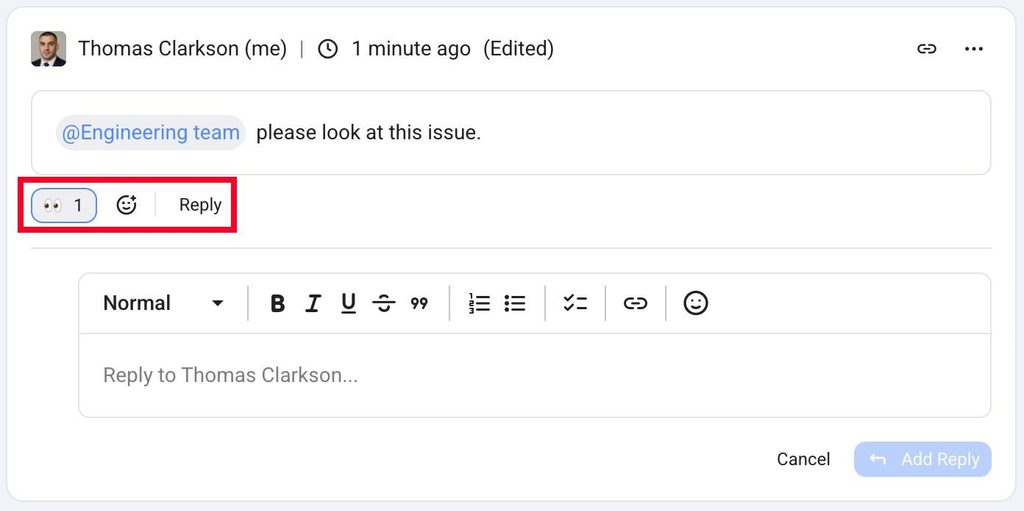
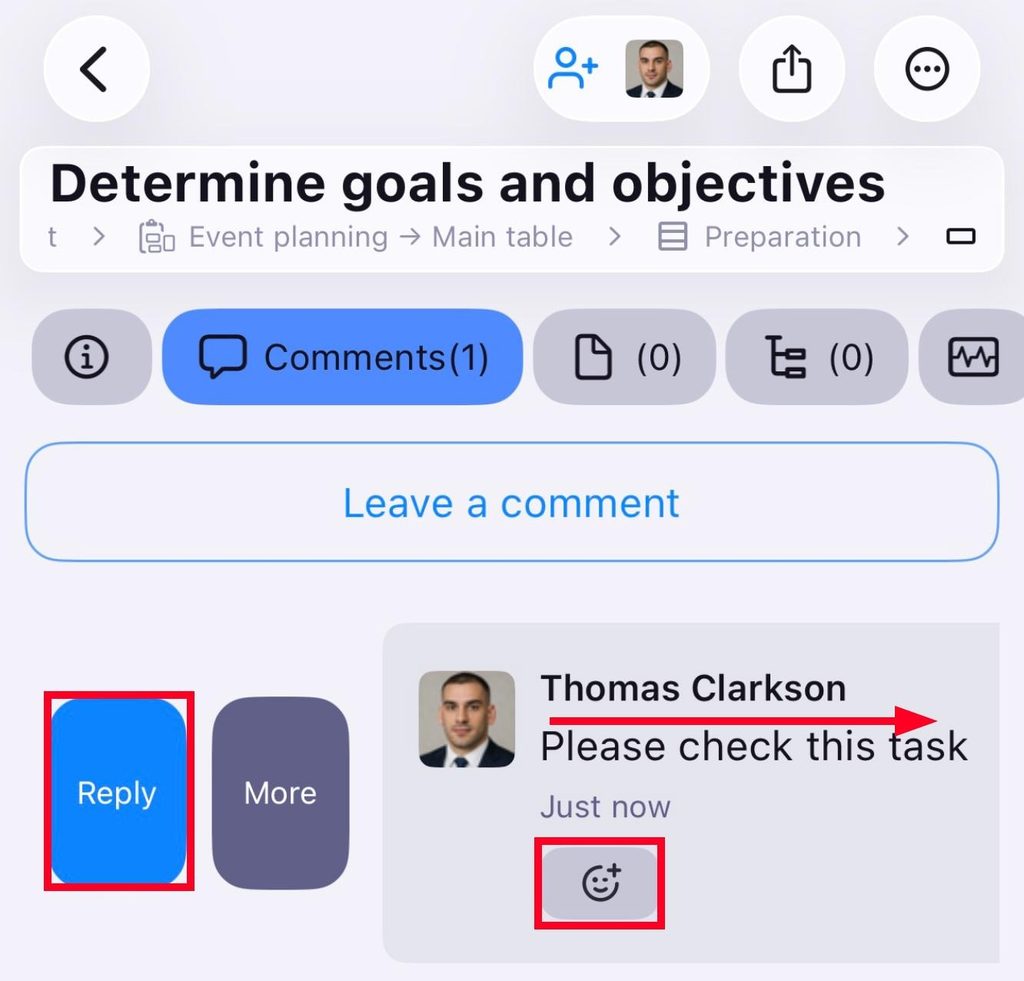
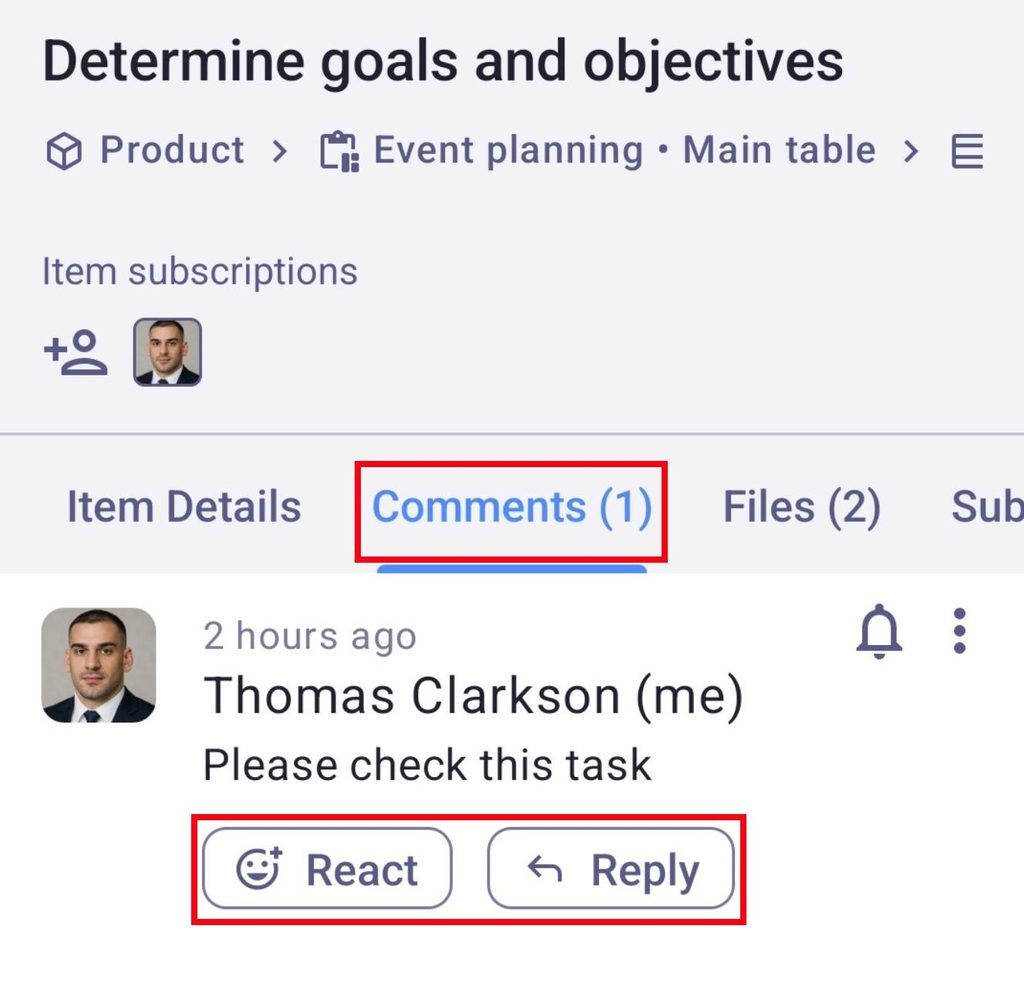
You can reply and react to comments from the Comments tab. To do this, simply click on the Reaction emoji/Reply button to add your reply or reaction.
To reply to a comment on iOS, first swipe right on the comment.
Erinnerung zu einem Kommentar festlegen #
If you want to be reminded of a specific comment at a particular time, you can set up a reminder. Here’s how to do it:
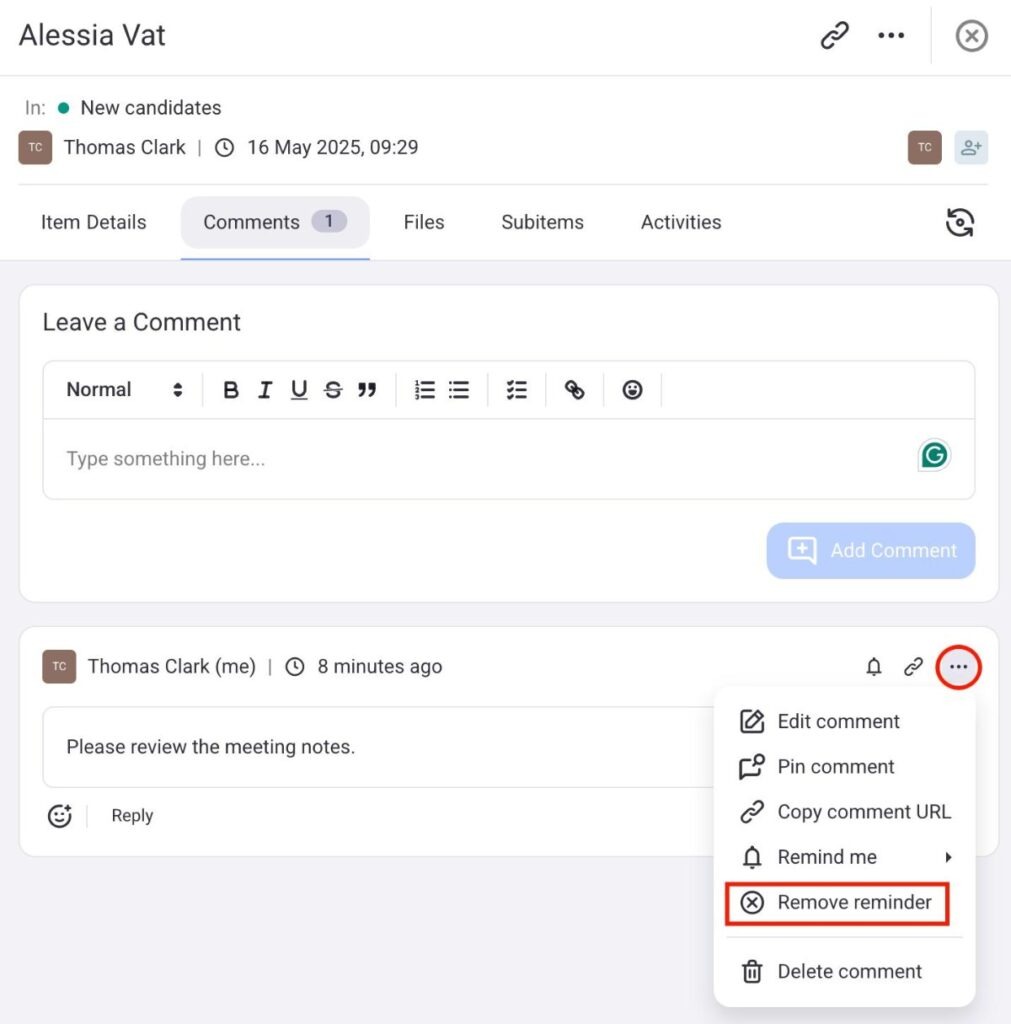
- Click on the three dots on the right side of your comment
- Hover over Remind me
- Wähle eine vordefinierte oder benutzerdefinierte Zeit für die Erinnerung aus
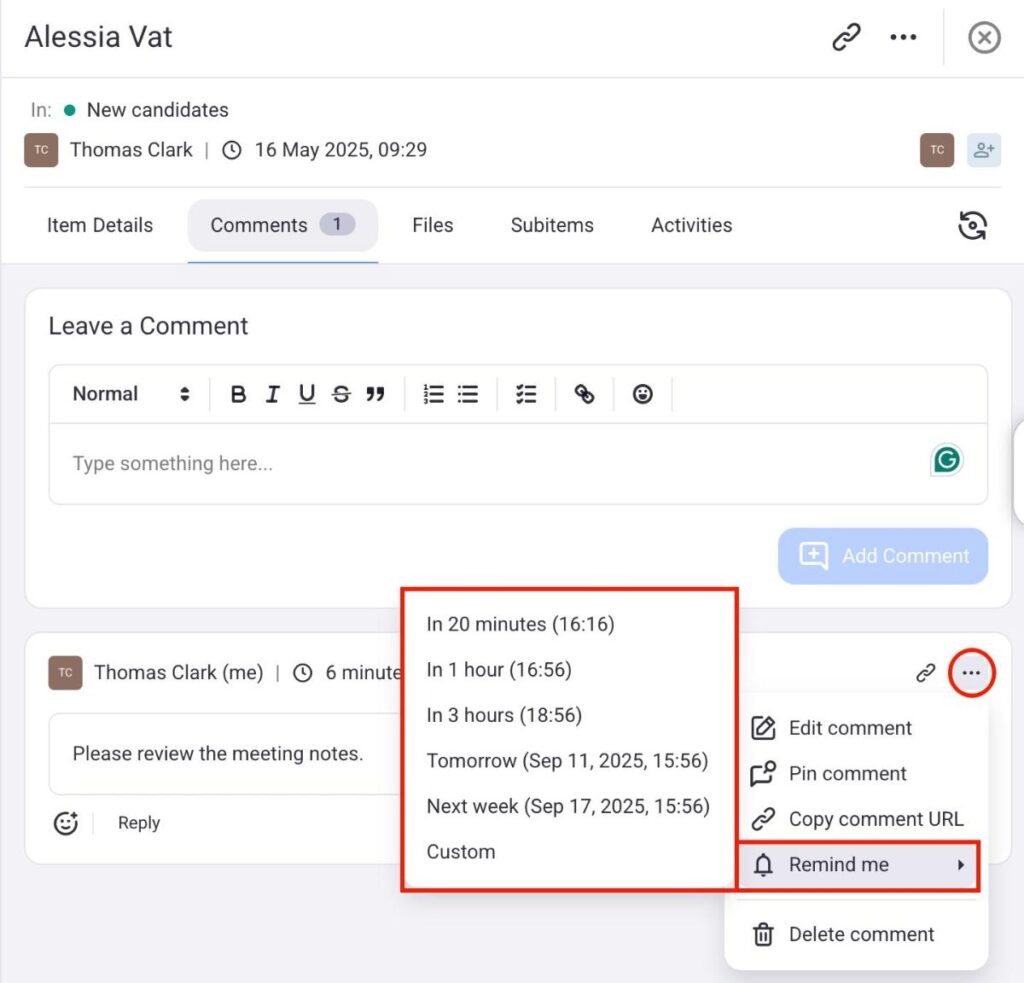
Sobald die Erinnerung eingerichtet ist, kannst du sie auf dieselbe Weise aktualisieren. Du kannst die Erinnerung auch entfernen, indem du diese Schritte befolgst:
- Click on the three dots on the right side of your comment
- Klicke auf Erinnerung entfernen
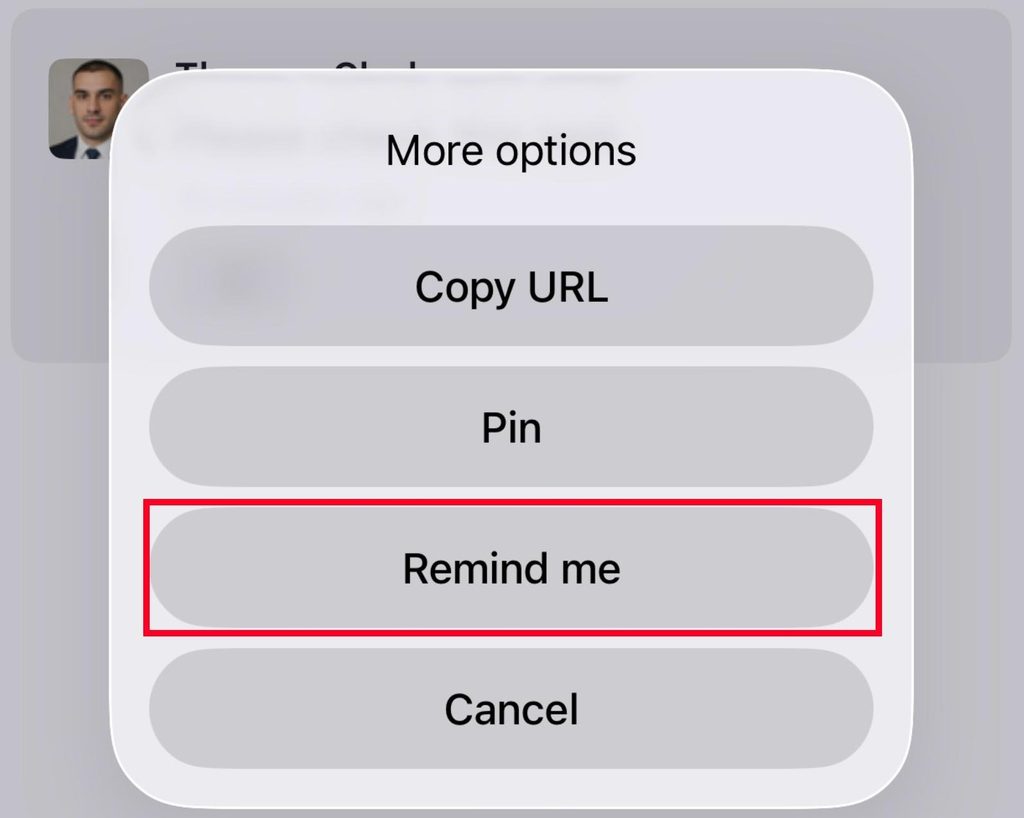
- Wische auf einem Kommentar nach rechts
- Tippe auf Mehr
- Select Remind me
- Choose when to set the reminder
Sobald die Erinnerung eingerichtet ist, kannst du sie auf dieselbe Weise aktualisieren. Du kannst die Erinnerung auch entfernen, indem du diese Schritte befolgst:
- Wische auf einem Kommentar nach rechts
- Tippe auf Mehr
- Select Remove reminder
- Tap on the three dots next to the comment
- Tippe auf Erinnere mich
- Set the reminder
- Tippe auf Speichern, um die Aktion abzuschließen
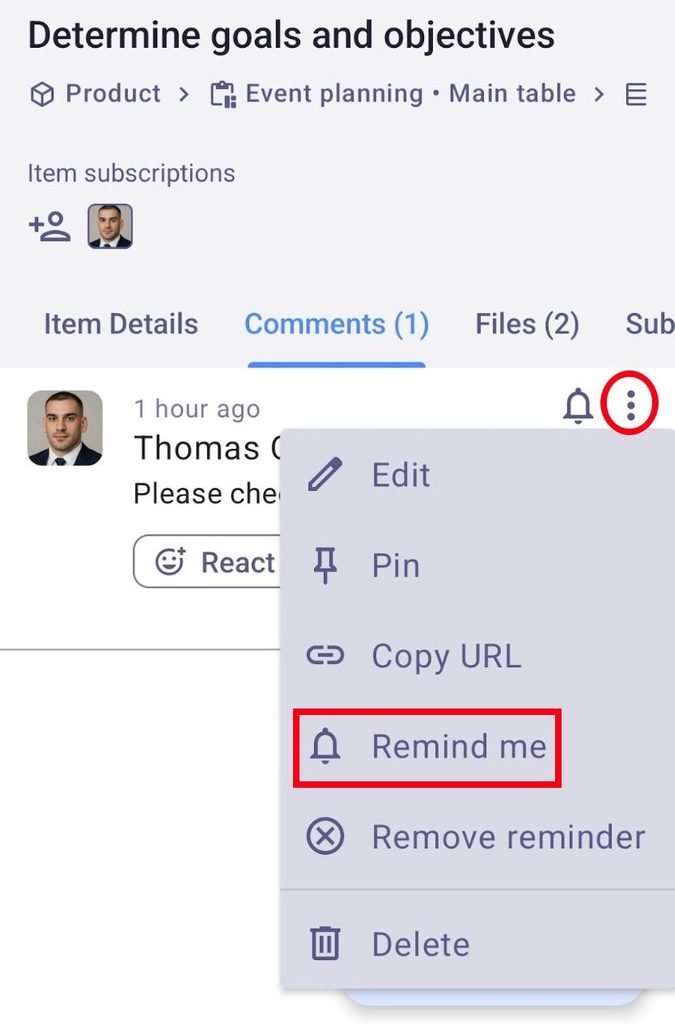
Sobald die Erinnerung eingerichtet ist, kannst du sie auf dieselbe Weise aktualisieren. Du kannst die Erinnerung auch entfernen, indem du diese Schritte befolgst:
- Tap on the three dots next to a comment
- Tippe auf Erinnerung entfernen
Hier sind einige Dinge, die du über Erinnerungen wissen solltest:
- Du kannst die Erinnerung entweder auf eine vordefinierte oder eine benutzerdefinierte Zeit einstellen
- Erinnerungen werden als Benachrichtigungen gesendet
- Kommentare mit einer eingestellten Erinnerung sind mit einem Glockensymbol versehen, das die Details der Erinnerung anzeigt.
Kommentar löschen #
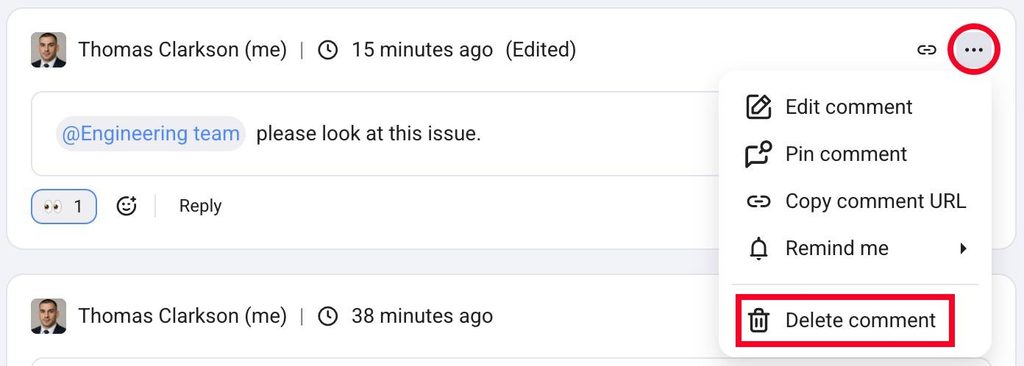
Das Löschen von Kommentaren kann nützlich sein, um Fehler zu korrigieren, irrelevante Informationen zu entfernen oder die Klarheit in deinen Projektdiskussionen aufrechtzuerhalten. So löschst du einen Kommentar:
- Click on the three dots in the top right corner of the comment
- Wähle Kommentar löschen
- Select Delete in the confirmation box to complete the action
- Swipe left on a comment
- Tippe auf Löschen
- Bestätige die Aktion
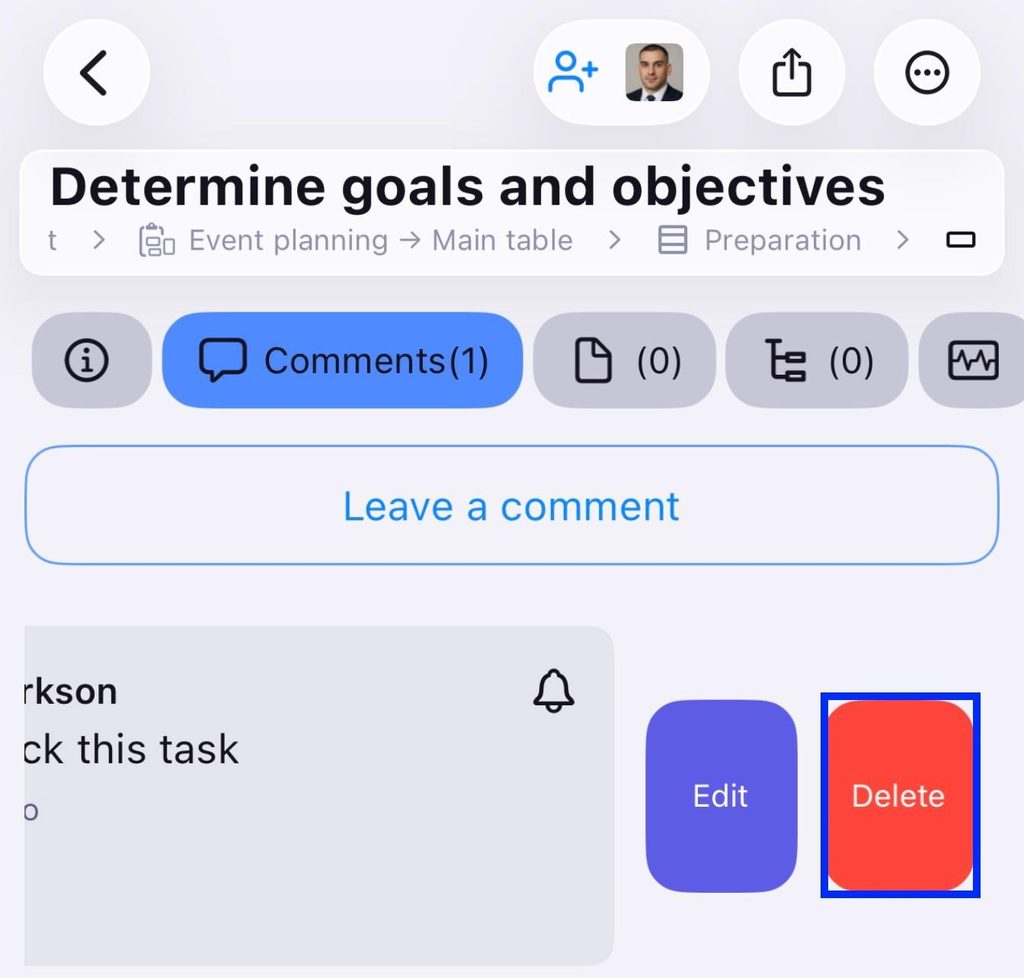
- Tap on the three dots next to a comment
- Tippe auf Löschen
- Bestätige die Aktion
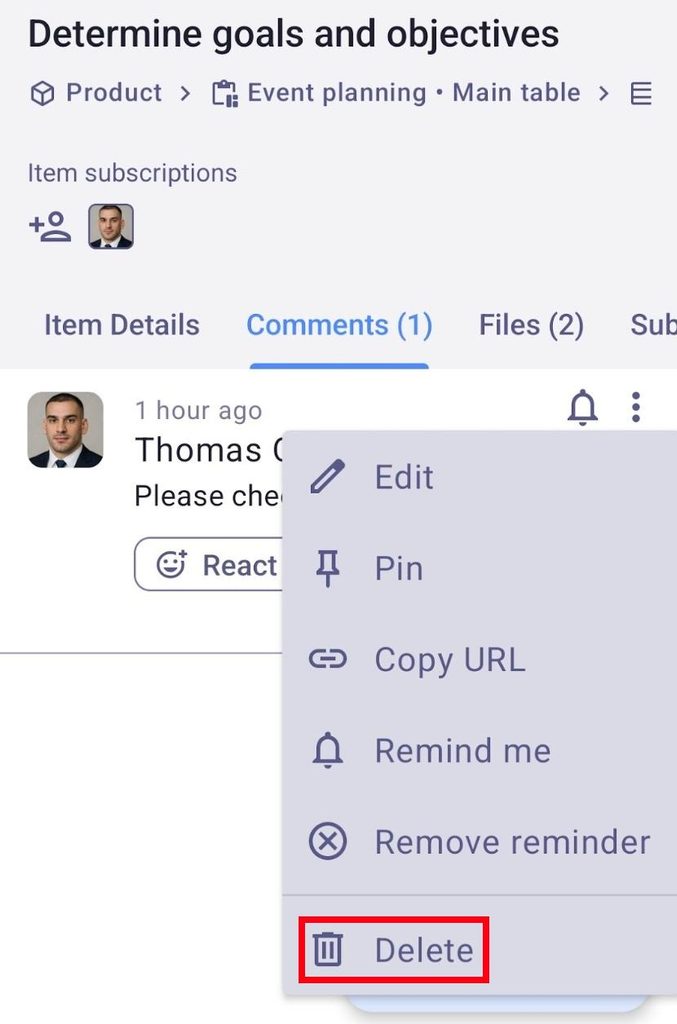
Nur Board-Inhaber können Kommentare anderer Benutzer löschen.
Dateien #
In the Files section, you can manage the files attached to the Item. Files can be uploaded, downloaded, opened, searched, and deleted. There is also the option to play video and audio files and view PDF file previews.
Upload files #
- Navigiere zur Registerkarte Dateien
- Klicke auf Dateien hinzufügen
- Wähle eine oder mehrere Dateien aus deinem lokalen Speicher aus
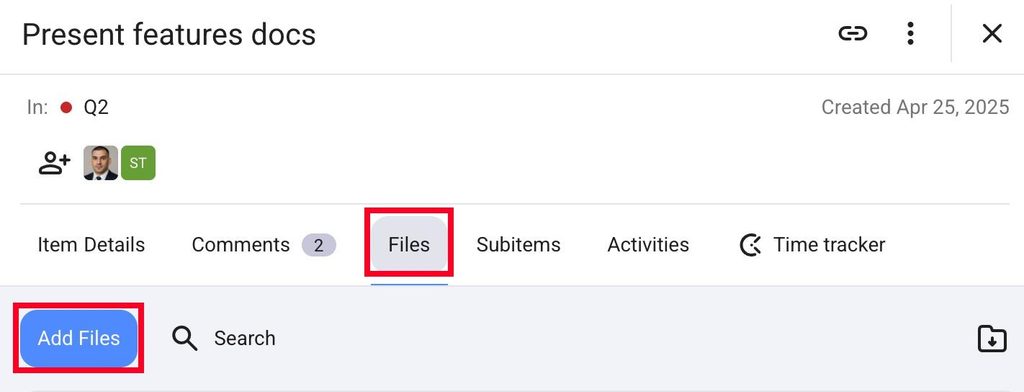
The maximum size of a single uploaded file on the Free plan is 10MB; on the Pro plan, it’s 25MB; and on the Enterprise plan, it’s 100MB.
Once the file has been uploaded, it can be opened, downloaded, or deleted by clicking the three dots button in the upper-right corner.
Plaky unterstützt die folgenden Dateitypen:
- PNG
- JPEG
- SVG
- GIF
- MP4
- WEBM
- WEBP
- BMP
- MP3
- WAV
- Open the Files tab
- Tap on Add file
- Select where to upload the files from
- Choose a file
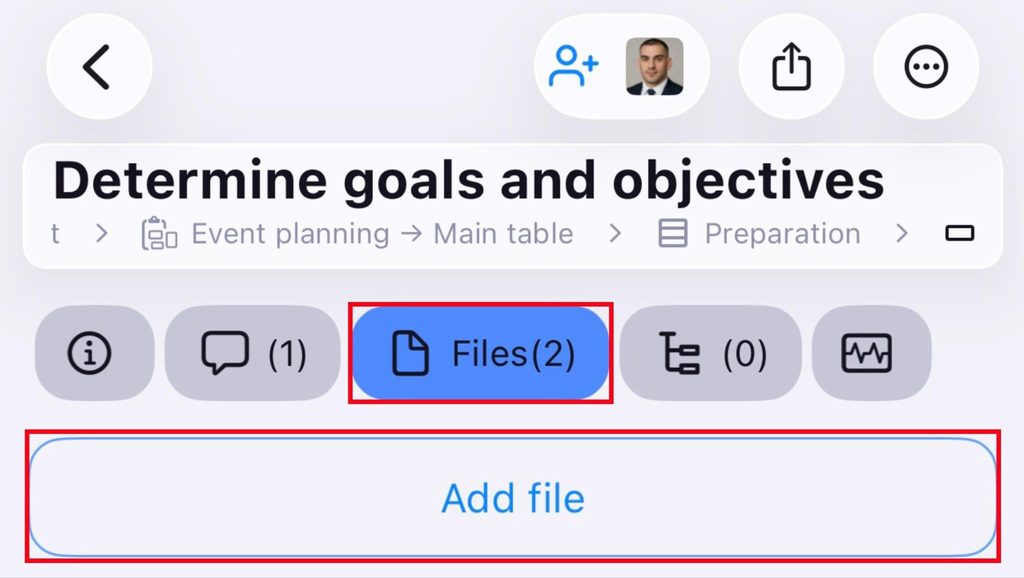
- Open the Files tab
- Tap on the + button in the bottom right corner
- Select what you want to upload
- Choose your file
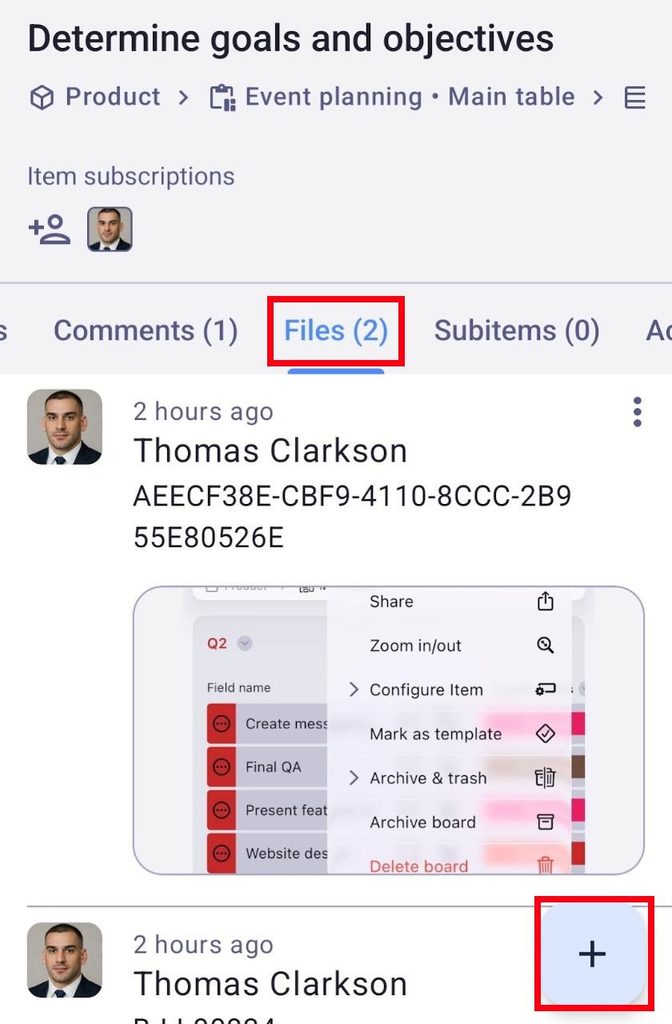
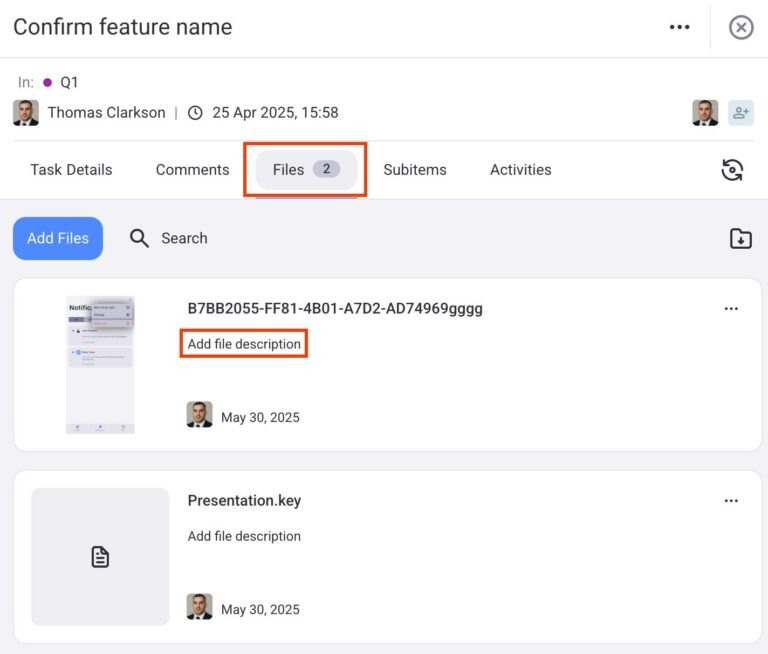
Add file description #
- Klicke auf die Registerkarte Dateien
- Click on Add file description
- Schreibe die Dateibeschreibung
- Drücke die Eingabetaste, um die Aktion abzuschließen
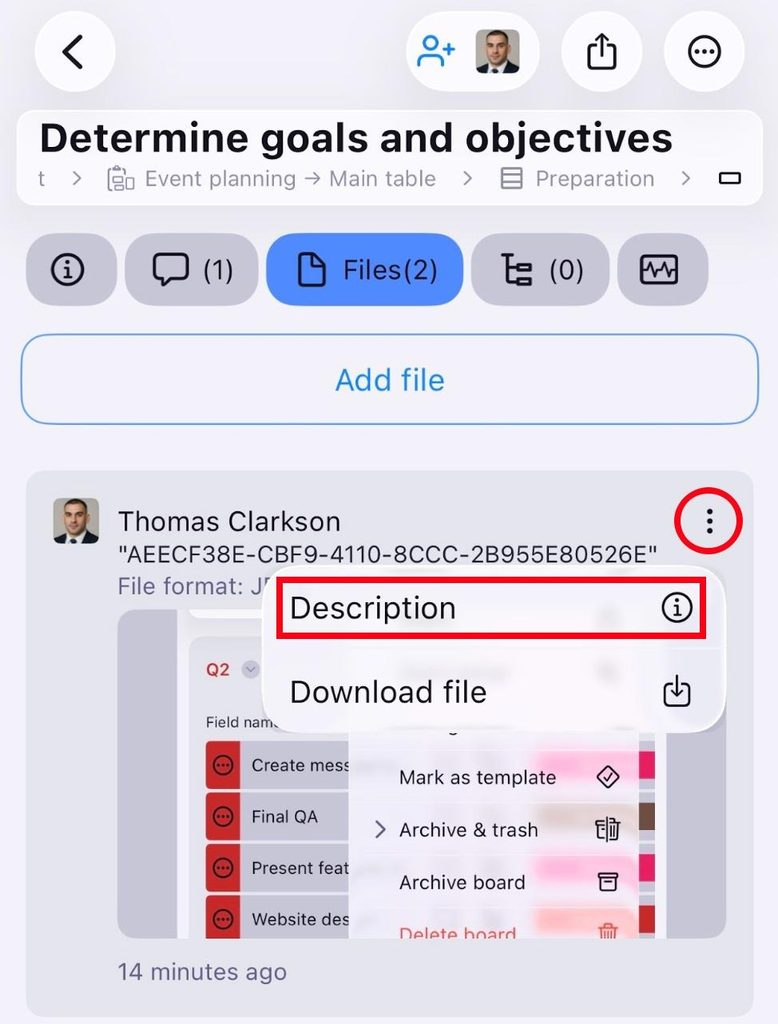
- Tap on the three dots next to a file
- Tippe auf Beschreibung
- Schreibe die Beschreibung
- Tap on ✔️to complete the action
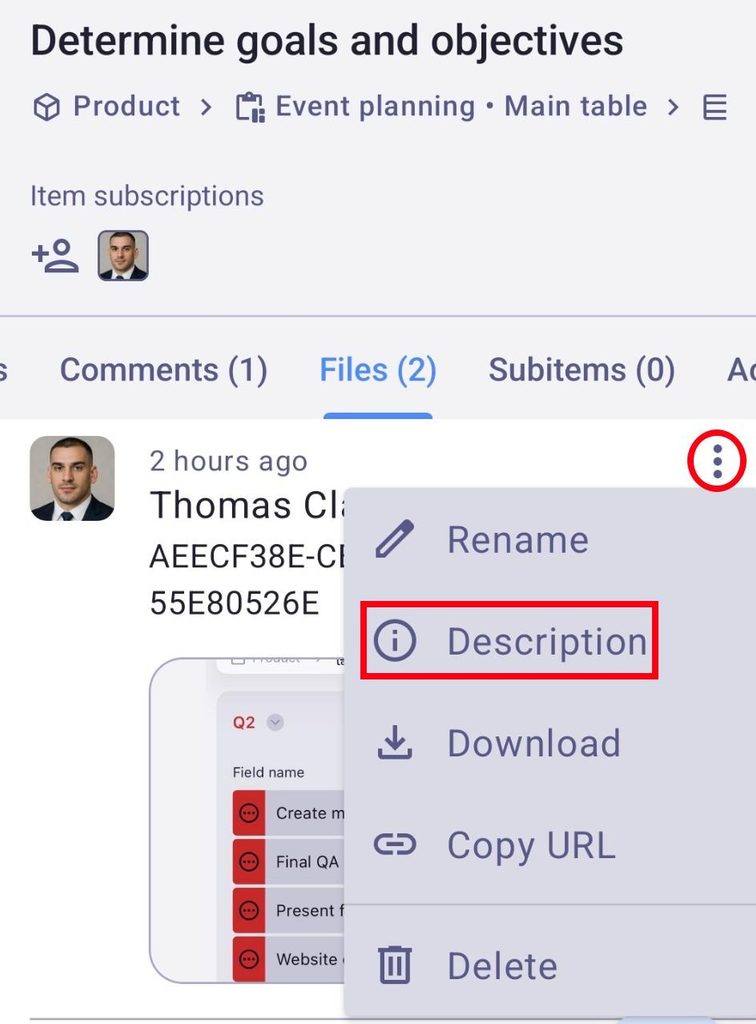
- Tap on the three dots next to a file
- Tippe auf Beschreibung
- Schreibe die Beschreibung
- Tippe auf Ändern, um die Aktion abzuschließen
Rename files #
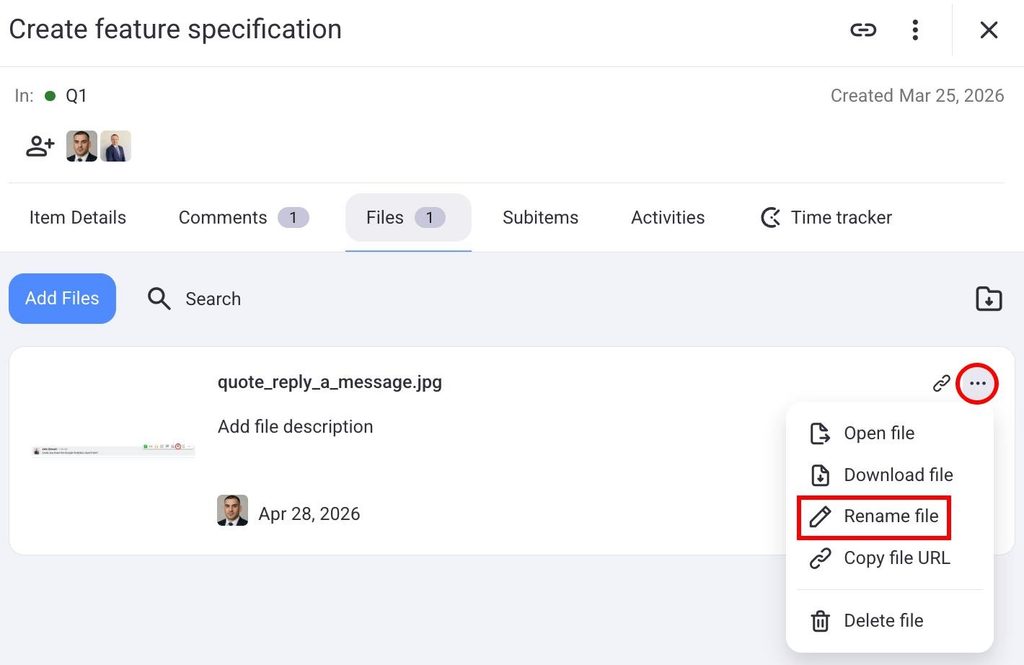
- Klicke auf die Registerkarte Dateien
- Click on the three dots in the top right corner of the File
- Select Rename File
- Gib einen neuen Dateinamen ein
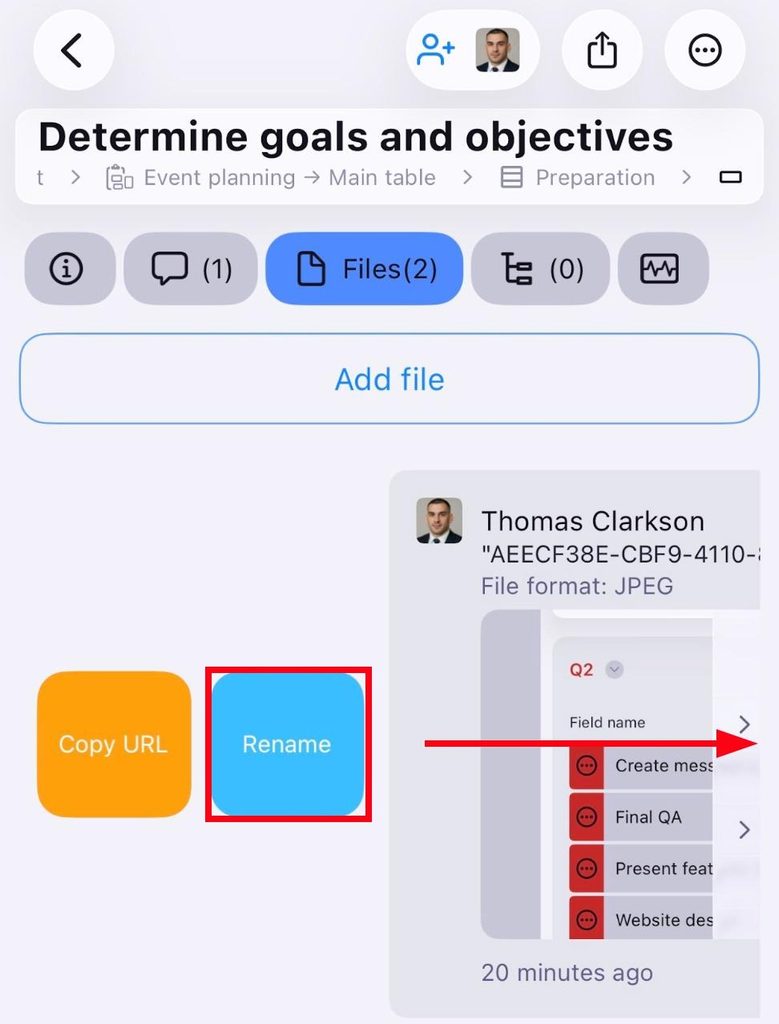
- Swipe right on a file
- Tippe auf Umbenennen
- Enter new file name
- Tap on ✔️ to complete the action
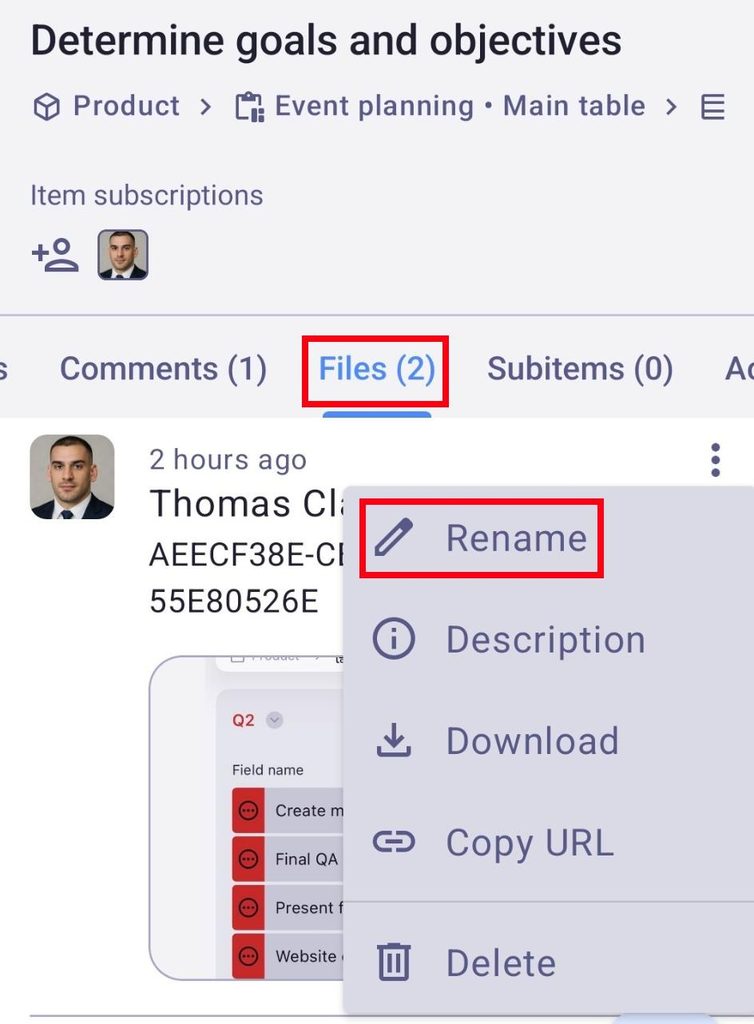
- Tap on the three dots next to a file
- Tippe auf Umbenennen
- Enter the new name
- Tap Rename to complete the action
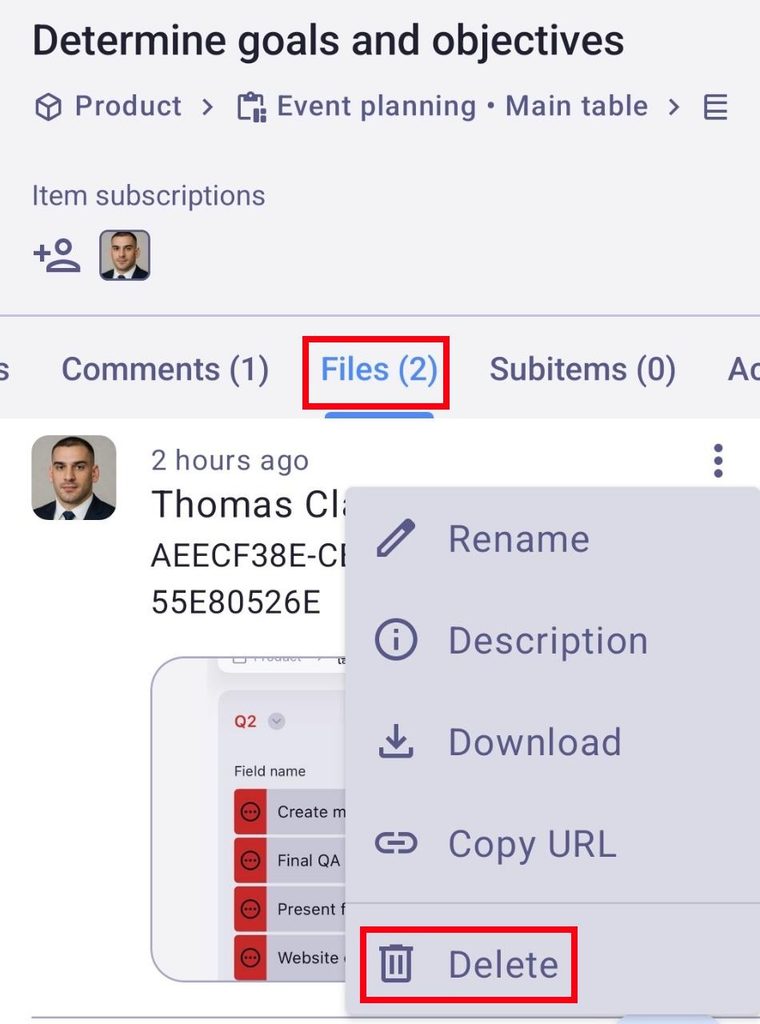
Delete files #
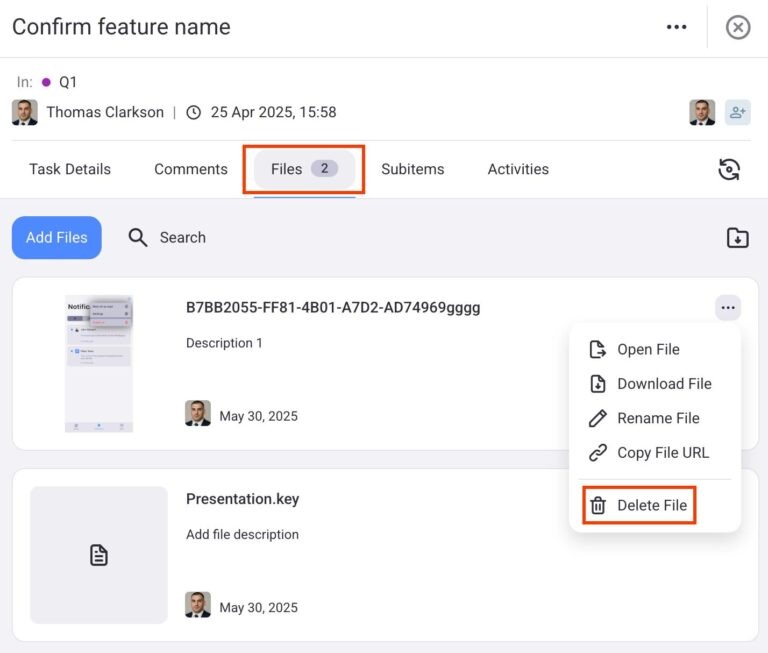
- Navigiere zur Registerkarte Dateien
- Click on the three dots in the top right corner of the File
- Wähle Datei löschen
- Click Delete in the confirmation box to complete the action
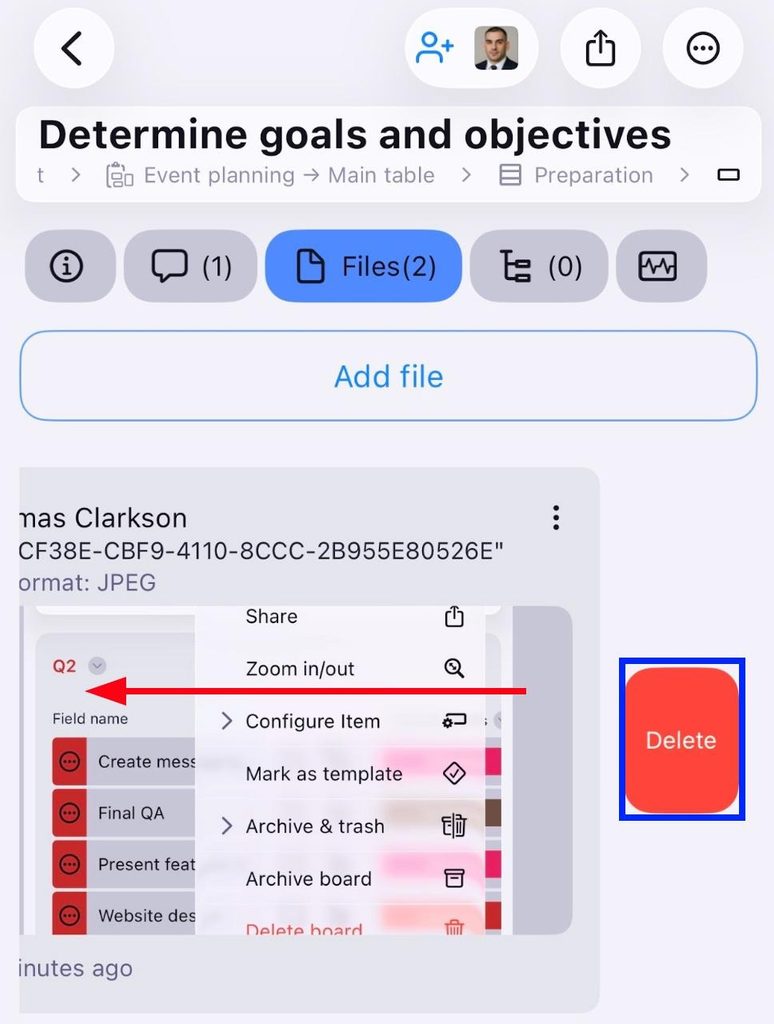
- Swipe left on a file
- Tippe auf Löschen
- Bestätige die Aktion
- Tap on the three dots next to a file
- Tippe auf Löschen
- Bestätige die Aktion