Einführung in Board-Ansichten
Die Art und Weise, wie deine Daten auf dem Board angezeigt werden, kann dir helfen, einen besseren Überblick über die Informationen, die dir zur Verfügung stehen, zu haben. Mit Board-Ansichten kannst du die auf deinem Board verfügbaren Daten auf verschiedene Weise visualisieren.
Typen von Board-Ansichten
In Plaky stehen dir folgende Board-Ansichten zur Verfügung:
- Tabellenansicht
- Kanban-Ansicht
- Gantt-Ansicht
- Diagramm-Ansicht
Nachfolgend findest du weitere Details zu jeder Ansicht.
Tabellenansicht #
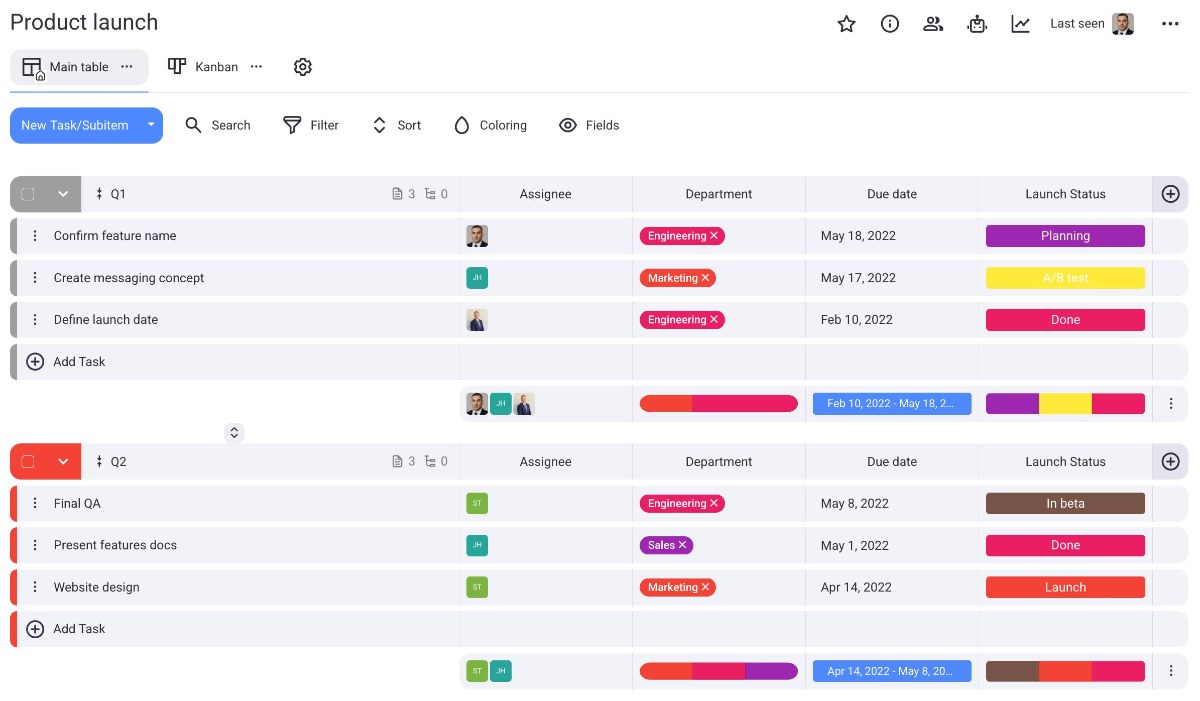
Mit der Tabellenansicht werden die auf deinem Board verfügbaren Informationen in Form einer Tabelle mit Feldern und Zeilen angezeigt.
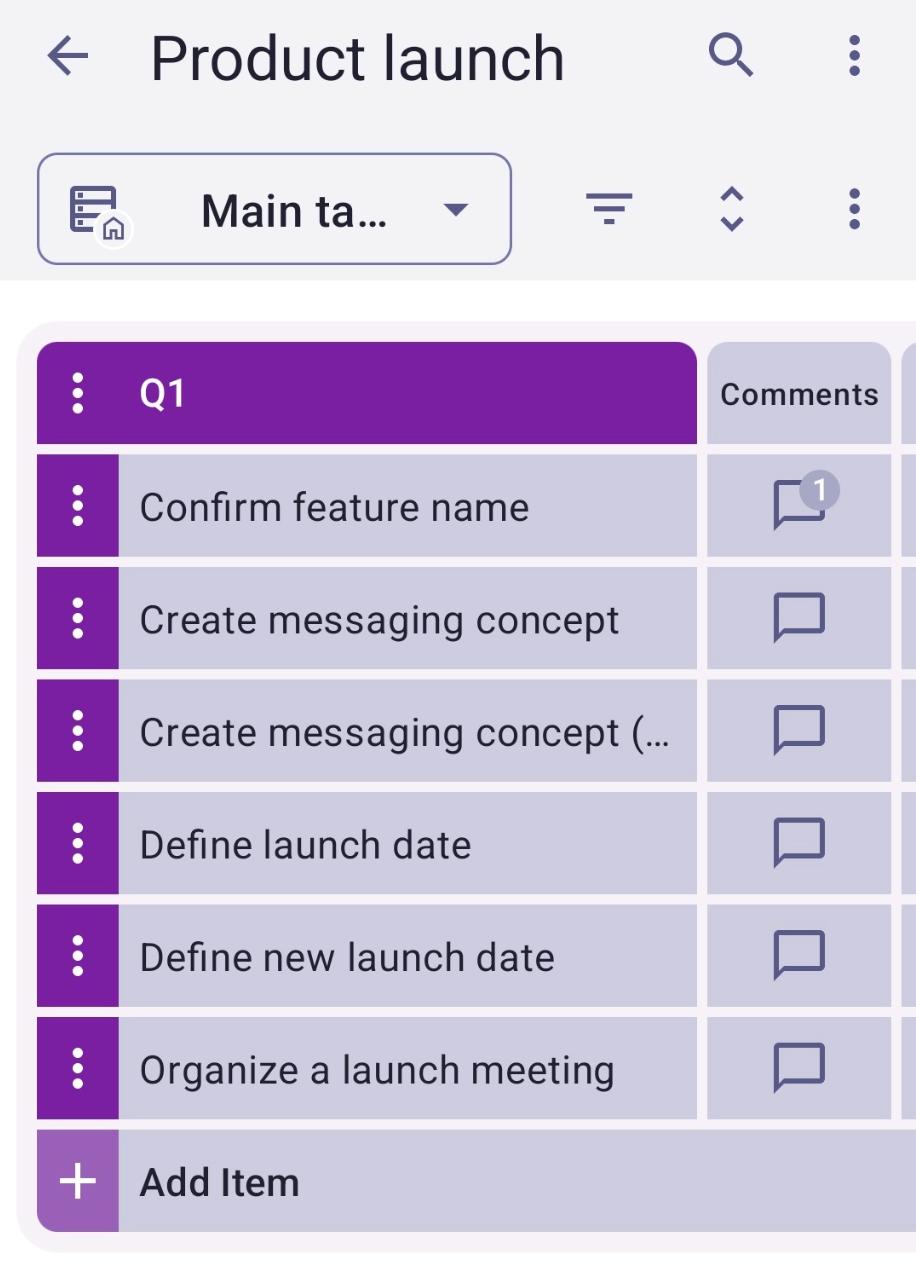
Hier ist das Beispiel der Tabellen-Ansicht für die Vorlage "Produktstart-Board".
Wische in der Tabellenansicht nach links, um alle Felder auf dem Board anzuzeigen.
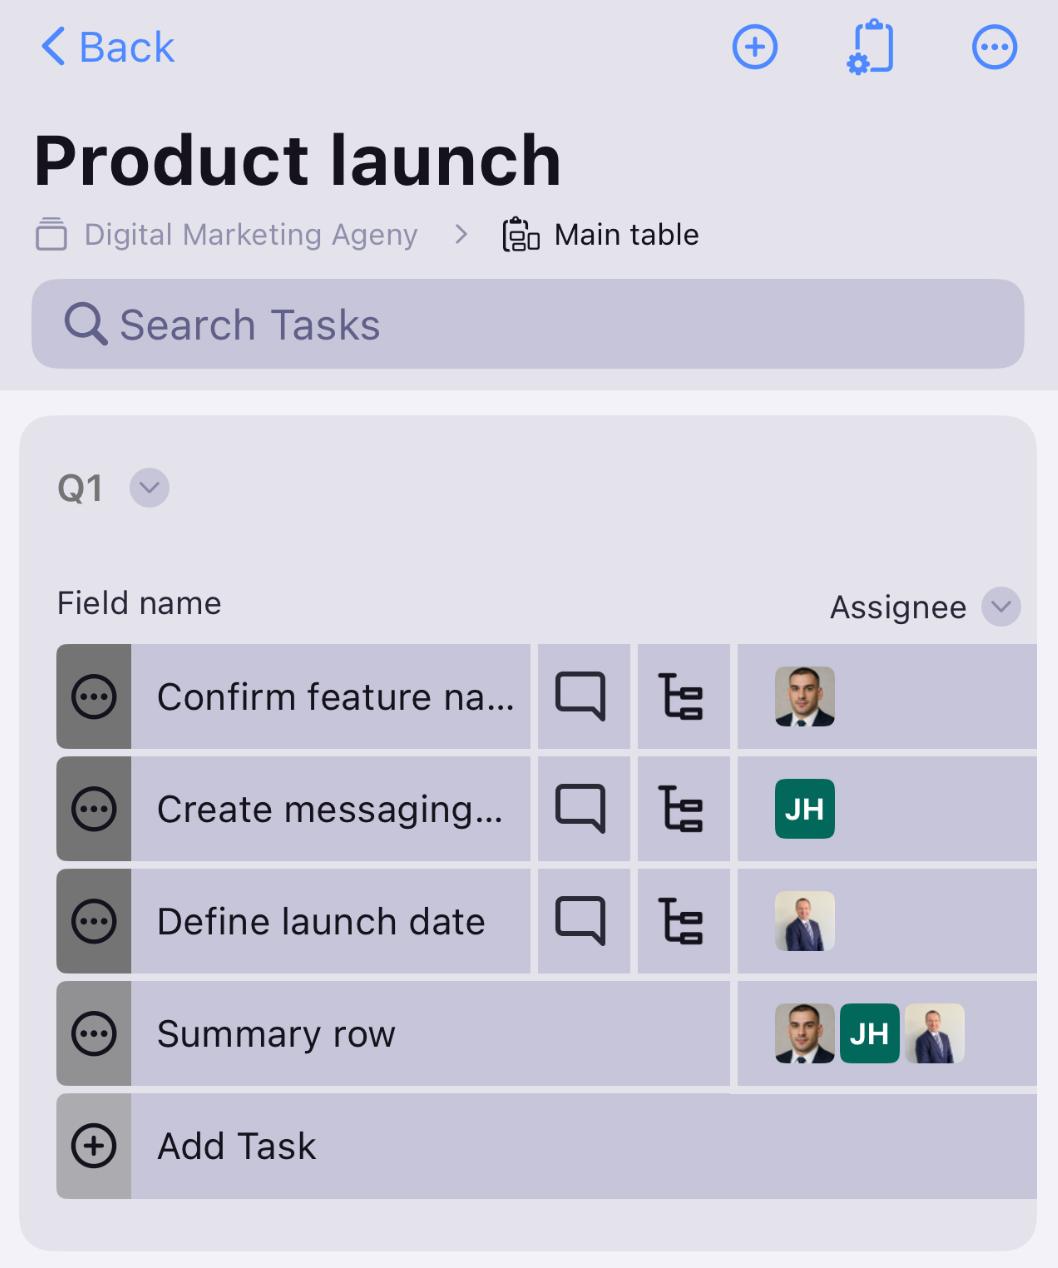
Wische nach links, um alle Felder auf dem Board anzuzeigen.
Kanban-Ansicht #
Kanban ist eine bekannte Projektmanagementtechnik, die zur Verwaltung von Arbeit verwendet wird, indem Aufgaben und Anforderungen entsprechend der verfügbaren Kapazität priorisiert werden.
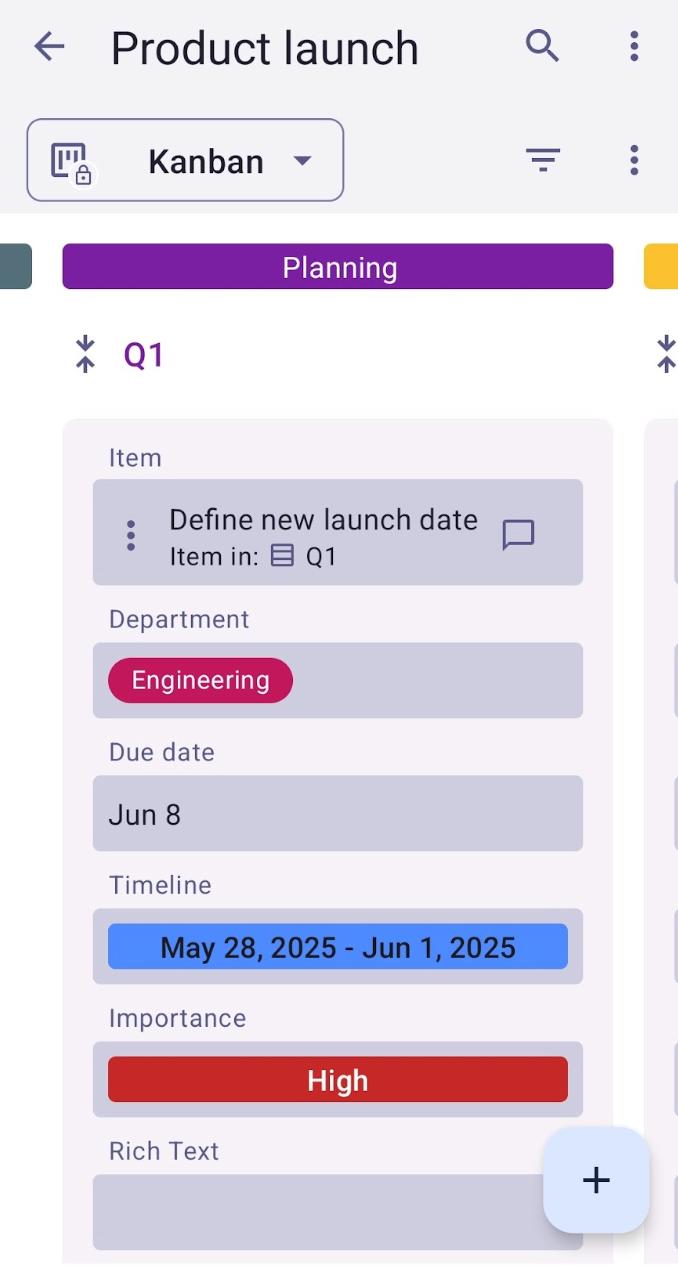
Hier ist das Beispiel der Kanban-Ansicht für die Vorlage "Produktstart-Board":
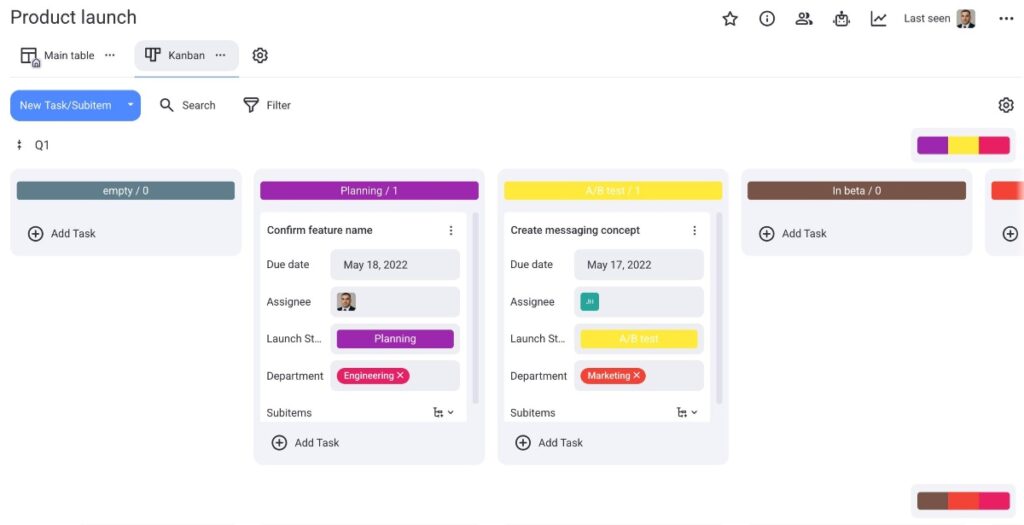
Wische in der Kanban-Ansicht nach links, um alle Elemente auf dem Board nach Status gruppiert anzuzeigen, und ziehe das Element per Drag & Drop, um seinen Status zu ändern.
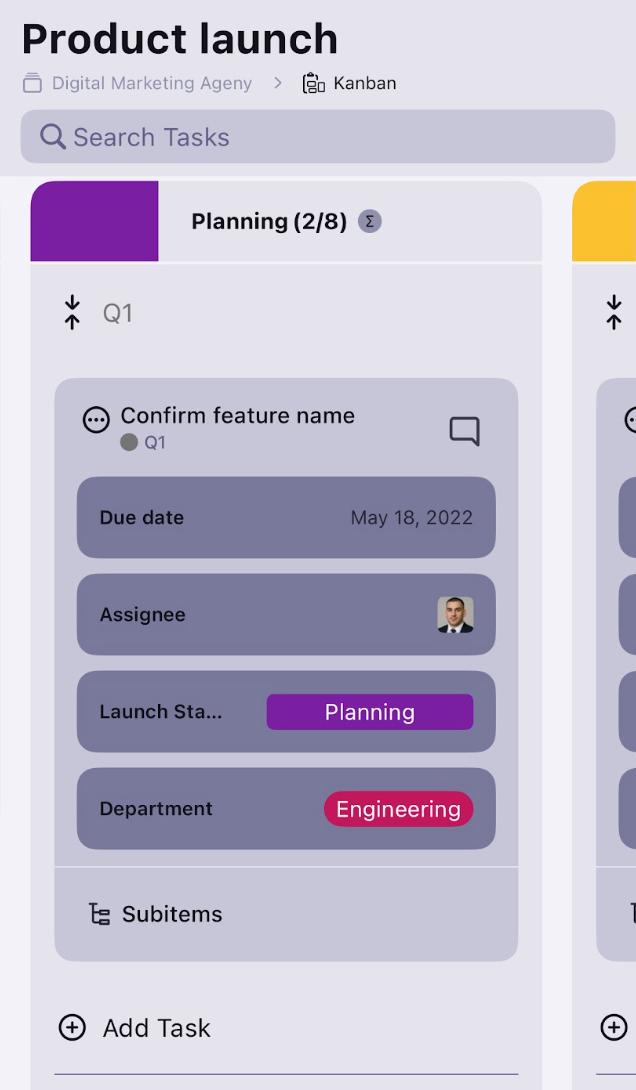
Wische nach links, um alle Elemente auf dem Board nach Status gruppiert anzuzeigen.
Erfahre mehr über die Kanban-Ansicht in Plaky in unserem Artikel.
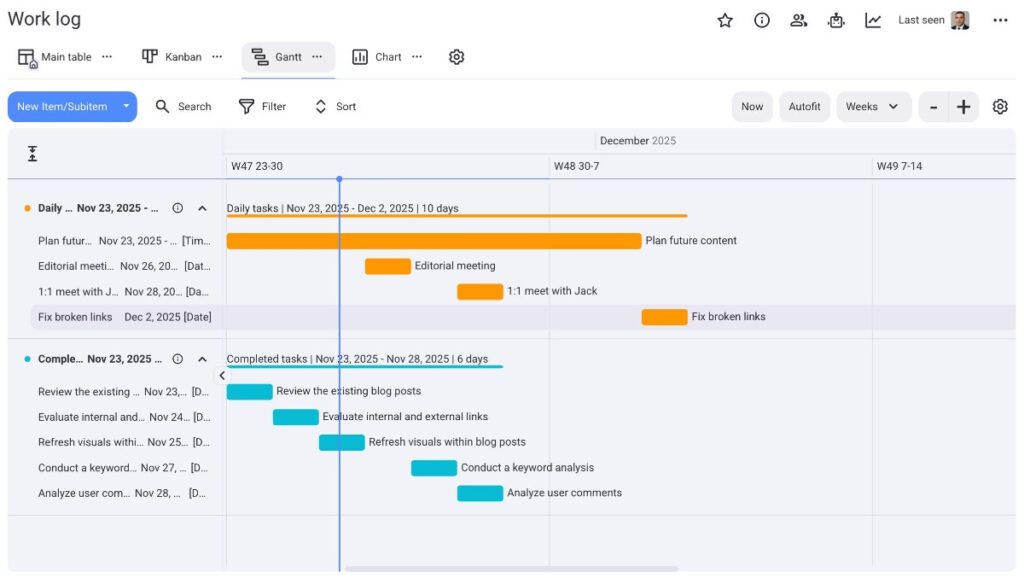
Gantt-Ansicht #
Die Gantt-Ansicht bietet dir eine visuelle Darstellung deiner Aufgaben als horizontale Balken auf einer Zeitachse.
Hier ist das Beispiel der Gantt-Ansicht für die Vorlage „Arbeitsprotokoll-Board“:
BALD VERFÜGBAR
BALD VERFÜGBAR
Um mehr über die Gantt-Ansicht in Plaky zu erfahren, besuche unseren Artikel.
Diagramm-Ansicht #
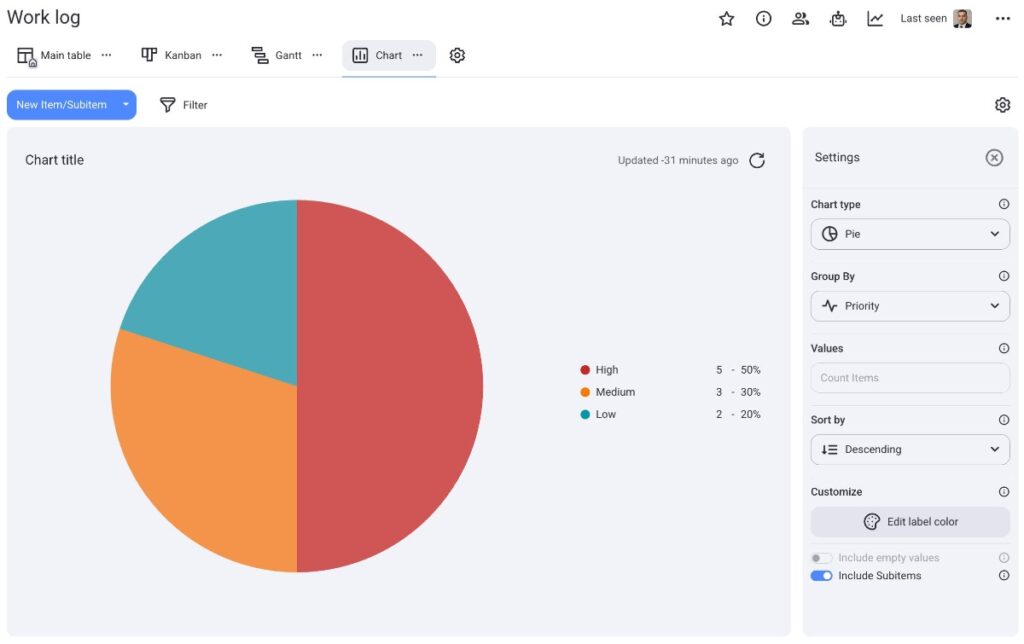
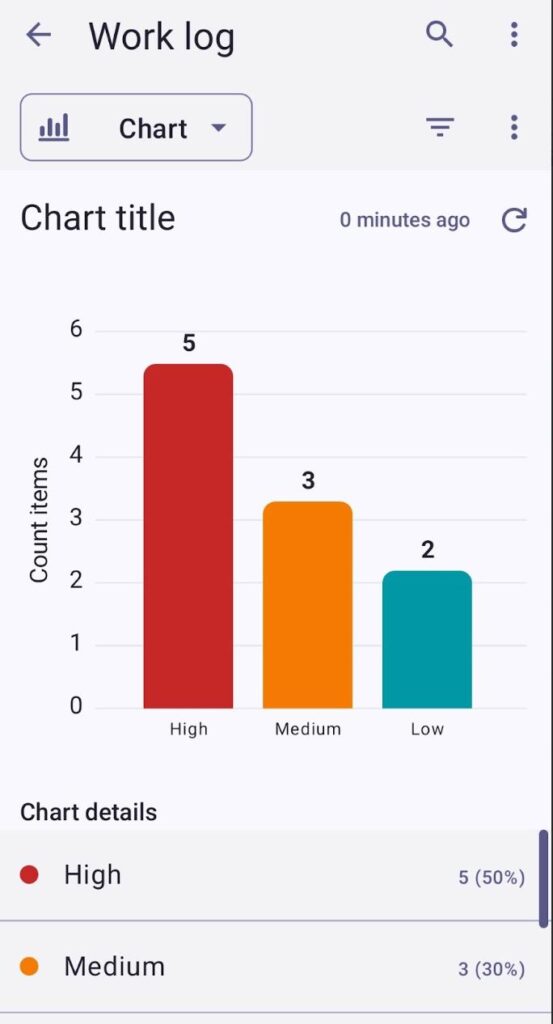
Mit der Diagramm-Ansicht kannst du Projekte und Aufgaben mithilfe interaktiver Kreis- und Balkendiagramme visualisieren.
Hier ist ein Beispiel für ein Kreisdiagramm in Plaky:
Hier ist ein Beispiel für ein Balkendiagramm in Plaky:

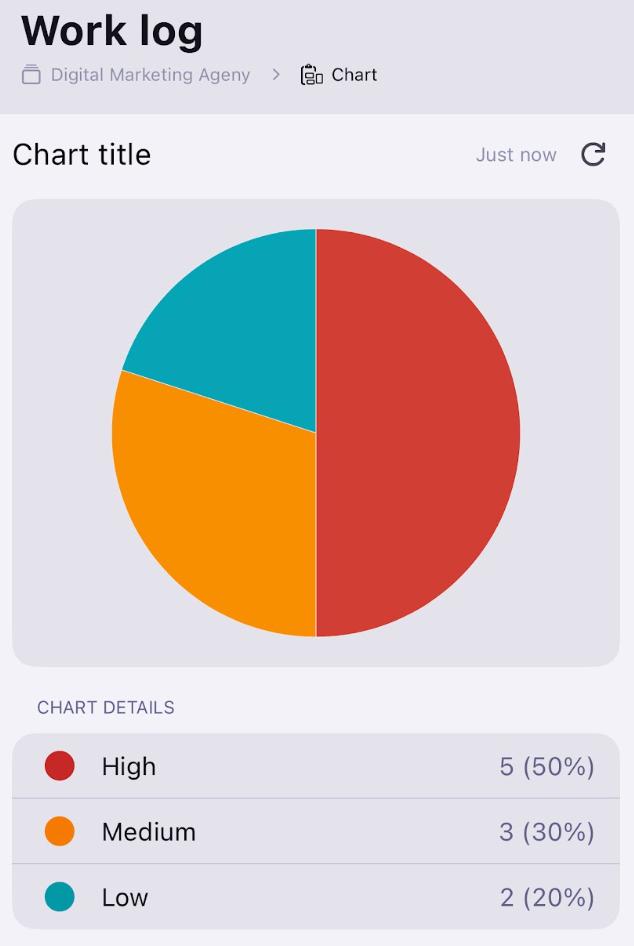
Hier ist ein Beispiel für ein Kreisdiagramm in Plaky in iOS:
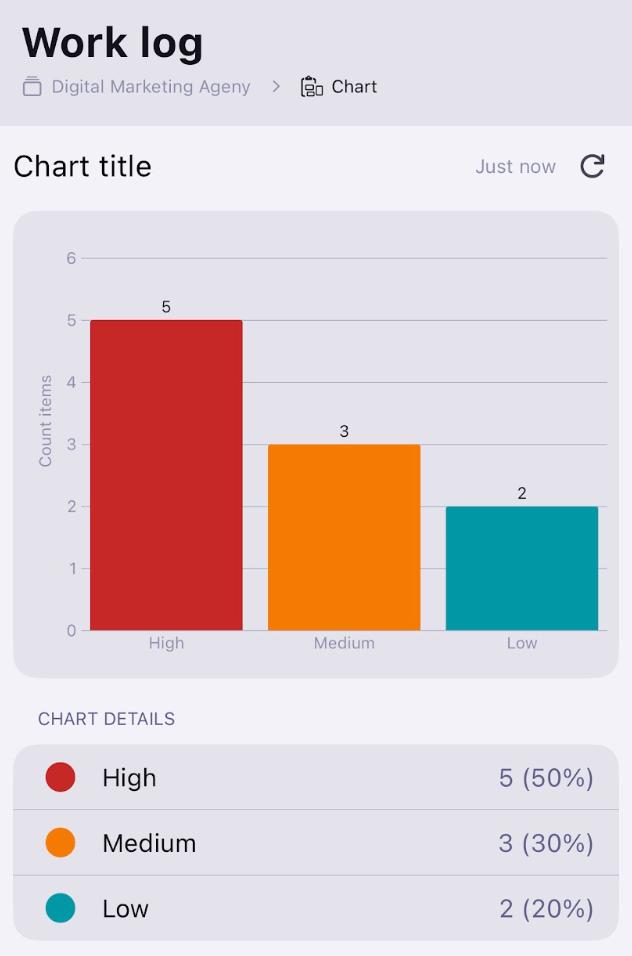
Hier ist ein Beispiel für ein Balkendiagramm in Plaky in iOS:
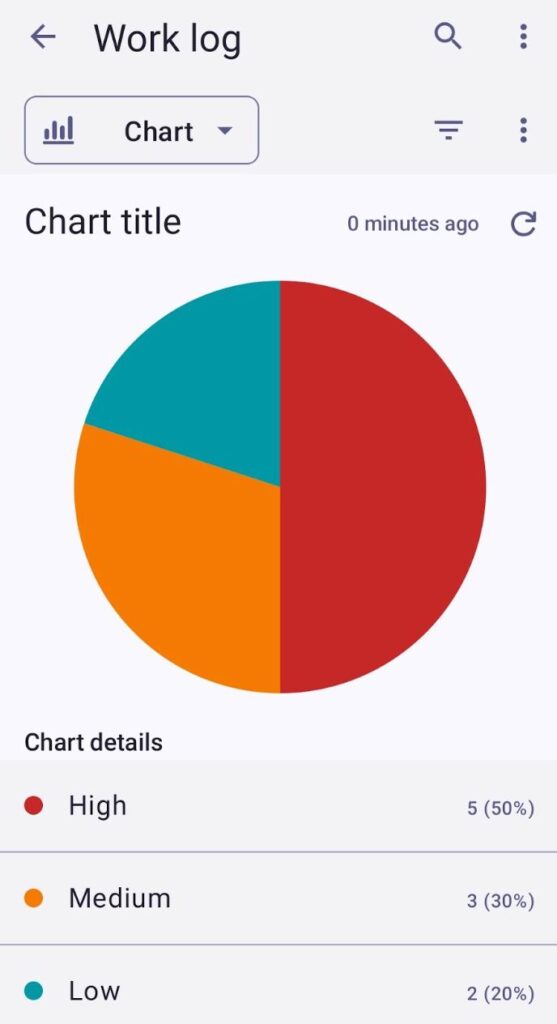
Hier ist ein Beispiel für ein Kreisdiagramm in Plaky in Android:
Hier ist ein Beispiel für ein Balkendiagramm in Plaky in Android:
Um mehr über die Diagramm-Ansicht in Plaky zu erfahren, besuche unseren Artikel.
Board-Ansicht hinzufügen #
- Klicke auf den Button +
- Wähle den neuen Ansichtstyp aus
- Tippe auf Board-Ansicht-Konfiguration oben rechts
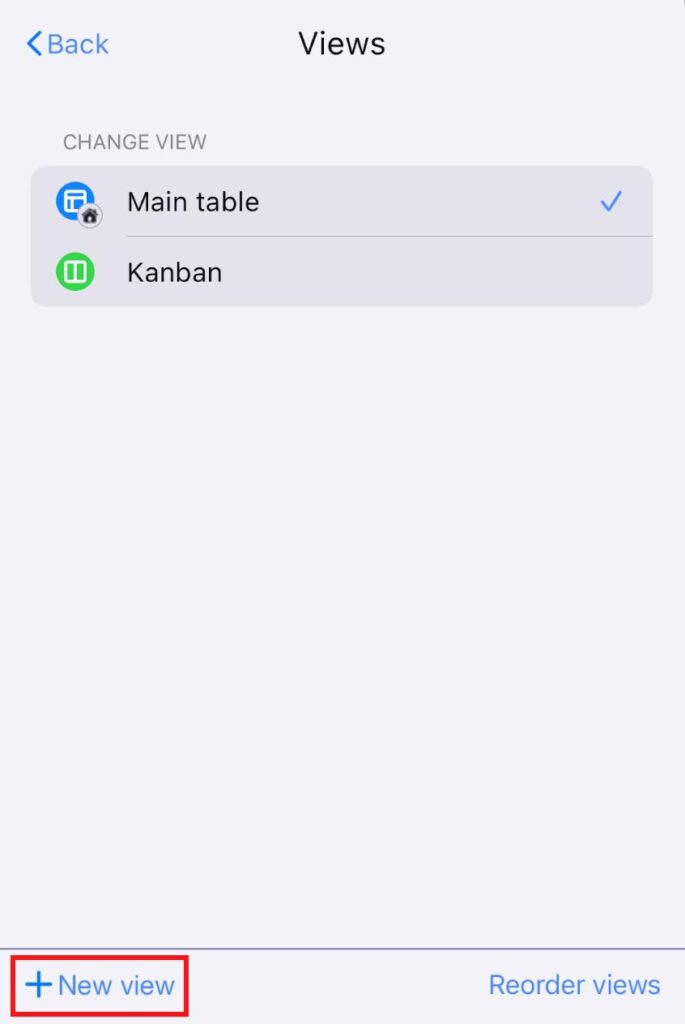
- Tippe auf Ansichten
- Tippe auf + Neue Ansicht
- Gib den Ansichtsnamen ein
- Schalte das Optionsfeld um, wenn du die Ansicht privat machen möchtest
- Wähle den Ansichtstyp aus
- Tippe auf Erstellen, um die Aktion abzuschließen
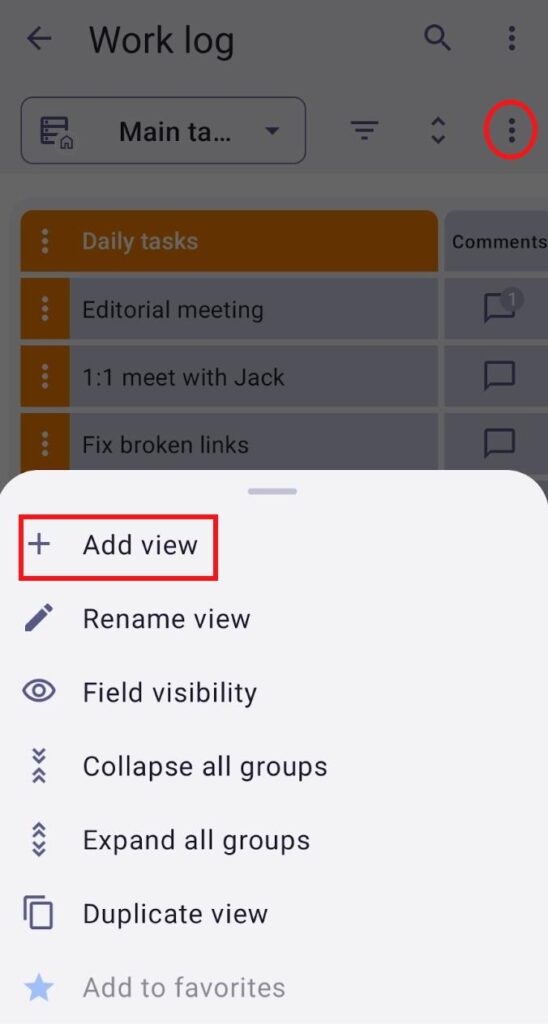
- Tippe auf die drei Punkte oben rechts
- Wähle Ansicht hinzufügen
- Gib den Ansichtsnamen ein
- Wähle den Ansichtstyp
- Aktiviere das Kontrollkästchen, wenn du die Ansicht privat machen möchtest
- Tippe auf Erstellen, um die Aktion abzuschließen
Ansicht umbenennen #
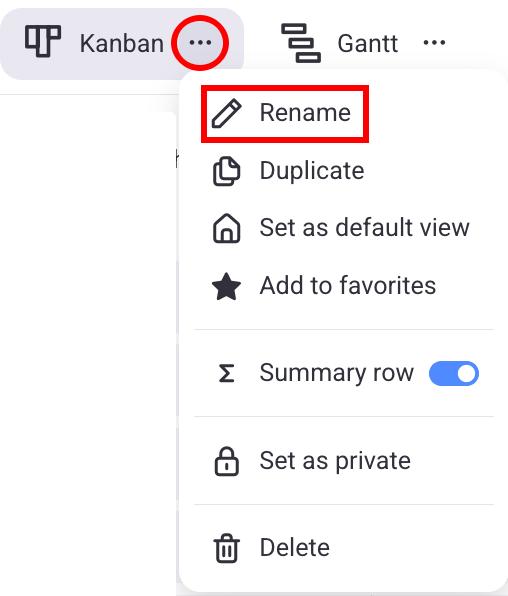
- Klicke auf die drei Punkte neben der Ansicht, die du umbenennen möchtest
- Wähle Umbenennen
- Gib einen neuen Namen ein
- Drücke die Eingabetaste/Klicke außerhalb des angegebenen Bereichs, um die Aktion abzuschließen
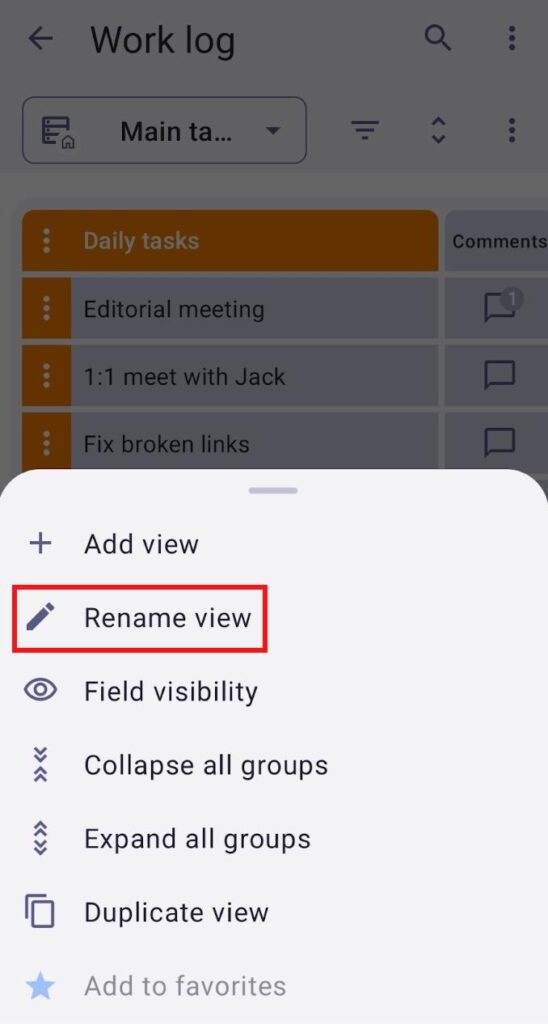
- Tippe auf Board-Ansicht-Konfiguration oben rechts
- Tippe auf Ansichten
- Wische auf einer Ansicht, die du umbenennen möchtest, nach rechts
- Tippe auf Ansicht umbenennen
- Gib einen neuen Namen für die Ansicht ein
- Tippe auf Fertig, um die Aktion abzuschließen
- Öffne die bevorzugte Ansicht
- Tippe auf die drei Punkte oben rechts
- Tippe auf Ansicht umbenennen
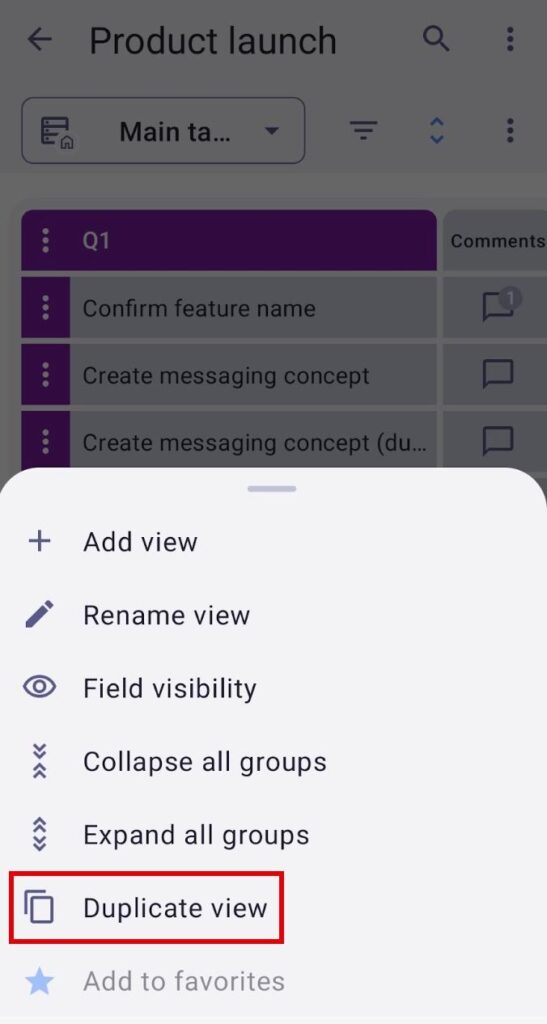
Ansicht duplizieren #
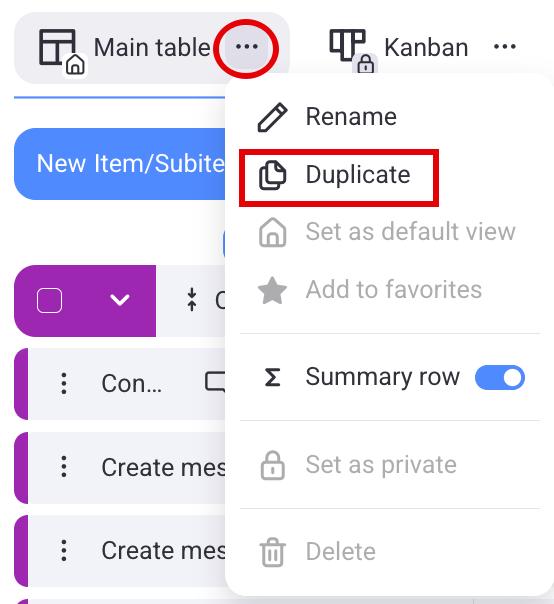
- Klicke auf die drei Punkte neben der Ansicht, die du umbenennen möchtest
- Wähle Duplizieren, um die Aktion abzuschließen
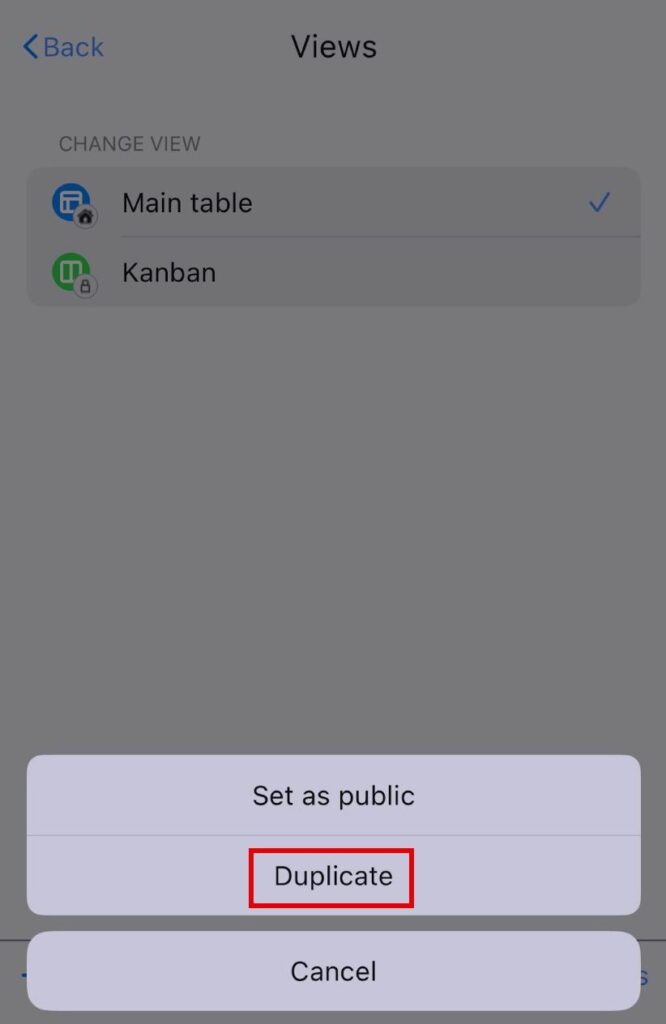
- Tippe auf Board-Ansicht konfigurieren oben rechts
- Tippe auf Ansichten
- Wische auf einer Ansicht nach links
- Tippe auf Weitere Optionen
- Wähle Duplizieren
- Öffne die bevorzugte Ansicht
- Tippe auf die drei Punkte oben rechts
- Tippe auf Ansicht umbenennen
Private Ansicht #
Diese Funktion ist in den Pro- und Enterprise-Plänen verfügbar.
Private Ansichten bieten eine dedizierte, persönliche Ansicht, die nur dem Ersteller zur Verfügung steht. Dadurch kann der Ersteller der Ansicht den Status von Aufgaben, Updates und Projekten verfolgen, ohne andere Board-Benutzer zu beeinträchtigen.
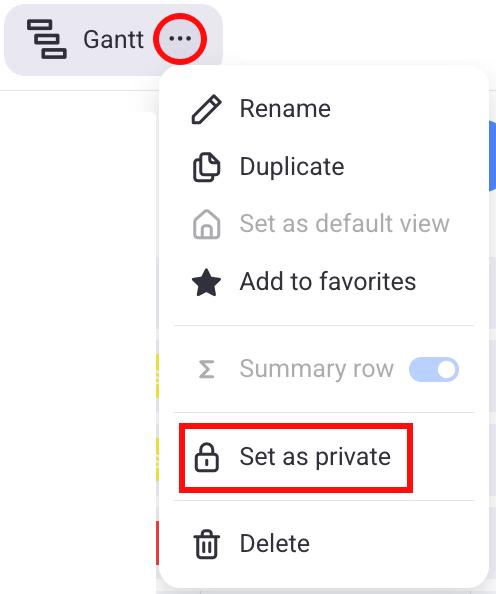
So machst du eine öffentliche Ansicht privat: #
- Klicke auf die drei Punkte neben der Ansicht
- Klicke auf Als privat festlegen
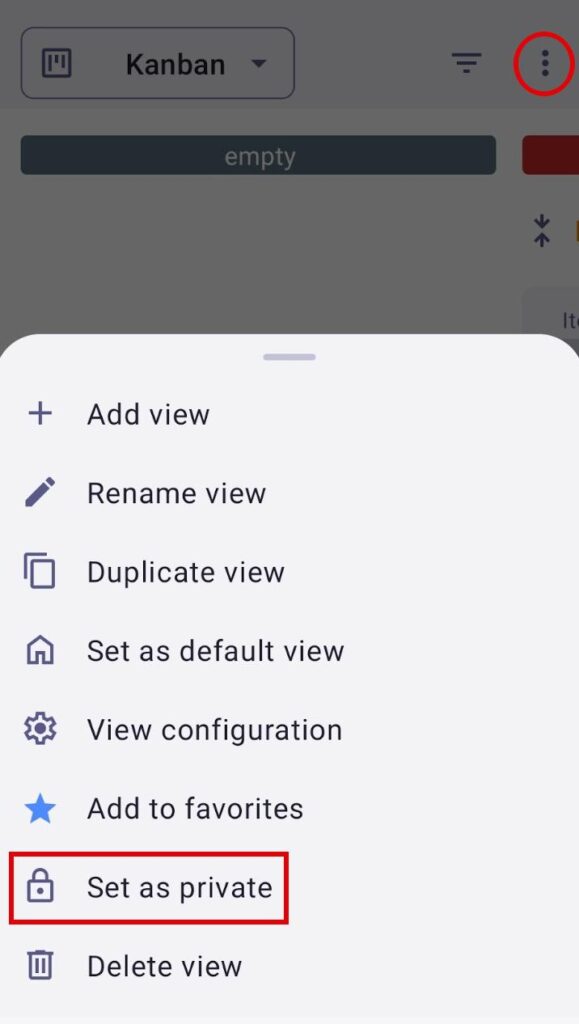
- Tippe auf Board-Ansicht-Konfiguration oben rechts
- Tippe auf Ansichten
- Wische auf einer Ansicht nach links
- Tippe auf Weitere Optionen
- Wähle Als privat festlegen
- Tippe auf die drei Punkte oben rechts
- Tippe auf Als privat festlegen
Private Ansichten sind nur für die Ersteller der Ansicht oder die Person sichtbar, die die Privatsphäre-Einstellungen der Ansicht geändert hat (von öffentlich auf privat), während öffentliche Ansichten für andere Benutzer sichtbar bleiben.
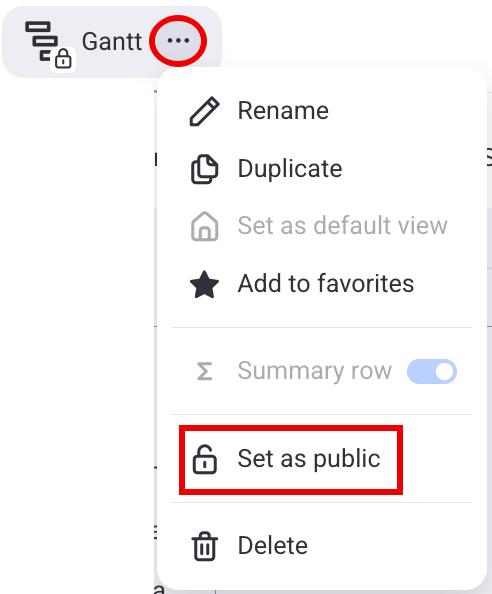
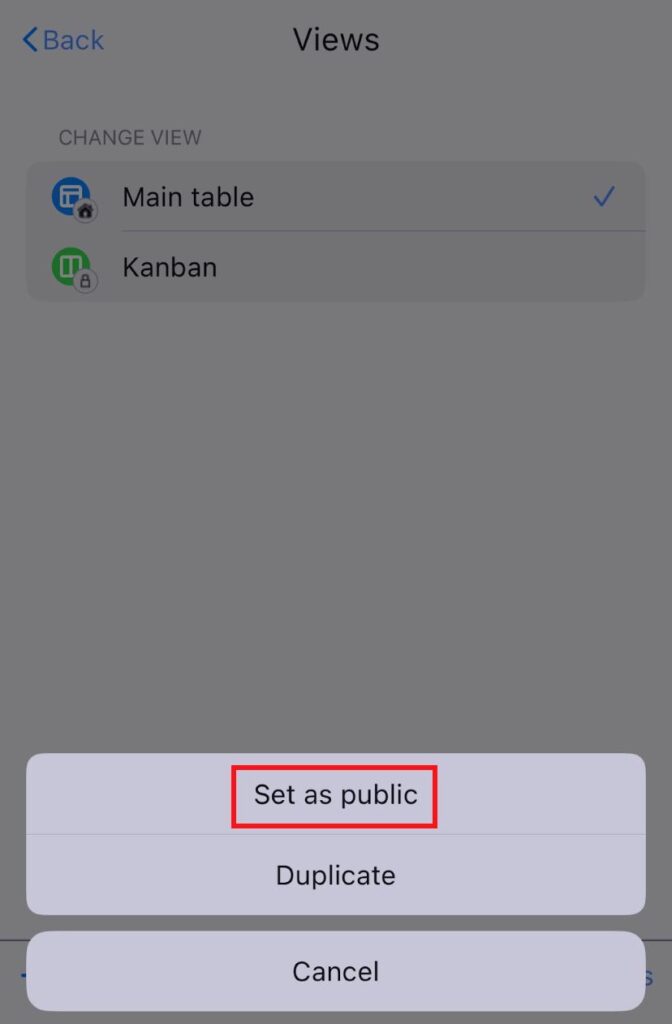
So machst du eine private Ansicht öffentlich: #
- Klicke auf die drei Punkte neben der Ansicht
- Klicke auf Als öffentlich festlegen
- Tippe auf Board-Ansicht-Konfiguration oben rechts
- Tippe auf Ansichten
- Wische auf einer Ansicht nach links
- Tippe auf Weitere Optionen
- Wähle Als öffentlich festlegen
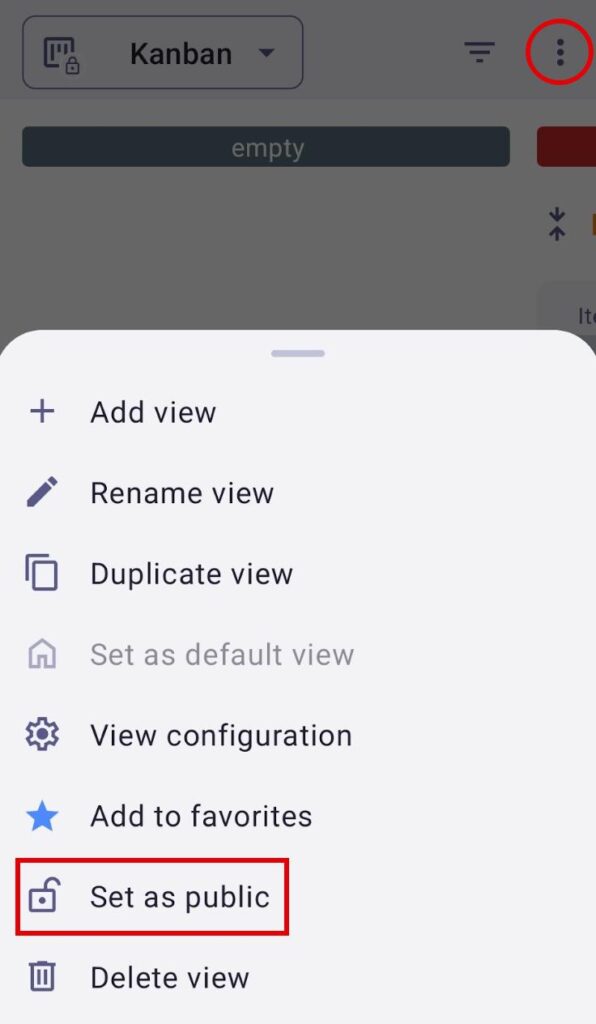
- Tippe auf die drei Punkte oben rechts
- Tippe auf Als öffentlich festlegen
Die Funktion „Private Ansicht“ ist nur Administratoren und Mitgliedern verfügbar. Wenn die Board-Berechtigungen auf etwas anderes als „Alles bearbeiten“ eingestellt sind, dürfen Benutzer, die keine Board-Inhaber sind, private Ansichten erstellen, ihre bereits vorhandene private Ansicht umbenennen, duplizieren oder löschen, aber sie können nicht diese in öffentliche Ansichten umwandeln.
Ansichten neu anordnen #
- Klicke auf eine Ansicht und halte sie gedrückt
- Ziehe die Ansicht an die gewünschte Stelle
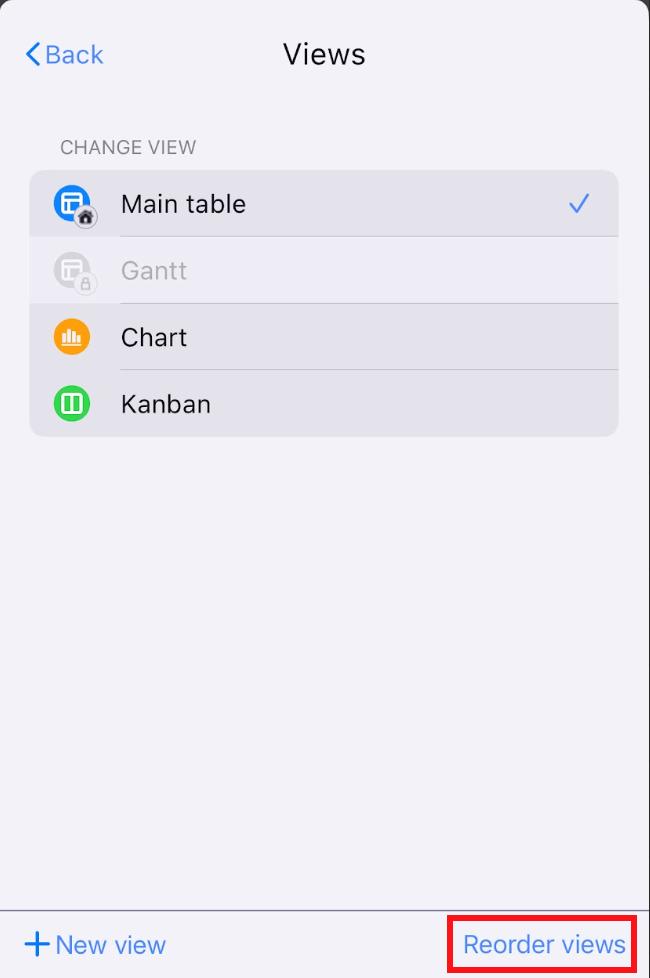
- Tippe auf Board-Ansicht-Konfiguration oben rechts
- Tippe auf Ansichten
- Tippe auf Ansichten neu anordnen
- Ziehe die Ansichten per Drag & Drop, um sie neu anzuordnen
- Tippe auf Erledigt, um die Aktion abzuschließen
BALD VERFÜGBAR
Die Standardansicht ist weiterhin die erste Ansicht.
Sowohl Administratoren als auch Mitglieder können Ansichten sortieren, es sei denn, ihre Zugriffsebene auf dem Board ist aufgrund bestimmter Board-Berechtigungen, die vom Board-Inhaber festgelegt wurden, eingeschränkt.
Die Neuanordnung der Ansichten umfasst nicht die privaten Ansichten der Benutzer, da die neue Reihenfolge der Ansichten angewendet wird und für alle Benutzer sichtbar ist.
Favoritenansicht hinzufügen #
- Klicke auf die drei Punkte neben der Ansicht
- Klicke auf Zu Favoriten hinzufügen
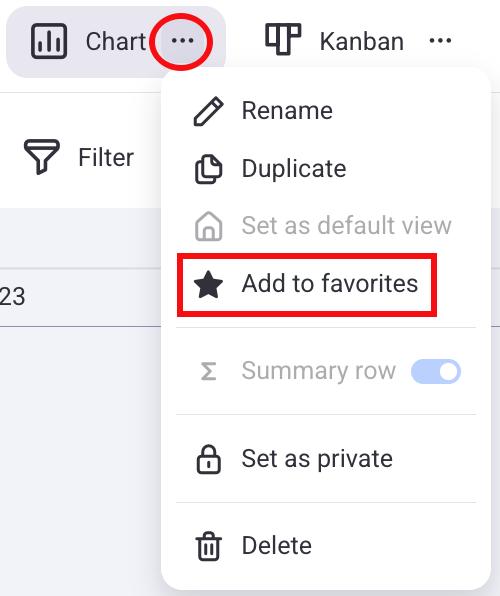
Diese Ansicht wird neben der Standardansicht platziert und neben ihrem Namen wird ein Sternsymbol angezeigt. Um eine Ansicht aus den Favoriten zu entfernen, klicke einfach auf die drei Punkte daneben und wähle „Nicht als Favorit markieren“.
- Tippe auf Board-Ansicht-Konfiguration oben rechts
- Tippe auf Ansichten
- Wische die gewünschte Ansicht nach rechts
- Tippe auf Zu Favoriten hinzufügen
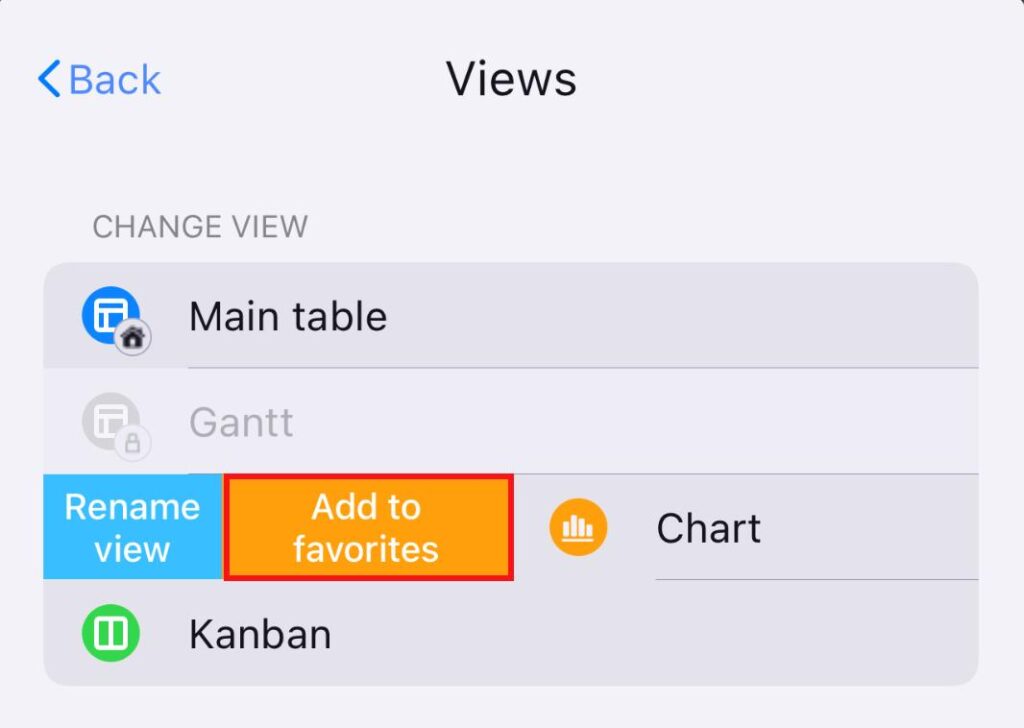
Diese Ansicht wird neben der Standardansicht platziert und neben deinem Namen wird ein Sternsymbol angezeigt. Um eine Ansicht aus den Favoriten zu entfernen, wische erneut nach links und wähle „Nicht als Favorit markieren“.
- Tippe auf die drei Punkte oben rechts
- Tippe auf Zu Favoriten hinzufügen
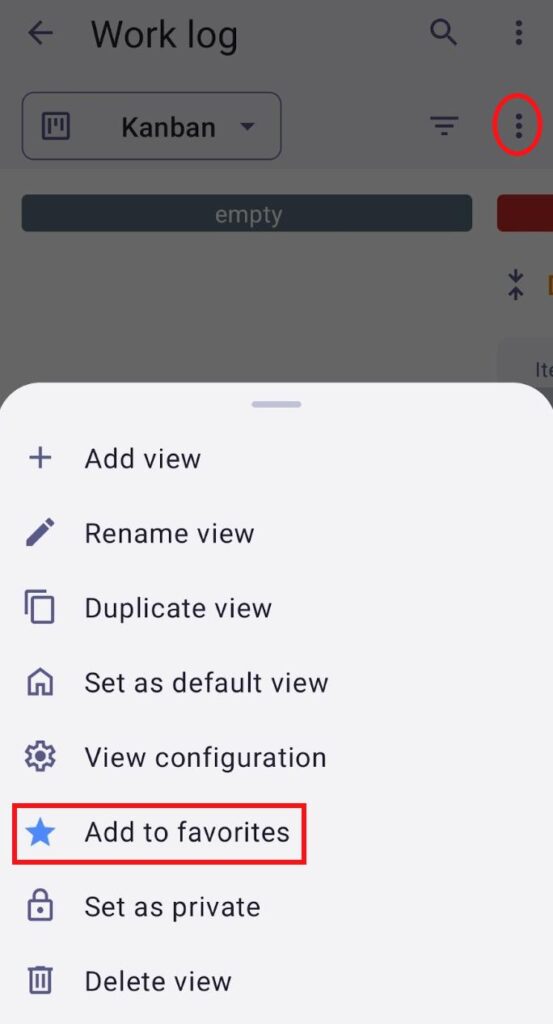
Diese Ansicht wird neben der Standardansicht platziert und neben ihrem Namen wird ein Sternsymbol angezeigt. Um eine Ansicht aus den Favoriten zu entfernen, tippe auf die drei Punkte daneben und wähle „Nicht als Favorit markieren“.
Wenn eine Ansicht als Favorit festgelegt ist, ist die Änderung nur für den Benutzer sichtbar, der die bevorzugte Ansicht festgelegt hat, und wirkt sich nicht auf andere Benutzer auf dem Board aus. Die Standardansicht kann nicht als Favorit markiert werden.
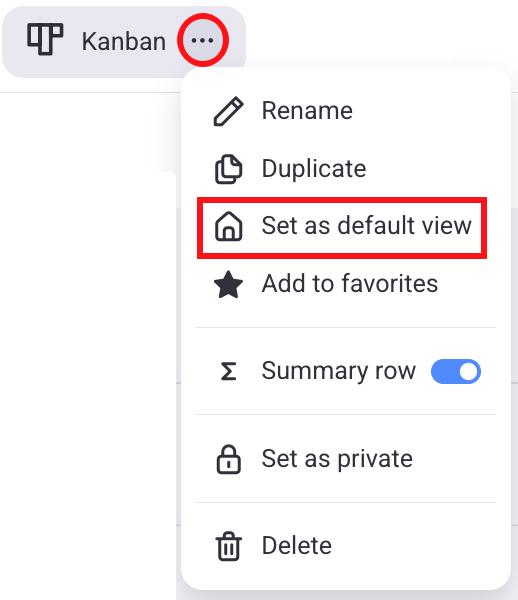
Standardansicht festlegen #
Jedes Board muss mindestens eine Ansicht enthalten. Beim Erstellen eines Boards wird automatisch eine Tabellenansicht generiert und als Hauptansicht (Standardansicht) festgelegt. Stattdessen kann jedoch jede andere Ansicht auf dem Board als Standardansicht festgelegt werden. Die Standardansicht kann nicht als Favoriten-Ansicht festgelegt werden. Nur der Board-Inhaber kann eine Ansicht als Standard festlegen.
- Klicke auf die drei Punkte neben der Ansicht
- Klicke auf Als Standardansicht festlegen
- Tippe auf Board-Ansicht-Konfiguration oben rechts
- Tippe auf Ansichten
- Wische die gewünschte Ansicht nach rechts
- Tippe auf Als Standardansicht festlegen
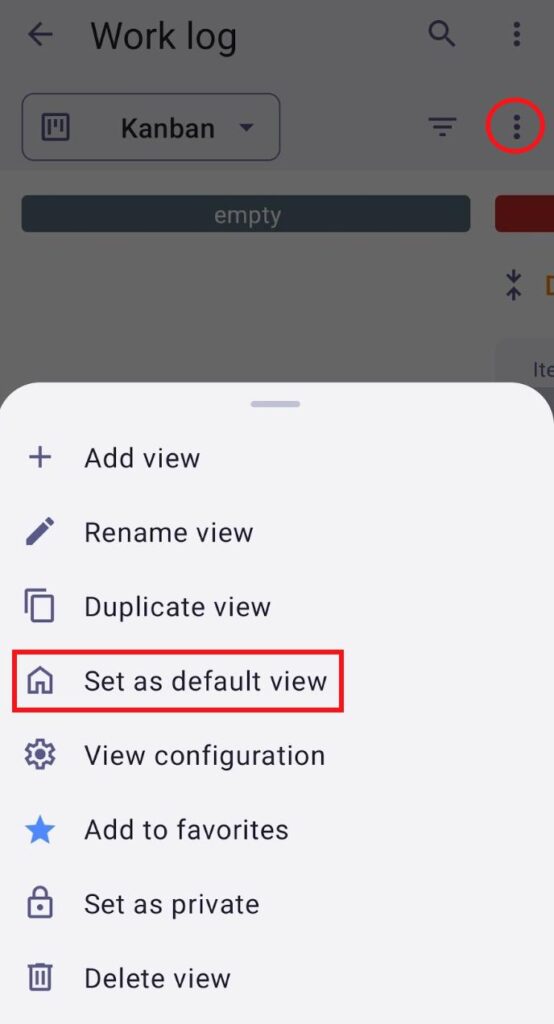
- Tippe auf die drei Punkte oben rechts
- Tippe auf Als Standardansicht festlegen