Archive and Trash sections
In this article
Plaky gives you two ways to remove content from your active Workspace without permanently losing it. The Archive section lets you preserve content indefinitely, while the Trash section stores all deleted content for 30 days before removing it.
Archive vs. Trash — differences #
| Archive | Trash |
|---|---|
| Content is hidden from Boards but is still preserved with no expiration. | Content stays in Trash for 30 days, and is then permanently and irreversibly deleted. |
| Archived content is viewable and can be restored at any time. | Deleted content can be viewed and restored during the 30-day window. |
| Good for completed projects, or finished Items you may need to reference later. | Good for content you intend to remove but still need a safety net for. |
Archive section #
With the Archive feature, you can organize your Workspace methodically and preserve content you no longer need. You can archive:
- Quadros
- Item groups
- Itens
- Subitems
Let’s look at how you can archive these in more detail.
How to archive content #
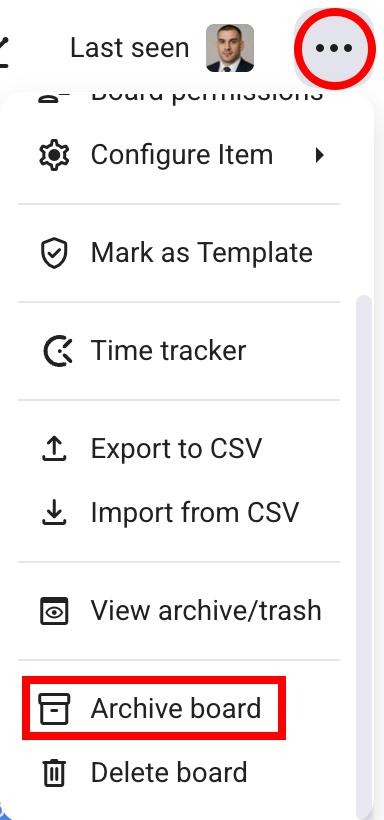
Archive Boards:
- Click on the three dots in the top right corner to open the board menu
- Select Archive board
- Confirme a ação
- Abra um quadro
- Toque nos três pontos no canto superior direito
- Tap on Archive board
- Confirme a ação
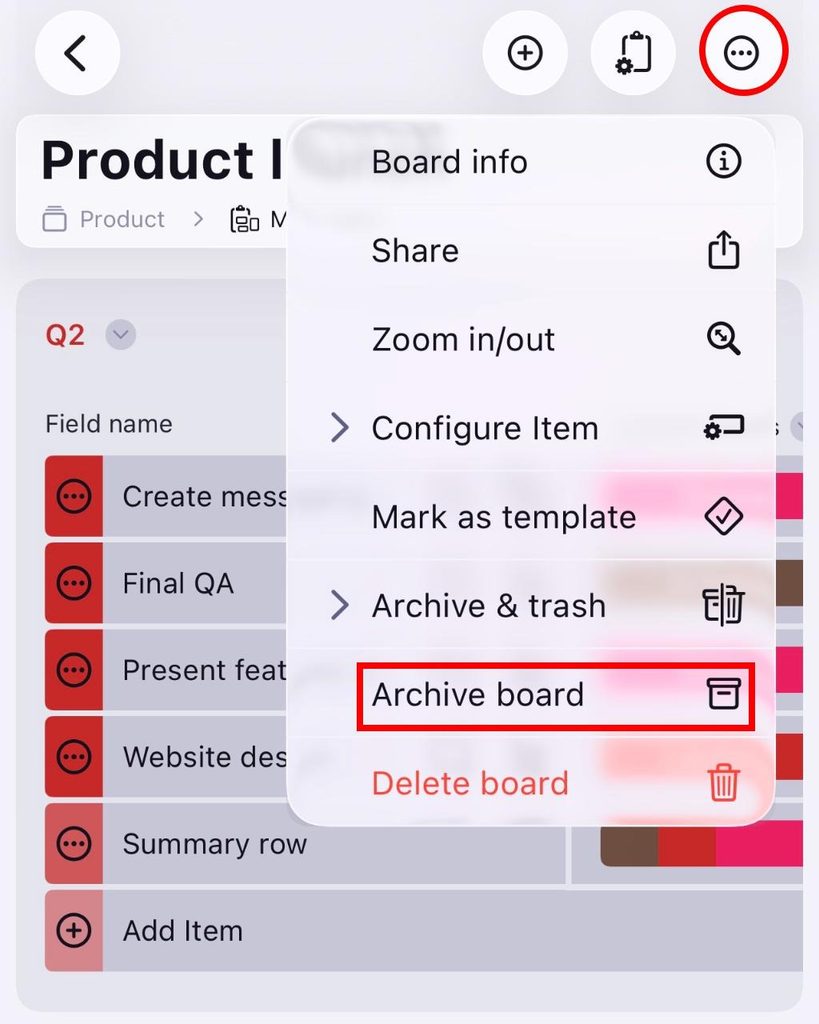
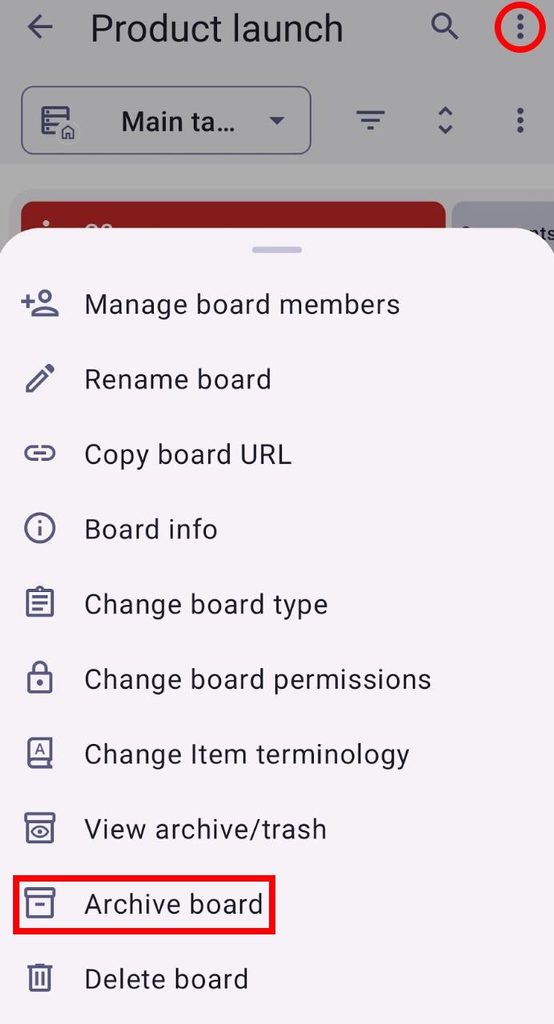
- Abra um quadro
- Toque nos três pontos no canto superior direito
- Tap on Archive board
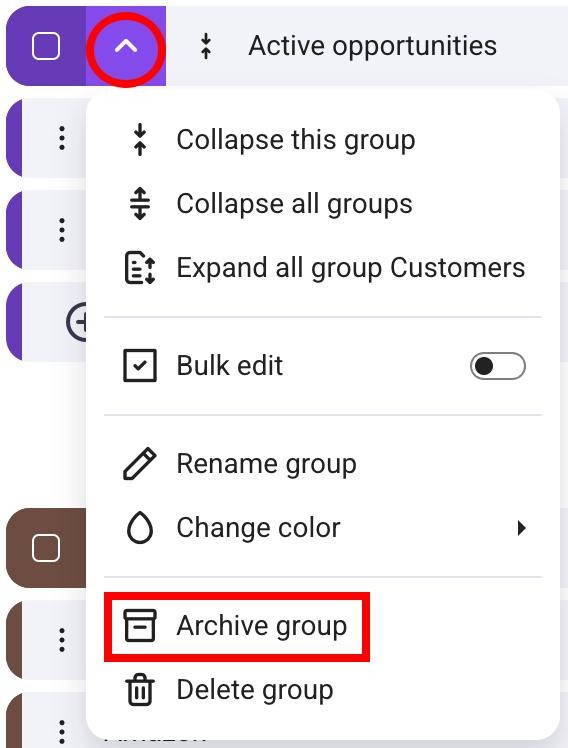
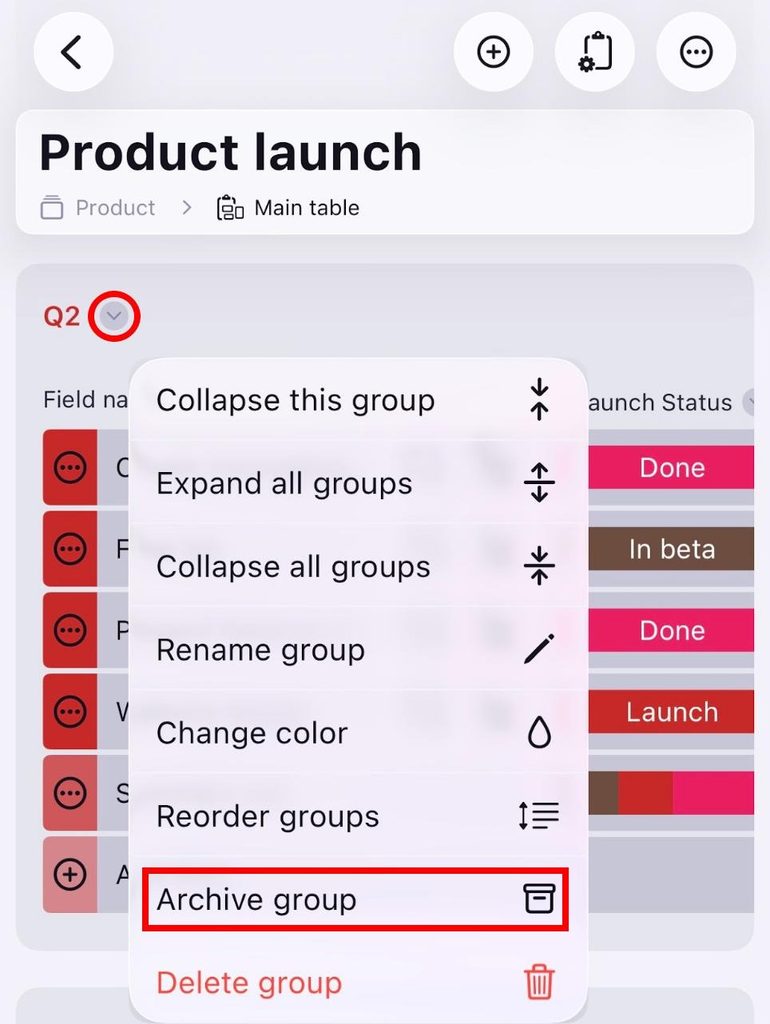
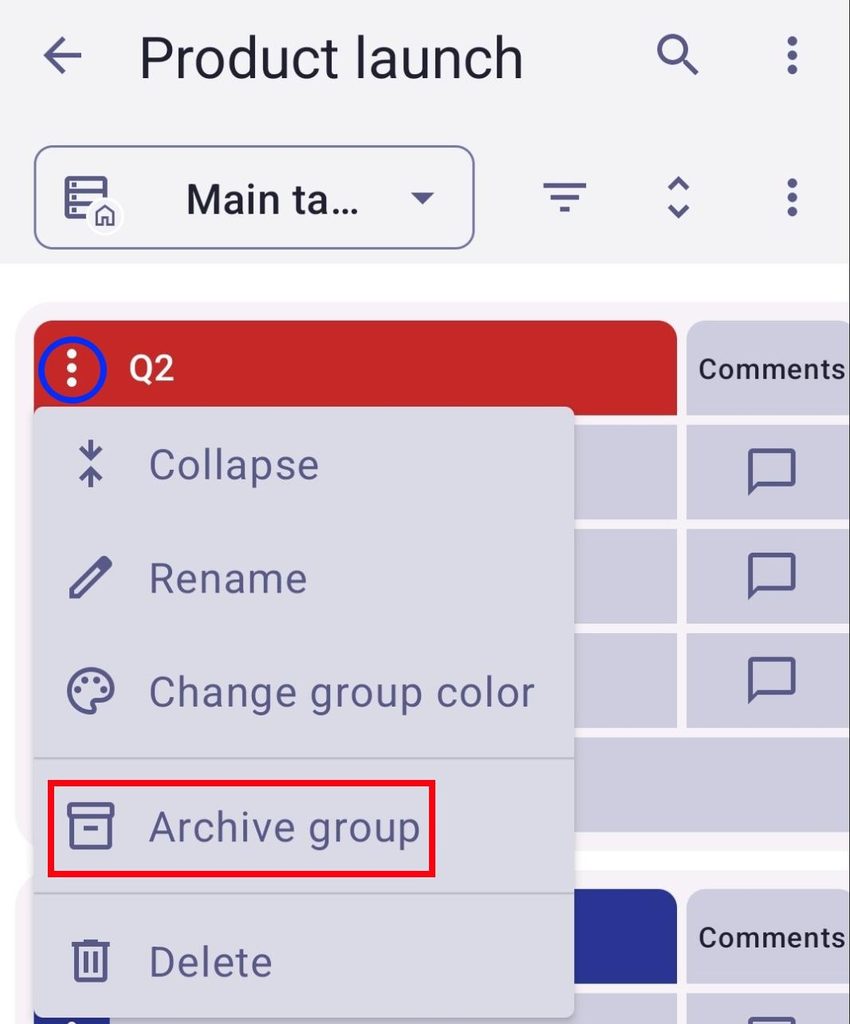
Archive Item groups:
- Clique na seta ao lado do nome do grupo de itens para abrir o menu do grupo de itens
- Selecione Grupo de arquivos para concluir a ação
- Abra um quadro
- Tap on the arrow next to the Item group name
- Tap on Archive group
- Confirme a ação
- Abra um quadro
- Tap on the three dots next to an Item group
- Tap on Archive group
Archive Items:
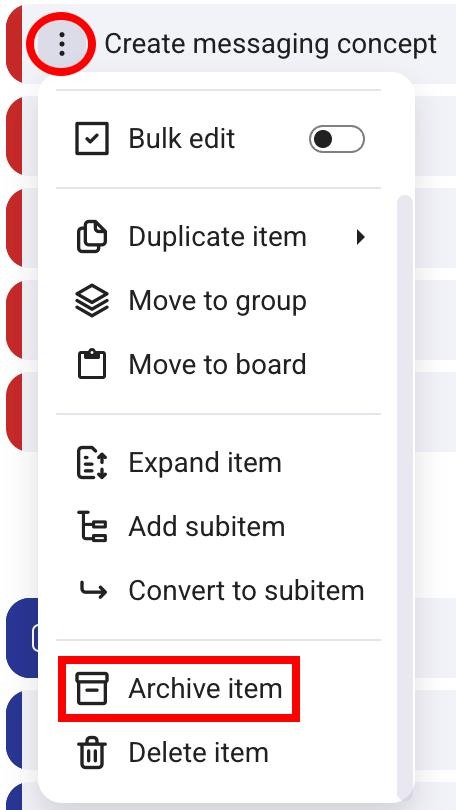
- Click on the three dots next to the item name to open the item menu
- Selecione Arquivar item para concluir a ação
- Toque nos três pontos ao lado de um item
- Select Archive
- Confirme a ação
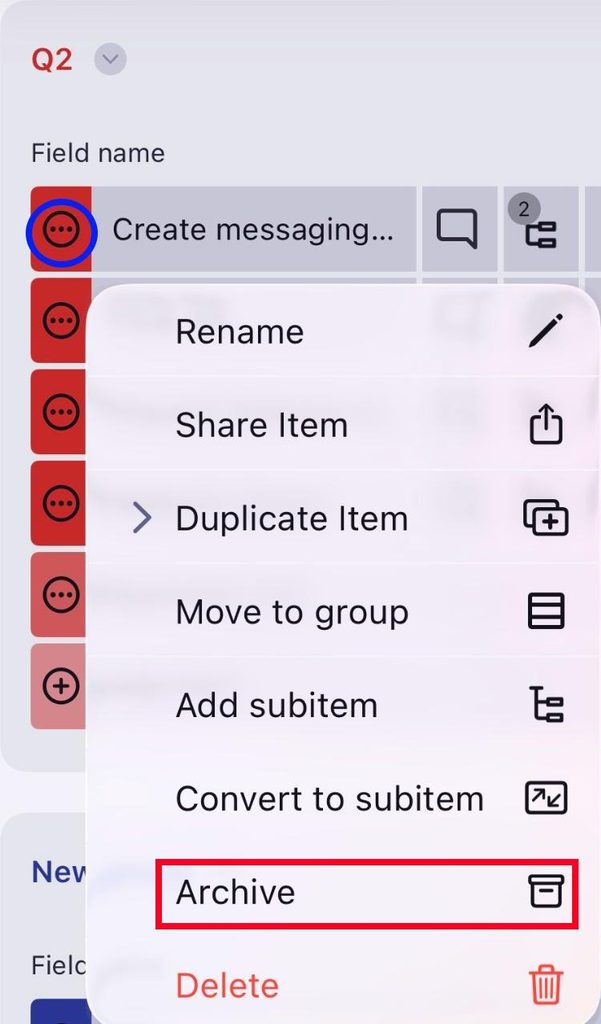
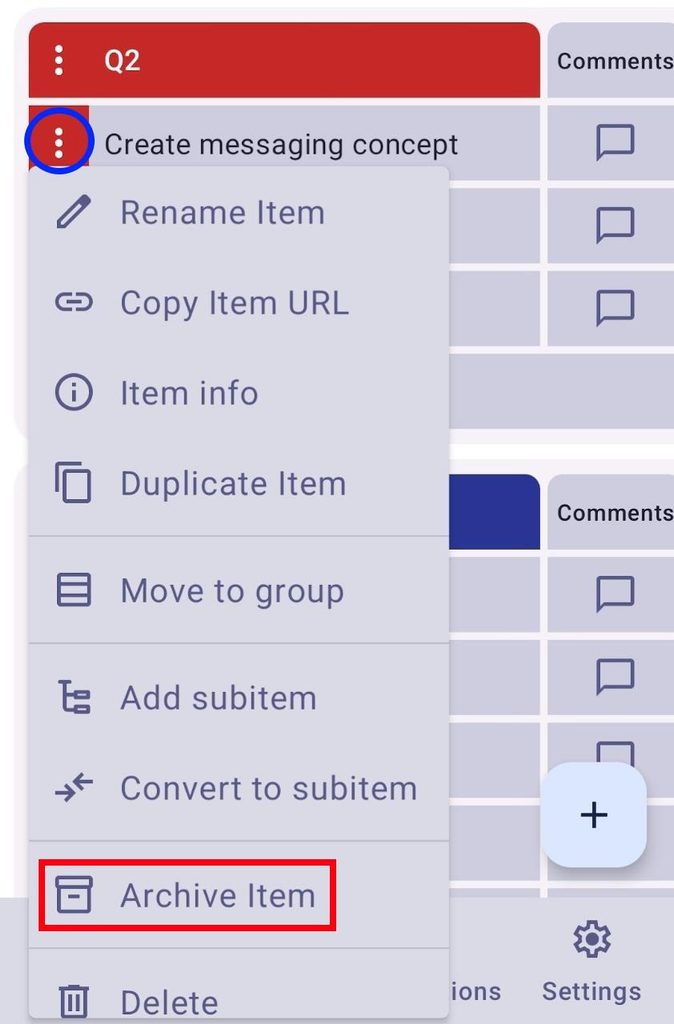
- ap on the three dots next to an Item
- Tap on Archive Item
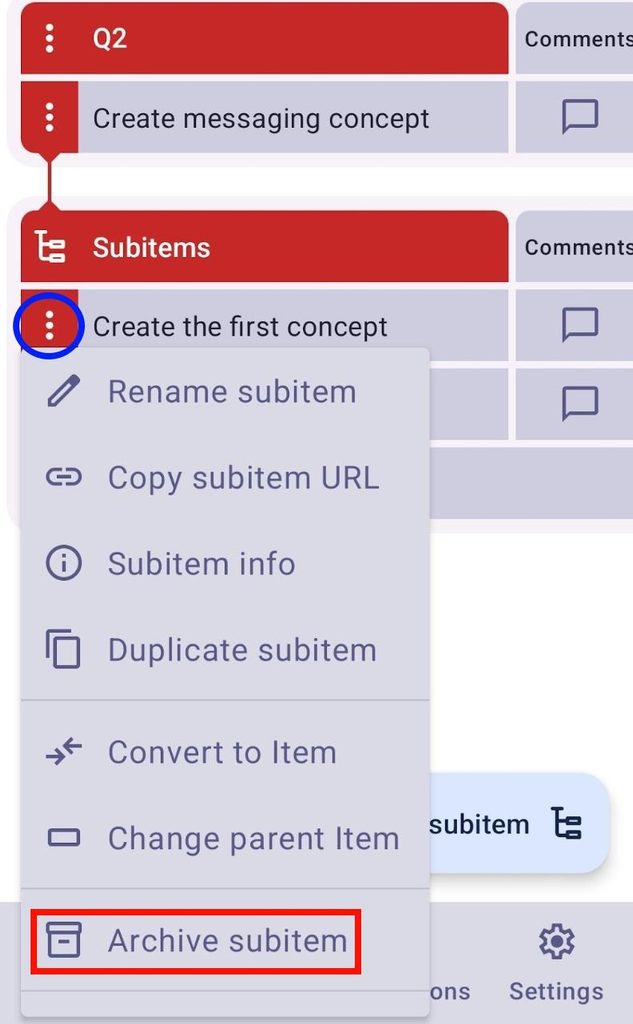
Archive Subitems:
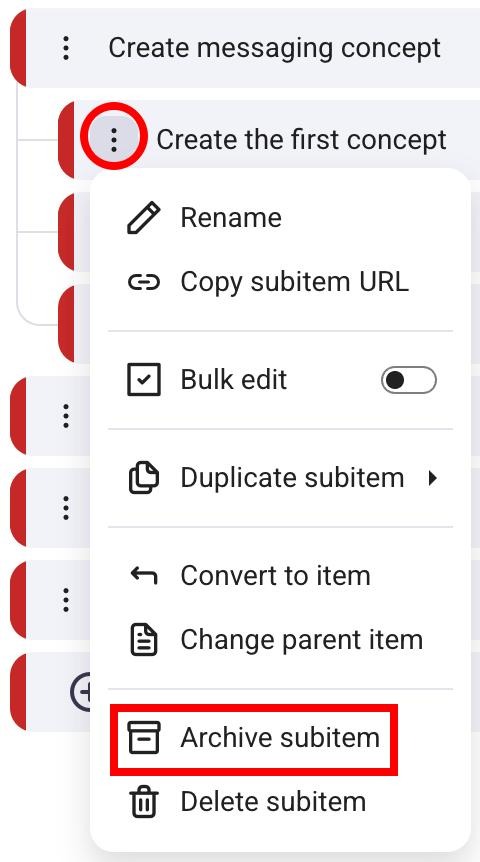
- Clique nos três pontos ao lado do nome do Subitem para abrir o menu do Subitem
- Select Archive subitem to complete the action
- Toque nos três pontos ao lado de um item
- Select Archive
- Confirme a ação
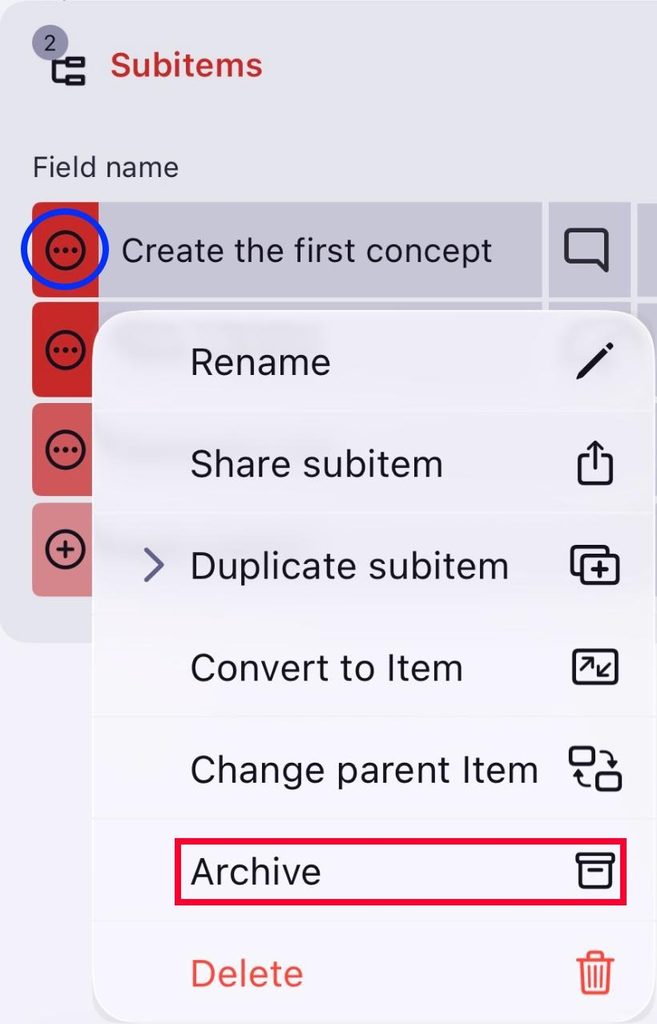
- Toque nos três pontos ao lado de um Subitem
- Tap on Archive subitem
Access archived content #
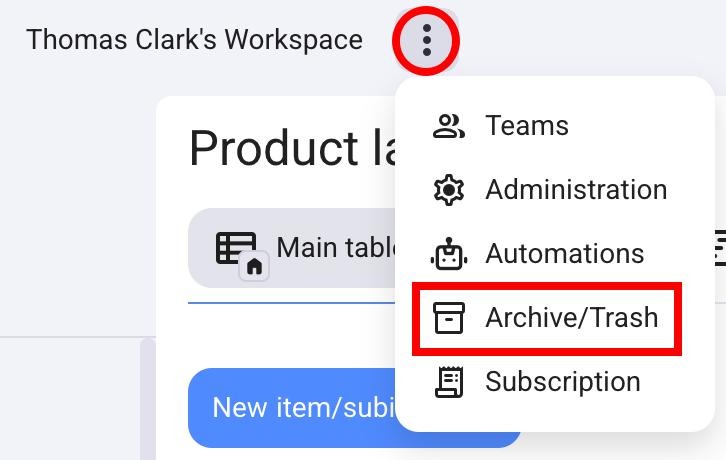
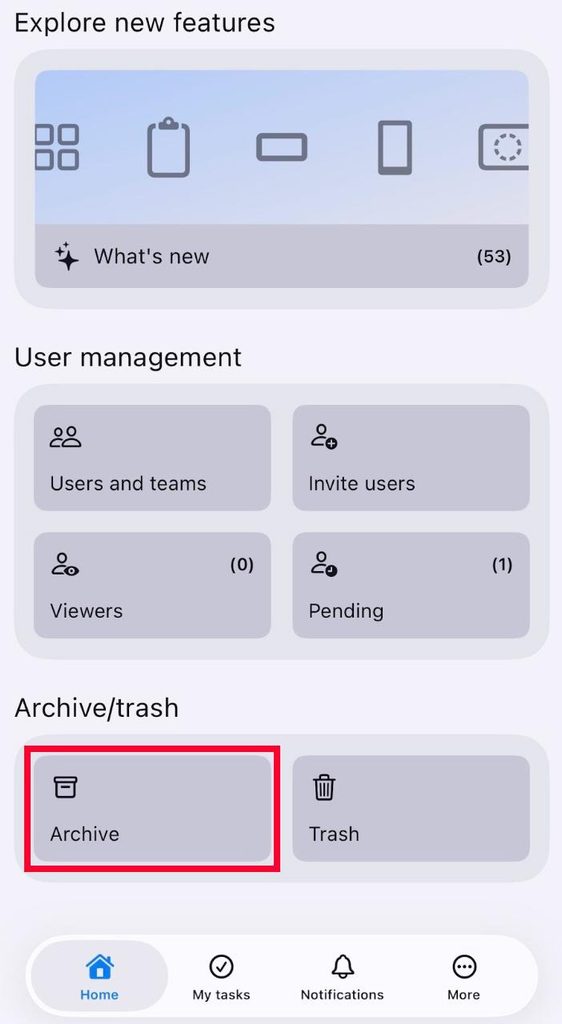
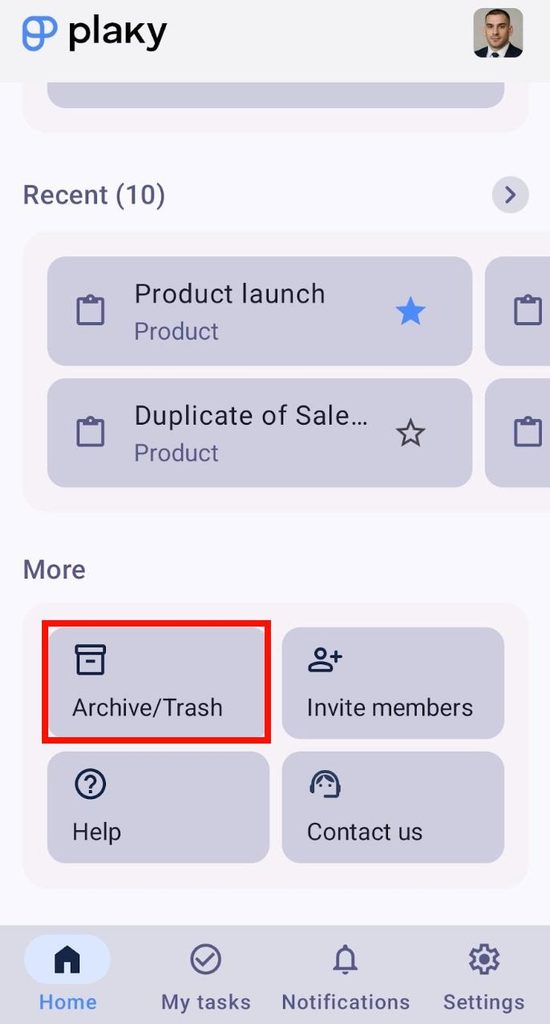
All archived content lives in the Archive/Trash panel. Here’s how you can access it:
- Clique nos três pontos ao lado do nome do seu espaço de trabalho
- Click on Archive/Trash
- Scroll down to the bottom of the Home screen
- Tap on Archive
- Scroll down to the bottom of the Home screen
- Tap on Archive/Trash
From here, you can manage your archived content further.
Actions in Archive #
You can view, restore, or move content to Trash in the Archive section.
You can only view Items in the Archive.
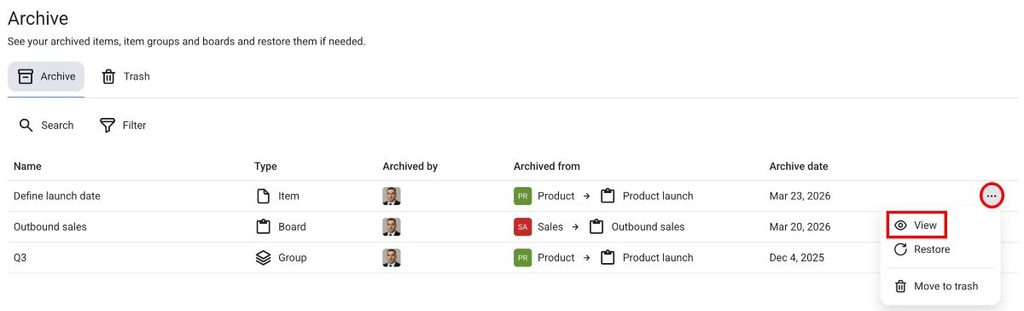
To view content in the Archive:
- Open the Archive panel
- Click on the three dots on the right side
- Click on View
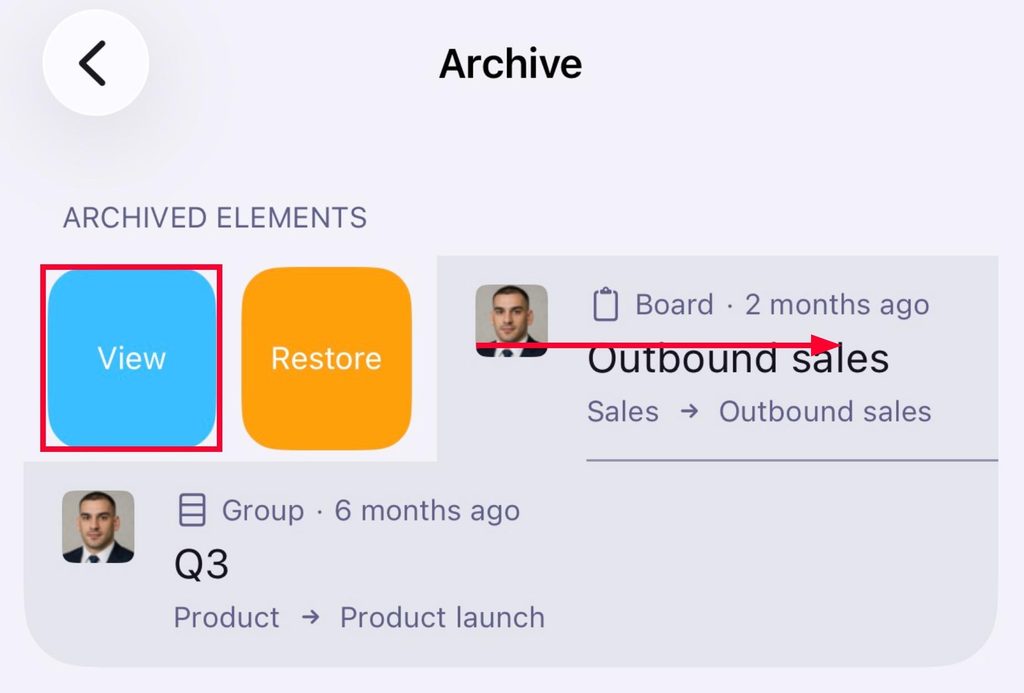
- Open the Archive
- Swipe right on an Item
- Tap View
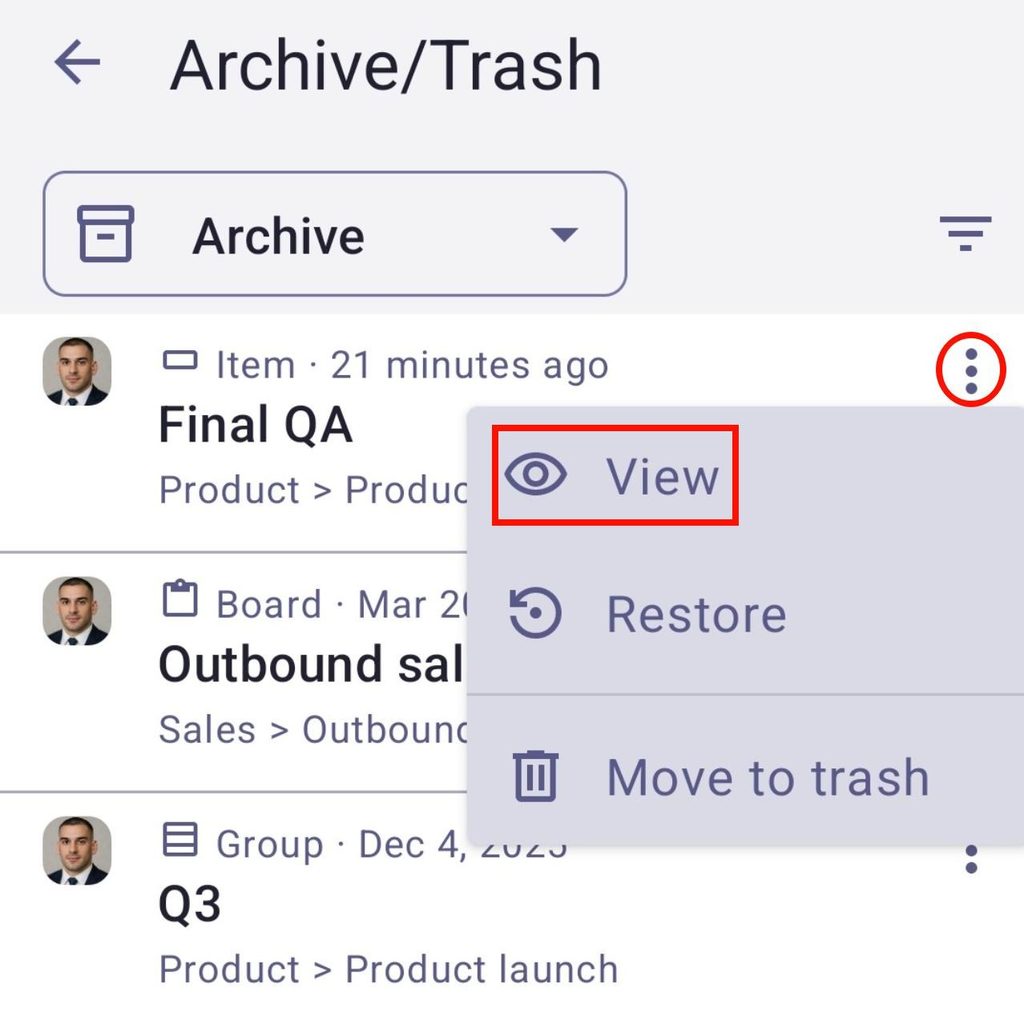
- Open Archive/Trash
- Tap on the three dots next to the archived content
- Tap View
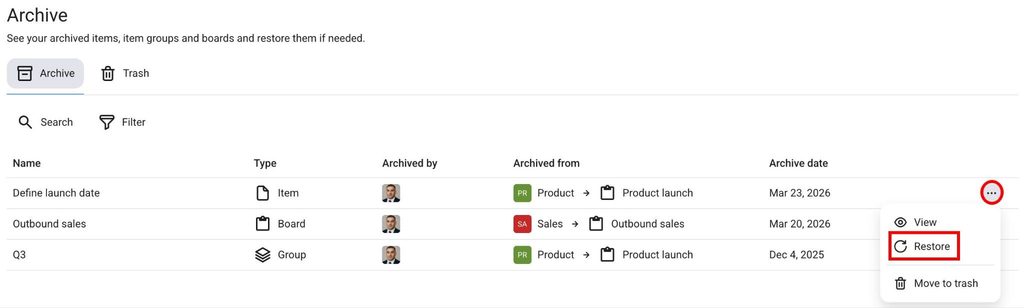
To restore content from the Archive:
- Open the Archive panel
- Click on the three dots on the right side
- Click on Restore
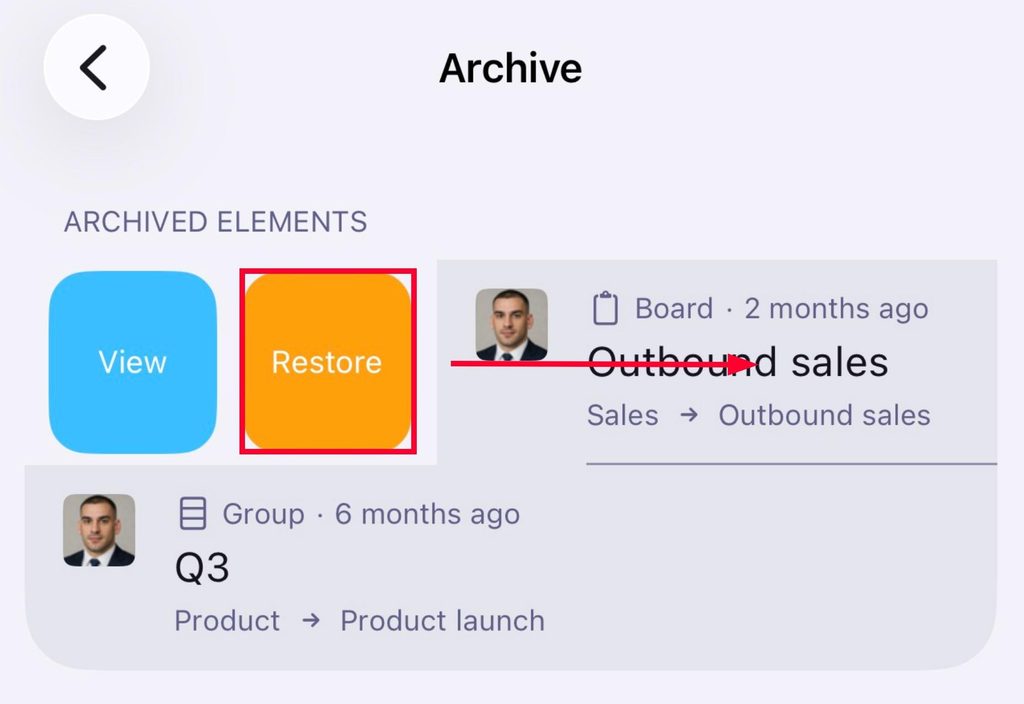
- Open the Archive
- Swipe right on content
- Tap on Restore
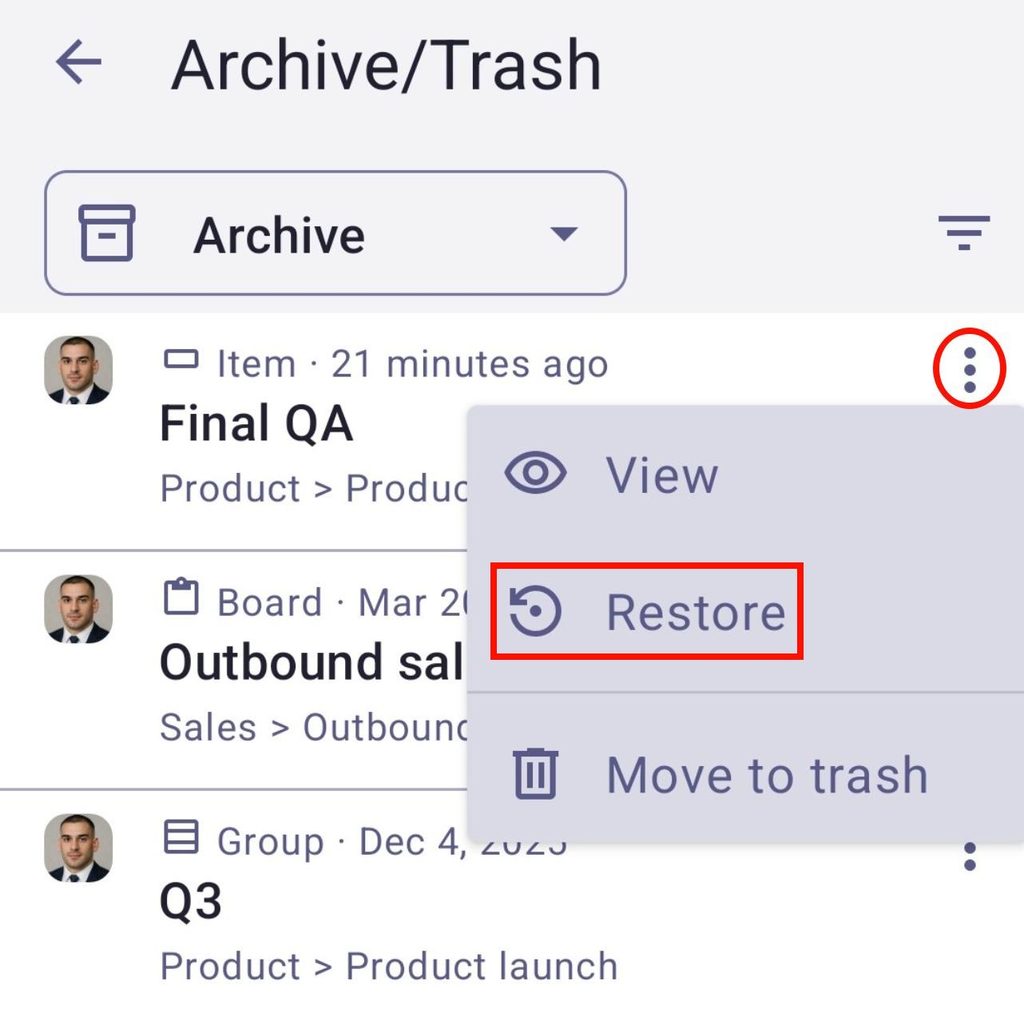
- Open Archive/Trash
- Tap on the three dots next to the archived content
- Tap Restore
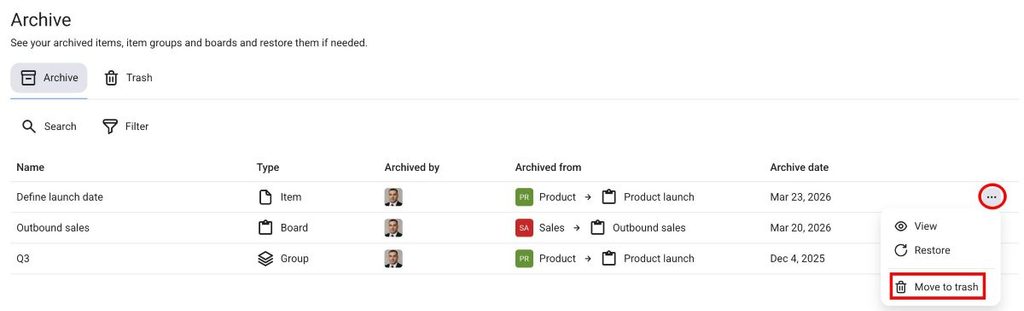
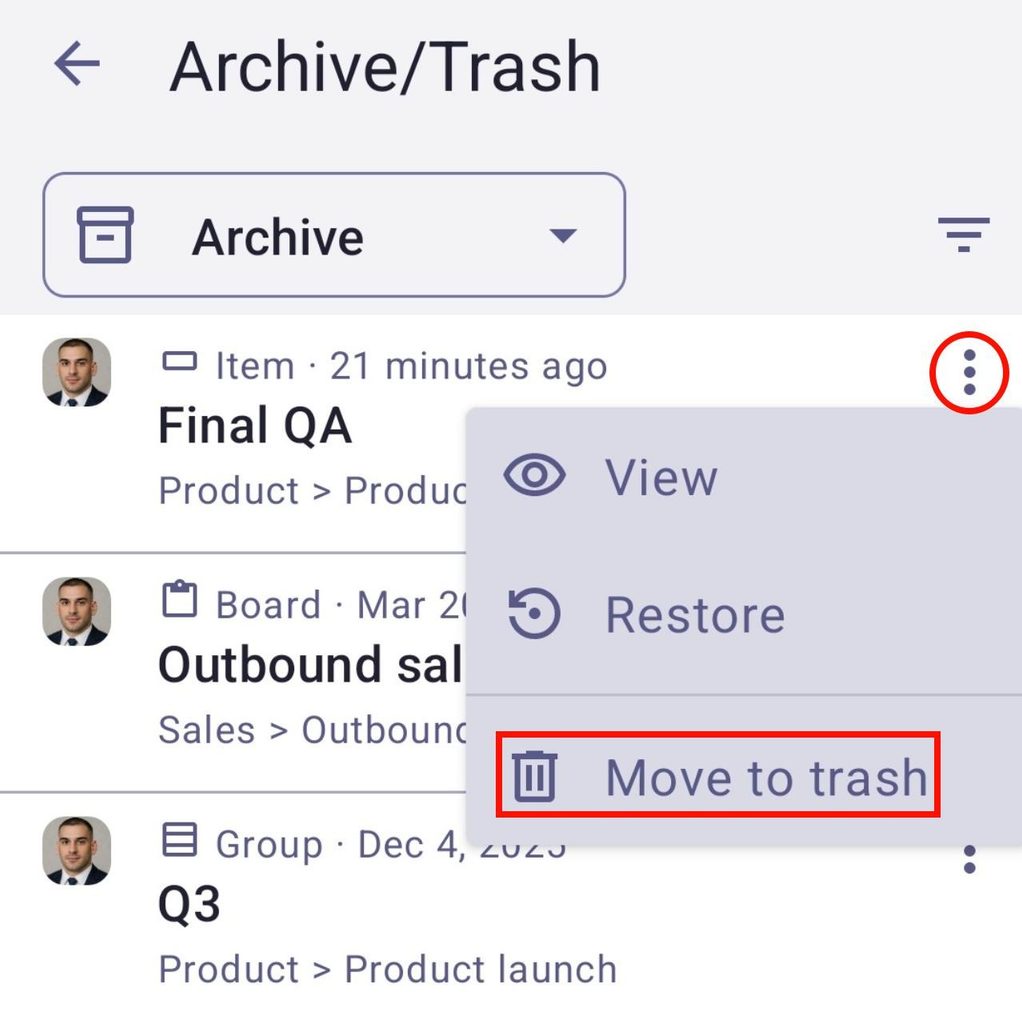
To move content to Trash from the Archive:
- Open the Archive panel
- Click on the three dots on the right side
- Click on Move to trash
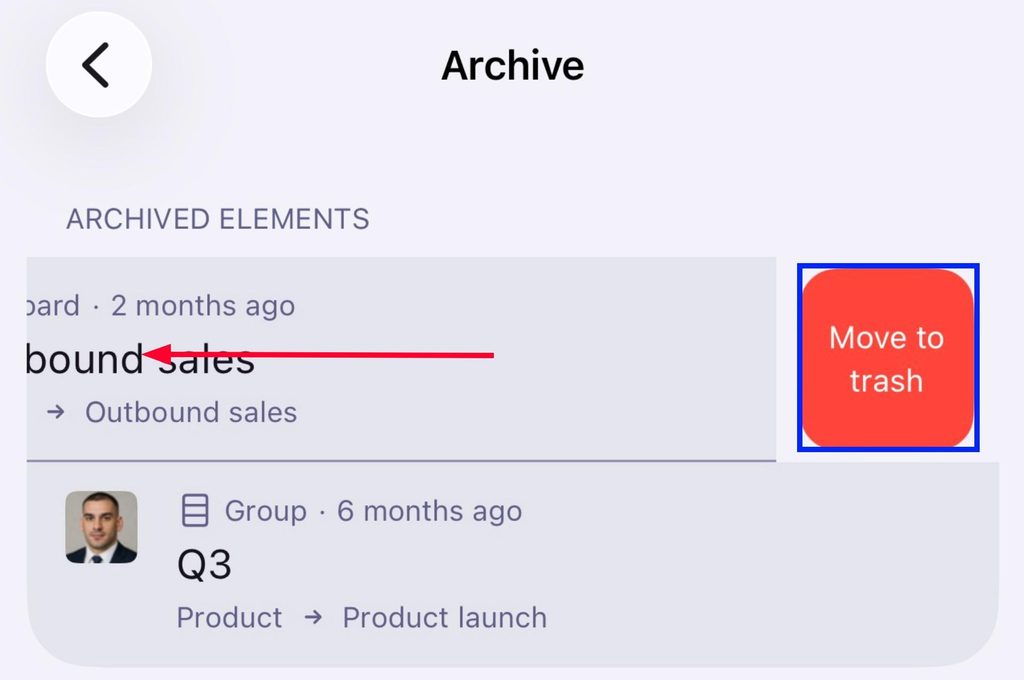
- Open the Archive
- Swipe left on content
- Tap on Move to trash
- Open Archive/Trash
- Tap on the three dots next to the archived content
- Tap Move to trash
Trash section #
The Trash section holds all deleted content in your Plaky Workspace for 30 days. The content ends up in Trash when you delete a Board, Item group, Item, or Subitem, or when you move archived content to Trash from the Archive panel.
After the 30-day period passes, the content in the Trash section will be permanently deleted.
Access the Trash section #
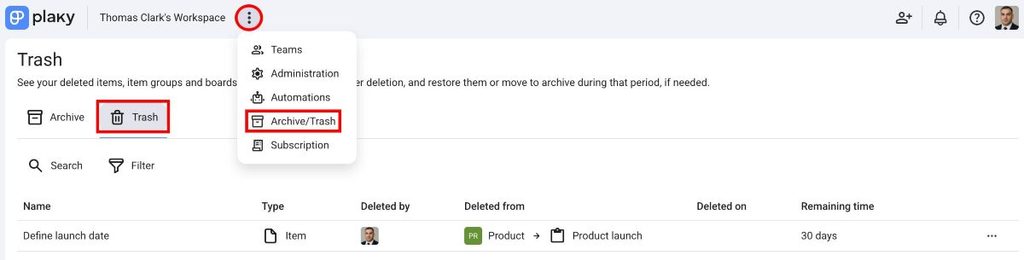
You can access the Trash section by following these steps:
- Clique nos três pontos ao lado do nome do seu espaço de trabalho
- Click on Archive/Trash
- Select the Trash panel
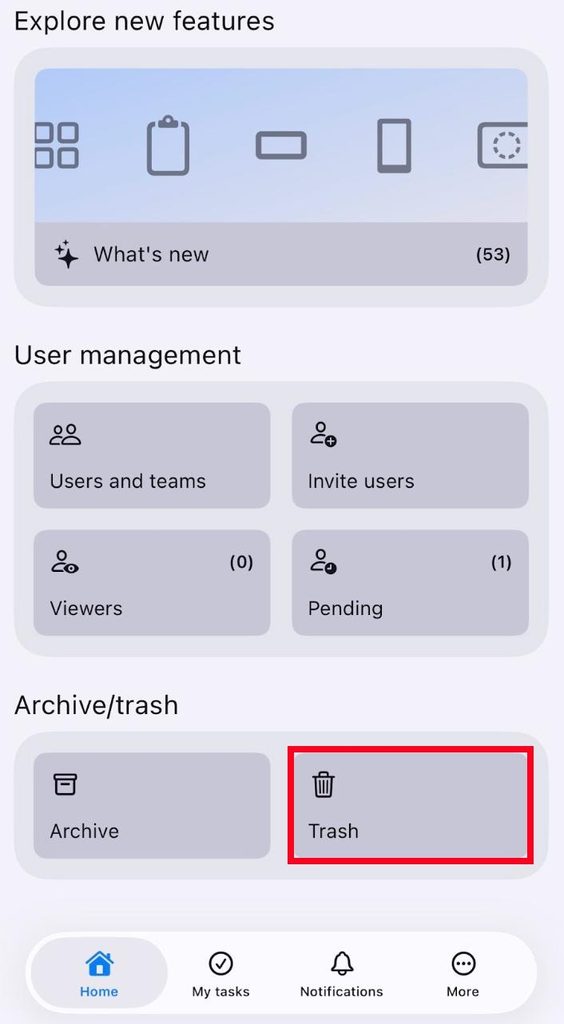
- Scroll down to the bottom of the Home screen
- Tap on Trash
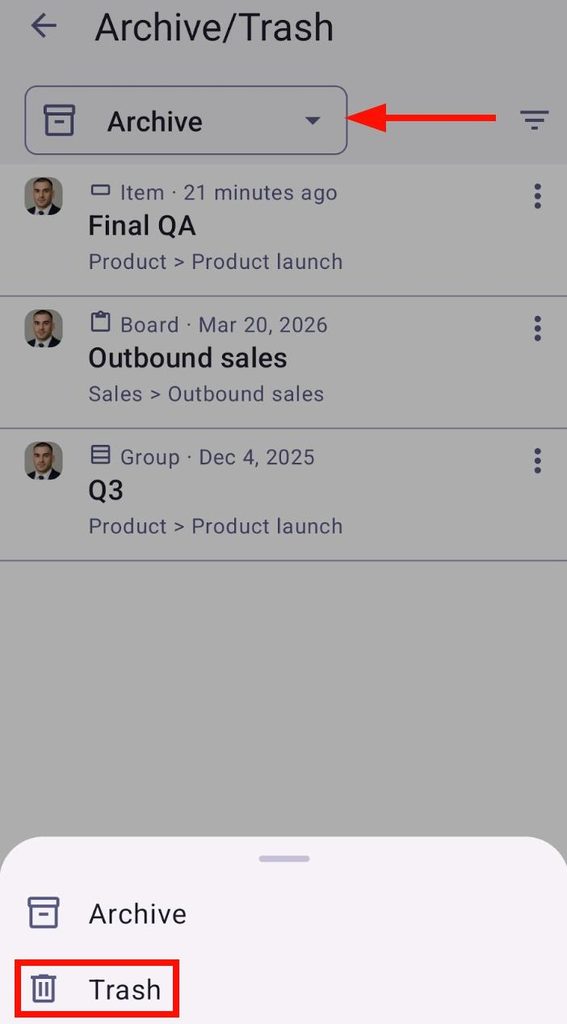
- Scroll down to the bottom of the Home screen
- Tap on Archive/Trash
- Select Trash from the dropdown
Actions in Trash #
You can perform the following actions from the Trash panel.
To view content from Trash:
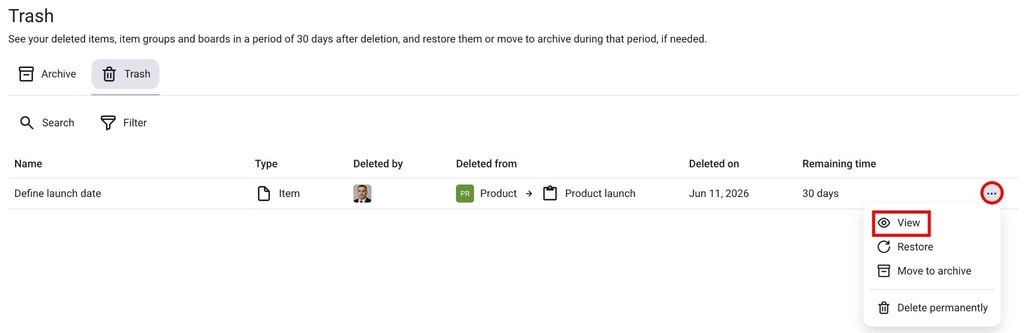
- Open the Trash panel
- Click on the three dots on the right side of the deleted entity
- Selecione Visualizar
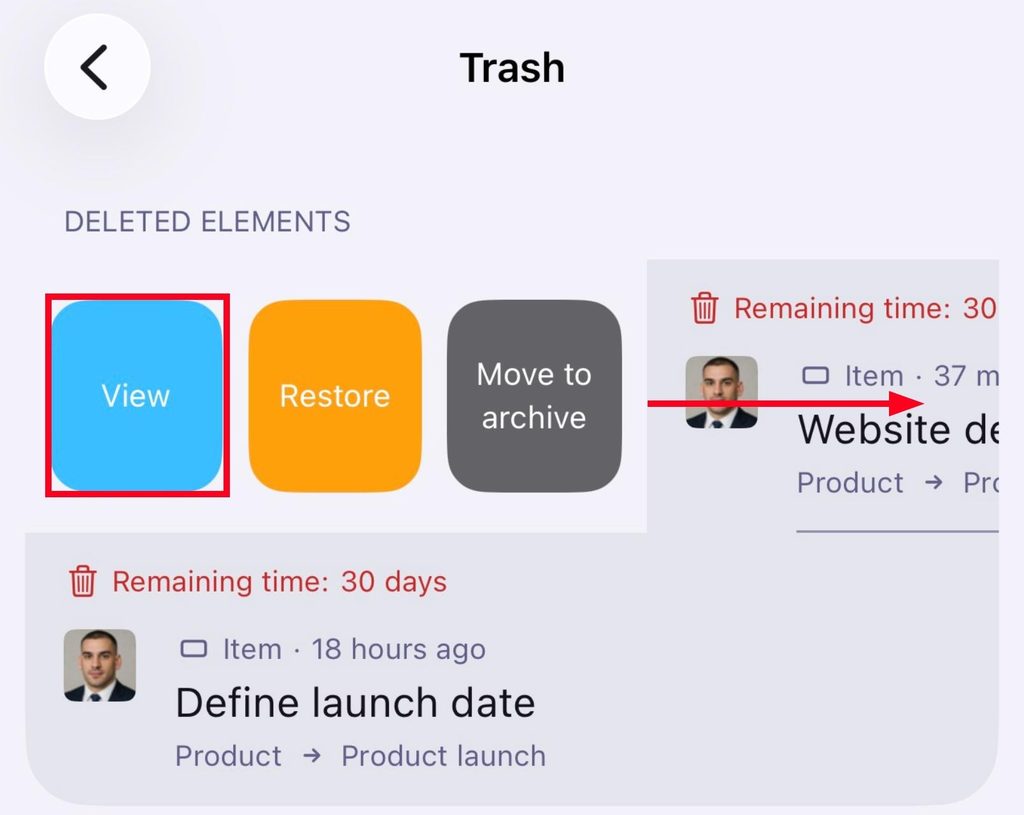
- Open Trash
- Swipe right on an Item
- Tap on View
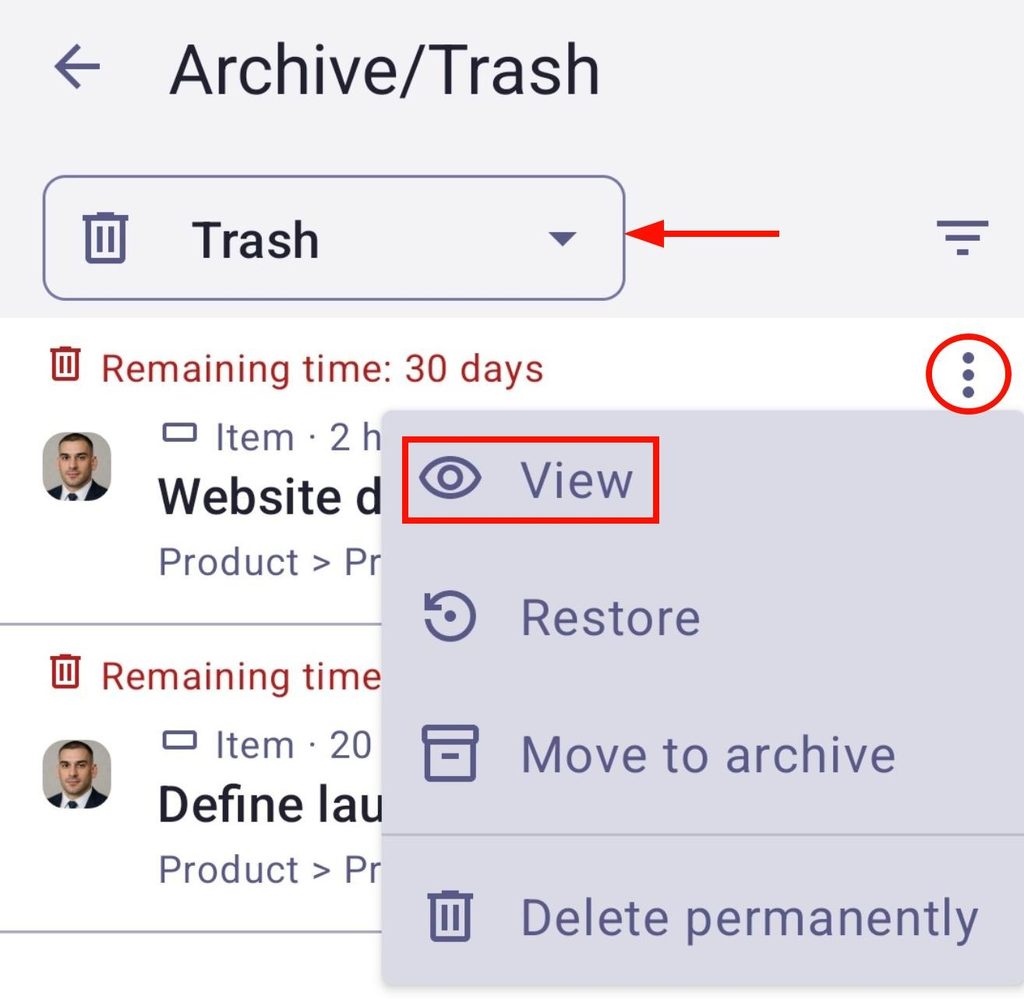
- Open Trash
- Tap on the three dots next to the content
- Tap on View
To restore content from Trash:
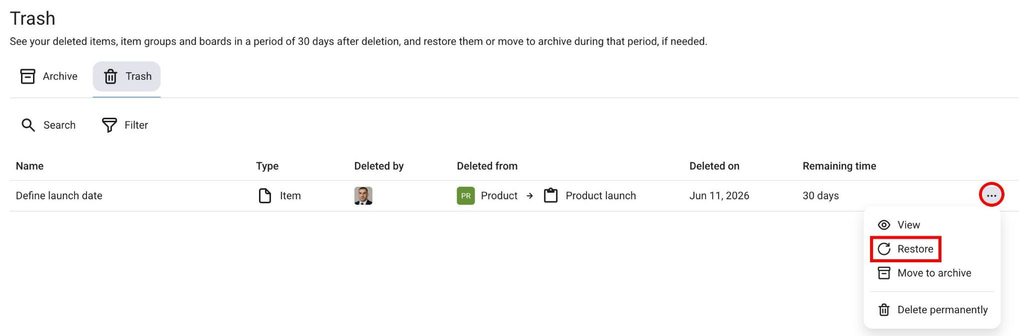
- Open the Trash panel
- Click on the three dots on the right side of the deleted entity
- Click on Restore
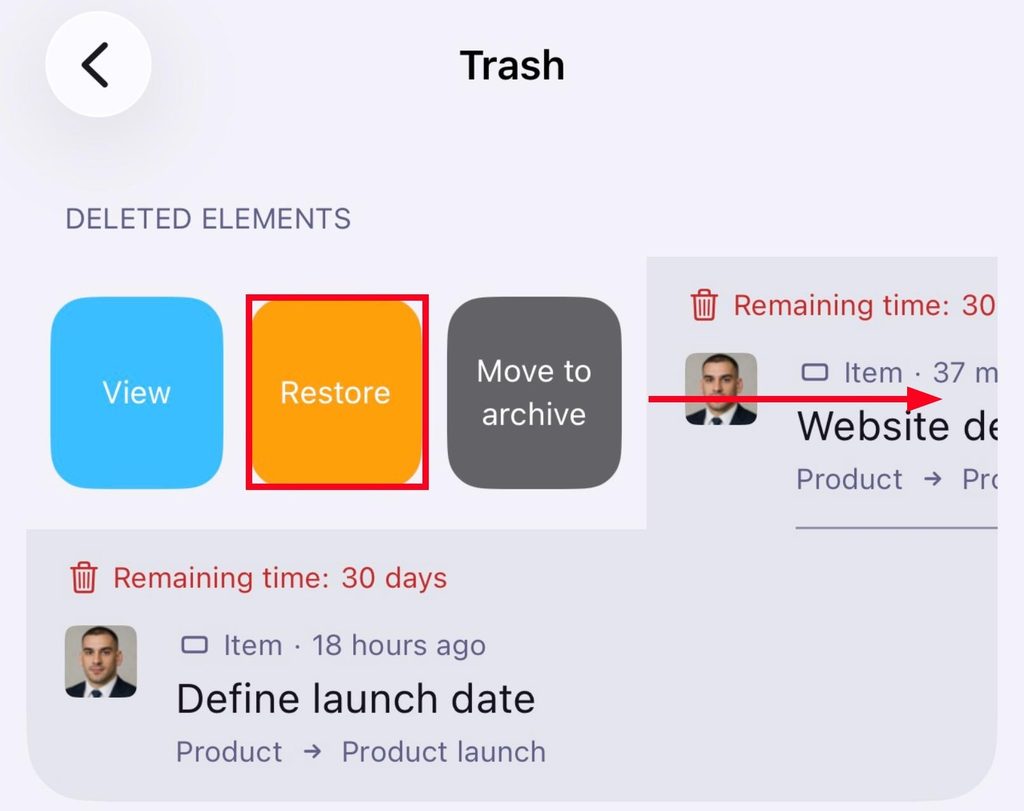
- Open the Trash
- Swipe right on an Item
- Tap on Restore
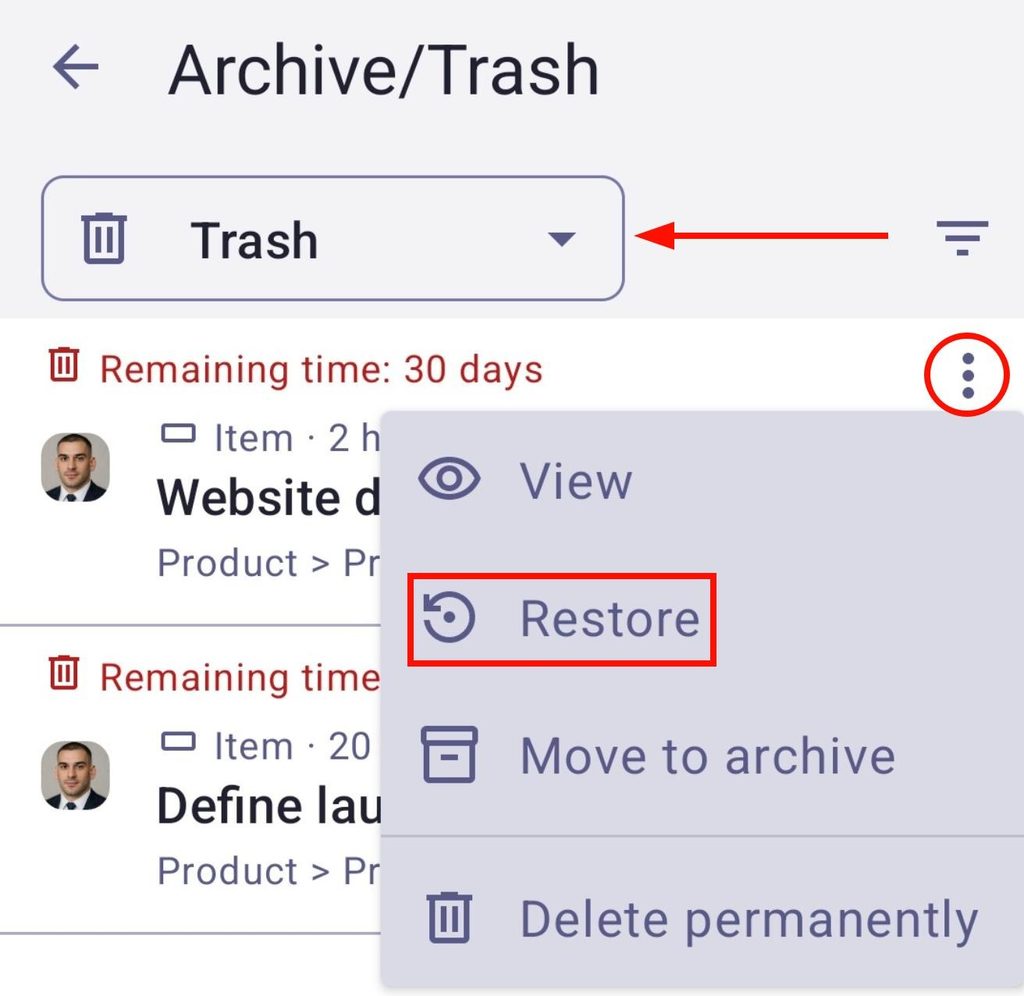
- Open Trash
- Tap on the three dots next to the content
- Tap on Restore
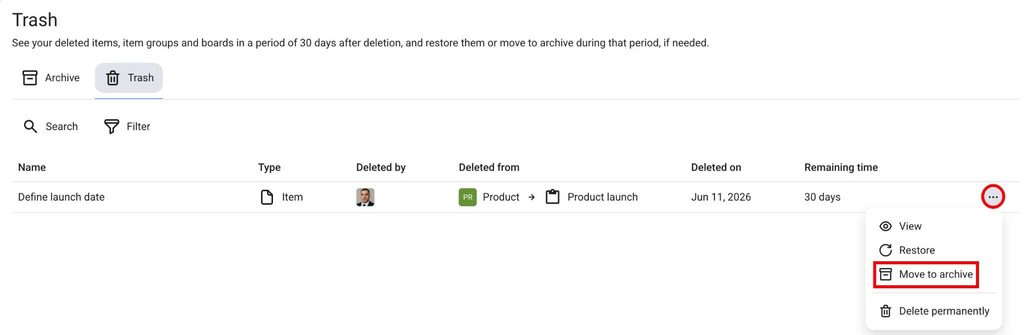
To move content to Archive from Trash:
- Open the Trash panel
- Click on the three dots on the right side of the deleted entity
- Click on Move to archive
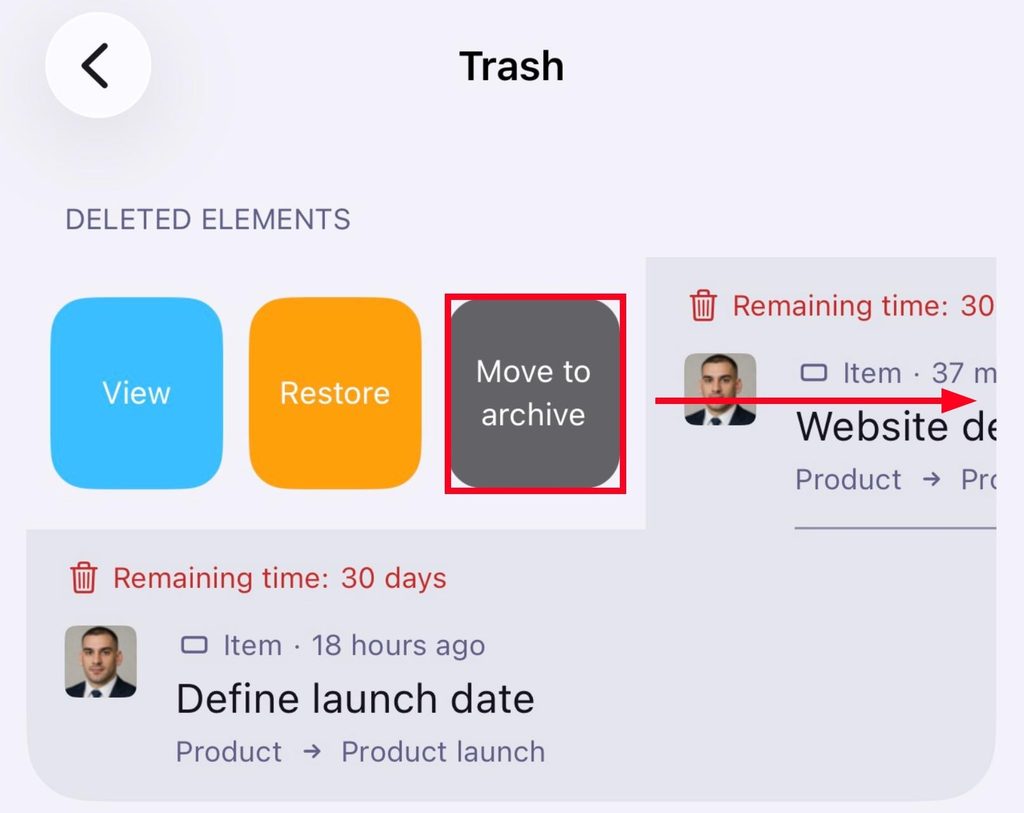
- Open the Trash
- Swipe right on an Item
- Tap on Move to archive
- Open Trash
- Tap on the three dots next to the content
- Tap on Move to archive
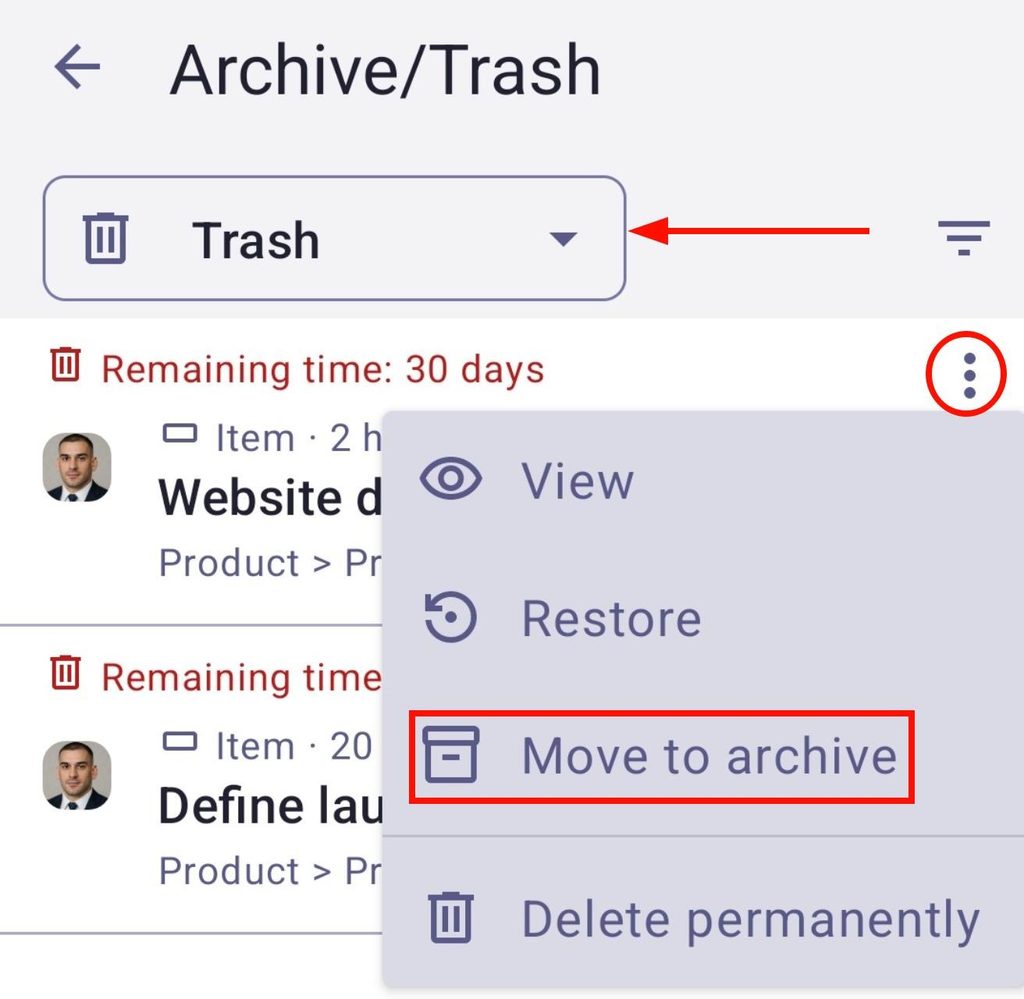
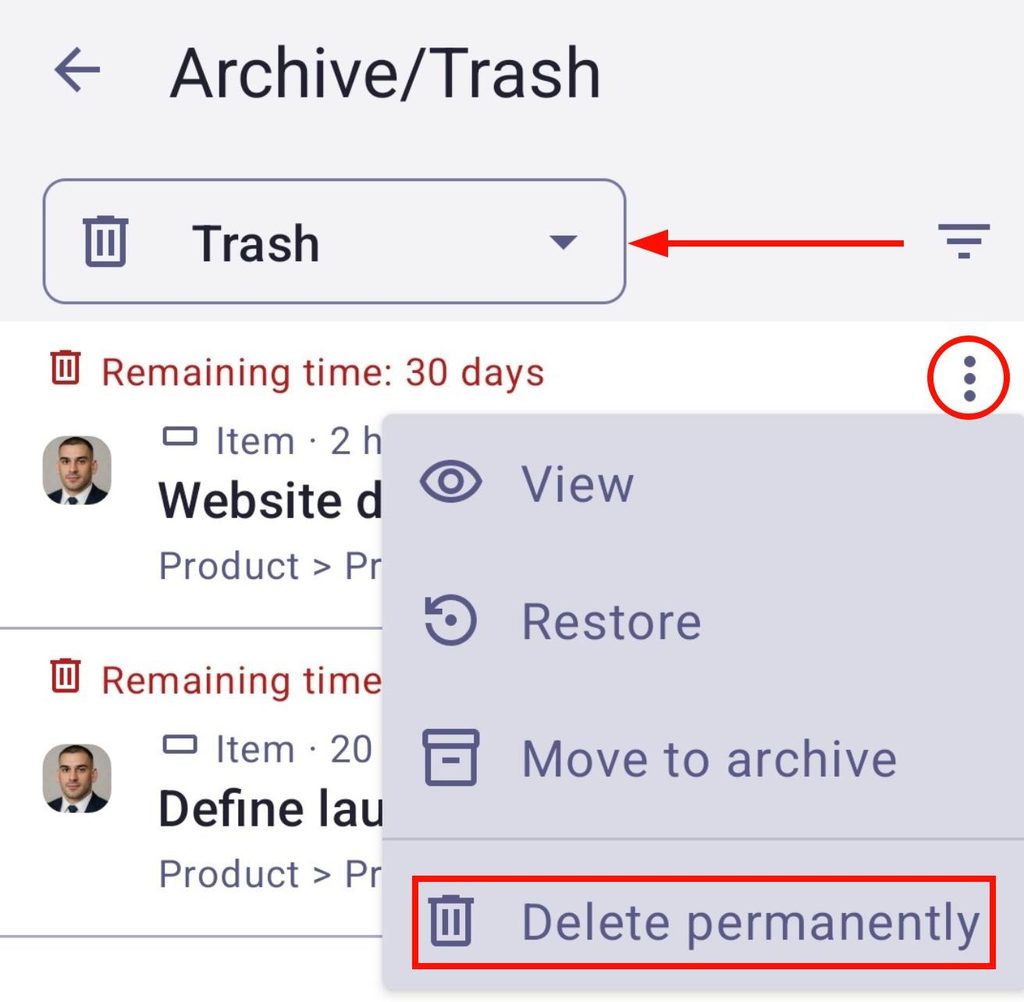
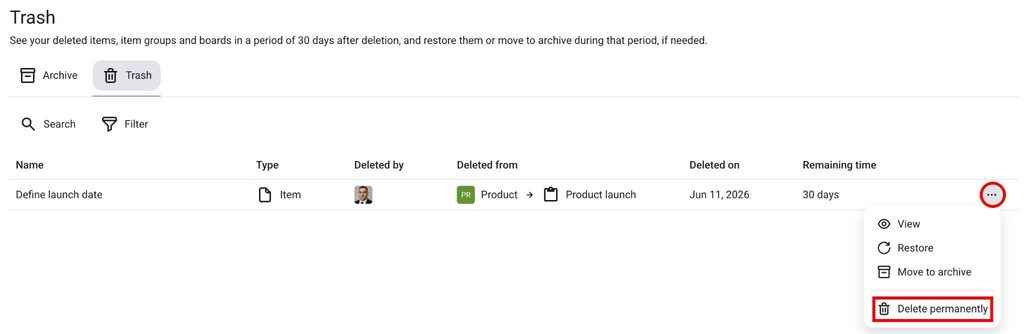
To delete content permanently from Trash:
- Open the Trash panel
- Click on the three dots on the right side of the deleted entity
- Click on Delete permanently
- Confirme a ação
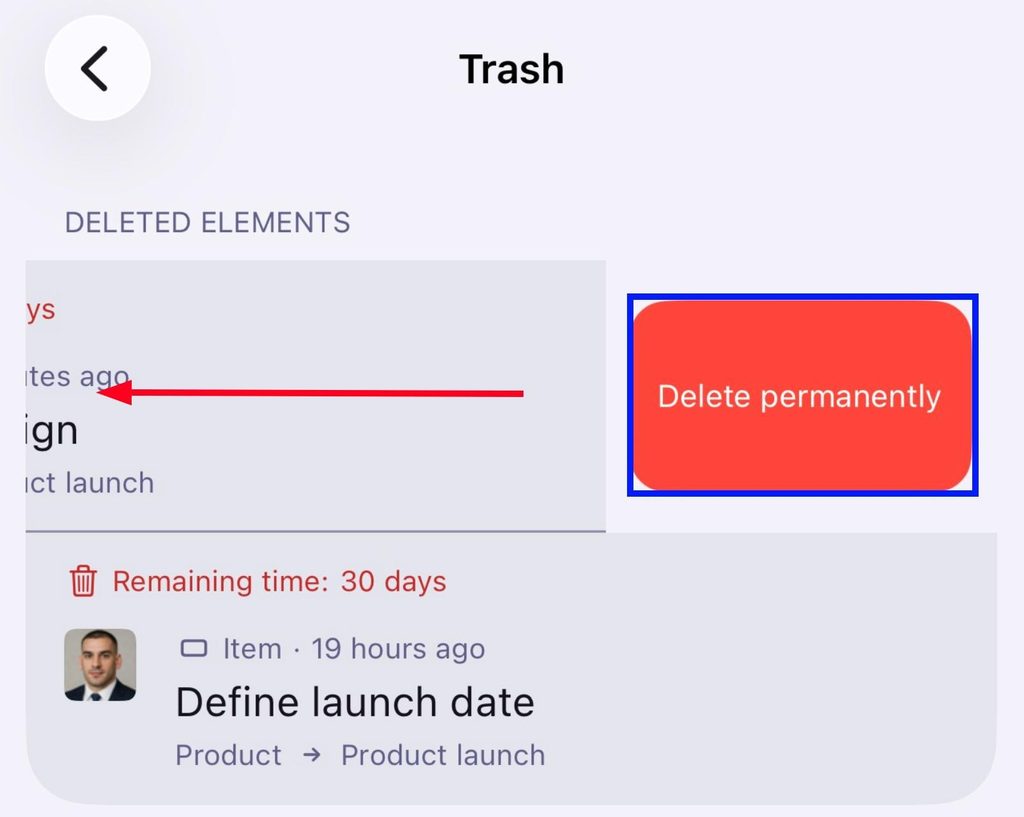
- Open the Trash
- Swipe left on the content
- Tap on Delete permanently
- Confirme a ação
- Open Trash
- Tap on the three dots next to the content
- Tap on Move to archive
- Confirme a ação