Mes tâches
Mes Tâches vous permet d'accéder à toutes les éléments qui vous sont assignées en un seul endroit, facilitant ainsi l'organisation de votre travail et la priorisation de vos projets. Au lieu de passer d'un tableau à l'autre, Mes Tâches vous offre une vue claire sur ce que vous devez faire ensuite.
Pour commencer à utiliser cette fonctionnalité, cliquez simplement sur la section Mes Tâches dans la barre latérale gauche, puis sélectionnez Démarrer le suivi des tâches.
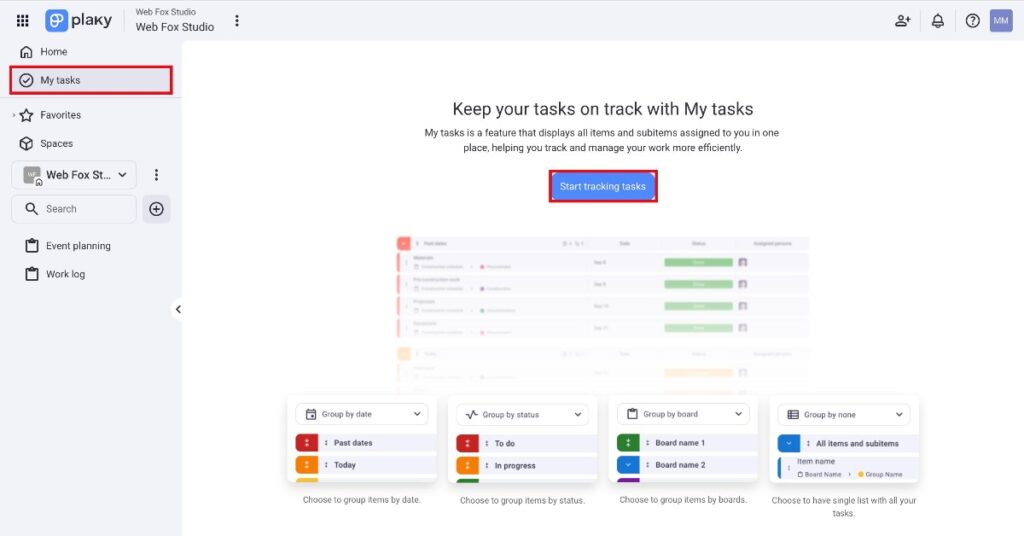
Cela ouvrira une nouvelle vue où vous pourrez localiser toutes les éléments qui vous sont assignées et configurer votre vue Mes tâches.
Voilà, c’est tout ! Vous êtes prêt !
Les tâches correspondent aux éléments/sous-éléments de votre espace de travail.
Ajouter de nouveaux éléments/sous-éléments #
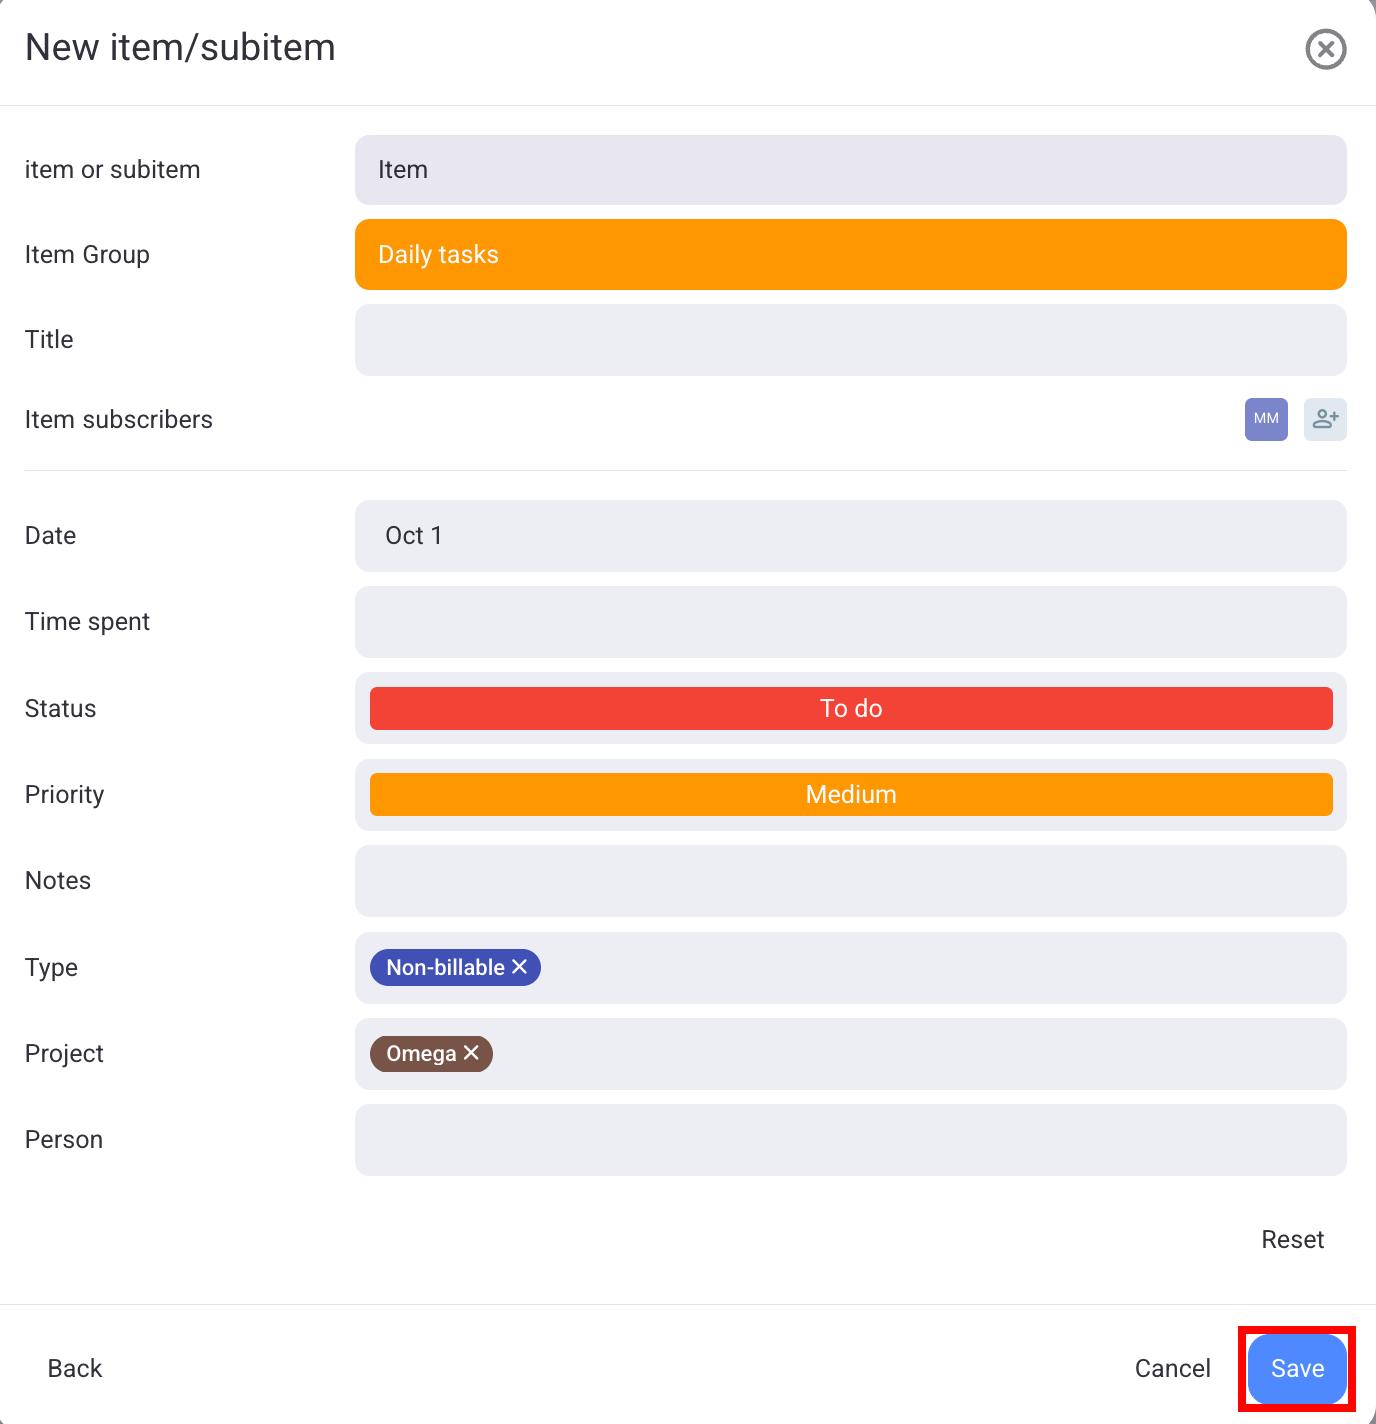
Avec cette fonctionnalité, vous pouvez ajouter de nouveaux éléments/sous-éléments directement depuis votre vue « Mes tâches ». Pour ce faire, suivez ces étapes :
- Cliquez sur le bouton Nouvel élément/sous-élément dans la partie gauche de votre écran
- Choisissez le Tableau de destinationdans le menu déroulant et cliquez sur Continuer
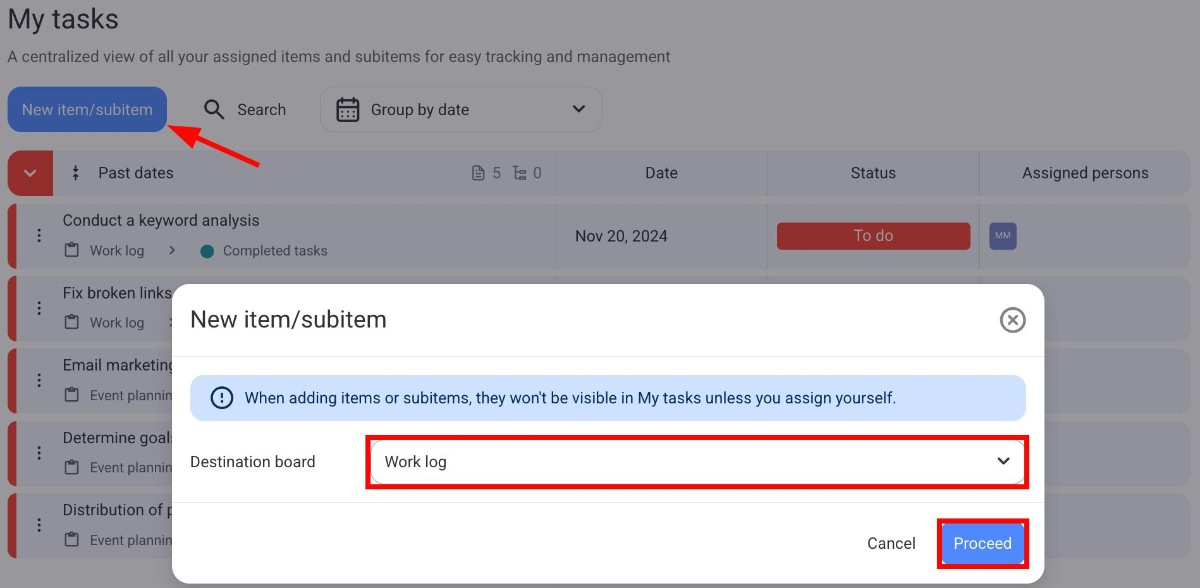
- Remplir les informations de la fenêtre du nouvel élément/sous-élément
- Cliquer sur Enregistrer pour valider l'action
Une fois l'élément ajouté, il s'affichera automatiquement dans la fenêtre « Mes tâches ». Il sera également visible sur votre tableau.
Si vous créez un élément sans vous l'assigner dans la colonne « Personne », il n'apparaîtra pas dans la page Mes tâches.
Grouper les tâches #
Chaque tâche (élément/sous-élément) possède des attributs spécifiques qui lui sont associés, dont certains incluent :
- Groupe d'éléments
- Titre
- Tableau
- Statut
- Date
- Membres de l'équipe assignés
La section Mes tâches vous permet d'organiser votre vue en regroupant les éléments selon leurs attributs. Vous pouvez grouper les éléments par plusieurs critères, tels que :
- Grouper par date
- Grouper par statut
- Grouper par tableau
- Aucun groupement
Voici comment vous pouvez grouper les éléments.
- Ouvrez Mes tâches
- Cliquez sur le menu déroulant
- Sélectionnez le mode de regroupement des éléments

- Ouvrez Mes tâches
- Appuyez sur la liste déroulante Grouper par
- Sélectionnez le mode de regroupement des éléments
- Ouvrez les paramètres de Mes tâches dans le coin supérieur droit
- Sélectionnez Grouper par
- Sélectionnez le mode de regroupement des éléments
Comme vous pouvez le voir, les éléments peuvent être regroupés de différentes manières. Examinons-les plus en détail.
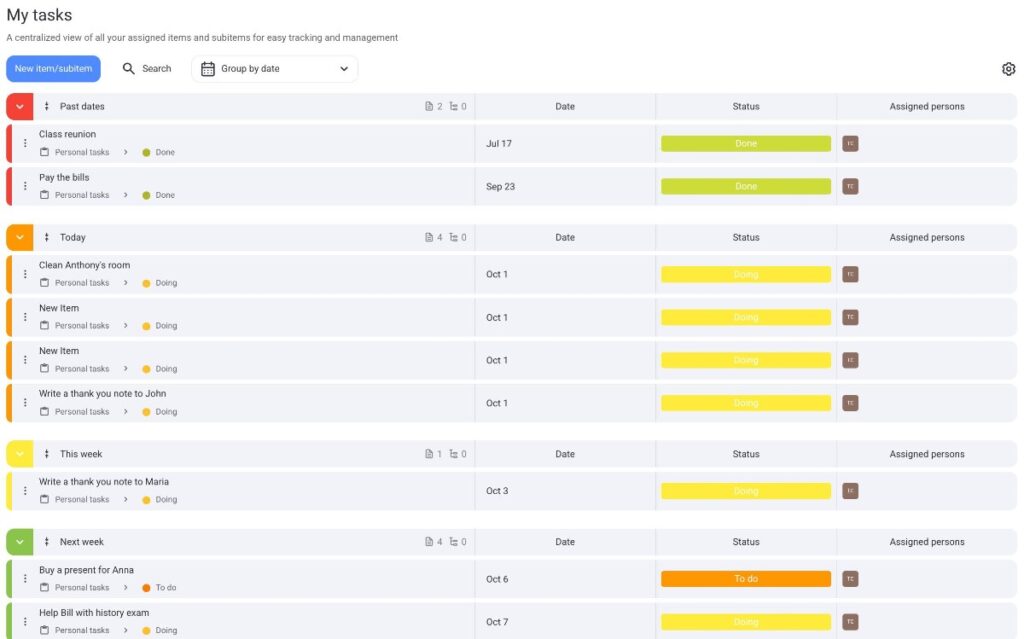
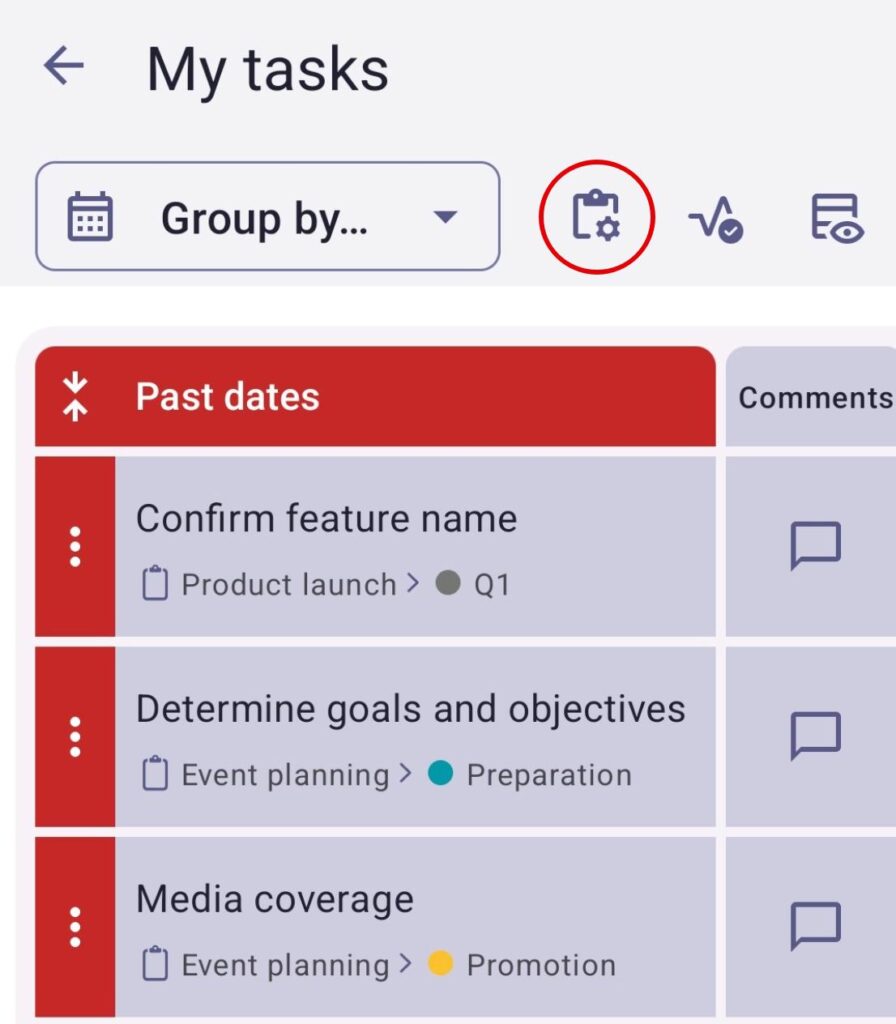
Par défaut, les tâches sont regroupées par date.
Grouper par date #
Avec l'affichage par date, tous vos éléments/sous-éléments seront organisés en fonction de leurs échéances. Les tâches (éléments/sous-éléments) sont affichées dans l'ordre suivant :
- Dates passées — affiche les tâches dont l'échéance est déjà dépassée
- Aujourd'hui — affiche les tâches qui arrivent à échéance aujourd'hui
- Cette semaine — affiche les tâches qui arrivent à échéance cette semaine
- Semaine prochaine — affiche les tâches prévues pour la semaine prochaine
- Plus tard — affiche les tâches dont l'échéance est postérieure à la semaine prochaine
- Date non définie — affiche les tâches qui n'ont pas de valeur dans le champ date/frise chronologique
- Sans champ de date — affiche les tâches qui ne possèdent pas de champ date/frise chronologique
Vous ne pouvez pas modifier les critères selon lesquels les éléments/sous-éléments sont organisés dans la mise en page par date.
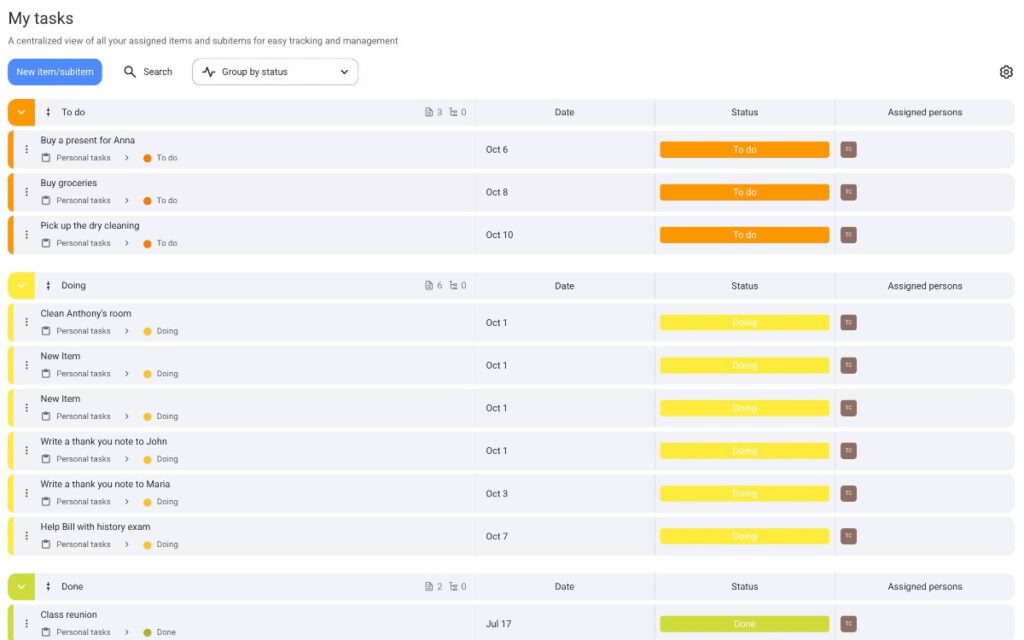
Grouper par statut #
Si vos éléments/sous-éléments possèdent un champ de statut, vous pouvez également les organiser selon leur statut actuel. Par exemple, vous pouvez voir quels éléments/sous-éléments sont marquées « À faire » et lesquelles sont actuellement « En cours ».
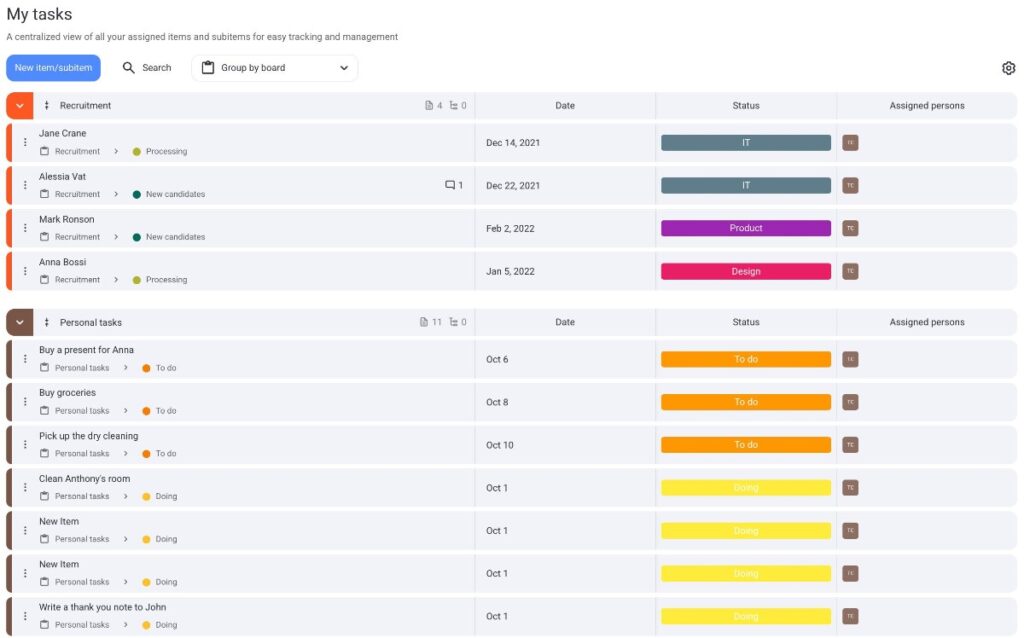
Grouper par tableau #
Si vous êtes membre de plusieurs tableaux, vous pouvez organiser vos éléments en fonction de leur tableau d'origine. Chaque tableau s'affiche sous forme d'étiquette distincte, vous permettant de voir chaque élément ou sous-élément qui s'y trouve.
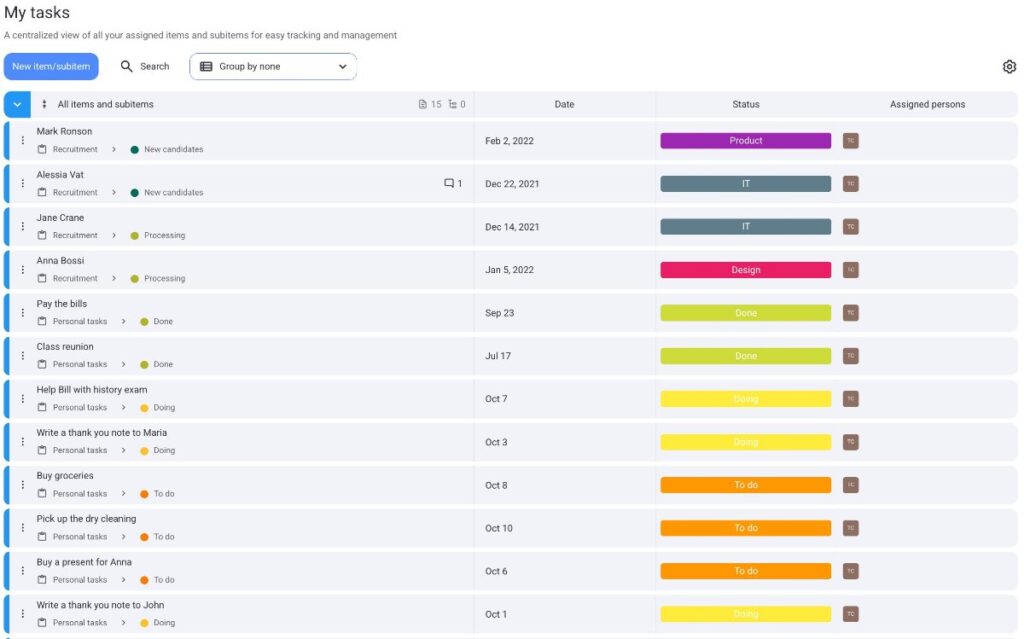
Grouper par aucun #
« Mes tâches » vous permet également d'avoir une disposition en liste unique, où vous pouvez voir tous les éléments/sous-éléments qui vous sont assignés sans les séparer en groupes.
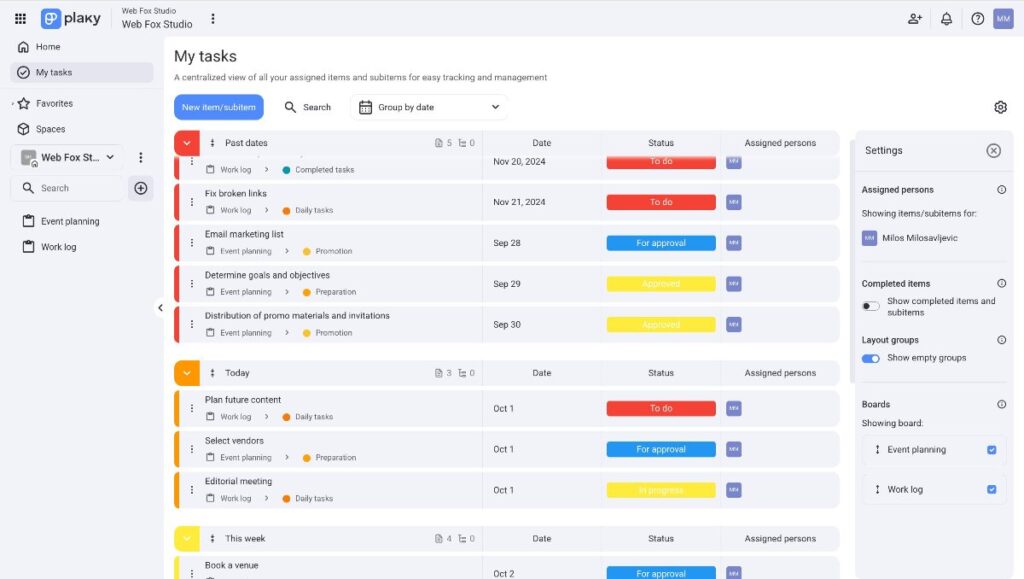
Définir les options du tableau #
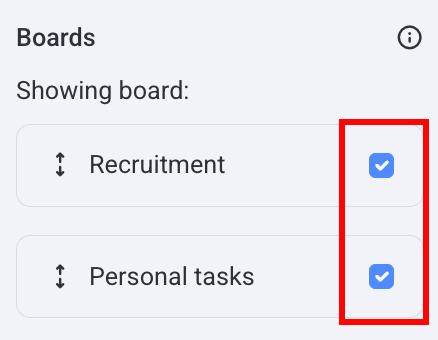
Vous pouvez sélectionner les tableaux qui s'afficheront dans votre vue « Mes tâches ». Cela vous aide à prioriser les tableaux et à n'afficher que les tâches des plus importants. Voici comment faire :
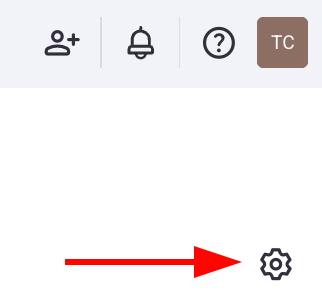
- Cliquez sur l'icône d'engrenage dans le coin supérieur droit
- Accédez à la section Tableaux
- Cochez les cases à côté des tableaux que vous souhaitez afficher
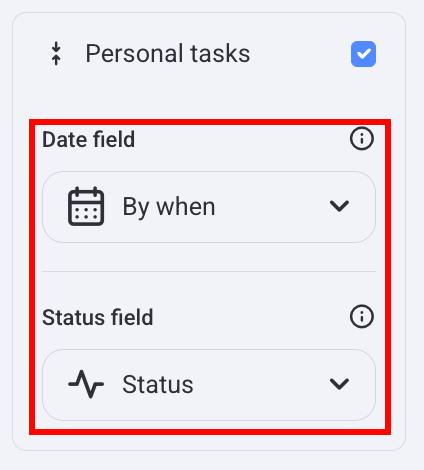
Lorsque vous cliquez sur le tableau, il se développe et vous permet de sélectionner les champs de date et de statut correspondants. Ces champs sont utilisés pour vos mises en page de date et de statut, et vous pouvez les ouvrir en cliquant sur le menu déroulant.
- Appuyez sur Paramètres du tableau en haut à droite
- Appuyez sur un Tableau
- Activez/désactivez le bouton Afficher le tableau
- Appuyez sur Paramètres de mes tâches dans le coin supérieur droit
- Accédez à la section Tableaux
- Appuyez sur le tableau que vous souhaitez modifier
- Activez ou désactivez le bouton Afficher le tableau pour l'afficher/le masquer
- Appuyez sur Enregistrer pour terminer l'action
Lorsque vous appuyez sur un tableau, celui-ci s'ouvre et vous permet de sélectionner les champs de date et de statut correspondants. Ces champs sont utilisés pour vos mises en page de dates et de statuts, et vous pouvez les ouvrir en cliquant sur le menu déroulant.
Afficher/masquer les éléments/sous-éléments terminés #
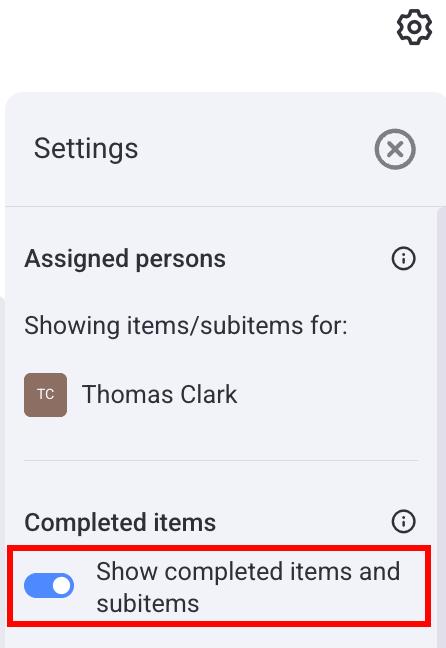
Pour afficher les éléments terminés sur votre page Mes tâches, vous pouvez les activer dans le panneau des paramètres. Pour ce faire, suivez ces étapes :
- Cliquez sur l'icône d'engrenage dans le coin supérieur droit
- Activez le bouton Afficher les éléments/sous-éléments terminés pour afficher/masquer les éléments terminés
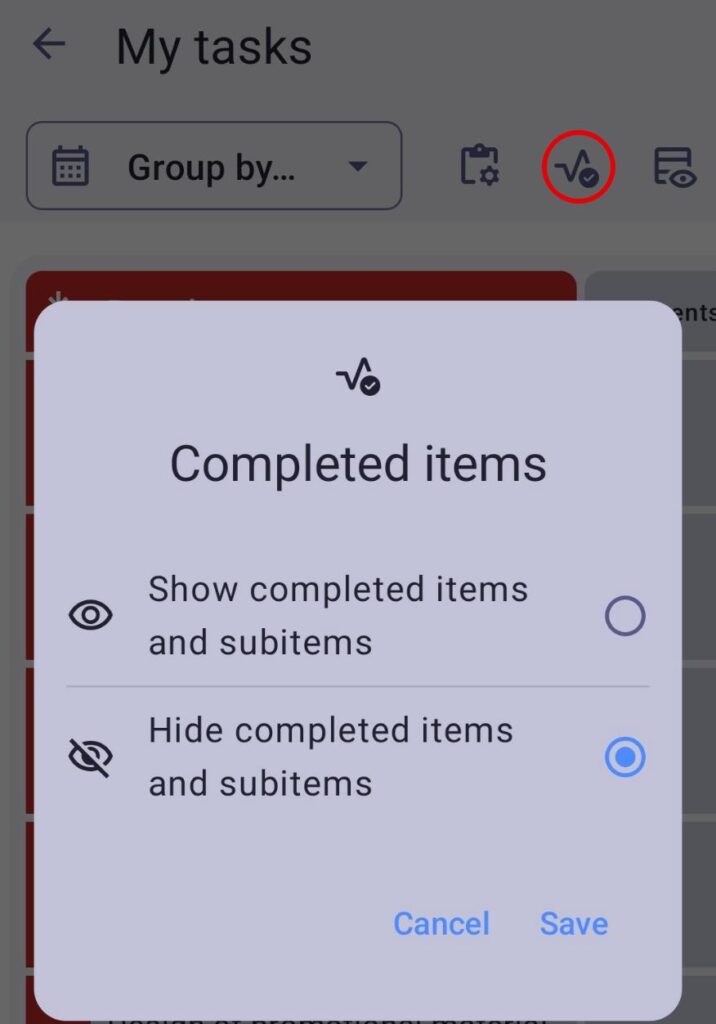
- Appuyez sur le bouton Éléments terminés dans le coin supérieur droit
- Choisissez d'afficher ou de masquer les éléments et sous-éléments terminés
- Appuyez sur Enregistrer pour terminer l'action
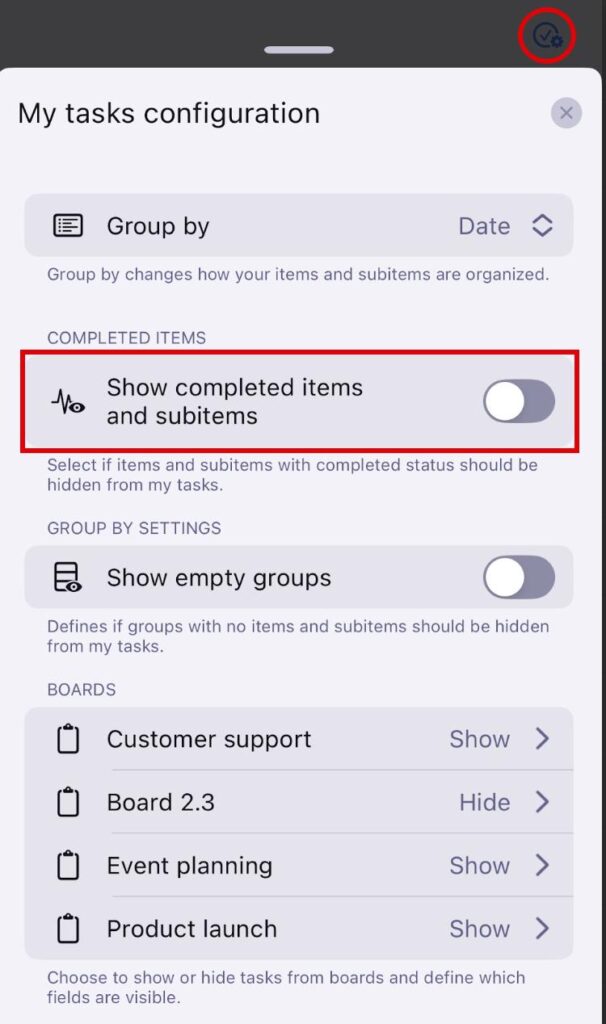
- Appuyez sur le bouton de paramètres de Mes tâches
- Activez ou désactivez le bouton Afficher les éléments et sous-éléments terminés pour afficher/masquer les tâches terminées
Avant d'activer le bouton Afficher les éléments terminés, vous devez définir ce qu'est un élément terminé sur votre tableau. Voici comment faire :
- Ouvrez votre tableau
- Click on the arrow next to the Status field
- Select Configure field
- Check the Status that you want to set as completed

Afficher/masquer les groupes vides #
Par défaut, tous les groupes sont affichés dans votre vue « Mes tâches ». Vous pouvez désactiver cette option en masquant les groupes qui ne contiennent pas d'éléments. Par exemple, si vous n'avez aucun élément dans le groupe « Semaine prochaine », ce groupe ne s'affiche pas. Voici comment faire :
- Cliquez sur l'icône d'engrenage dans le coin supérieur droit
- Activez ou désactivez le bouton Afficher les groupes vides pour les afficher ou les masquer
- Appuyer sur le bouton Groupes de mise en page en haut à droite
- Choisir d'afficher ou de masquer les groupes vides
- Appuyez sur Enregistrer pour terminer l'action
- Appuyez sur le bouton de paramètres de Mes tâches
- Activez le bouton Afficher les groupes vides pour afficher/masquer les groupes vides
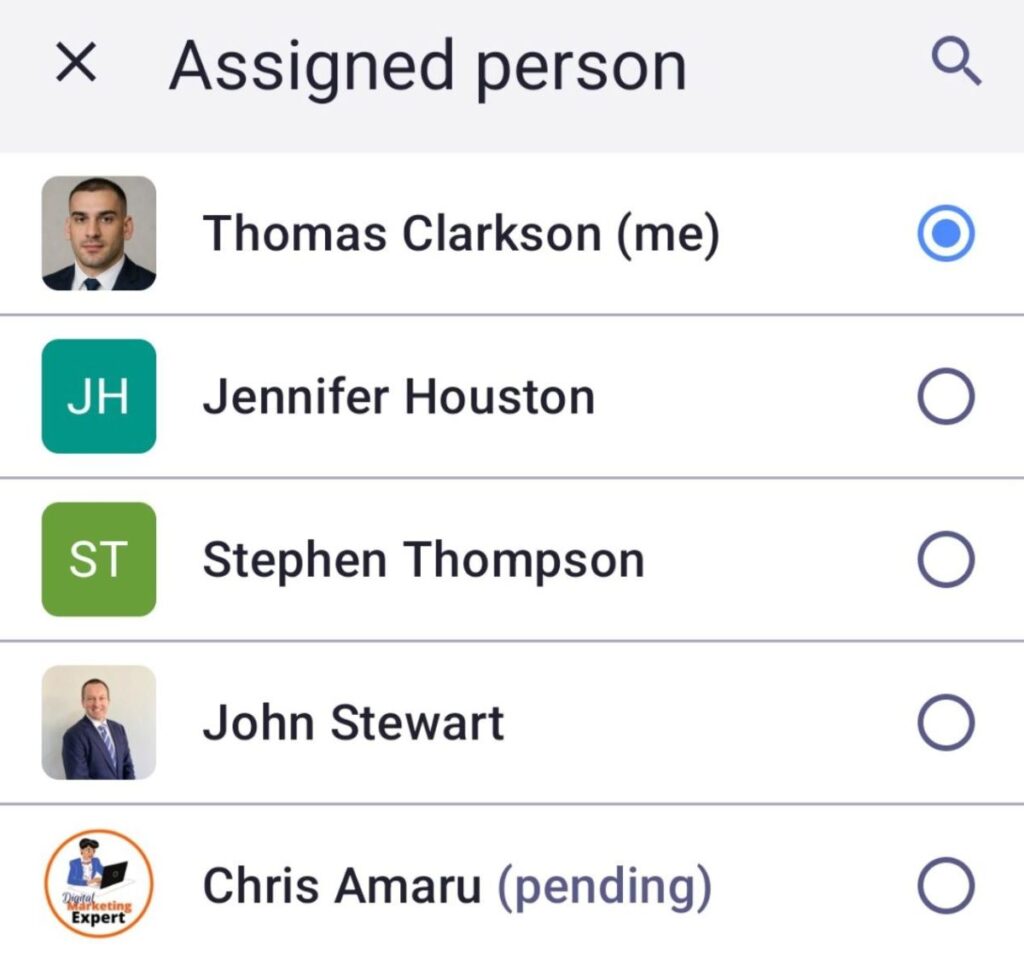
Modifier la personne assignée #
Changer la personne responsable est réservé aux plans Pro et Enterprise.
Vous pouvez choisir les éléments/sous-éléments des membres de l'équipe à afficher dans le panneau des paramètres. Cela affichera toutes les tâches assignées à une seule personne. Voici comment procéder :
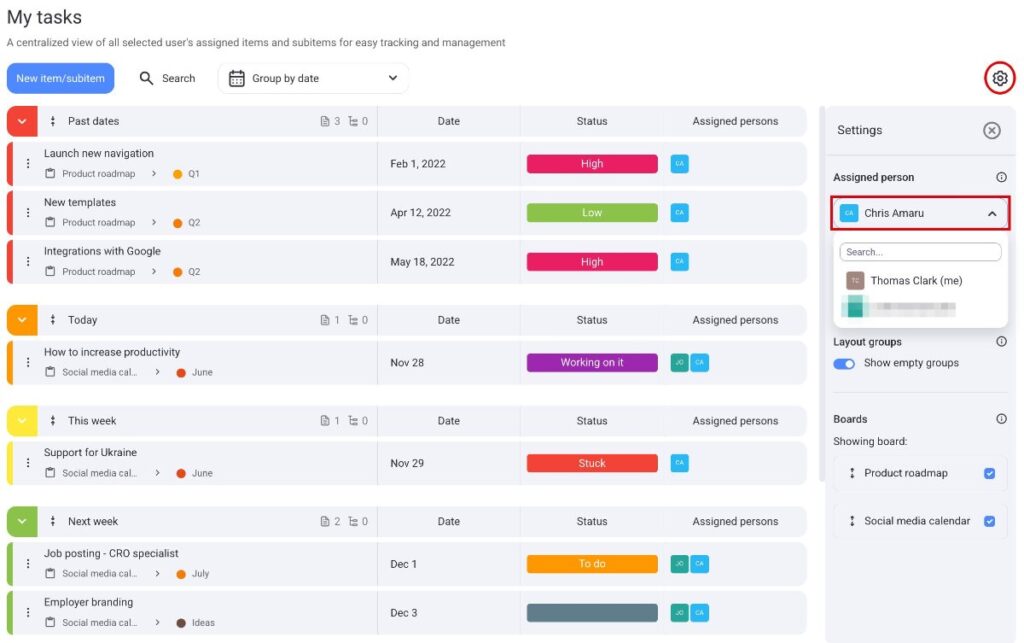
- Cliquez sur l'icône d'engrenage dans le coin supérieur droit
- Cliquez sur le menu déroulant sous Personne assignée
- Sélectionnez l'utilisateur dont vous souhaitez afficher les tâches
- Appuyez sur Sélectionner une personne en haut à droite
- Choisissez la personne désignée
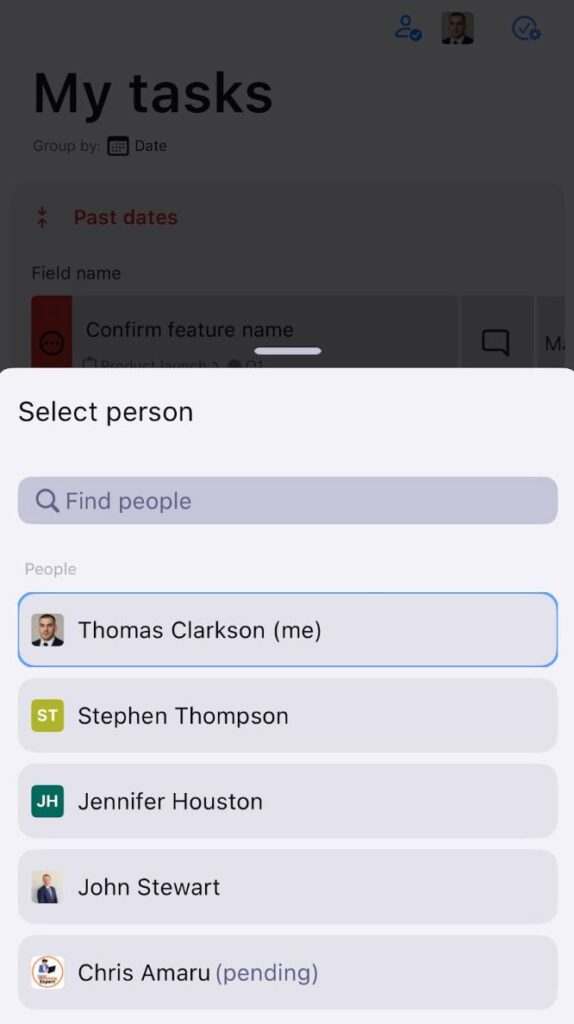
- Appuyez sur l'icône de la personne assignée en haut à droite
- Choisissez la personne désignée