Introducción a vistas de tablero
La forma en que se presentan tus datos en el tablero te puede ayudar a tener un mejor resumen de la información a tu disposición. Con las vistas de tabla, puedes visualizar los datos disponibles en tu tablero de diferentes maneras.
Tipos de vistas de tabla #
Plaky te permite elegir entre diferentes vistas de tablero:
- Vista de tabla
- Vista Kanban
- Vista de Gantt
- Vista de gráfico
A continuación puedes encontrar más detalles sobre cada vista.
Vista de tabla #
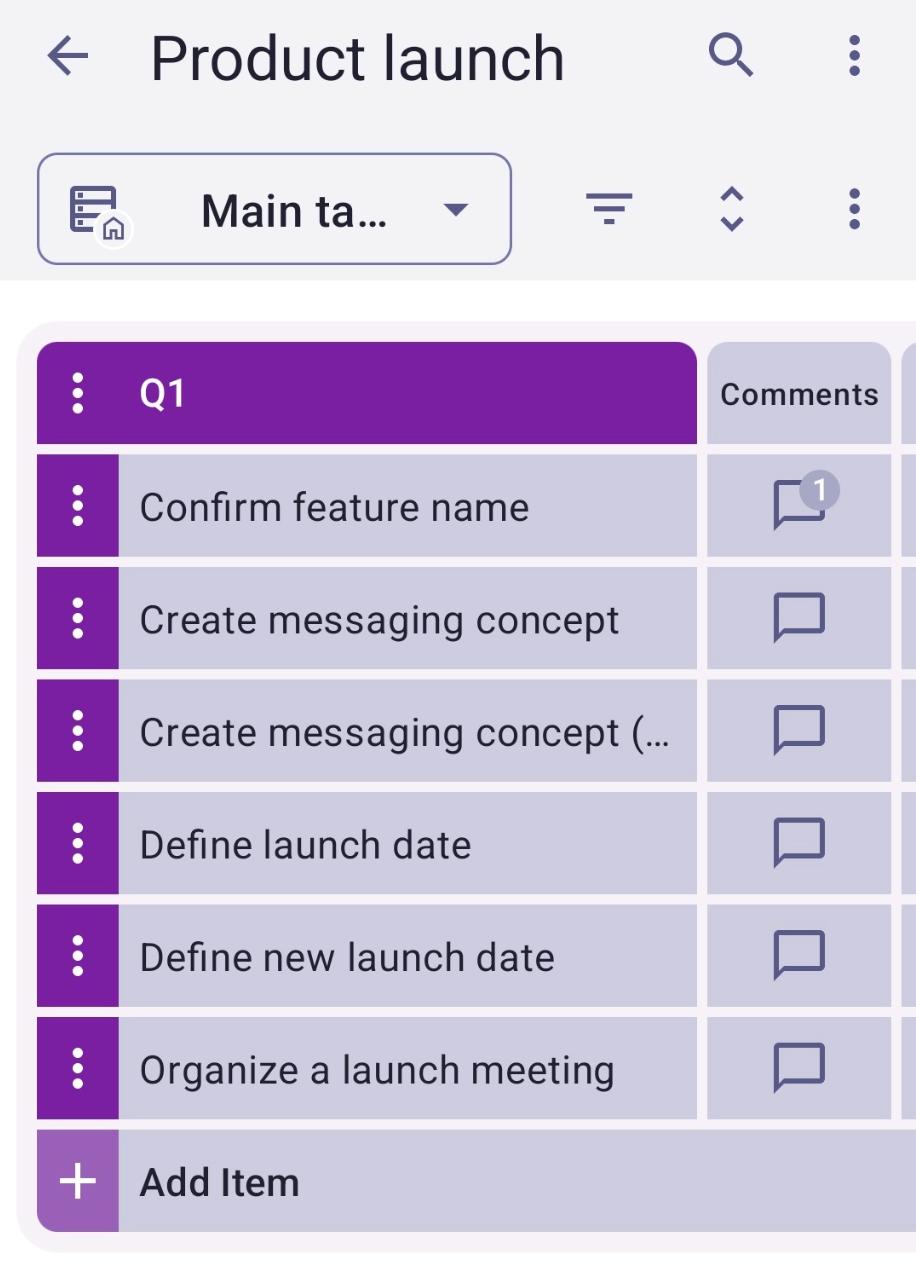
En la vista de tabla, la información en tu tablero se mostrará como una tabla con campos y filas.
Aquí es un ejemplo de la vista de tabla para la Plantilla de lanzamiento de producto:
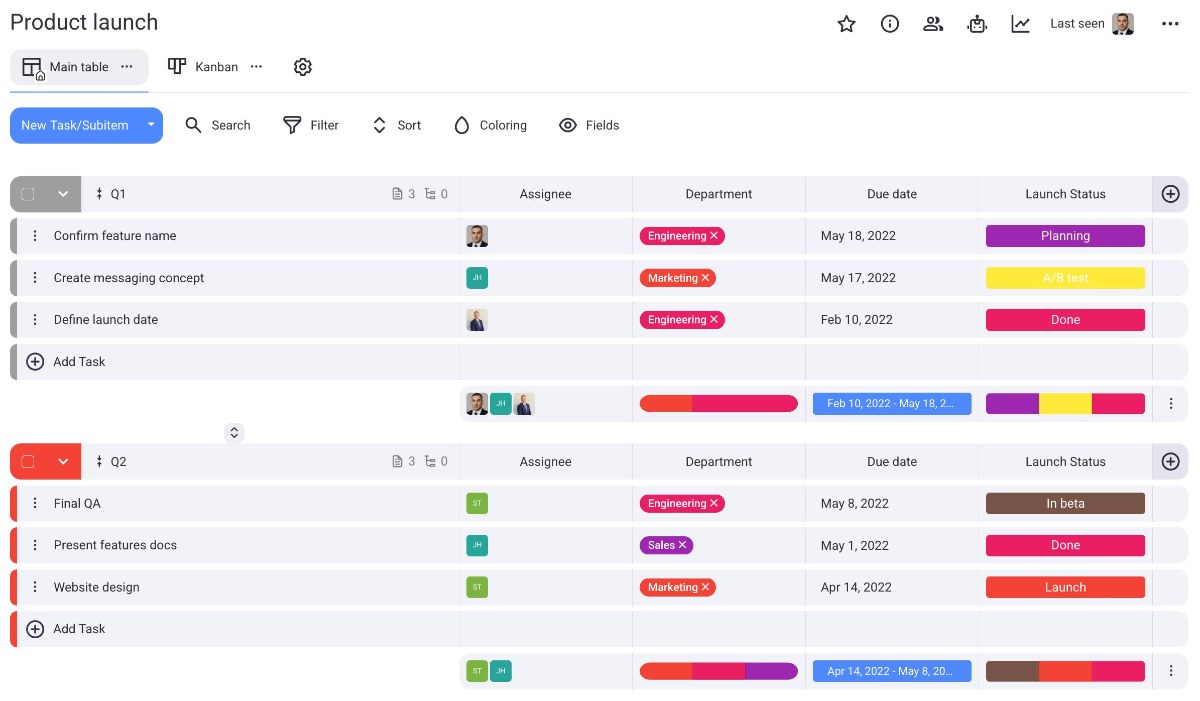
En la vista de tabla, deslízate hacia la izquierda para ver todos los campos en el tablero.
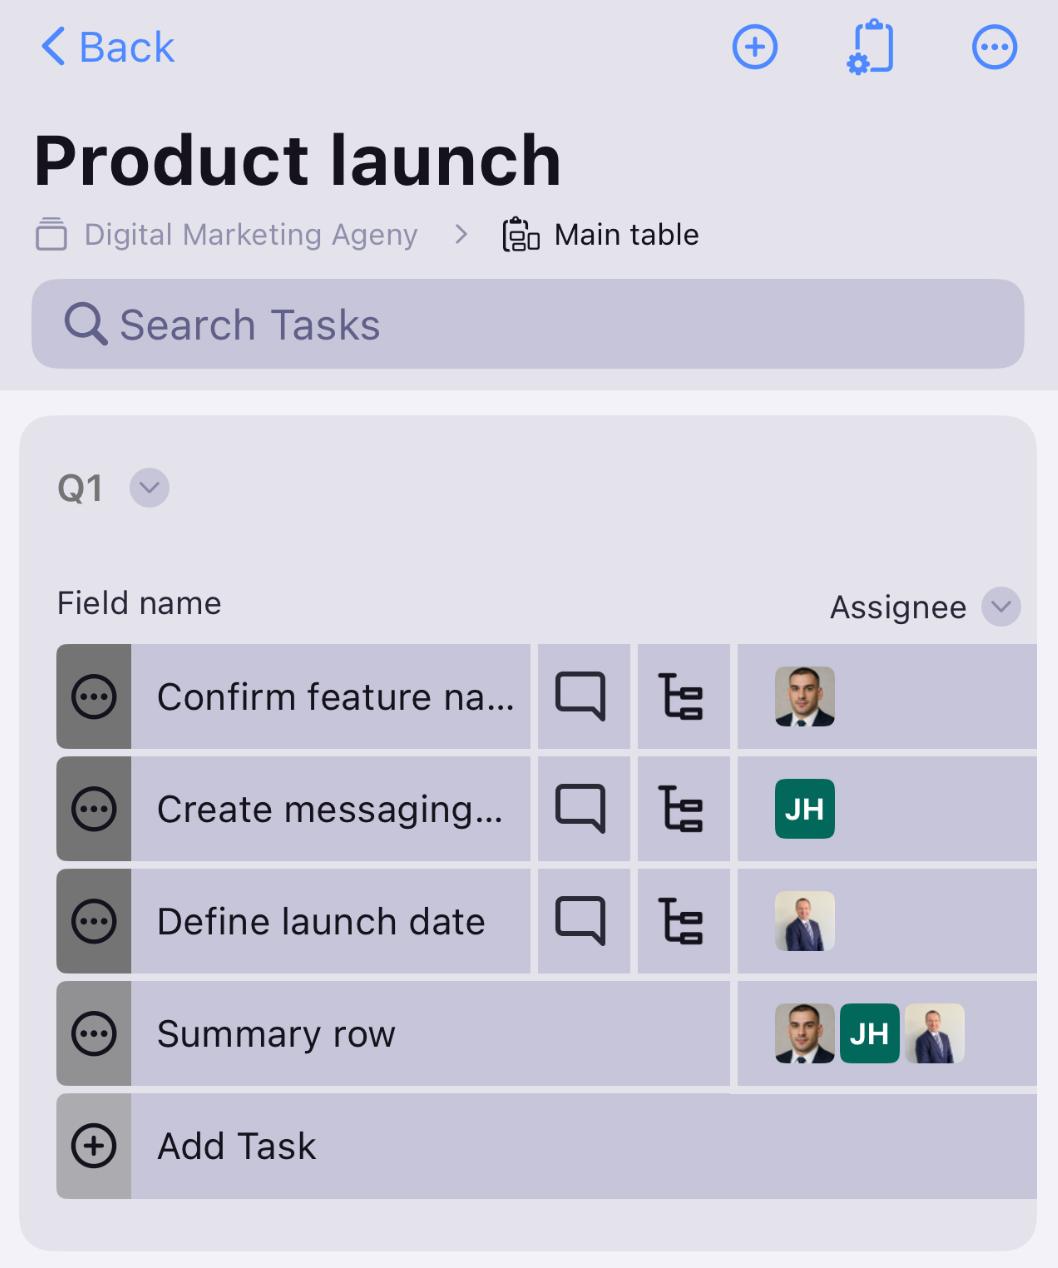
Desliza a la izquierda para ver todos los campos del tablero.
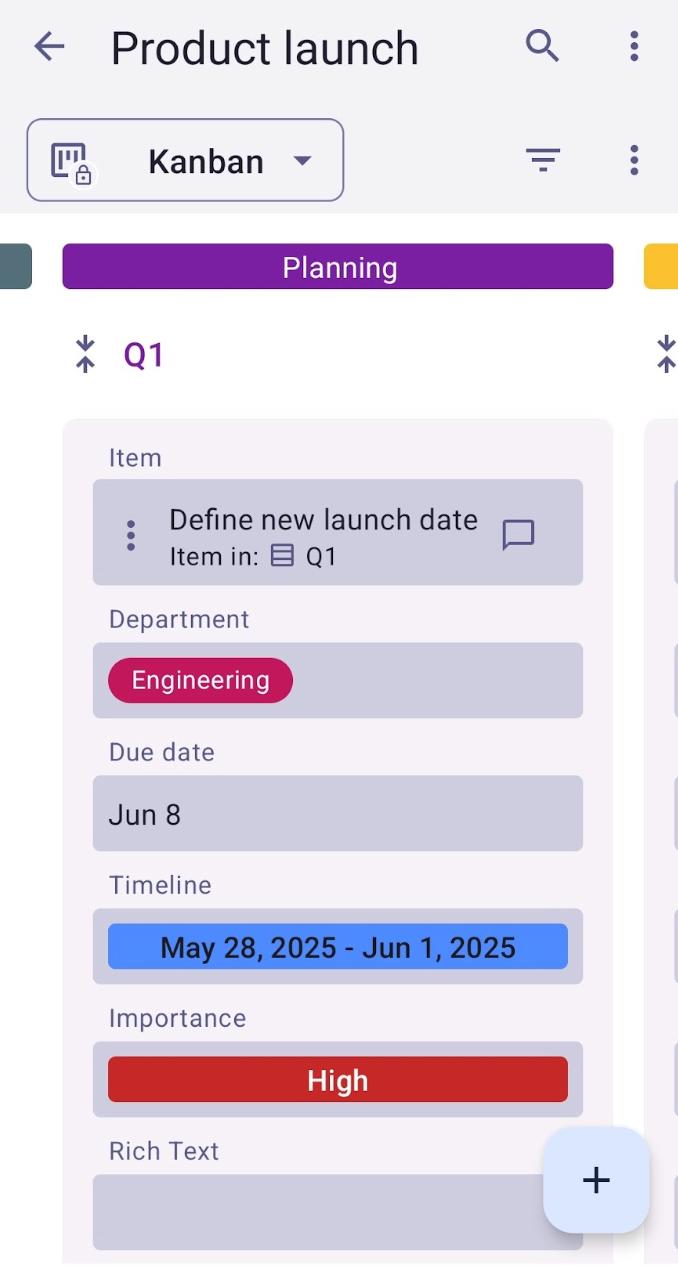
Vista Kanban #
Kanban es una famosa técnica de gestión de proyectos utilizada para gestionar el trabajo al priorizar tareas y demandas según la capacidad disponible.
Aquí es un ejemplo de la vista de Kanban para la Plantilla de lanzamiento de producto:
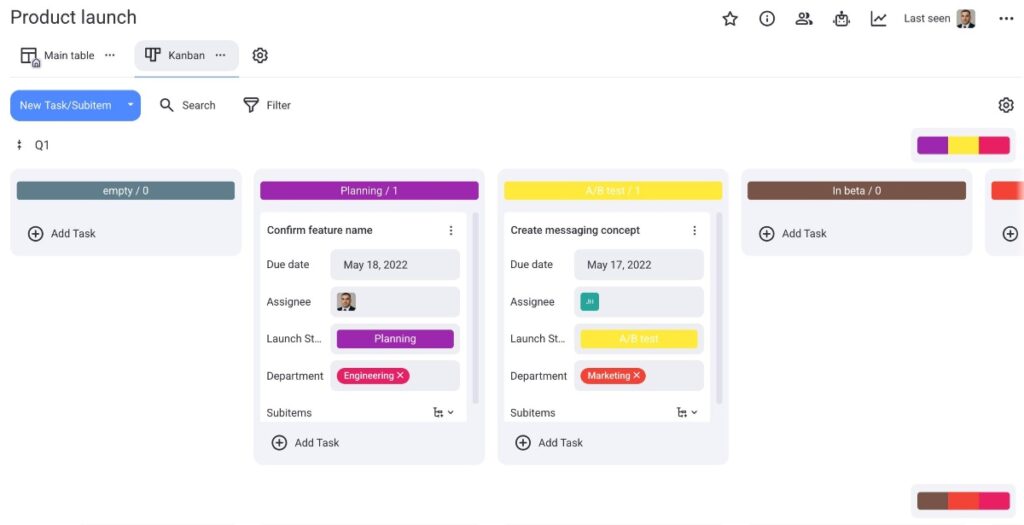
En la vista Kanban, deslízate hacia la izquierda para ver todos los elementos en el tablero agrupados por estado, y arrastra y suelta el elemento para cambiar su estado.
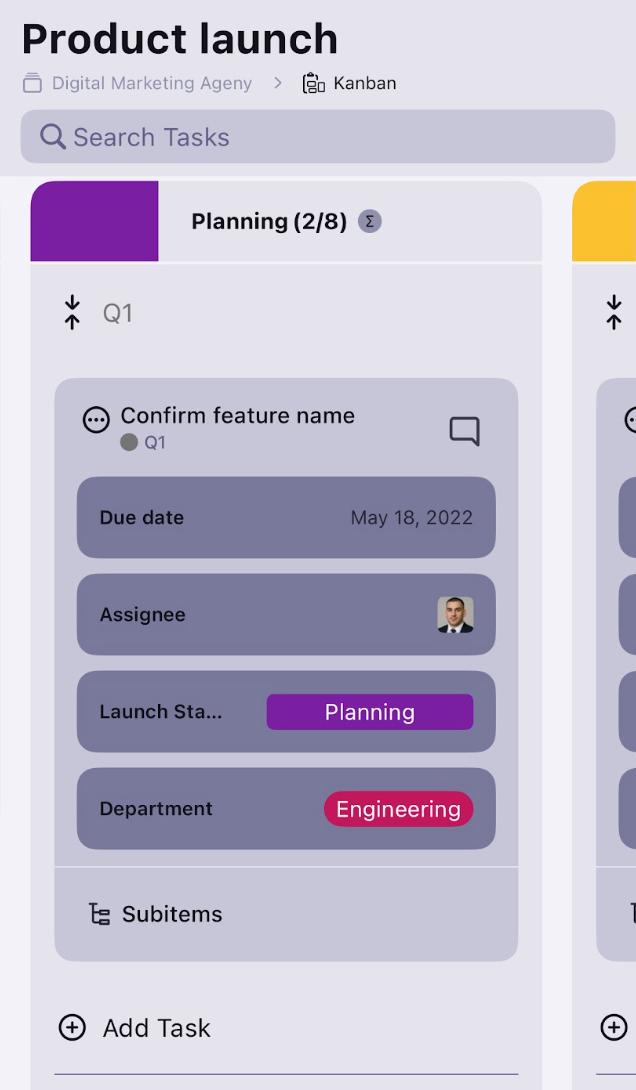
Desliza a la izquierda para ver todos los elementos del tablero agrupados por estado.
Para aprender más sobre la vista de Kanban en Plaky, consulta nuestro artículo.
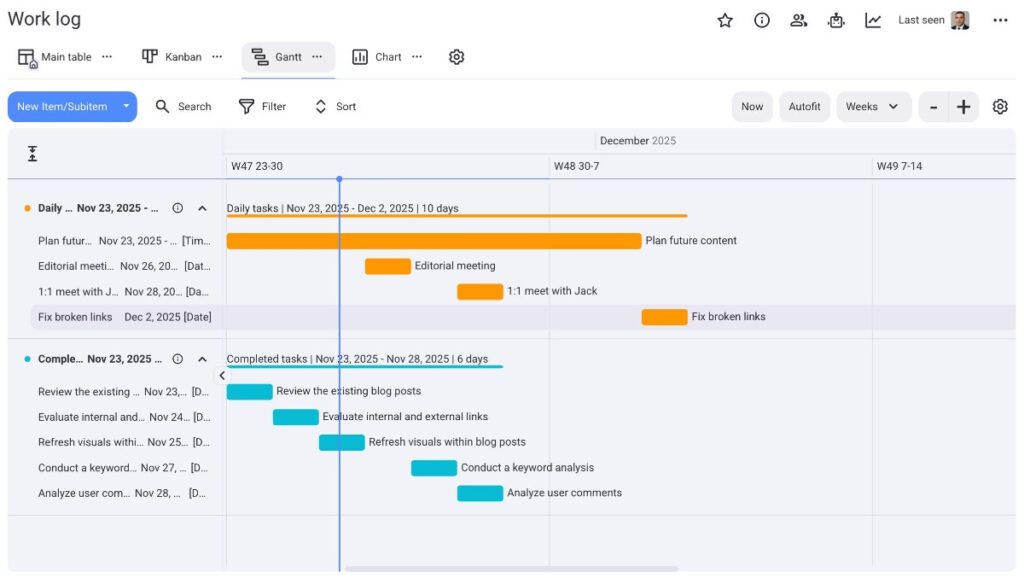
Vista de Gantt #
La vista de Gantt te ofrece una representación visual de tus tareas como barras horizontales en una línea temporal.
Aquí es un ejemplo de vista de Gantt para la Plantilla de tablero de registro de trabajo:
PRÓXIMAMENTE
PRÓXIMAMENTE
Para aprender más sobre la vista de Gantt, consulta nuestro artículo.
Vista de gráfico #
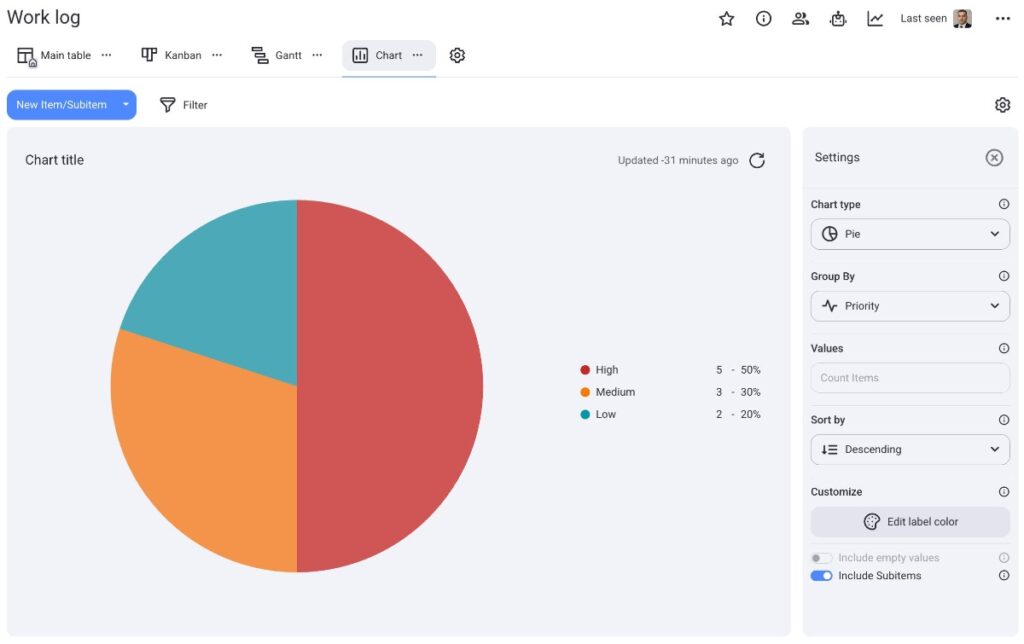
Con vista de gráfico, puedes visualizar proyectos y tareas utilizando gráficos circulares y de barra interactivos.
Aquí es un ejemplo de un gráfico circular en Plaky:
Aquí es un ejemplo de un gráfico de barra en Plaky:

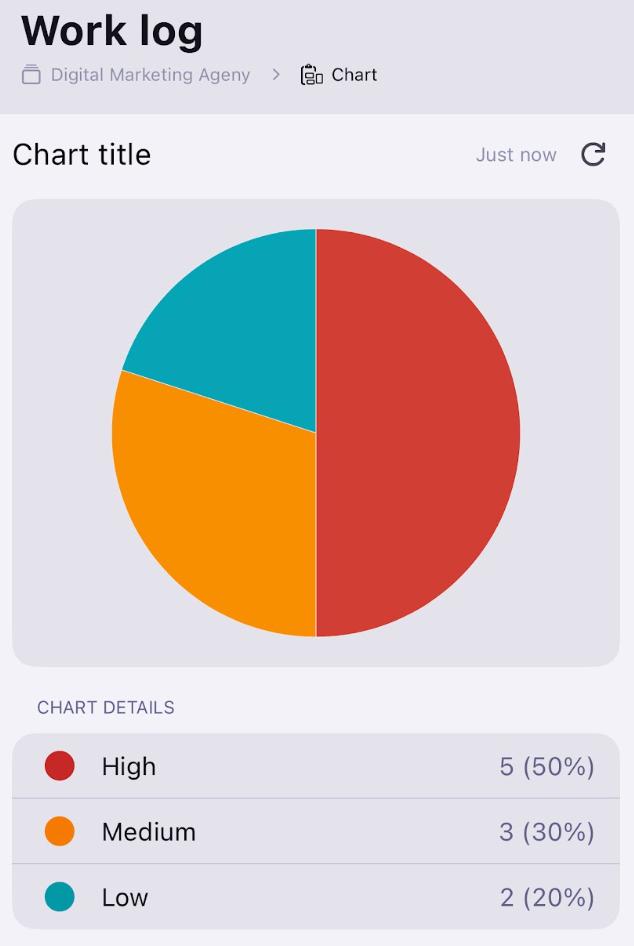
Aquí es un ejemplo de un gráfico circular en Plaky en iOS:
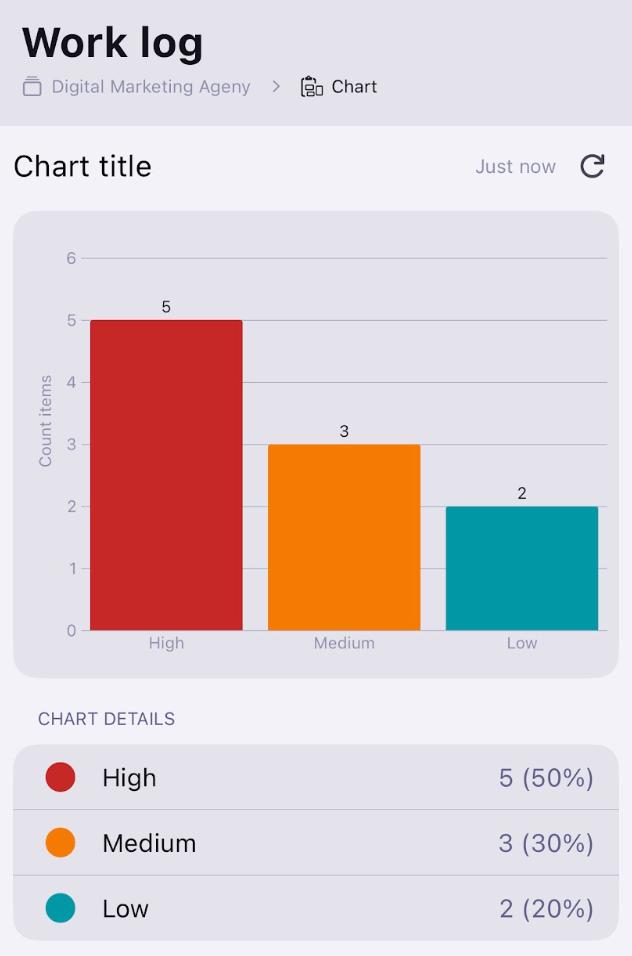
Aquí es un ejemplo de un gráfico de barra en Plaky en iOS:
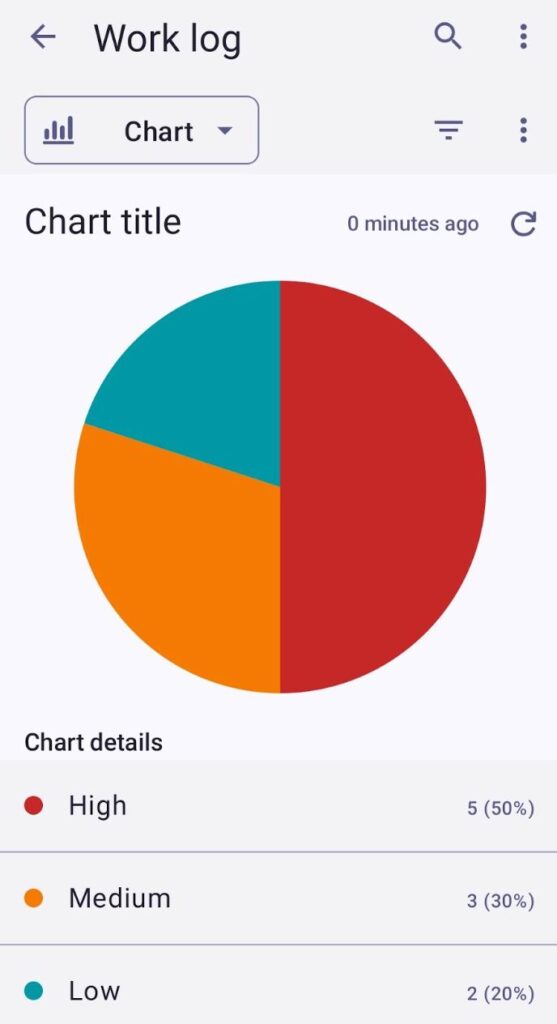
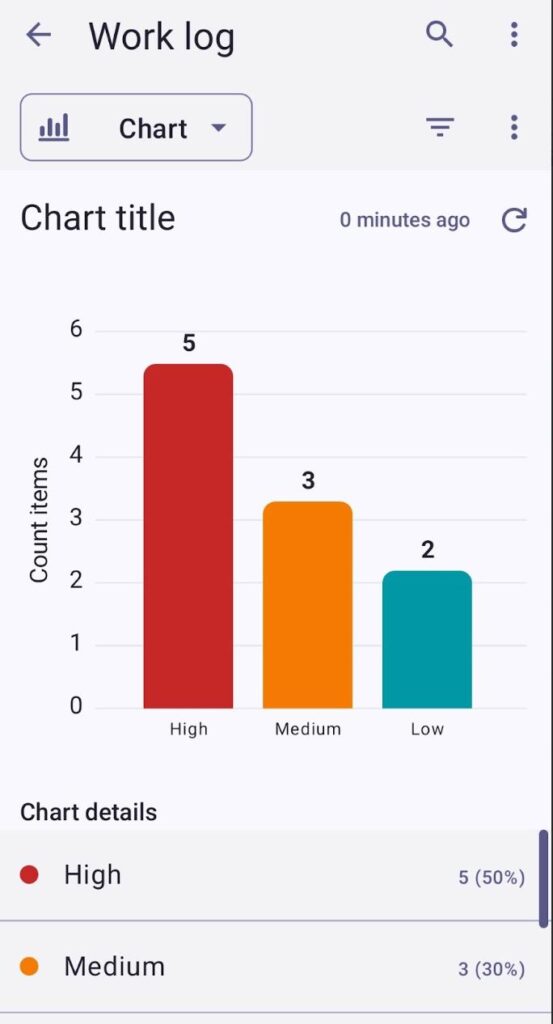
Aquí es un ejemplo de un gráfico circular en Plaky en Android:
Aquí es un ejemplo de un gráfico de barra en Plaky en Android:
Para aprender más sobre la vista de gráfico, consulta nuestro artículo.
Añadir vista de tablero #
- Haz clic en el botón +
- Selecciona nuevo tipo de vista
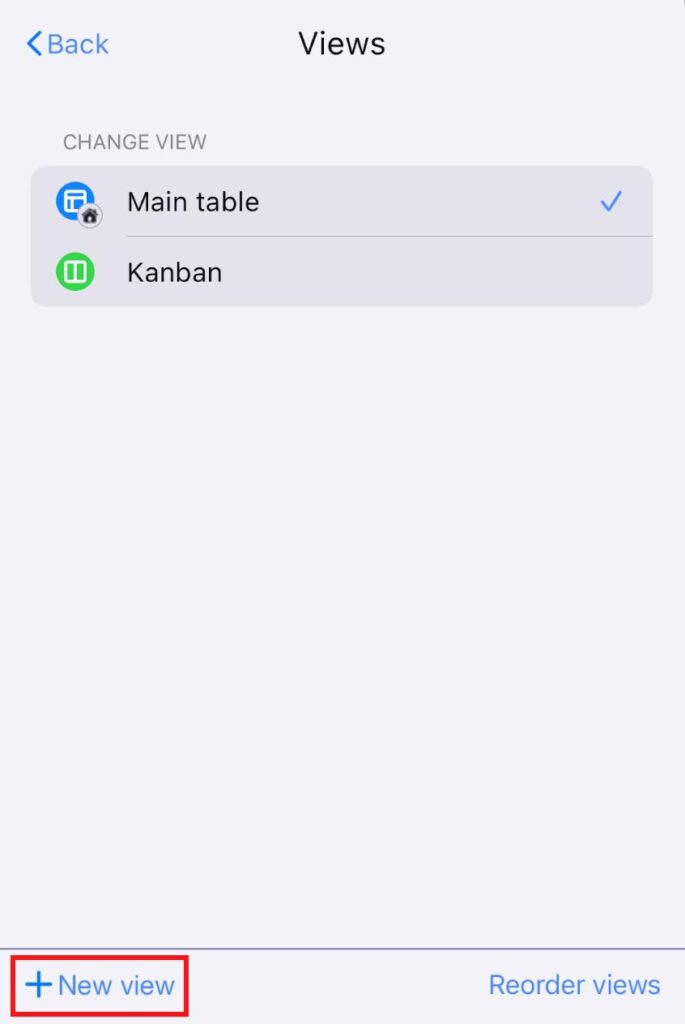
- Toca la Configuración de vista de tablero en la esquina superior derecha
- Toca Vistas
- Toca +Nueva vista
- Introduce el nombre de la vista
- Cambia el botón de opción si quieres que la vista sea privada
- Elige el tipo de la vista
- Toca Crear para completar la acción.
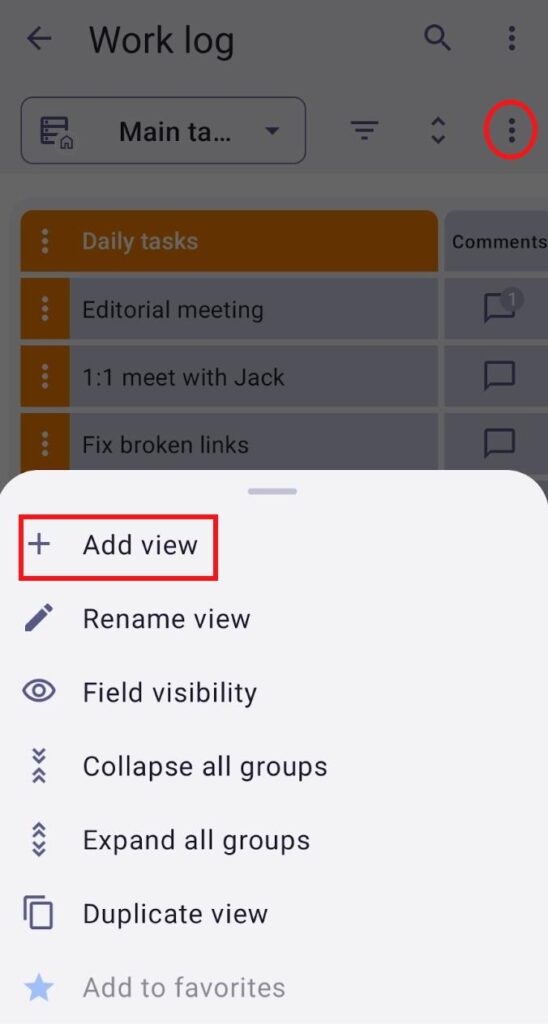
- Toca los tres puntos en la esquina superior derecha
- Selecciona Añadir vista
- Escribe el nombre de la vista
- Elige el tipo de vista
- Marca la casilla si quieres que la vista sea privada
- Toca Crear para completar la acción
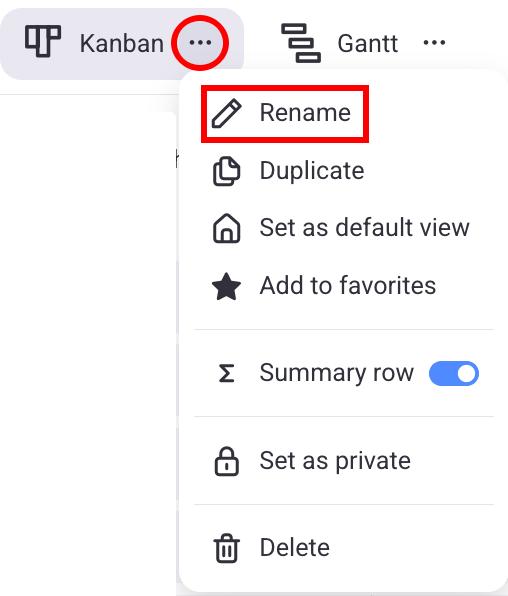
Cambiar el nombre de vista #
- Haz clic en los tres puntos al lado de la vista cuyo nombre quieres cambiar
- Selecciona Cambiar nombre
- Escribe nuevo nombre
- Presiona Enter/Haz clic fuera del área designada para completar la acción
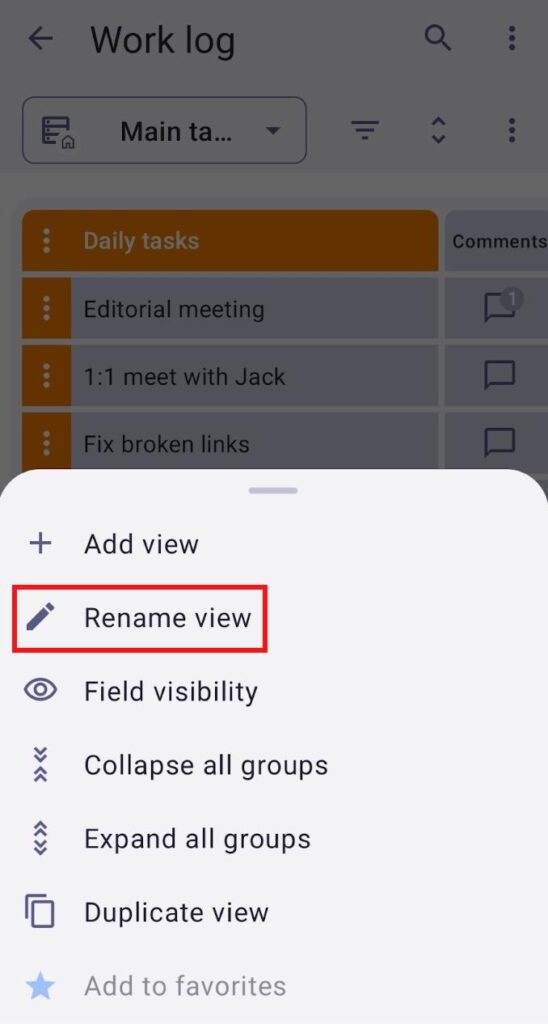
- Toca la Configuración de vista de tablero en la esquina superior derecha
- Toca Vistas
- Desliza la vista deseada hacia la derecha
- Toca Cambiar nombre de vista
- Introduce nuevo nombre
- Toca Hecho para completar la acción
- Abre tu vista deseada
- Toca los tres puntos en la esquina superior derecha
- Toca Cambiar nombre de vista
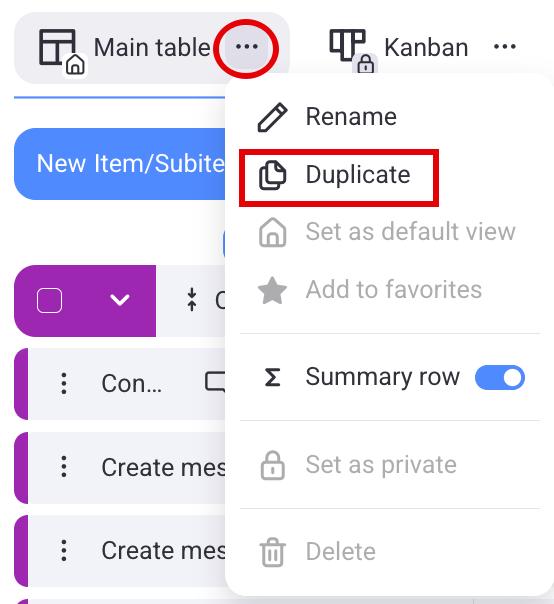
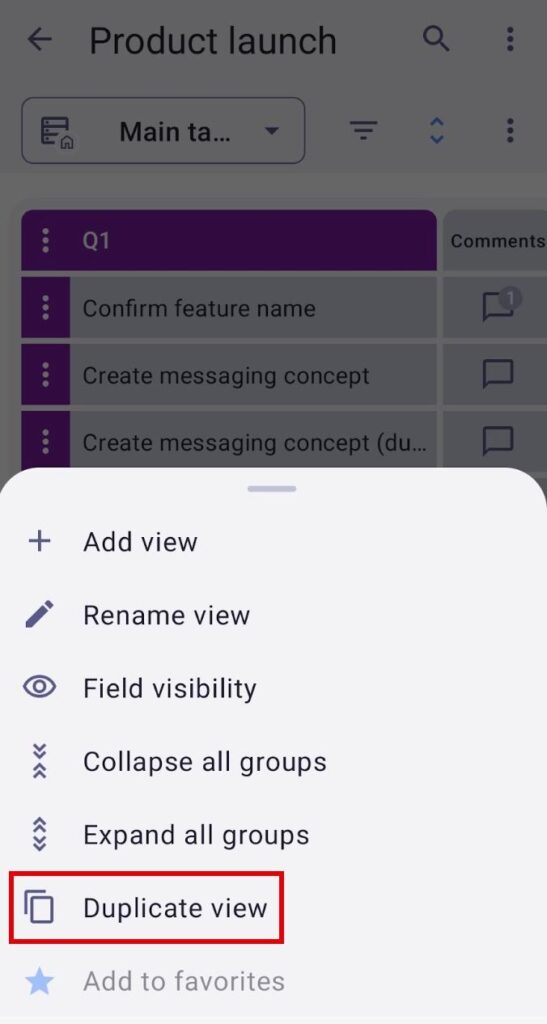
Duplicar la vista #
- Haz clic en los tres puntos al lado de la vista cuyo nombre quieres cambiar
- Selecciona Duplicar para completar la acción
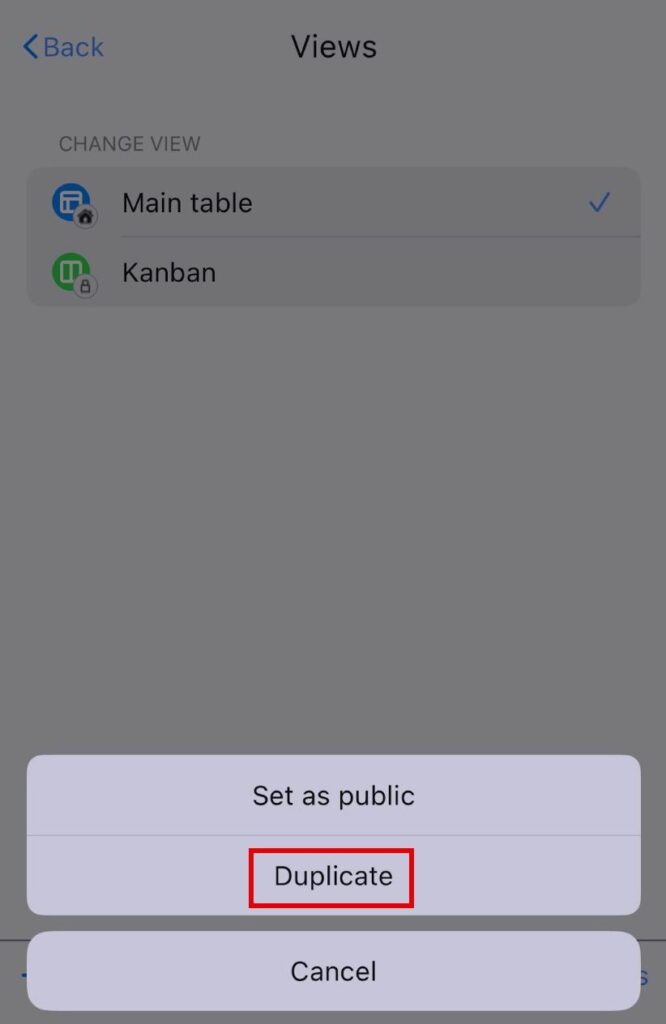
- Toca la Configuración de vista de tablero en la esquina superior derecha
- Toca Vistas
- Desliza la vista deseada hacia la izquierda
- Toca Más opciones
- Selecciona Duplicar
- Abre tu vista deseada
- Toca los tres puntos en la esquina superior derecha
- Toca Cambiar el nombre de vista
Vista privada #
Esta función está disponible en planes Pro y Enterprise.
Vistas privadas ofrecen una vista personal dedicada exclusiva a su creador. Esto permite que el creador de la vista siga estados, actualizaciones de tareas y proyectos, sin afectar a otros usuarios de tablero.
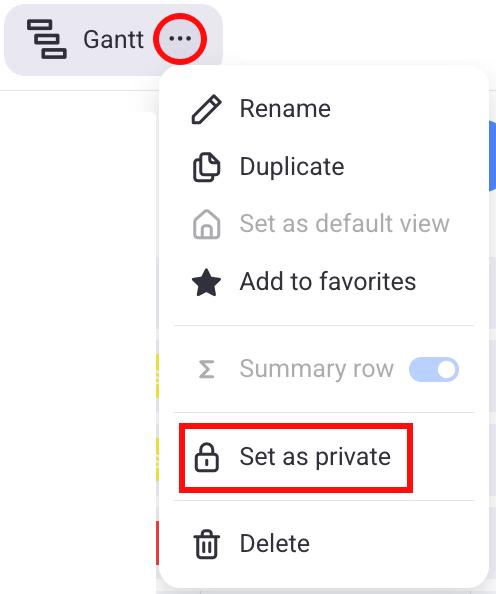
Para convertir una vista pública en privada #
- Haz clic en los tres puntos al lado de Vista
- Haz clic en Establecer como privado
- Toca la Configuración de vista de tablero en la esquina superior derecha
- Toca Vistas
- Desliza la vista deseada hacia la izquierda
- Toca Más opciones
- Selecciona Configurar como privado
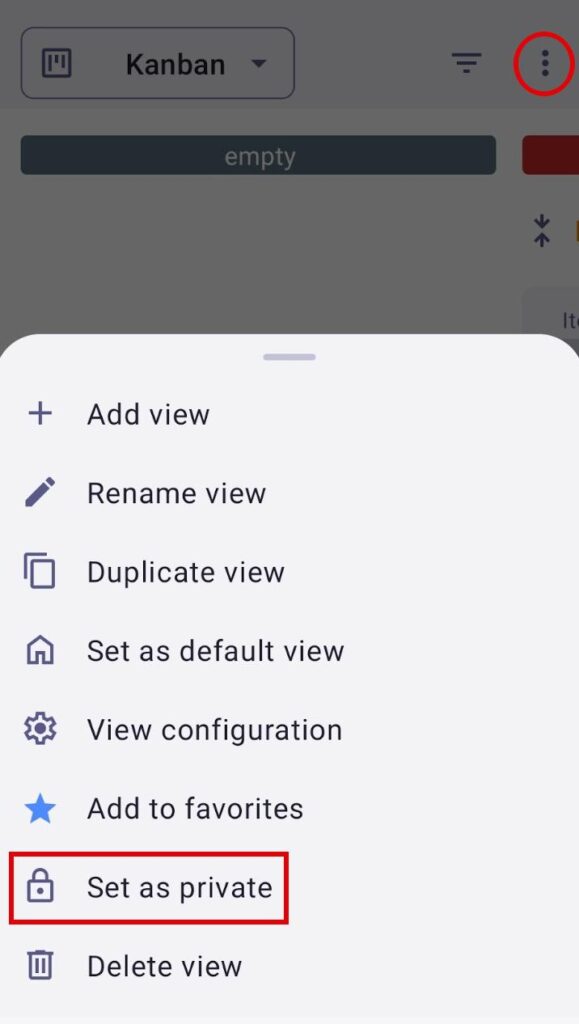
- Toca los tres puntos en la esquina superior derecha
- Toca Configurar como privado
Las vistas privadas son visibles solo para los creadores de vistas o para la persona que cambió la privacidad de la vista (de pública a privada), mientras que las vistas públicas permanecerán visibles para otros usuarios.
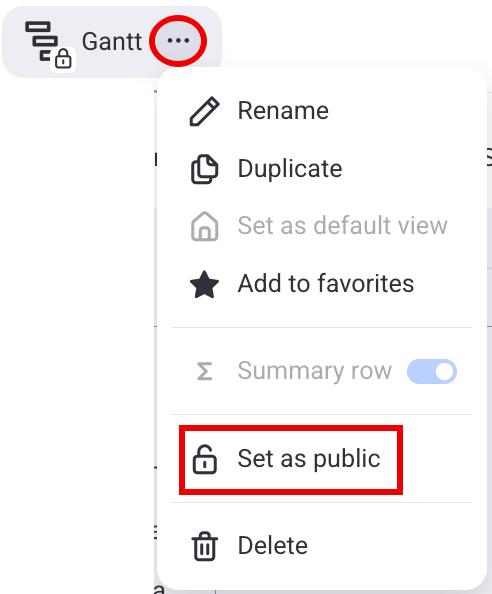
Convertir una vista privada en pública #
- Haz clic en los tres puntos al lado de Vista
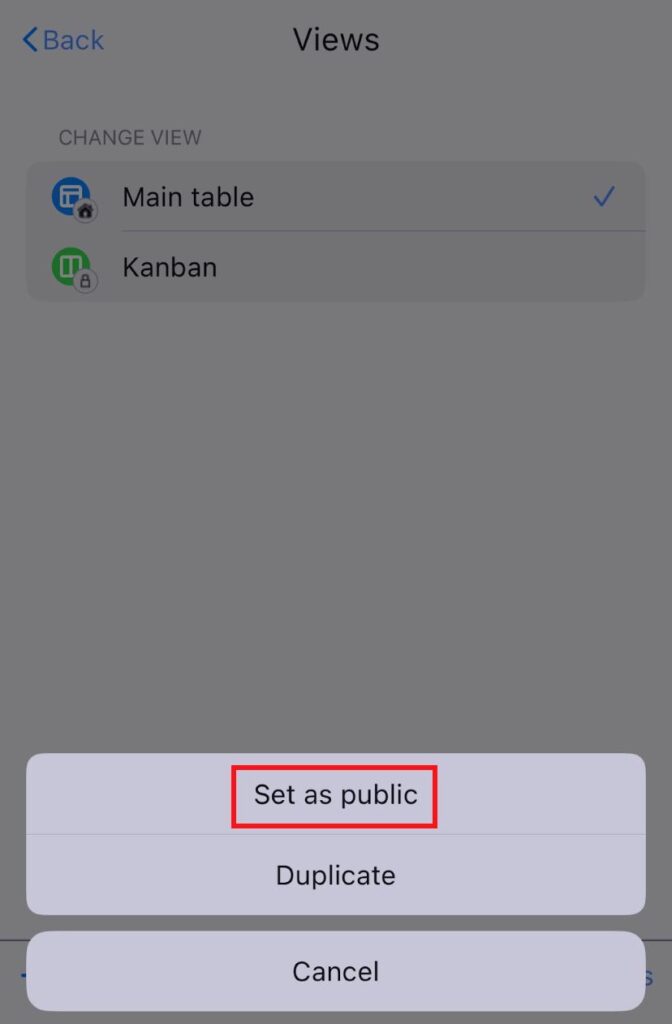
- Haz clic en Configurar como público
- Toca la Configuración de vista de tablero en la esquina superior derecha
- Toca Vistas
- Desliza la vista deseada hacia la izquierda
- Toca Más opciones
- Selecciona Configurar como público
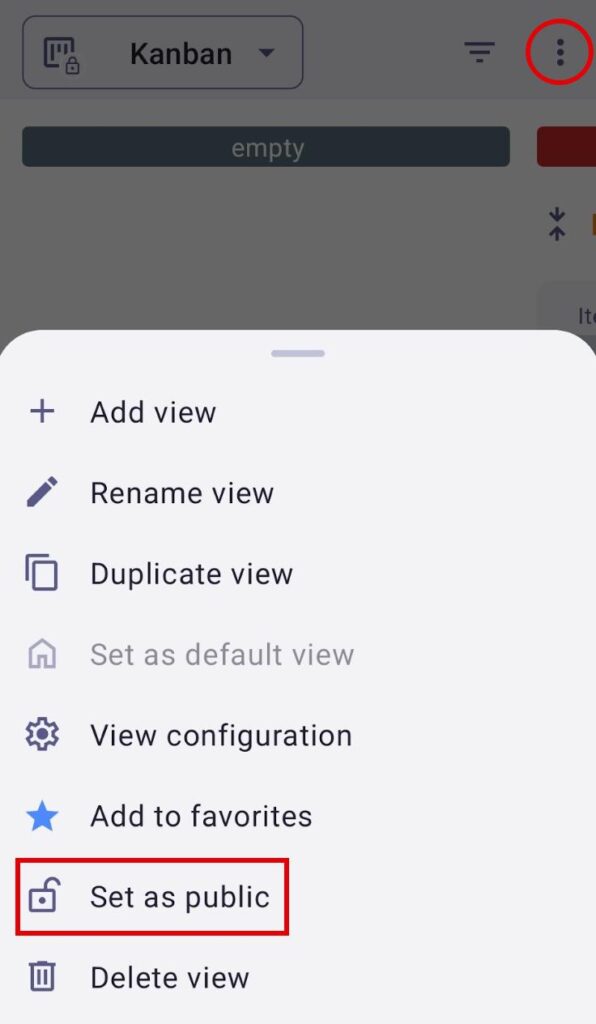
- Toca los tres puntos en la esquina superior derecha
- Toca Configurar como público
La función de Vista privada solo se puede utilizar por administradores y miembros. Si los permisos del tablero están configurados en una opción distinta a Editar todo, los usuarios que no son propietarios del tablero pueden crear vistas privadas, cambiar el nombre, duplicar o eliminar su vista privada ya existente, pero no pueden convertirlas en públicas.
Reordenar vistas #
- Haz clic y mantén presionado una vista
- Arrastra y suelta la vista para reordenarla
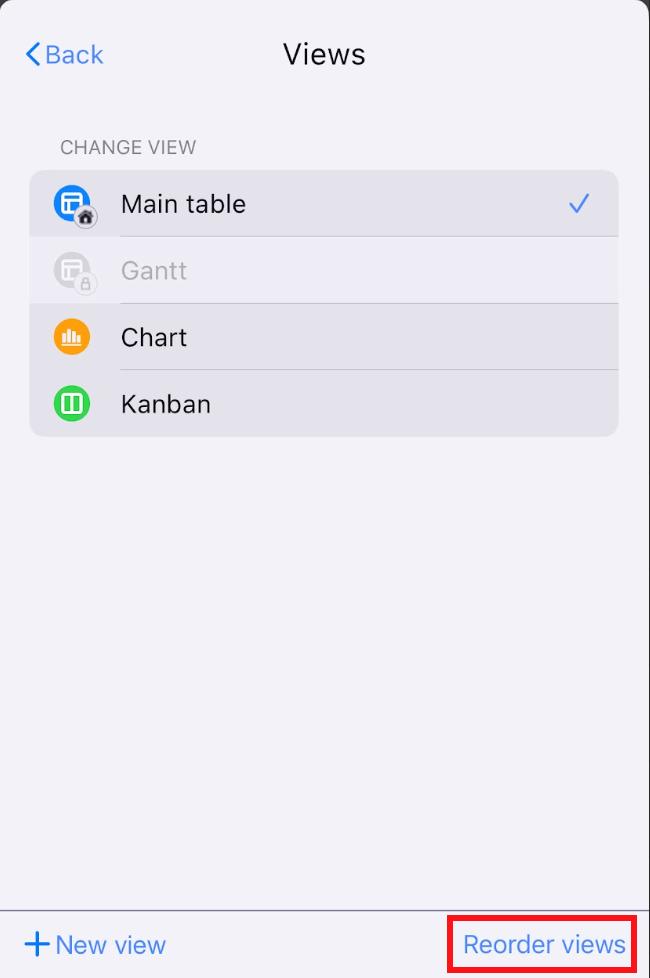
- Toca la Configuración de vista de tablero en la esquina superior derecha
- Toca Vistas
- Toca Reordenar vistas
- Arrastra y suelta las vistas para reordenarlas
- Toca Hecho para completar la acción
PRÓXIMAMENTE
La vista predeterminada seguirá siendo la primera vista.
Tanto los administradores como los miembros pueden ordenar las vistas, a menos que su nivel de acceso en el tablero esté restringido debido a permisos específicos del tablero establecidos por el propietario del tablero.
La reordenación de las vistas no incluye las vistas privadas de los usuarios, ya que se aplica un nuevo orden de vistas y es visible para todos los usuarios.
Añadir vista favorita #
- Haz clic en los tres puntos al lado de Vista
- Haz clic en Añadir a favoritas
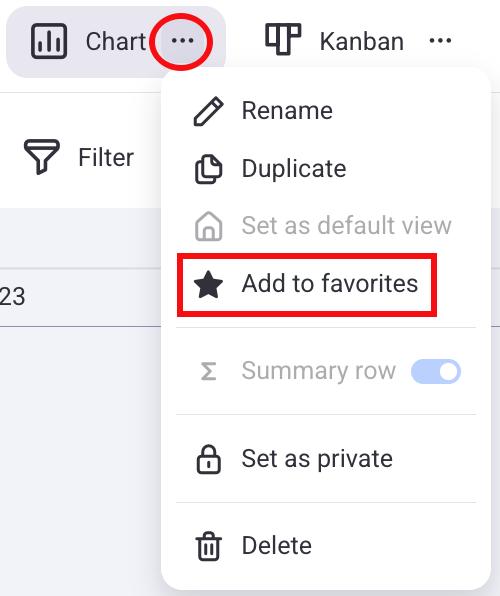
Esta vista se colocará junto a la vista predeterminada y aparecerá un ícono de estrella junto a su nombre. Para eliminar una Vista de favoritos, simplemente haz clic en los tres puntos junto a ella y selecciona Mover de favoritos.
- Toca la Configuración de vista de tablero en la esquina superior derecha
- Toca Vistas
- Desliza la vista deseada hacia la derecha
- Toca Añadir a favoritas
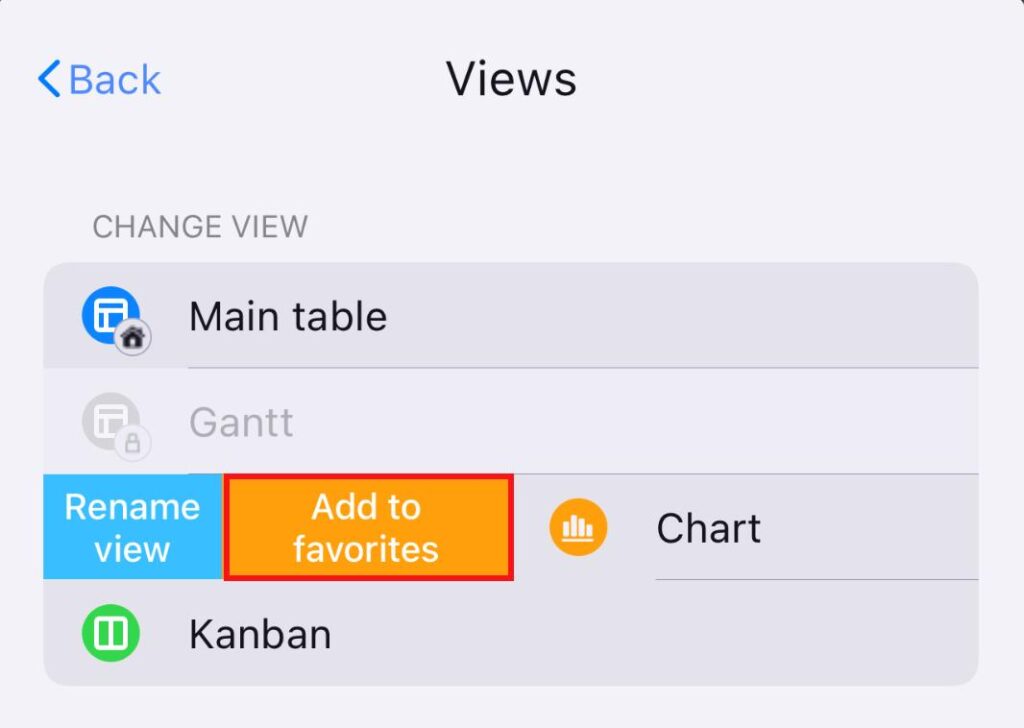
Esta vista se colocará junto a la vista predeterminada y aparecerá un ícono de estrella junto a su nombre. Para eliminar una vista de favoritos, deslízala hacia la izquierda nuevamente y selecciona Eliminar de favoritas.
- Toca los tres puntos en la esquina superior derecha
- Toca Añadir a favoritas
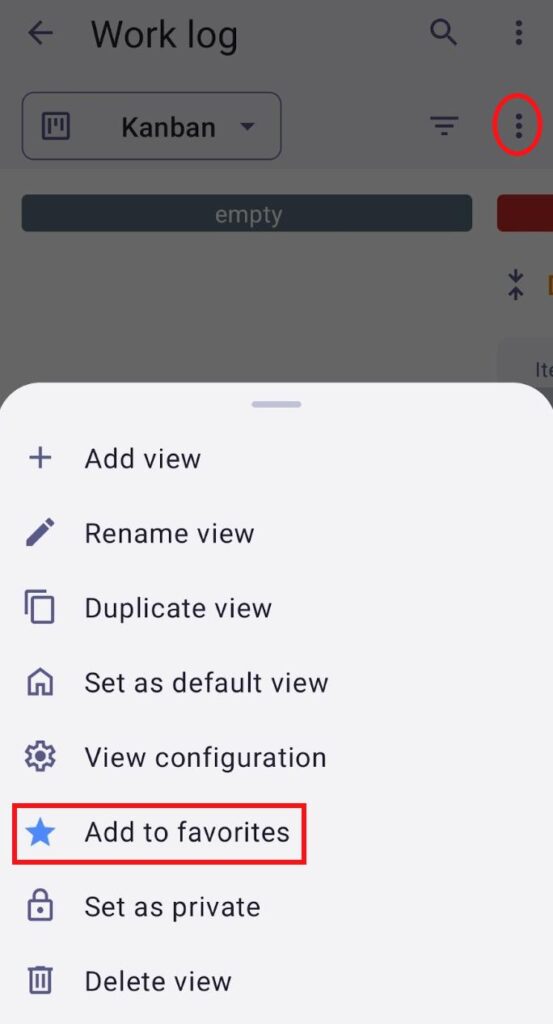
Esta vista se colocará junto a la vista predeterminada y aparecerá un ícono de estrella junto a su nombre. Para eliminar una Vista de favoritos, simplemente toca los tres puntos junto a ella y selecciona Mover de favoritos.
Cuando una vista se configura como favorita, el cambio solo es visible para el usuario que configuró la vista favorita y no afectará a otros usuarios en el tablero. La vista predeterminada no se puede marcar como favorita.
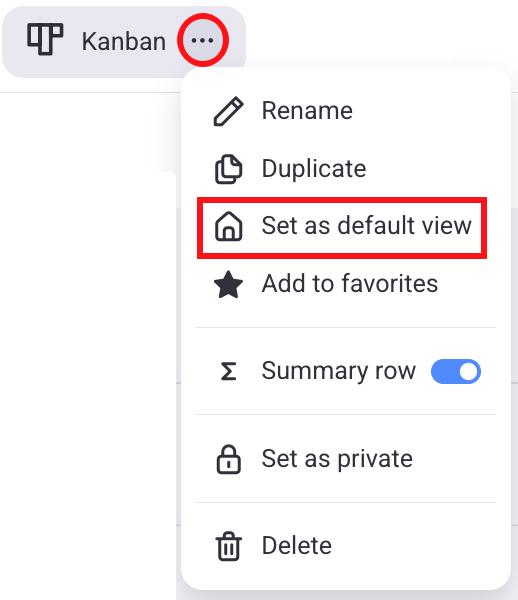
Establecer vista predeterminada #
Cada Tablero debe incluir un mínimo de una vista. Tras la creación de un tablero, se genera automáticamente una vista de tabla y se designa como la vista principal (predeterminada). Sin embargo, cualquier otra vista (si no está marcada como vista favorita) en el tablero se puede configurar como vista predeterminada. Solo el propietario del tablero puede establecer una vista como predeterminada.
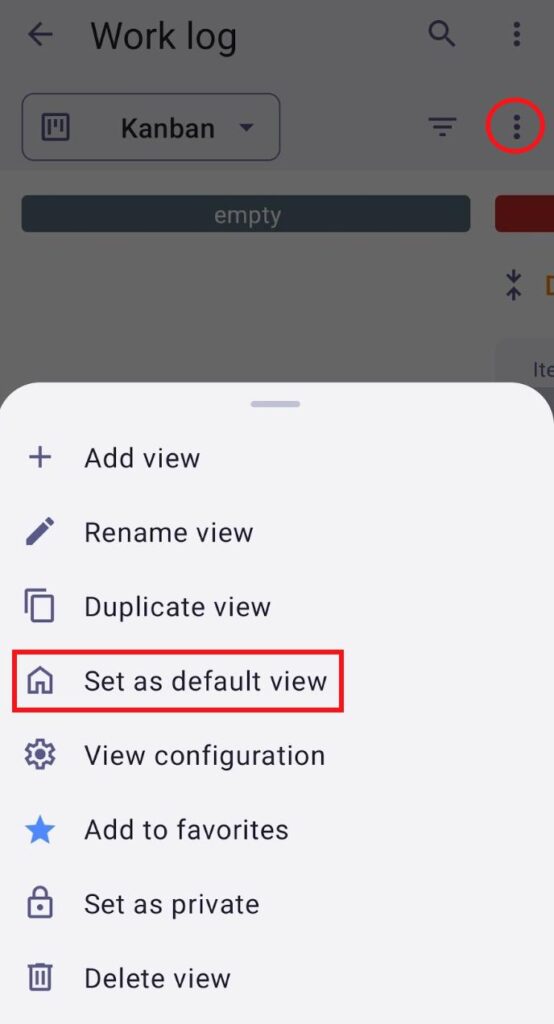
- Haz clic en los tres puntos al lado de Vista
- Haz clic en Configurar como vista predeterminada
- Toca la Configuración de vista de tablero en la esquina superior derecha
- Toca Vistas
- Desliza la vista deseada hacia la derecha
- Toca Configurar como vista predeterminada
- Toca los tres puntos en la esquina superior derecha
- Toca Configurar como vista predeterminada