Introdução às visualizações do Quadro
A forma como seus dados são exibidos no Quadro pode ajudá-lo a obter uma visão geral melhor das informações disponíveis. Com as Visualizações do Quadro, você pode visualizar os dados exibidos no seu Quadro de diferentes maneiras.
Tipos de visualização do quadro #
O Plaky permite que você escolha entre diferentes visualizações do quadro:
- Exibição de Tabela
- Exibição Kanban
- Visualização de Gantt
- Visualização de Gráfico
Abaixo, você encontrará mais detalhes sobre cada vista.
Exibição de tabela #
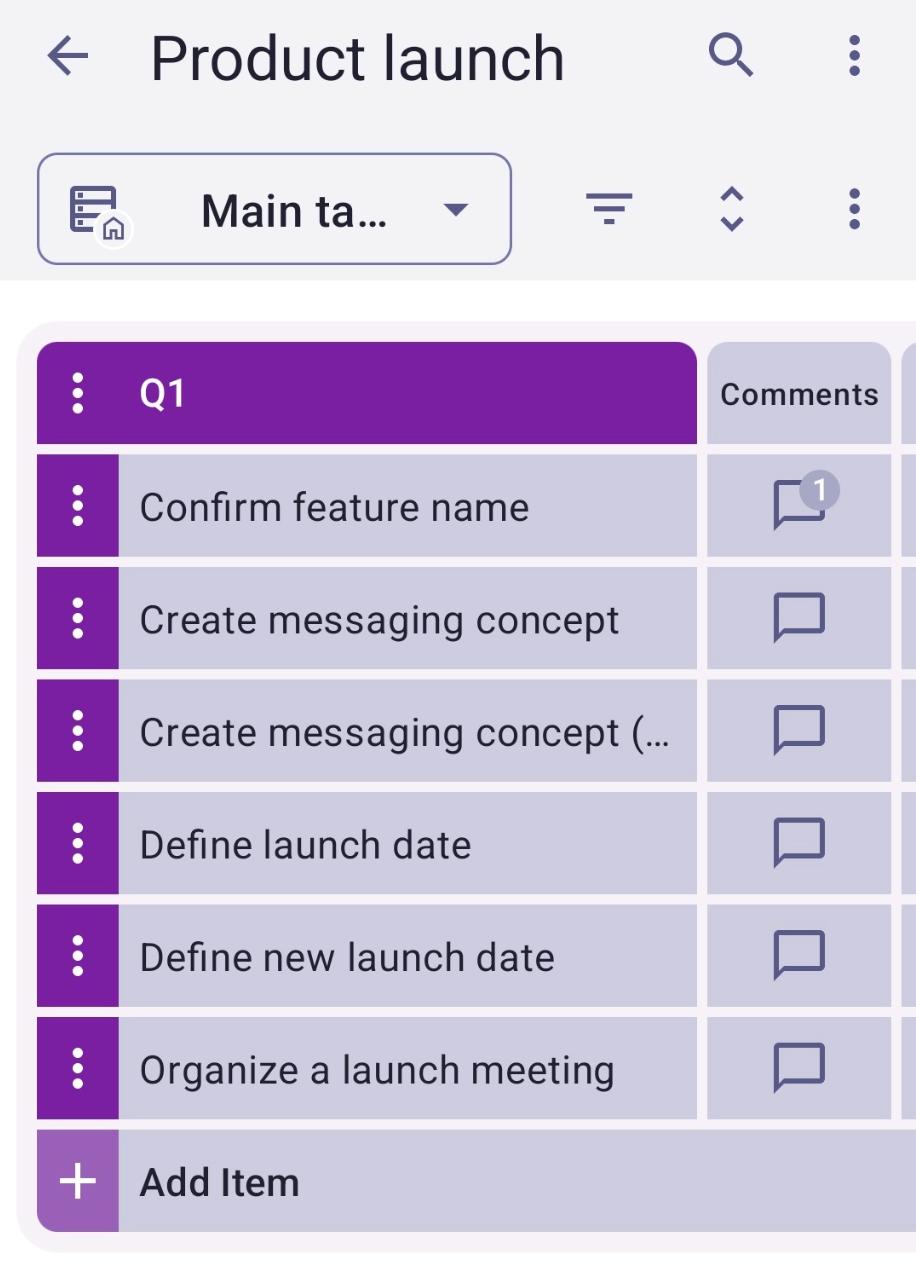
Na visualização em tabela, as informações do seu quadro serão exibidas como uma tabela com campos e linhas.
Aqui está um exemplo da visualização em tabela para o modelo de quadro de lançamento de produto:
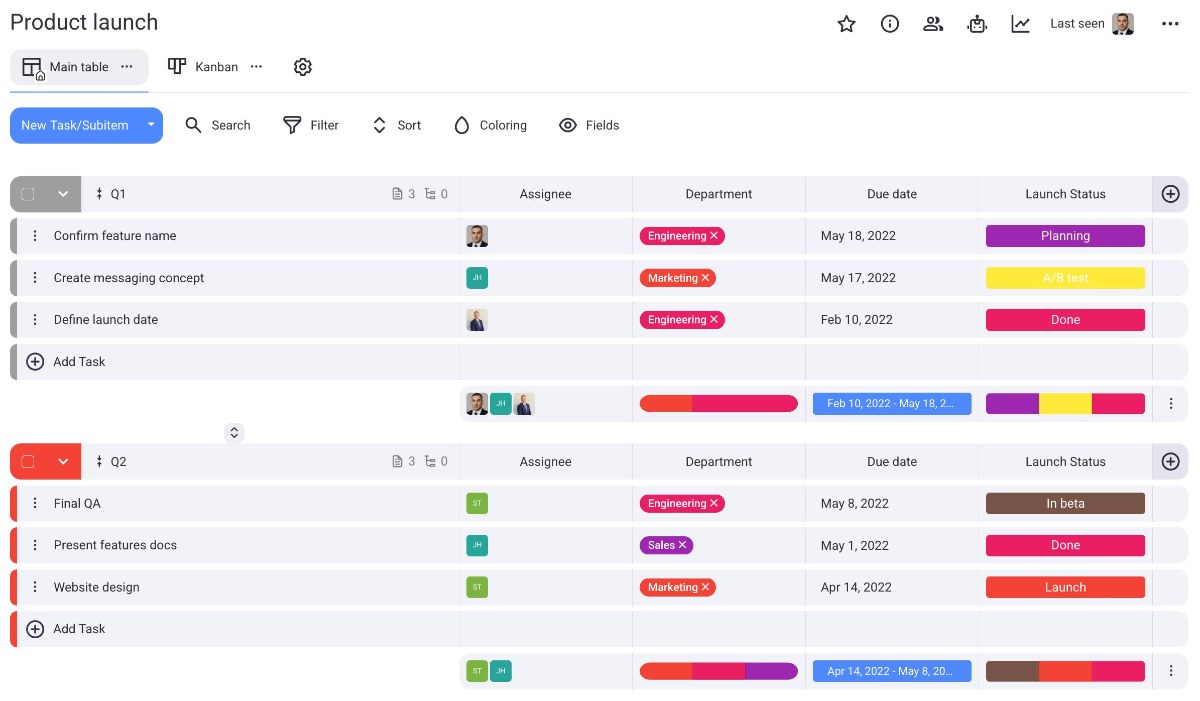
Na visualização em tabela, deslize para a esquerda para ver todos os campos no quadro.

Deslize para a esquerda para ver todos os campos no quadro
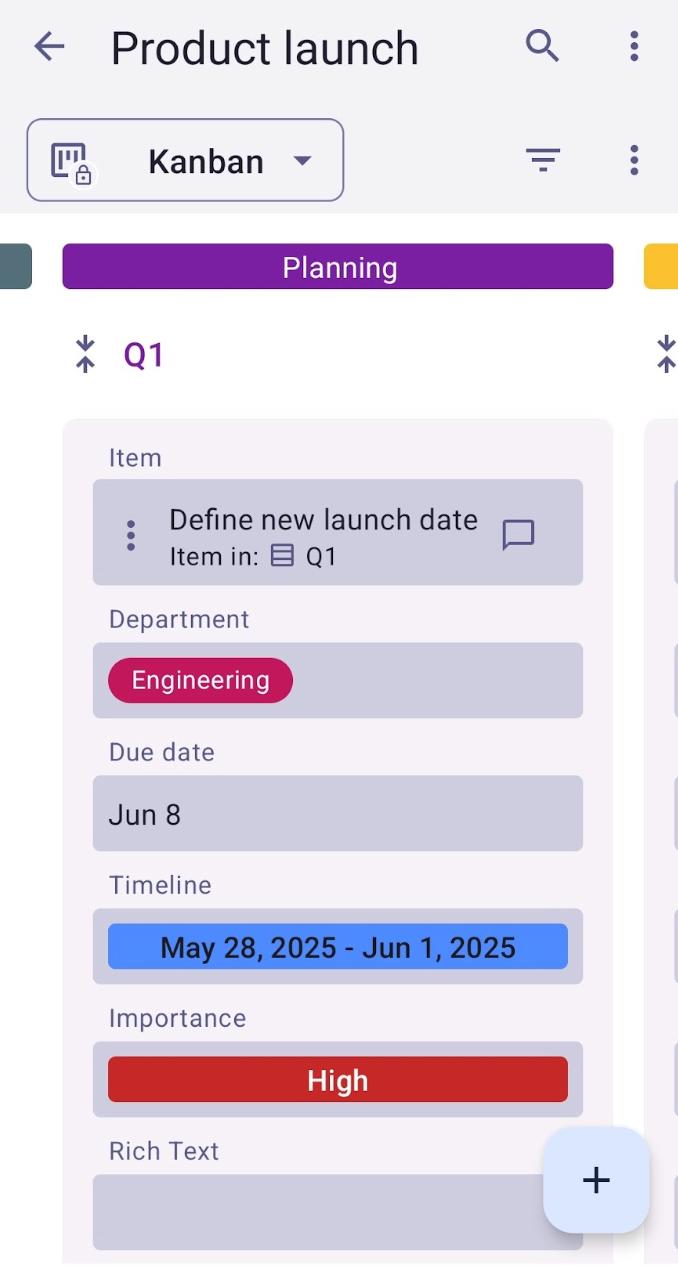
Exibição Kanban #
Kanban é uma técnica de gerenciamento de projetos bastante conhecida, que consiste em gerenciar o trabalho priorizando tarefas e demandas com base na capacidade disponível.
Aqui está um exemplo da visualização Kanban para o modelo de quadro de lançamento de produto:
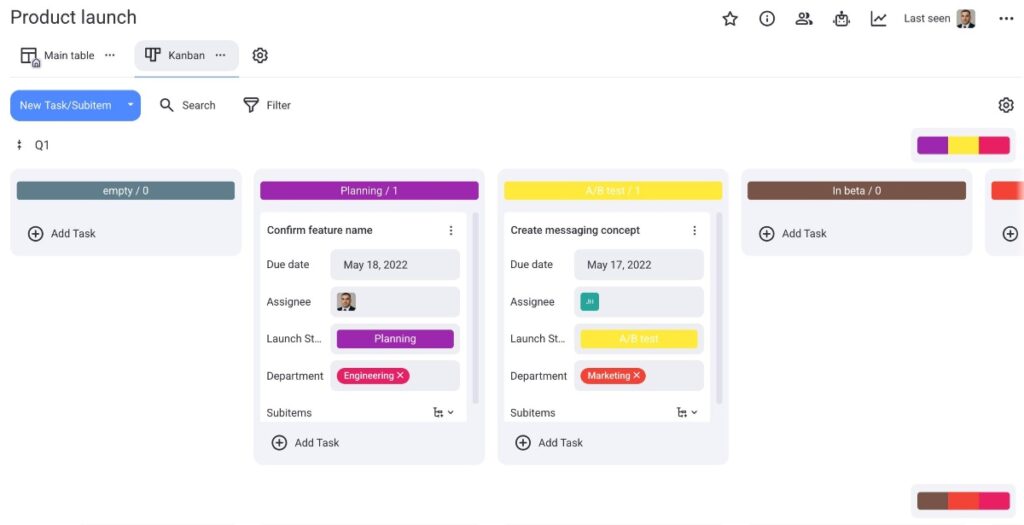
Na visualização Kanban, deslize para a esquerda para ver todos os itens no quadro agrupados por status e arraste e solte o item para alterar seu status.
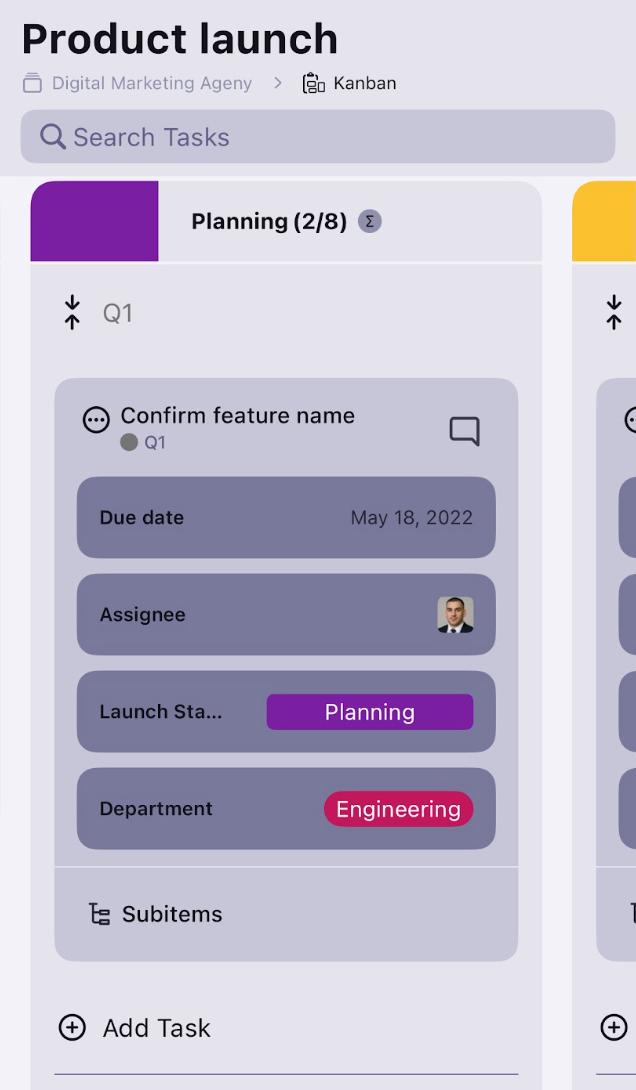
Deslize para a esquerda para ver todos os itens do quadro agrupados por status.
Para saber mais sobre a visualização Kanban no Plaky, visite nosso artigo.
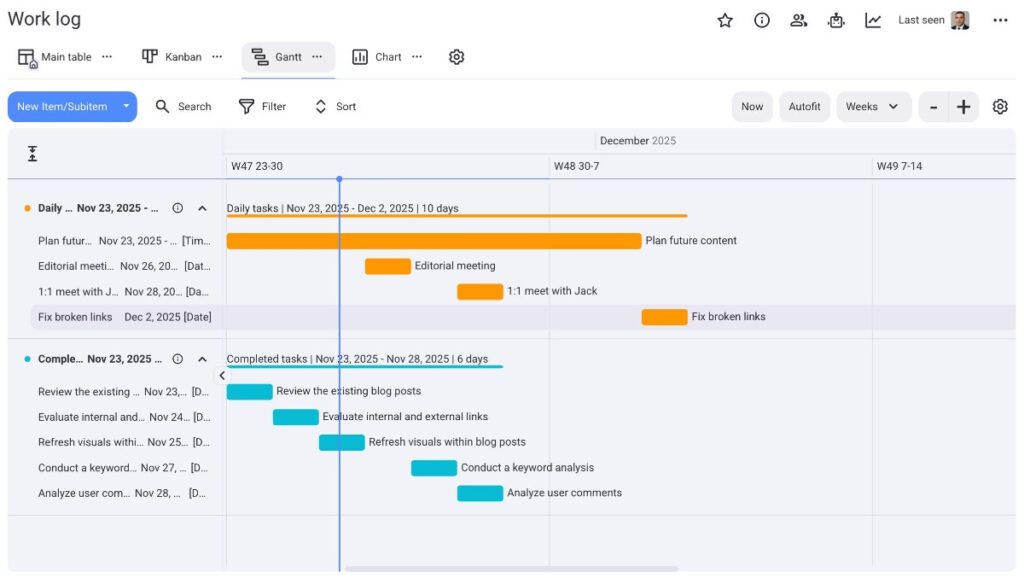
Vizualização de Gantt #
A visualização de Gantt oferece uma representação visual de suas tarefas como barras horizontais em uma linha do tempo.
Aqui está um exemplo da visualização de Gantt para o modelo de quadro de registro de trabalho:
EM BREVE
EM BREVE
Para saber mais sobre a Visualização de Gantt, visite nosso artigo.
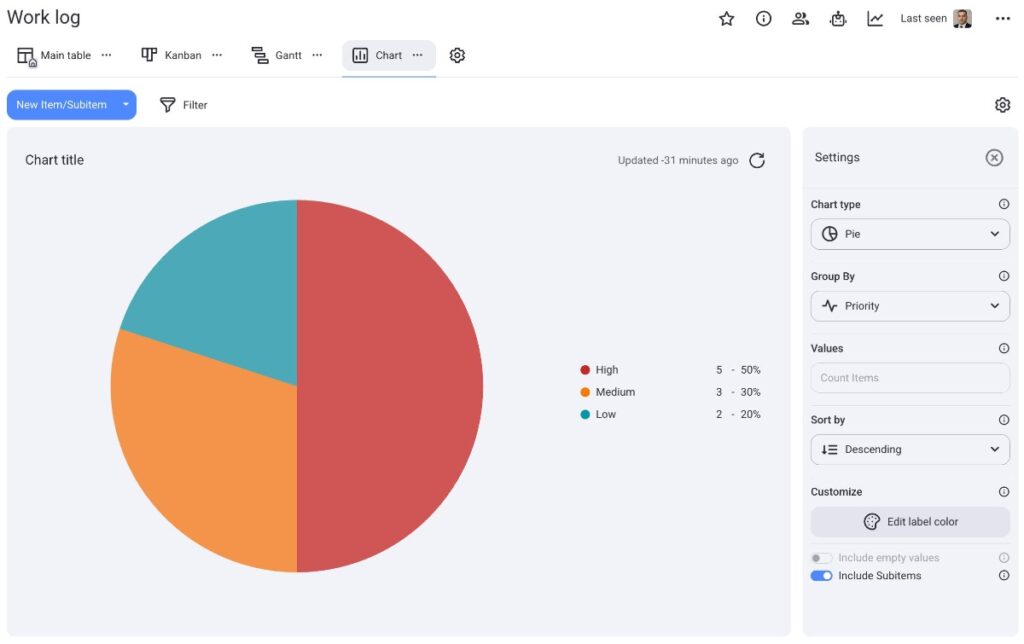
Visualização de gráfico #
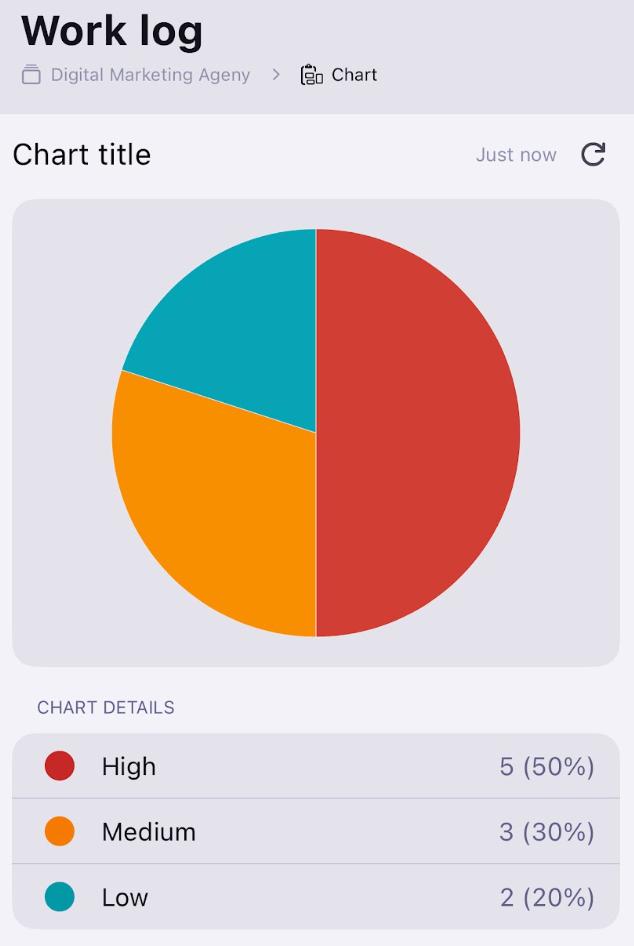
Com a visualização em gráfico, você pode visualizar projetos e tarefas usando gráficos interativos de pizza e barras.
Aqui está um exemplo de um gráfico de pizza no Plaky:
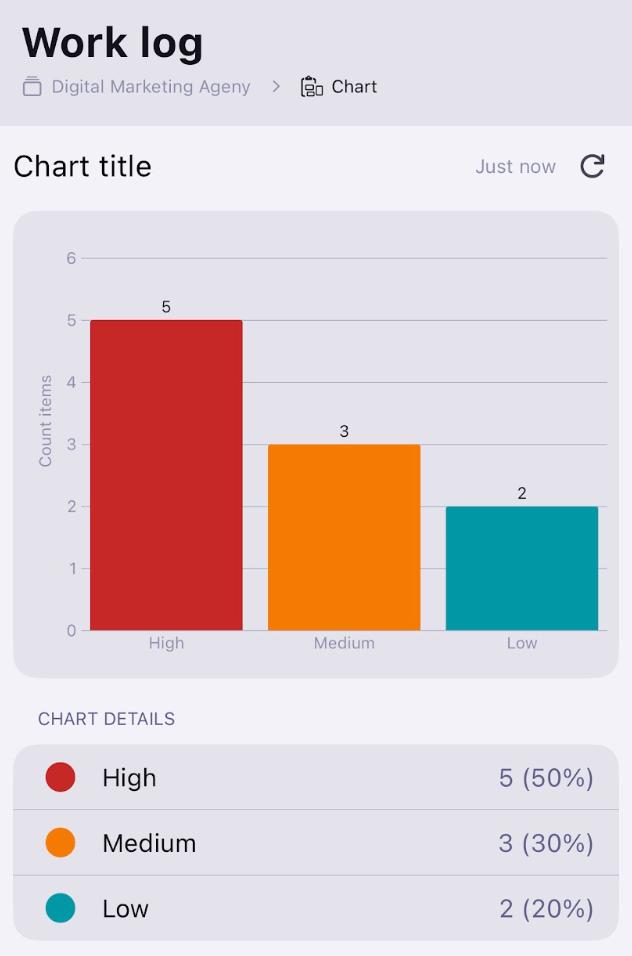
Aqui está um exemplo de um gráfico de barras no Plaky:

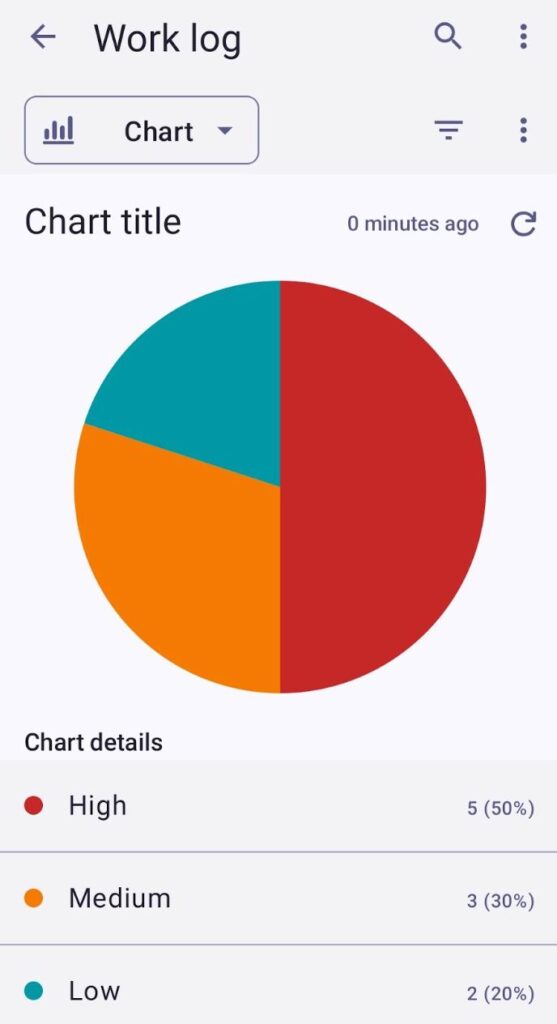
Aqui está um exemplo de um gráfico de pizza no Plaky para iOS:
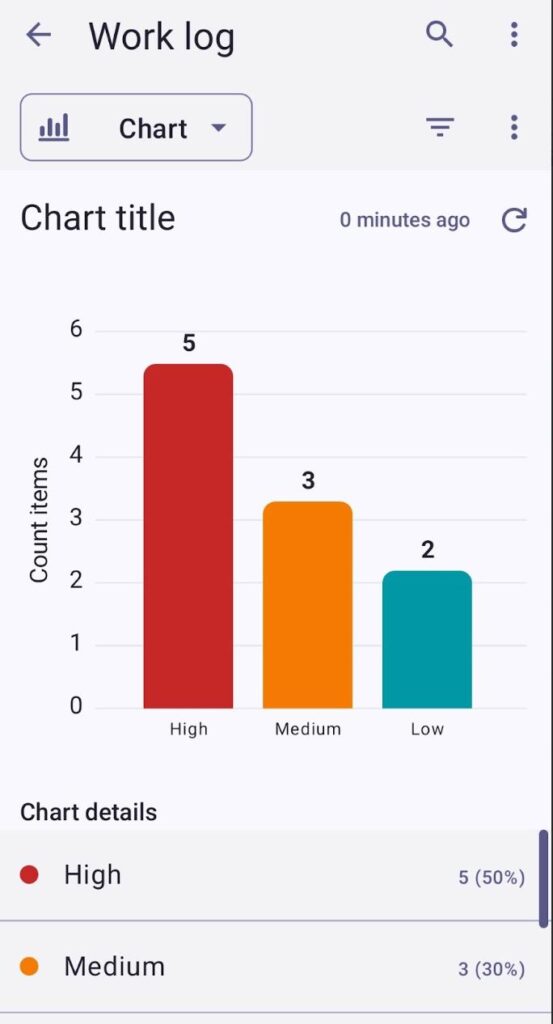
Aqui está um exemplo de um gráfico de barras no Plaky para iOS:
Aqui está um exemplo de um gráfico de pizza no Plaky para Android:
Aqui está um exemplo de um gráfico de barras no Plaky para Android:
Para saber mais sobre a Visualização em Gráfico, visite nosso artigo.
Adicionar exibição de quadro #
- Clique no botão +
- Selecione um novo tipo de visualização
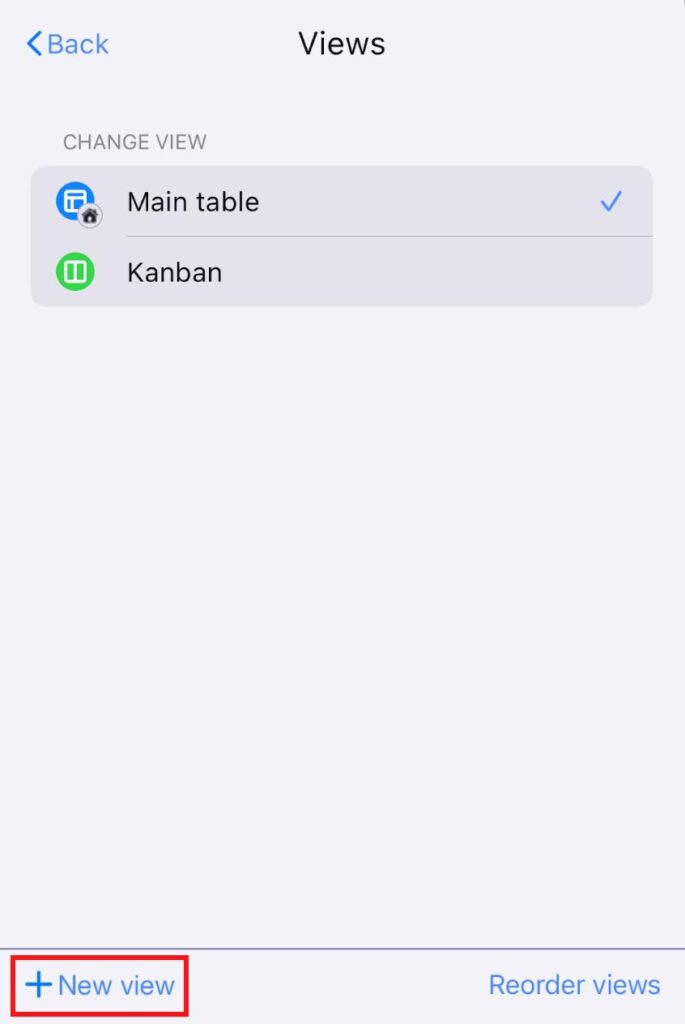
- Toque em Configuração da visualização do quadro no canto superior direito
- Toque em Visualizações
- Toque em + Nova visualização
- Digite o nome da visualização
- Ative a opção se desejar tornar a visualização privada
- Escolha o tipo de visualização
- Toque em Criar para concluir a ação
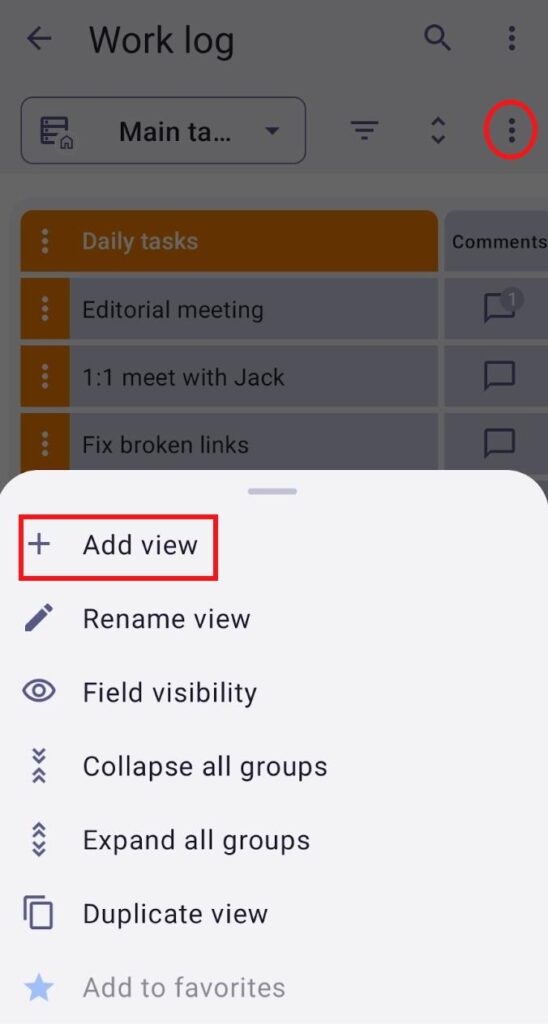
- Toque nos três pontos no canto superior direito
- Selecione Adicionar visualização
- Digite o nome da visualização
- Selecione o tipo de visualização
- Marque a caixa se desejar tornar a visualização privada
- Toque em Criar para concluir a ação
Renomear exibição #
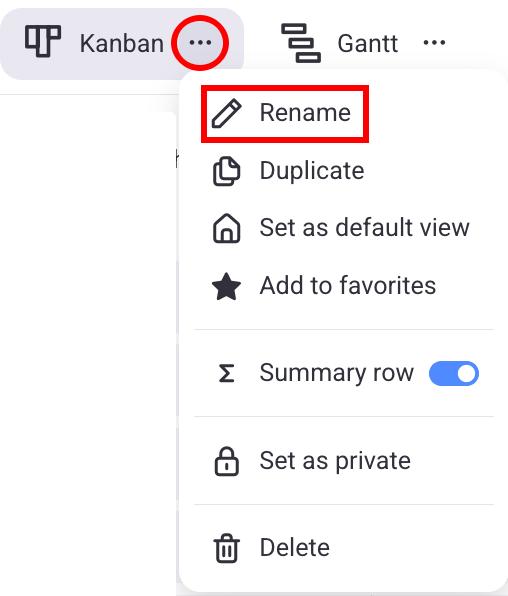
- Clique nos três pontos ao lado da Vista que deseja renomear
- Selecione Renomear
- Digite o novo nome
- Pressione Clique fora da área designada para concluir a ação
- Toque em Configuração da visualização do quadro no canto superior direito
- Toque em Visualizações
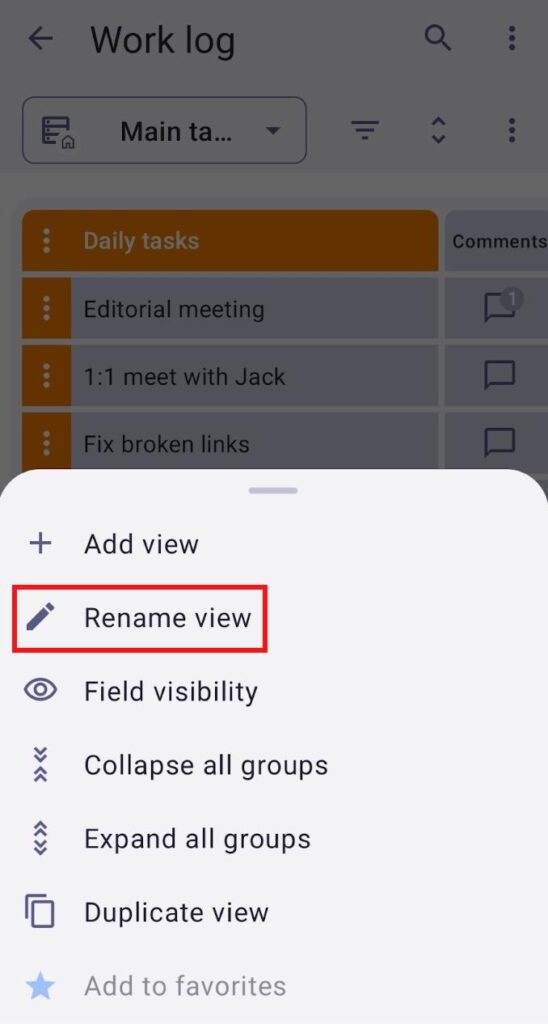
- Deslize para a direita na visualização que deseja renomear
- Toque em Renomear visualização
- Insira um novo nome de visualização
- Toque em Concluir para concluir a ação
- Abra a sua visualização preferida
- Toque nos três pontos no canto superior direito
- Toque em Renomear visualização
Duplicar exibição #
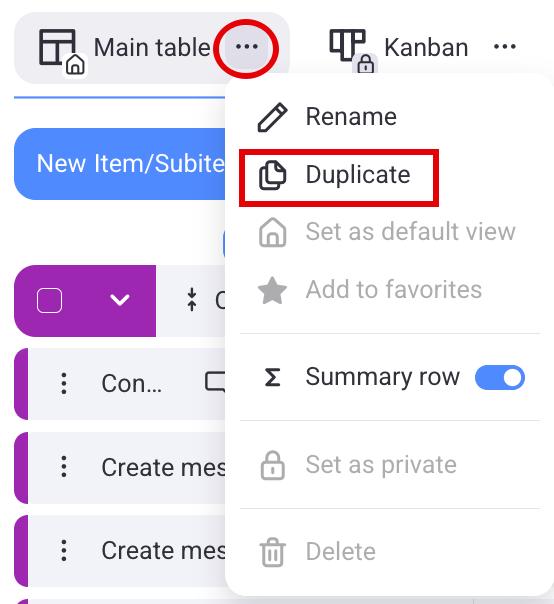
- Clique nos três pontos ao lado da Vista que deseja renomear
- Selecione Duplicar para concluir a ação
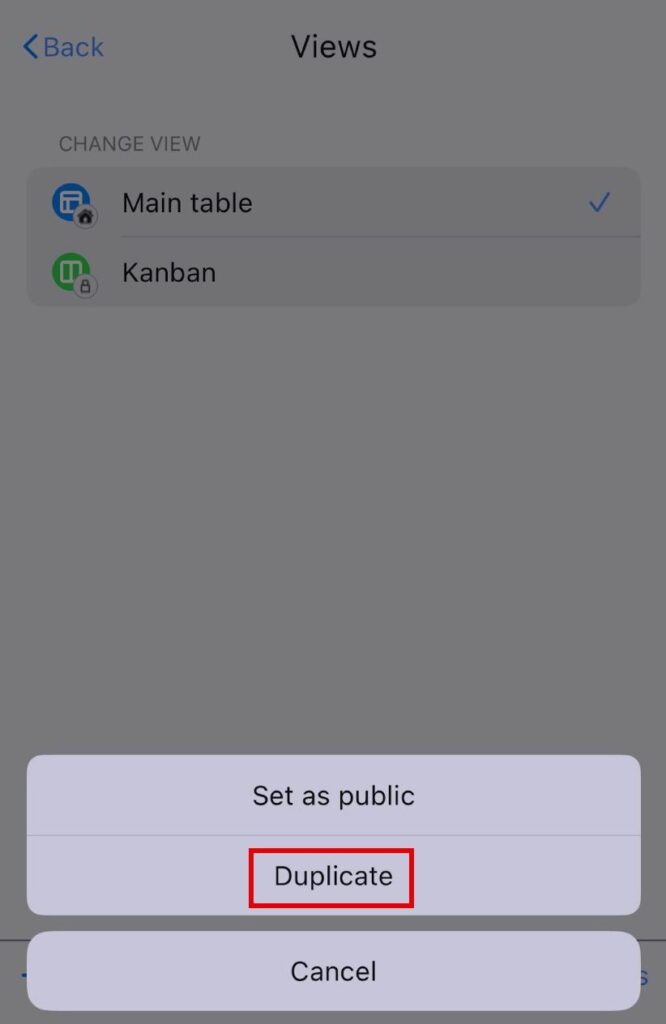
- Toque em Configuração da visualização do quadro no canto superior direito
- Toque em Visualizações
- Deslize para a esquerda na visualização
- Toque em Mais opções
- Selecione Duplicar
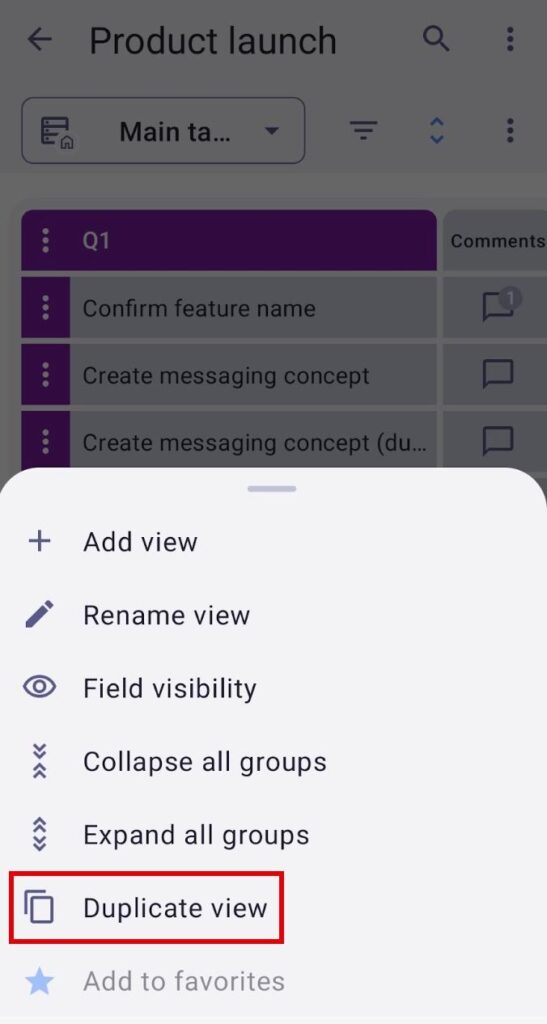
- Abra a sua visualização preferida
- Toque nos três pontos no canto superior direito
- Toque em Duplicar
Exibição privada #
Este recurso está disponível nos planos Pro e Enterprise.
As Visualizações Privadas oferecem uma visão pessoal e dedicada, exclusiva para seu criador. Isso permite que o criador da Visualização acompanhe o status das tarefas, atualizações e projetos sem afetar os outros usuários do Quadro.
Tornar a visualização pública privada #
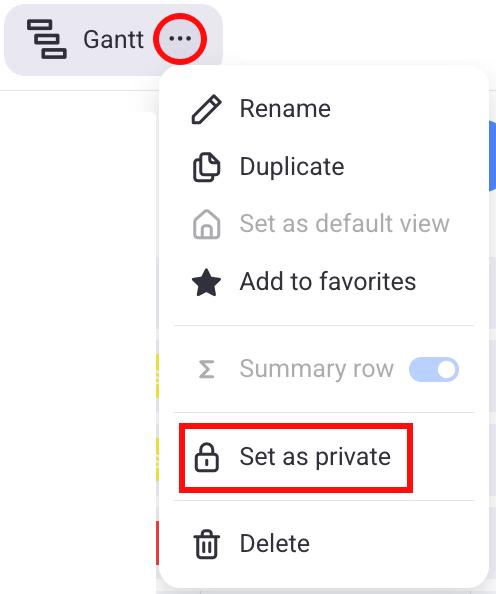
- Clique nos três pontos ao lado de Visualizar
- Clique em Definir como privado
- Toque em Configuração da visualização do quadro no canto superior direito
- Toque em Visualizações
- Deslize para a esquerda em uma visualização
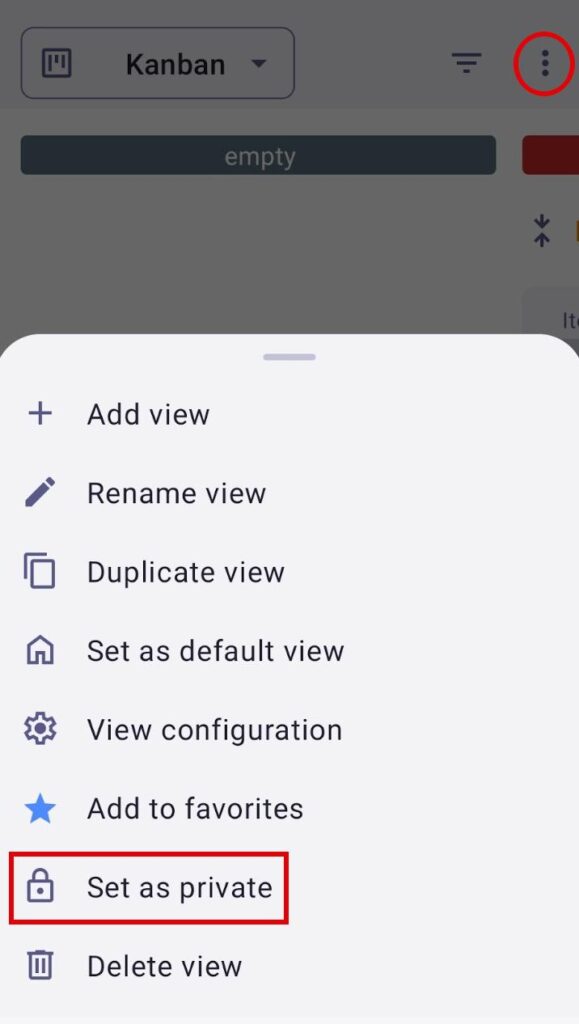
- Toque em Mais opções
- Selecione Definir como privado
- Toque nos três pontos no canto superior direito
- Toque em Definir como privado
As visualizações privadas são visíveis apenas para o criador da visualização ou para a pessoa que alterou a configuração de privacidade da visualização (de pública para privada), enquanto as visualizações públicas permanecem visíveis para outros usuários.
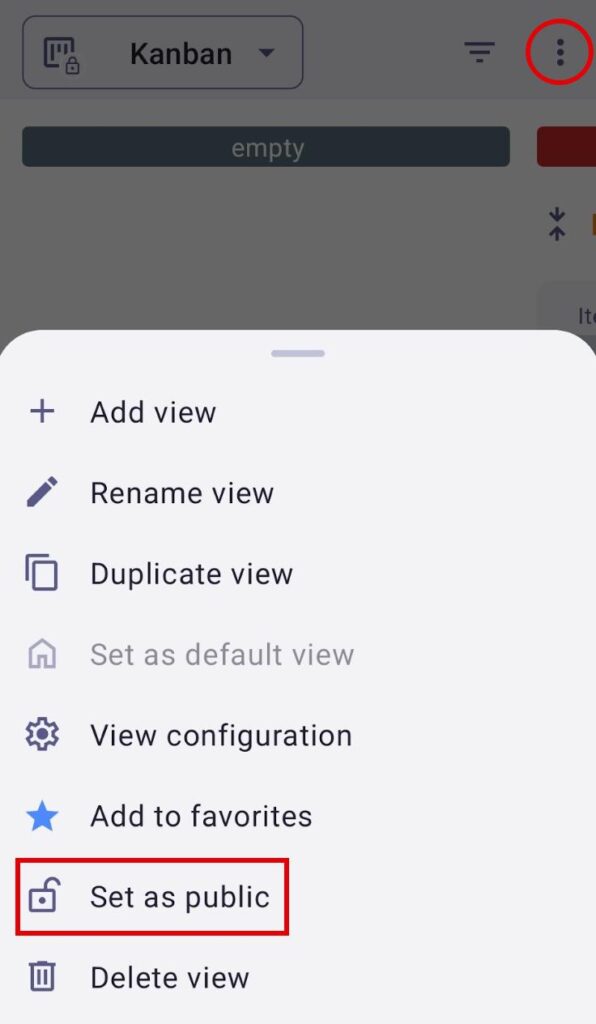
Tornar a visualização privada pública #
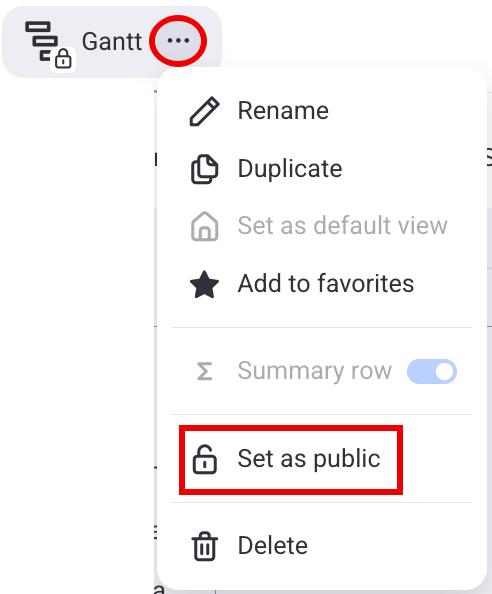
- Clique nos três pontos ao lado de Visualizar
- Clique em Definir como público
- Toque em Configuração da visualização do quadro no canto superior direito
- Toque em Visualizações
- Deslize para a esquerda em uma visualização
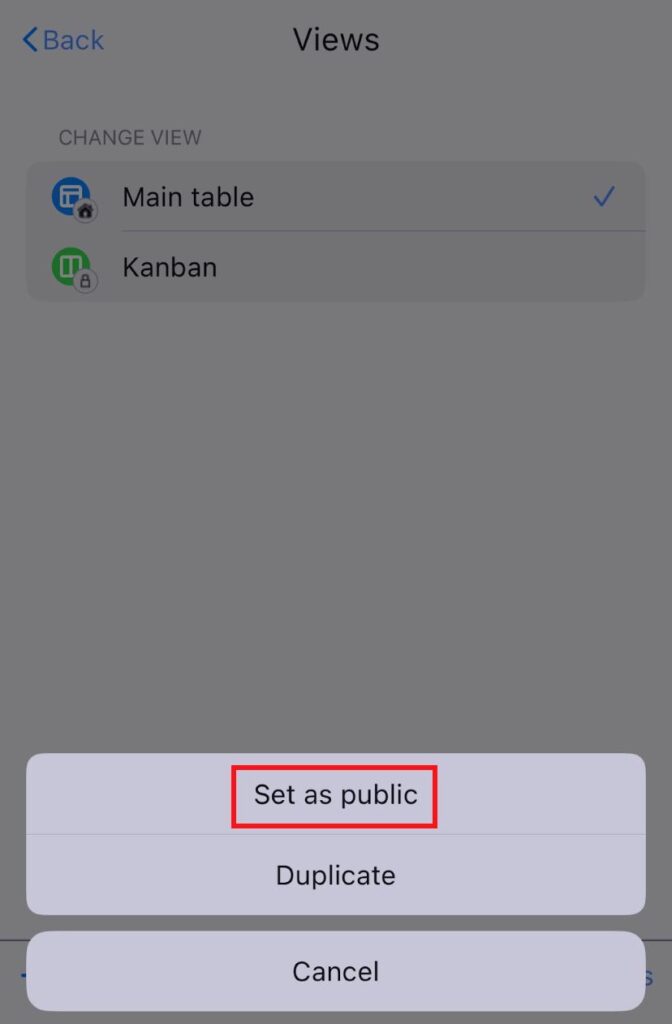
- Toque em Mais opções
- Selecione Definir como público
- Toque nos três pontos no canto superior direito
- Toque em Definir como público
The Private View feature is available only to Admins and Members. If the Board permissions are set to anything other than Edit everything, users who are not Board owners are allowed to create private views, rename, duplicate, or delete their existing private views, but cannot turn them into public views.
Reordenar exibição #
- Clique e mantenha pressionado em uma visualização
- Arraste e solte a visualização onde desejar
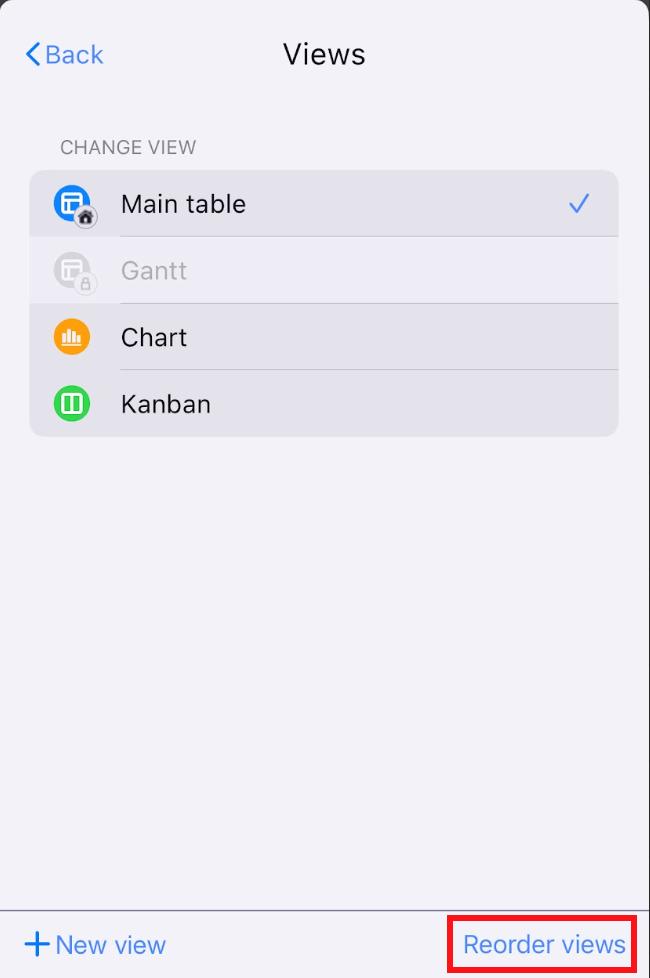
- Toque em Configuração da visualização do quadro no canto superior direito
- Toque em Visualizações
- Toque em Reordenar visualizações
- Arraste e solte as exibições para reordená-las
- Toque em Concluído para finalizar a ação
EM BREVE
A exibição padrão ainda será a primeira.
Tanto os administradores quanto os membros podem classificar as exibições, a menos que seu nível de acesso no quadro seja restrito devido a permissões específicas do quadro definidas pelo proprietário do quadro.
A reordenação das visualizações não inclui as visualizações privadas dos usuários, pois a nova ordem é aplicada e fica visível para todos os usuários.
Adicionar uma Vista Favorita #
- Clique nos três pontos ao lado de Visualizar
- Clique em Adicionar aos favoritos
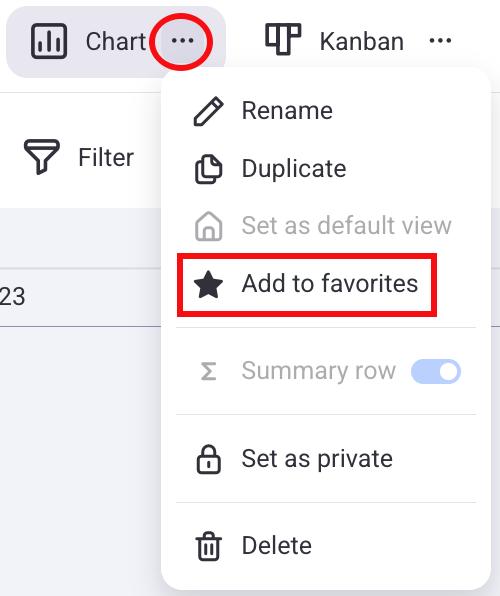
Essa visualização será exibida ao lado da visualização padrão e um ícone de estrela aparecerá ao lado do nome dela. Para remover uma visualização dos favoritos, basta clicar nos três pontos ao lado dela e selecionar "Remover dos favoritos".
- Toque em Configuração da visualização do quadro no canto superior direito
- Toque em Visualizações
- Deslize para a direita na vista que você deseja
- Toque em Adicionar aos favoritos
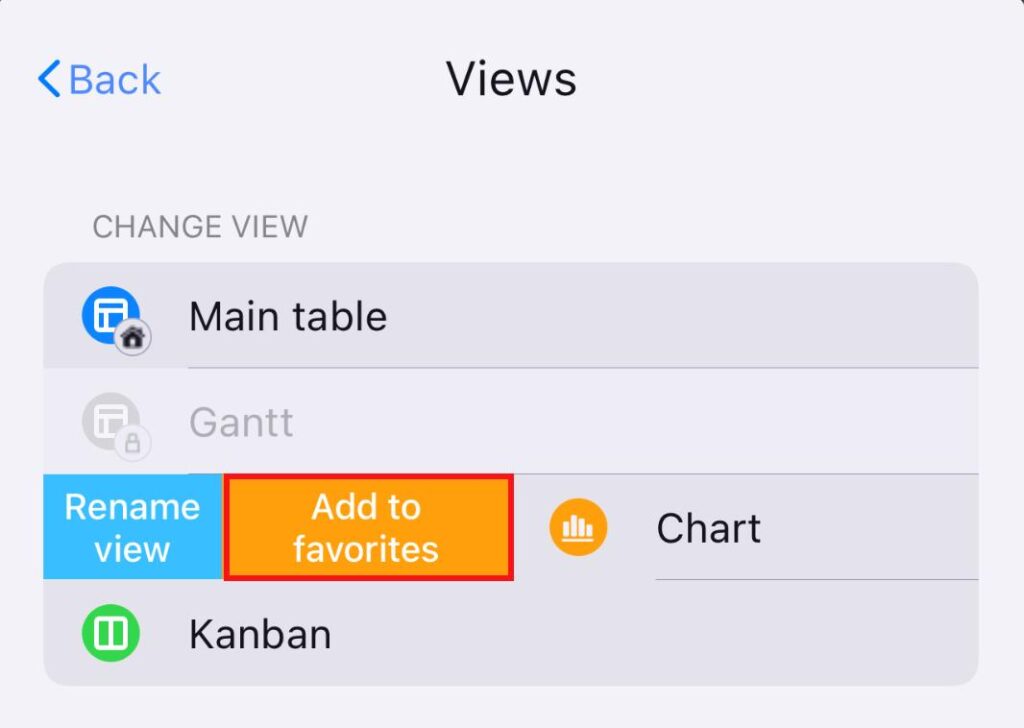
Essa visualização será exibida ao lado da visualização padrão e um ícone de estrela aparecerá ao lado do nome dela. Para remover uma visualização dos favoritos, deslize-a para a esquerda novamente e selecione "Remover dos favoritos".
- Toque nos três pontos no canto superior direito
- Toque em Adicionar aos favoritos
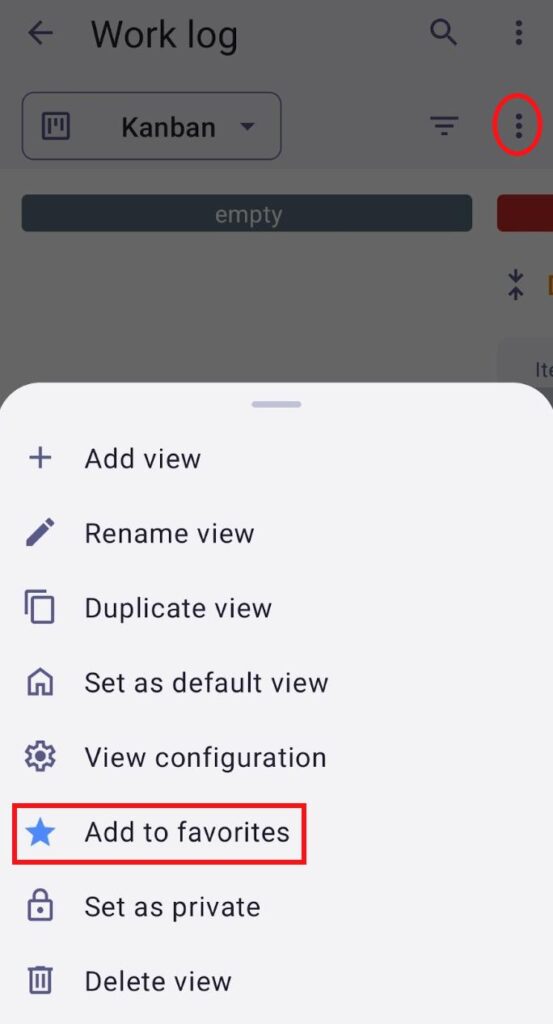
Essa visualização será exibida ao lado da visualização padrão e um ícone de estrela aparecerá ao lado do nome dela. Para remover uma visualização dos favoritos, toque nos três pontos ao lado dela e selecione "Remover dos favoritos".
Quando uma visualização é definida como favorita, a alteração fica visível apenas para o usuário que a definiu como favorita e não afeta os outros usuários do quadro. A visualização padrão não pode ser marcada como favorita.
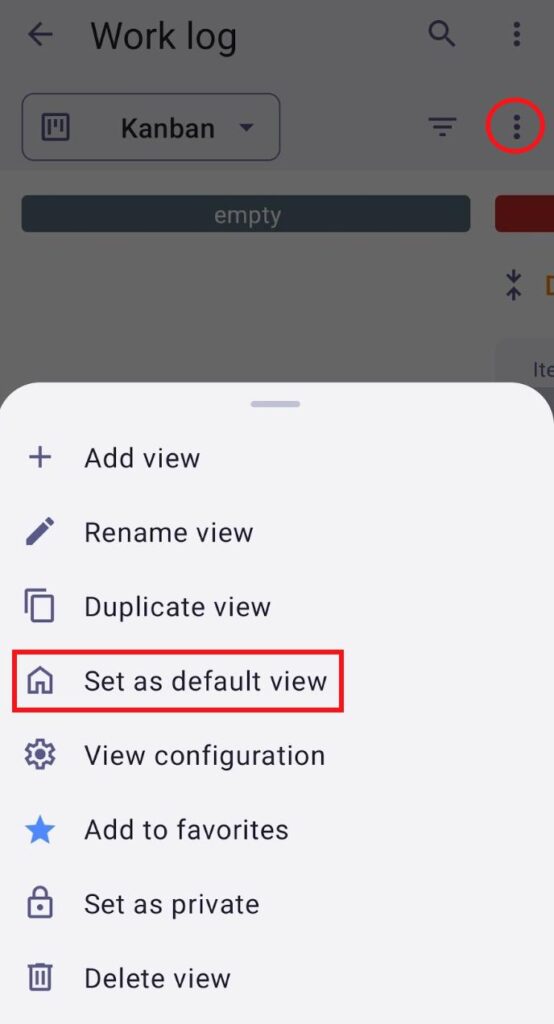
Definir exibição padrão #
Cada quadro deve incluir pelo menos uma visualização. Quando um quadro é criado, uma visualização em tabela é gerada automaticamente e designada como a visualização principal (padrão). No entanto, qualquer outra visualização no quadro pode ser definida como padrão. A visualização padrão não pode ser definida como favorita. Somente o proprietário do quadro pode definir uma visualização como padrão.
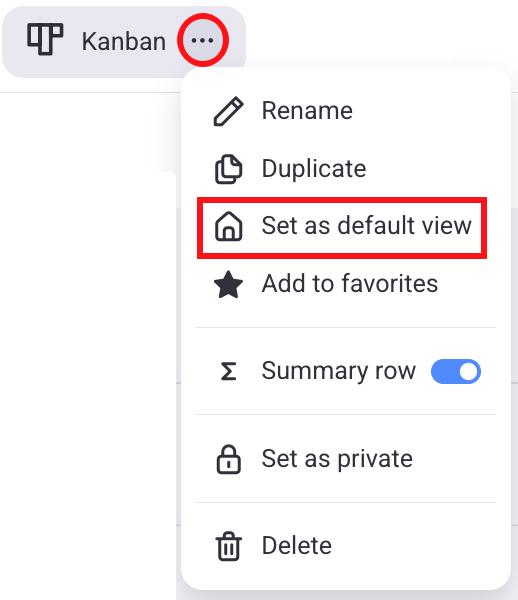
- Clique nos três pontos ao lado de Visualizar
- Clique em Definir como visualização padrão
- Toque em Configuração da visualização do quadro no canto superior direito
- Toque em Visualizações
- Deslize para a direita na vista que você deseja
- Toque em Definir como visualização padrão
- Toque nos três pontos no canto superior direito
- Toque em Definir como visualização padrão