Getting Started with Plaky
If you want to minimize email and messaging clutter, work with your team on clearly-defined projects and tasks and be able to follow your progress and the progress of your team members, Plaky is all you need!
It’s a highly visual project management tool that enables you to manage your projects, teams and tasks in an efficient and timely manner.
So, let’s start with some basic steps you need to take in order to start using Plaky.
Register or Log in #
If you would like to create a new Workspace, you can do it directly from the Plaky Registration page. In case that you received an invitation to join Plaky, you will receive an invitation email. Check out this article for more detailed information on how to sign up.
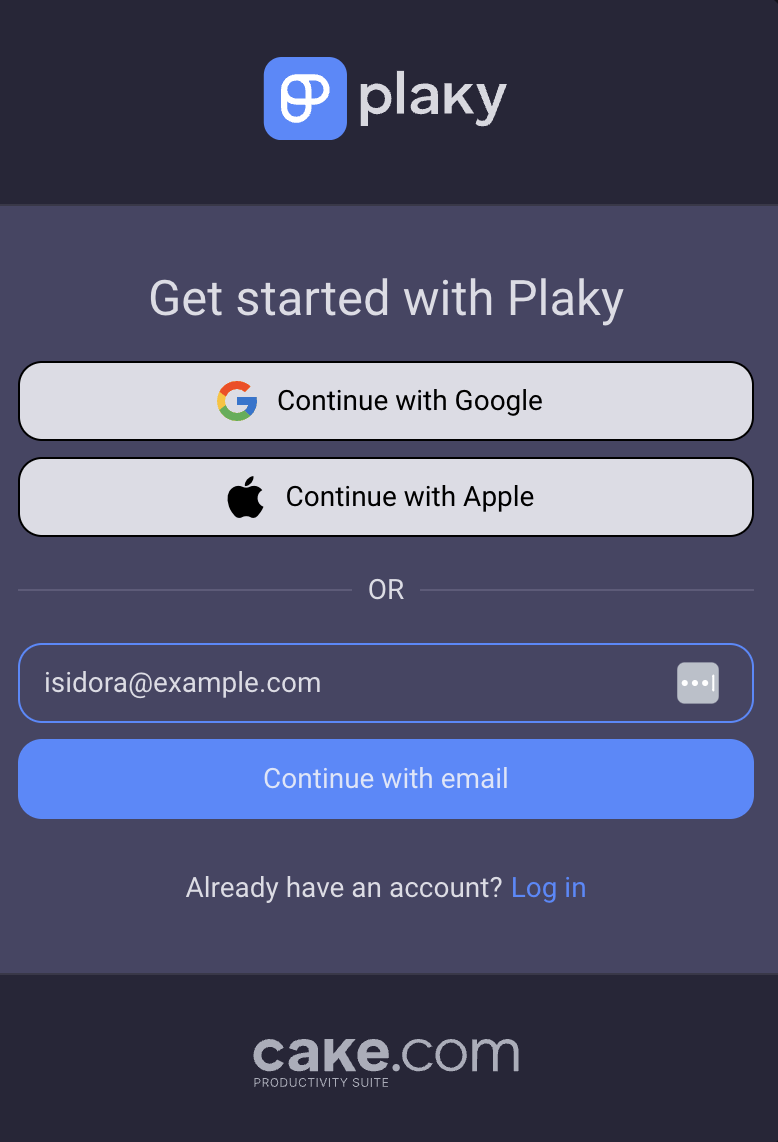
If you already have an account on Plaky, and you’d simply want to log in to the app, proceed with Log in.
To log in using secure code:
- Access Plaky login page
- Click on Log in with email
- Enter your email address
- Enter the code you received on your email address
- Click Log in
- Choose the Workspace to complete the action
Log in with Apple #
- Access Plaky login page
- Click Log in with Apple
- Enter your email associated with your Apple ID
- Enter the password associated with the Apple ID
- Choose the Workspace to complete the action
Log in with Google #
- Access Plaky login page
- Click Log in with Google
- Choose your Google account
- Choose the Workspace to complete the action
- Access the URL of the Workspace that has SSO configured
- Click on Login with [Custom_SSO_name] account
- Select your Google account to complete the action
Add Space #
Prior to doing anything else, you need access to the Space in Plaky application. Depending on your user role, you can either be invited to the Space, or automatically assigned to it when you register your account and create a Workspace.
Once you complete the initial step and log in, you’ll find yourself in the Space you were invited to (as a regular member), or the Main Space that has automatically been assigned to you (as the Owner).
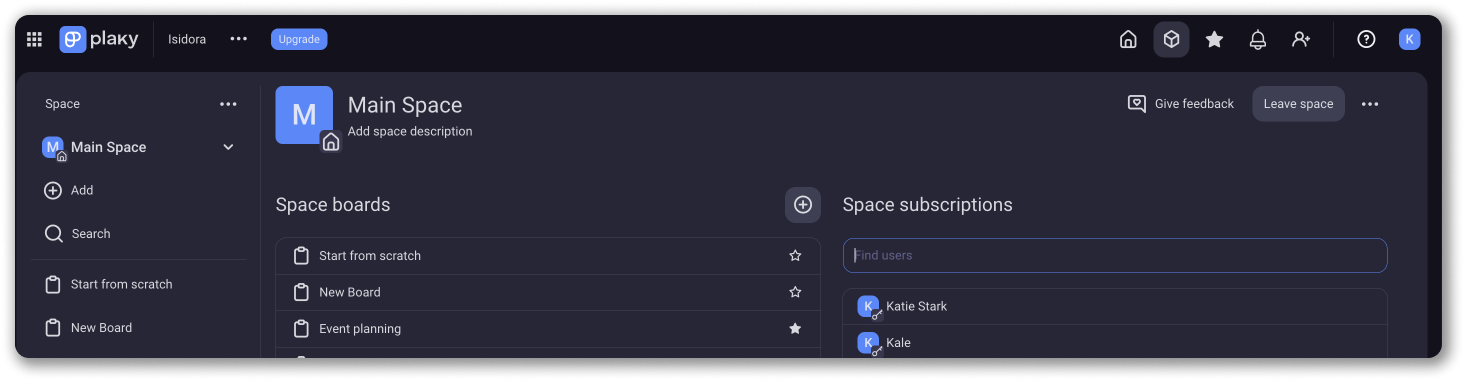
Depending on your user role, you will be able to handle the Space differently.
Add Board #
After you’ve made all the modifications, you can add a new Board to the Space.
On Board you can manage all your Items, organize Projects and correspond with your teammates.
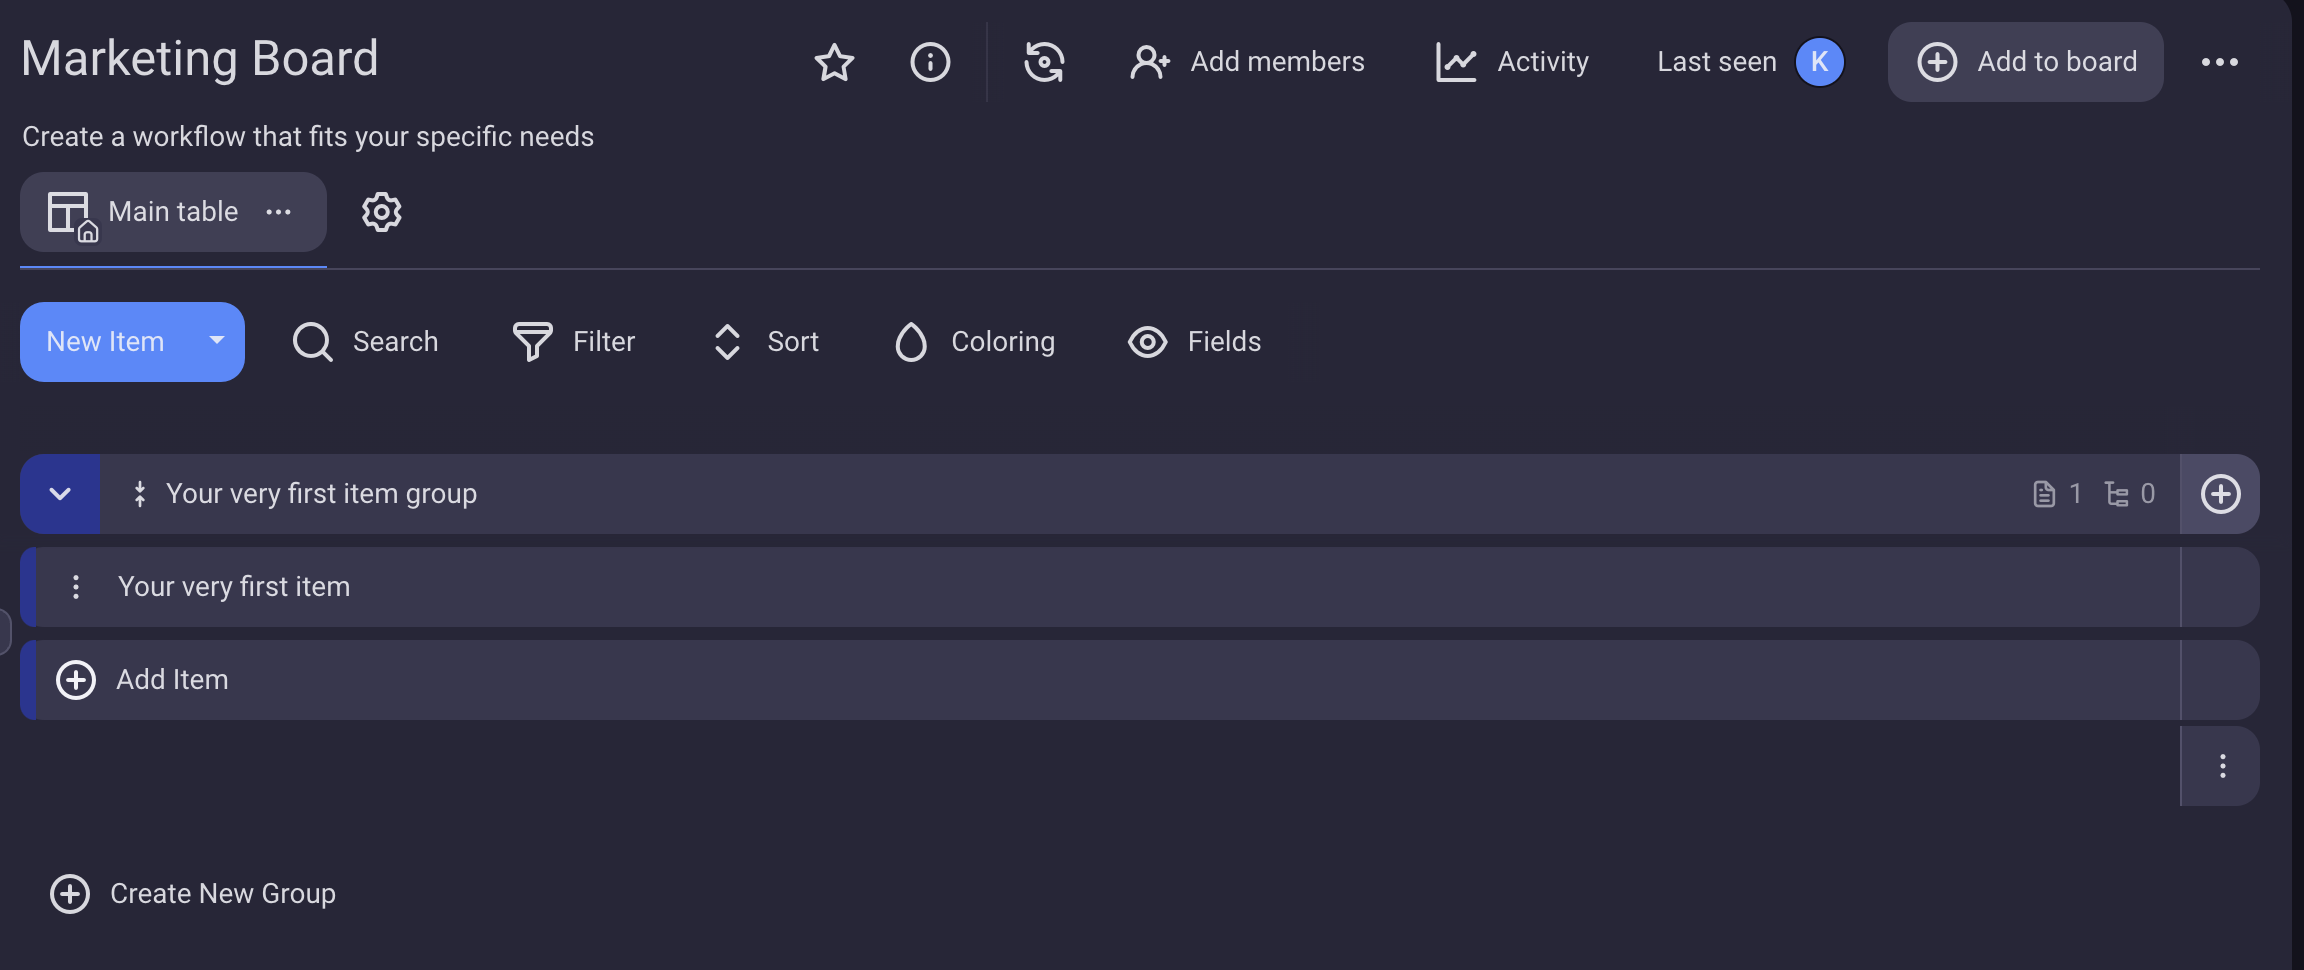
Upon adding new Board, you automatically get a template for Item Group and Item.
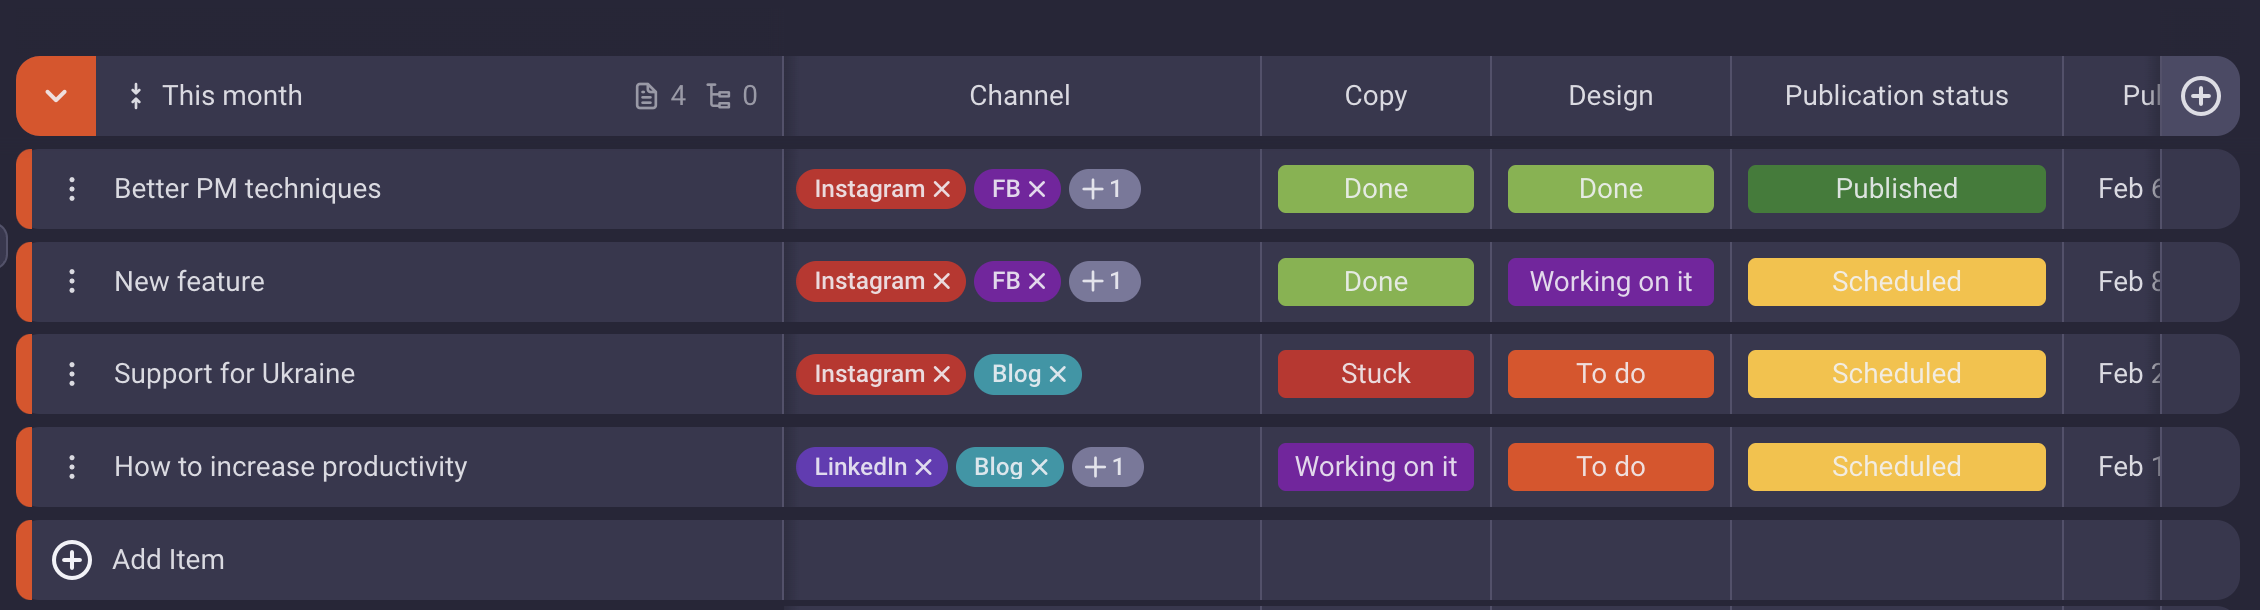
Add Item Group #
Each Item created on the Board has an Item Group it belongs to. Item Group is a type of container that makes the Board cleaner and helps you organize the Items. You can organize your Board in any way you like and according to the criteria you prefer.
No Item can be created as a standalone entity. It needs to be in Item Group. Although you automatically get a template for Item Group and Item once you create the Board, you can create more Item groups.
After creating Item Group, you can continue by adding Items.

Add Item #
Now, continue the process by adding Item. Item represents any type of task, assignment or responsibility that is part of the project and should be completed.

Now, you can continue with Board configuration and start adding Custom fields.
Add Custom Fields #
Custom fields represent any type of data that can be added to your Items and help you organize and complete the Items on your Board in the most efficient way (e.g. text, link, status, person…)
Fields work on a Board level and are propagated to all Groups.
Start using Plaky #
Now that you’ve configured your Board and Space and made all the initial setups, you can start using Plaky and manage your project.
Assign Task #
One of the most important features in Plaky enables team members to assign tasks in form of Items to each other. With this feature, apart from transparency in terms of members being able to see who is working on which task and track the progress, they can also handle all the correspondence related to the task in question and the overall project.
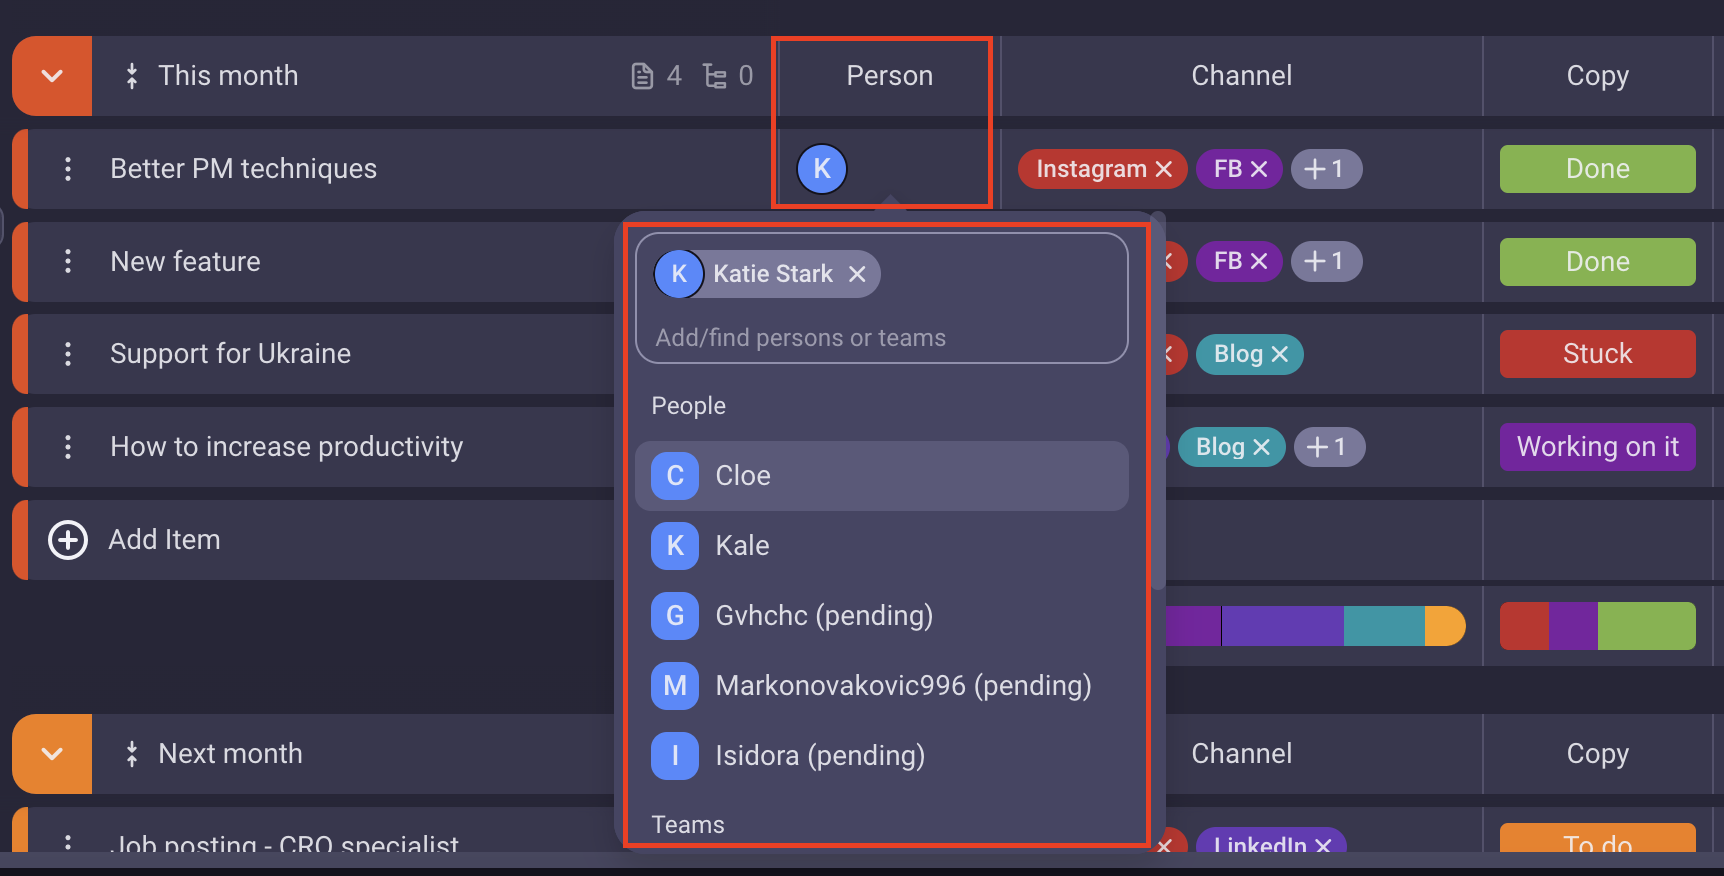
You can assign multiple members of your team, or entire team that belongs to your Space.
Leave Comment #
You can maintain correspondence with anyone assigned to Items. This way, all the improvement, alterations and discussions related to the Item can be tracked.
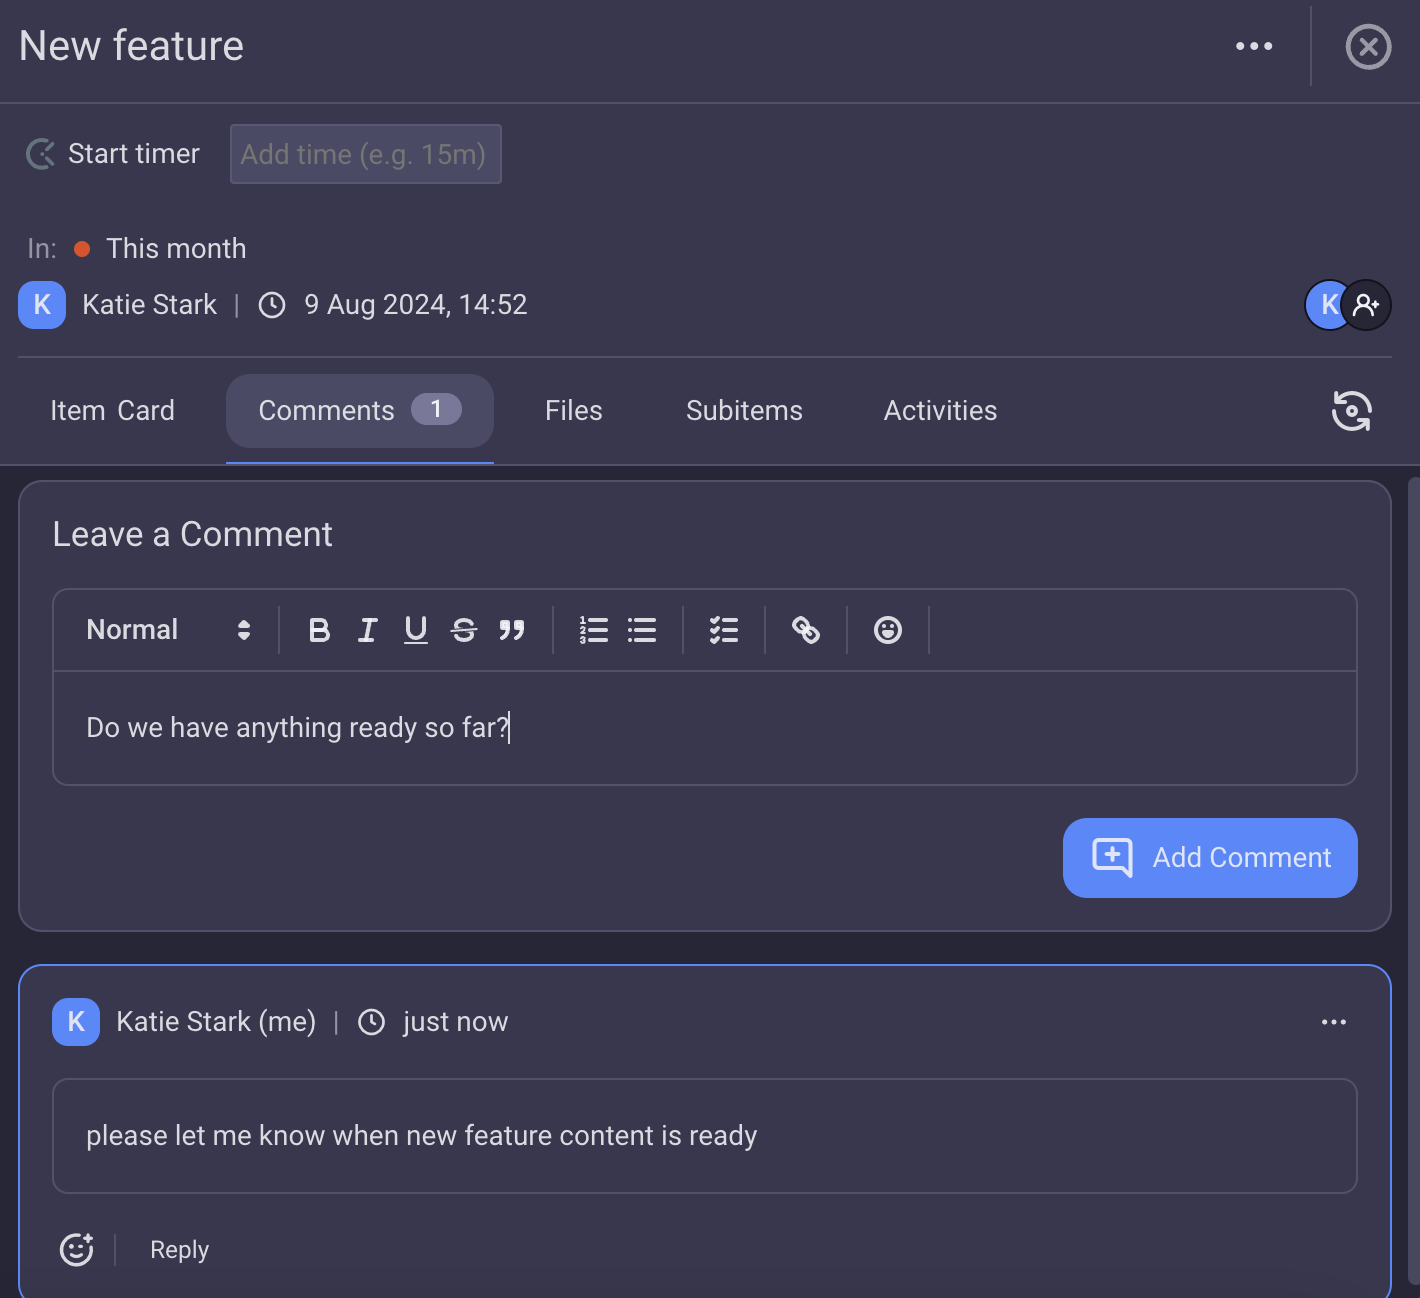
Item that contains comment will be marked as such when you hover over Item’s name.
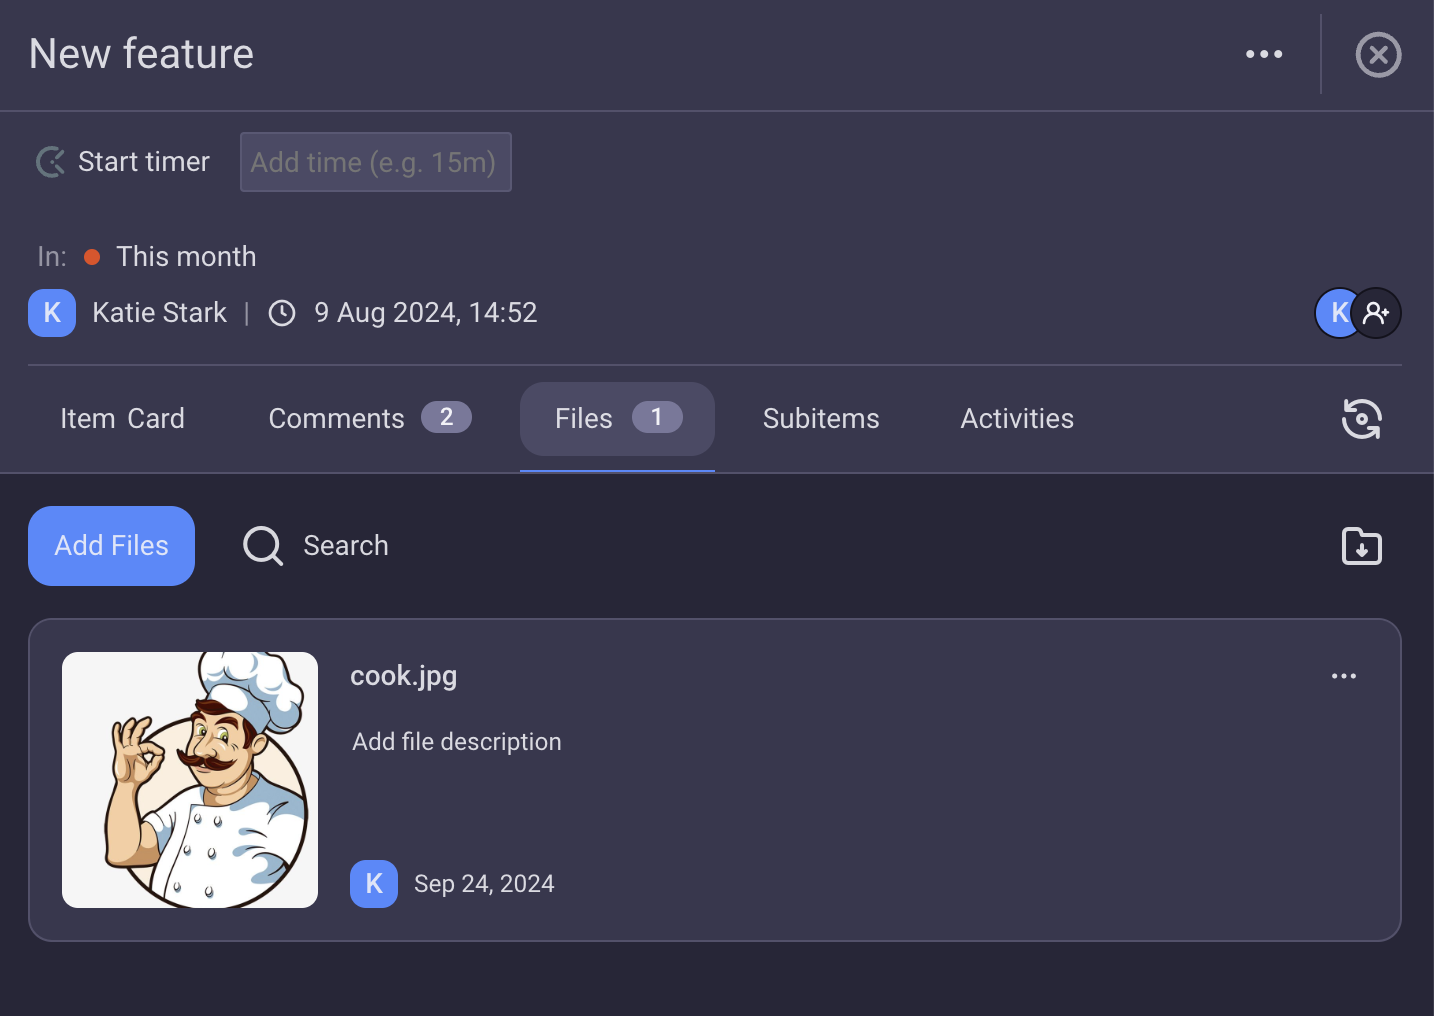
Add Files #
Enhance your workflow in Plaky by effortlessly attaching Files to your items, keeping all your project resources conveniently organized and easily accessible. Check out this text to learn how to add Files.