
Item Overview
Each Board in Plaky contains entities called Items. Item can be a notion, unit or any other building part of your project that makes sense to you (e.g. task, location, client, time determinant…).
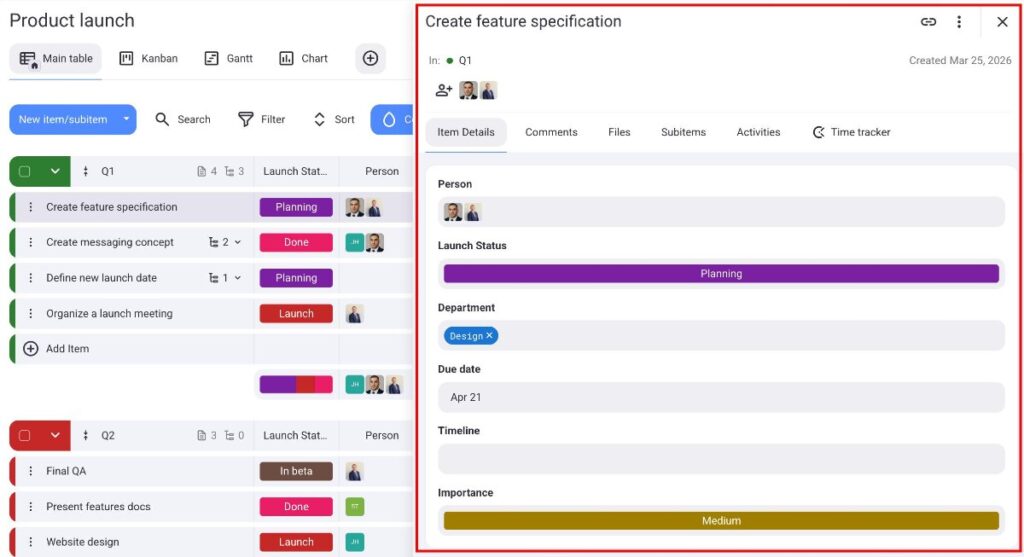
Each created Item has the following components: Item Card, Comments, Activities, and Files.
Once created, all Item components can be edited and modified according to your needs. All information related to the Item can be edited in the Item Card section. Additionally to that, you can also add Comments, Files, Item subscribers and check Activity log.
For each Item on your Board you can create one or more subitems. For more information about it, check out this article.
Item Card #
To open and edit Item Card, click on the Item and in the Item Card tab you can edit the info you need (e.g. change subscriber, date, tag, status…).
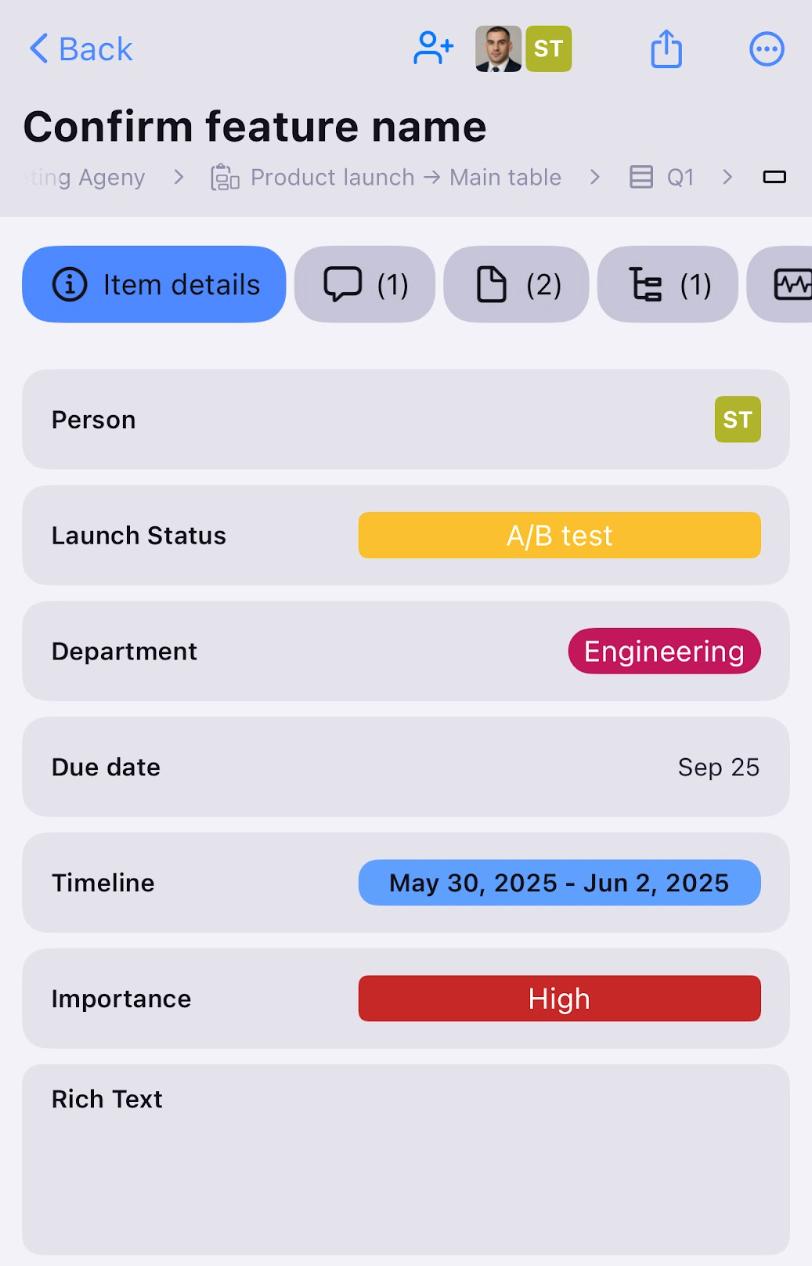
To open and edit Item Card, tap on the Item and in the Item Card tab you can edit the info you need (e.g. change subscriber, date, tag, status…).
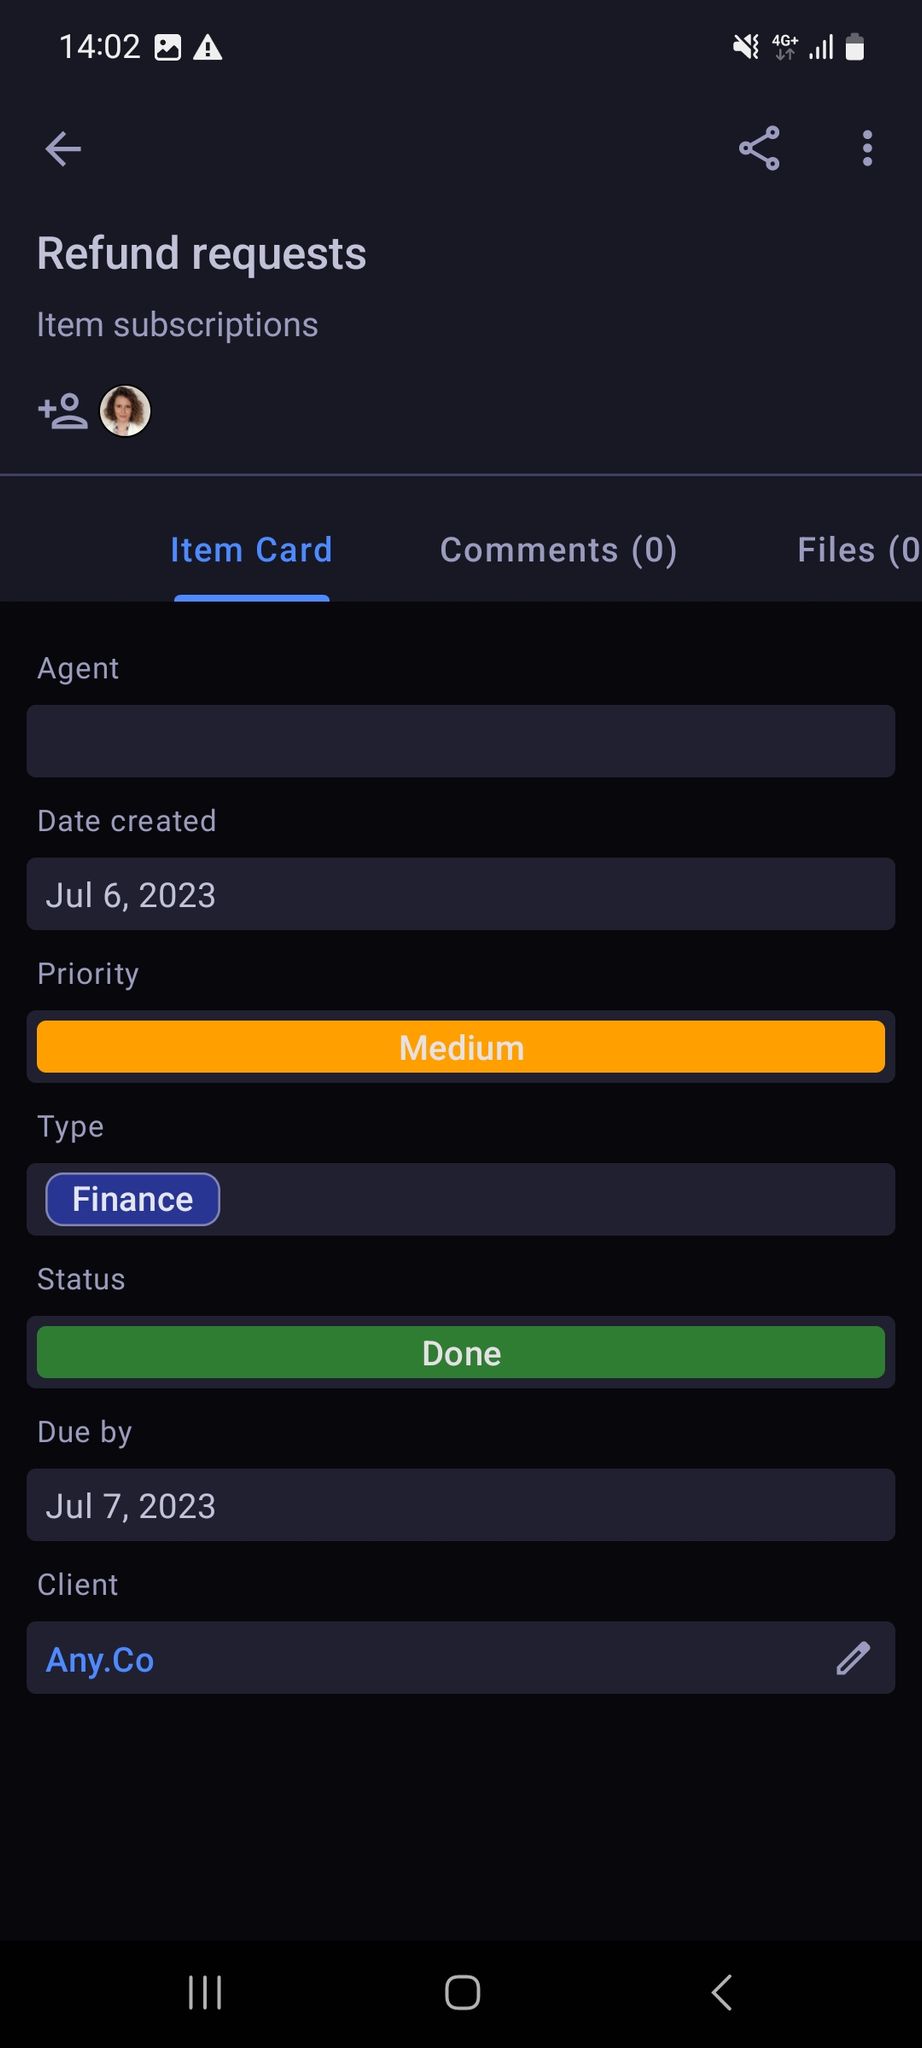
To open and edit Item Card, tap on the Item and in the Item Card tab you can edit the info you need (e.g. change subscriber, date, tag, status…).
Explore this text to gain a deeper understanding of the Fields that can be modified on the Item Card.
Comments #
In the Item’s Comments section, you can add any additional information, mention another Team Member, or add an update relevant to the Item in question. This information is in a text format.
If you, for some reason, started to type the text in the Item’s Comment section on the Web version of the app and left the section without saving the text, Plaky will save that text in draft form. This way, you can come back to it and continue where you left off.
Additionally, you have the option to perform certain actions on comments.
Pin a comment #
Pinned comments are displayed on top and are visible to everyone. After duplicating or moving item to another board, if comments are duplicated/moved, pinned comments remain pinned. To pin/unpin a comment:
- Click on three dots to open the Comment dropdown menu
- Click Pin comment/Unpin comment to complete the action
- Swipe right on a comment
- Tap on More
- Select Pin
- Click on three dots to open the Comment dropdown menu
- Tap Pin/Unpin to complete the action
Team mention #
With the Team mention in place, all Team Members can easily keep up with the development of the project, Item or task relevant to them and other Team Members.
To mention the Team:
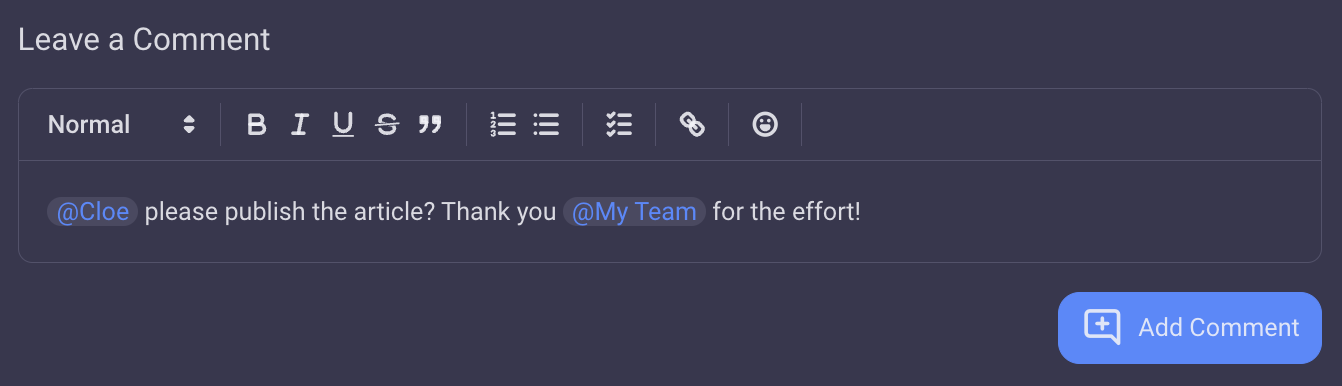
- Navigate to the Comments section in the Board and Item you’d like to add the mention in
- Enter @ and choose Team you’d like to mention from the ones listed below
- Click Add Comment
- Navigate to the Comments section in the Board and Item you’d like to add the mention in
- Tap Leave a comment
- Enter @ and choose Team you’d like to mention from the ones listed below
- Tap Save to complete the action
- Navigate to the Comments section in the Board and Item you’d like to add the mention in
- Tap Add comment
- Enter @ and choose Team you’d like to mention from the ones listed below
- Tap Send to complete the action
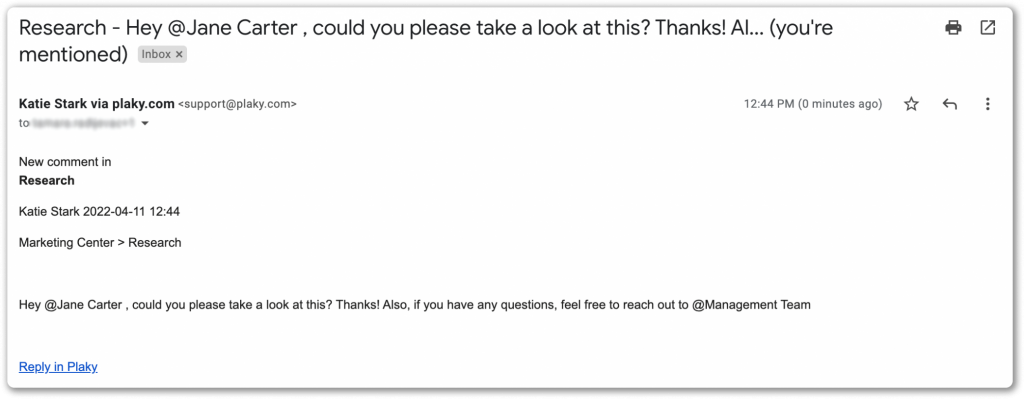
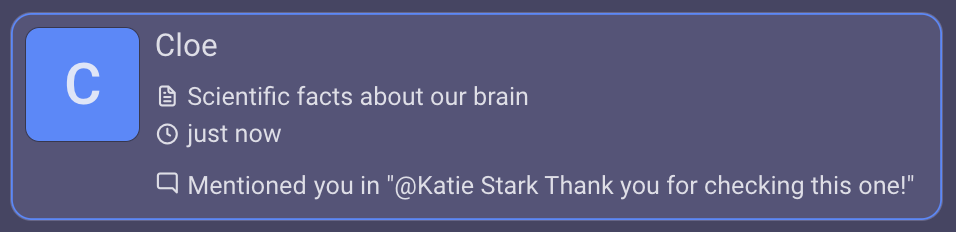
Once you’ve done that, all Team Members will get Email and Bell Notification. Both types of Notifications display the content and the link to jump to that Comment in the app.
You can also mention Team in the Rich-Text Field. It works and looks the same as in the Comments section described above.
Copy comment URL #
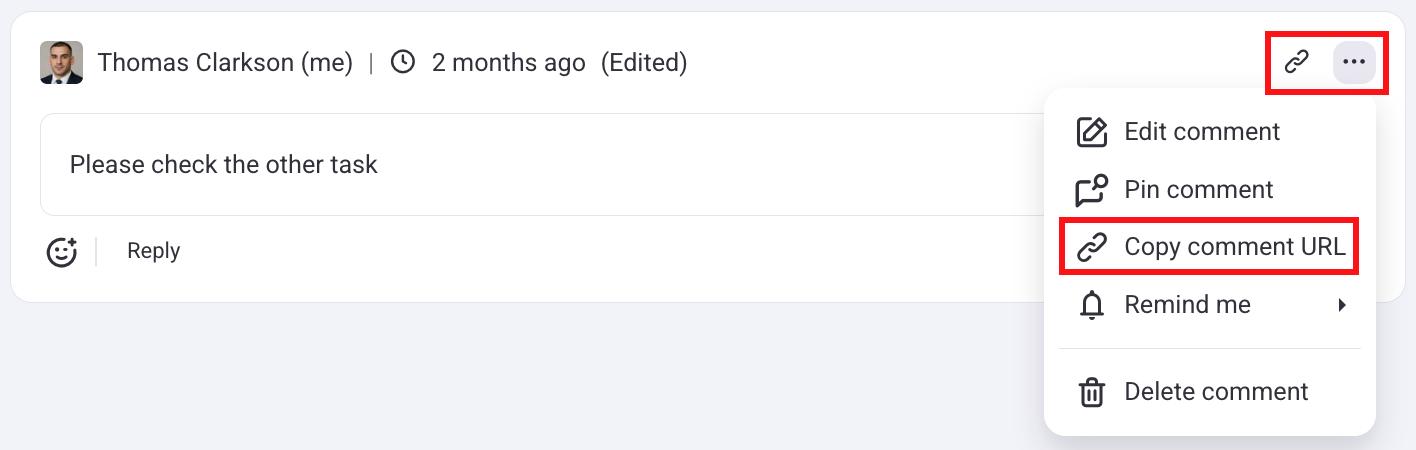
Share a link to the Item with your teammates by copying the Item URL. To copy comment URL:
- Tap on the three dots in the top right corner of the comment
- Click Copy comment URL
Or, click on the Copy comment URL button directly.
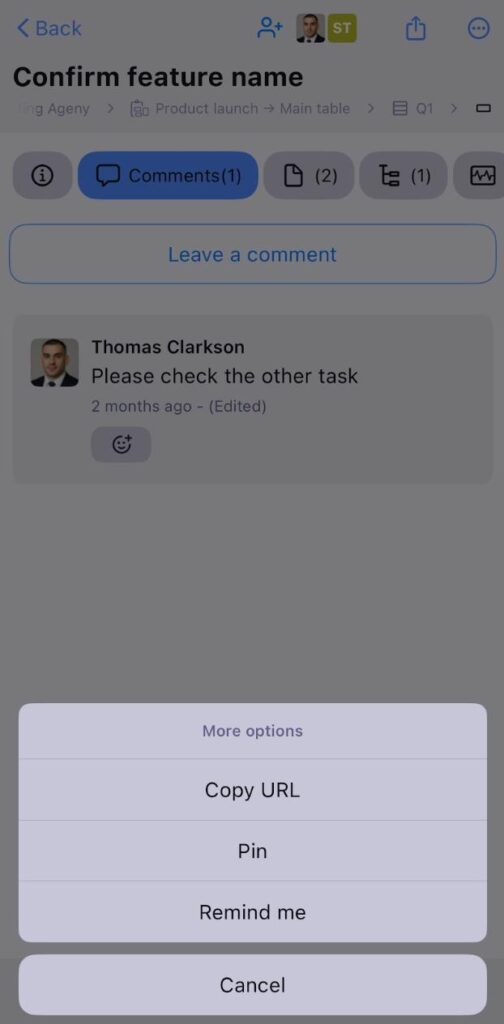
- Swipe the comment to the right
- Select More
- Tap Copy URL to complete
- Open the drop-down menu in the top right corner of the comment
- Select copy URL option to complete the action
Edit comment #
- Open the drop-down menu in the top right corner of the comment
- Select Edit comment
- Make changes to the comment
- Click on Save to complete the action
- Swipe the comment to the left
- Tap on Edit
- Make changes to the comment
- Tap Save to complete the action
COMING SOON
Sort comments #
If there are at least two comments that are not pinned on the Item, you can choose to sort comments by creation date in ascending or descending order. The change will be applied to all the comments on all items of the Workspace, but it will be visible only for the user who has selected the sort. To do it, just click on the icon for changing sort  in the comments section, and the arrow on the icon will change to reflect the change in the sorting order.
Reply and react to comments #
Replying to a comment allows for seamless communication and collaboration, ensuring all relevant parties stay informed about the tasks and engaged. To reply to a comment:
- Click on Reply under a comment
- Enter your reply
- Click Add Reply to complete the action
A reply to a comment can be pinned.
Leaving a reaction to a comment provides a quick and expressive way to acknowledge, agree with, or express sentiment towards a comment, enhancing communication within the platform. To leave a reaction to a comment:
- Click on the emoji icon under a comment
- Select the emoji to complete the action
Or
Click on the emoji that is already left as a reaction by another user. To remove a reaction, simply click on the emoji again.
- Swipe right on a comment
- Select Reply
- Enter your reply
- Tap Save to complete the action
Or, long swipe right on a comment.
To leave a reaction to a comment:
- Tap on the emoji icon under a comment
- Select the emoji to complete the action
Or
Tap on the emoji that is already left as a reaction by another user.
To reply to a comment:
- Tap on Reply under a comment
- Enter your reply
- Tap Add Reply to complete the action
To leave a reaction to a comment:
- Tap on the emoji icon under a comment
- Select the emoji to complete the action
Or
Tap on the emoji that is already left as a reaction by another user
You can leave more than one emoji reaction on a comment. Hovering over the reaction shows who left it.
If you choose to receive these notifications, you will get in-app and push notifications each time someone replies or reacts to your comments.
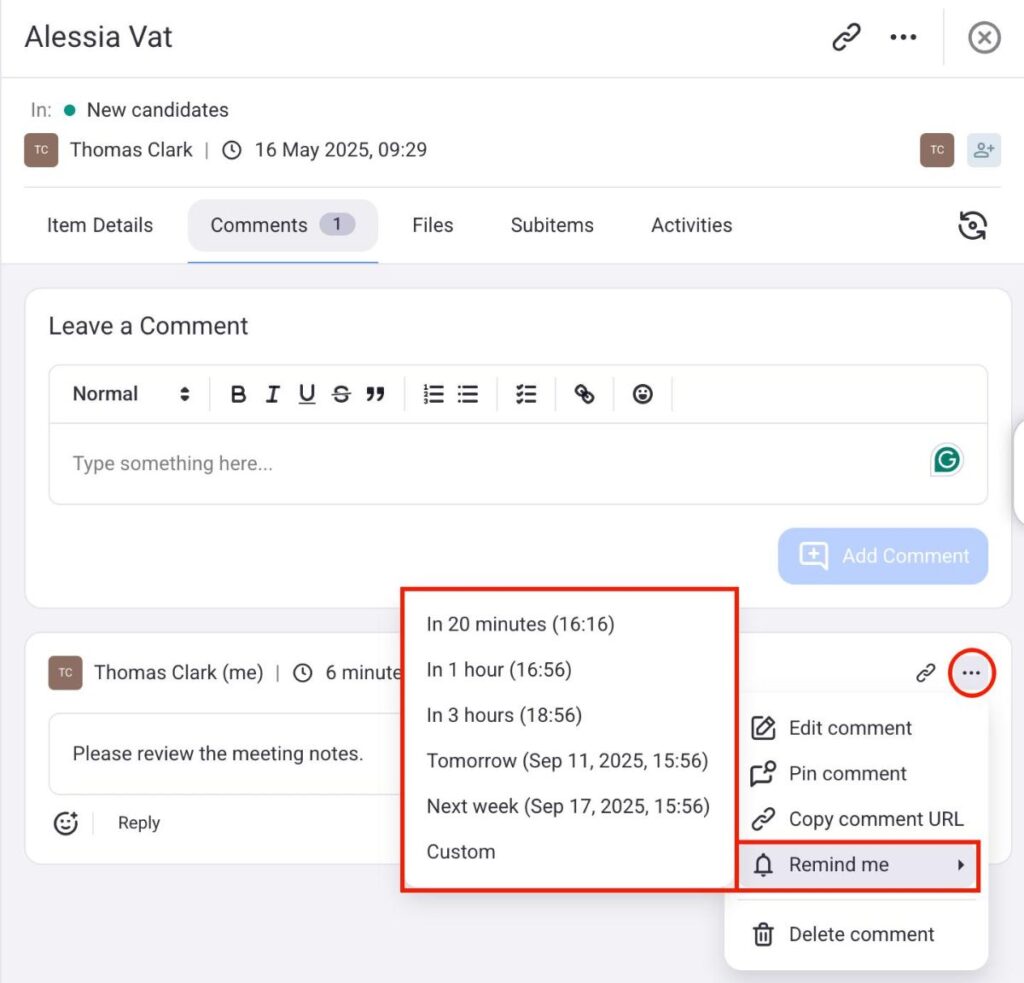
Set comment reminders #
If you want to be reminded about a specific comment at a particular time, you can set up reminders. Here’s how to do it:
- Click on the three dots on the right side of your comment
- Hover over Remind me
- Select predefined or custom time for the reminder
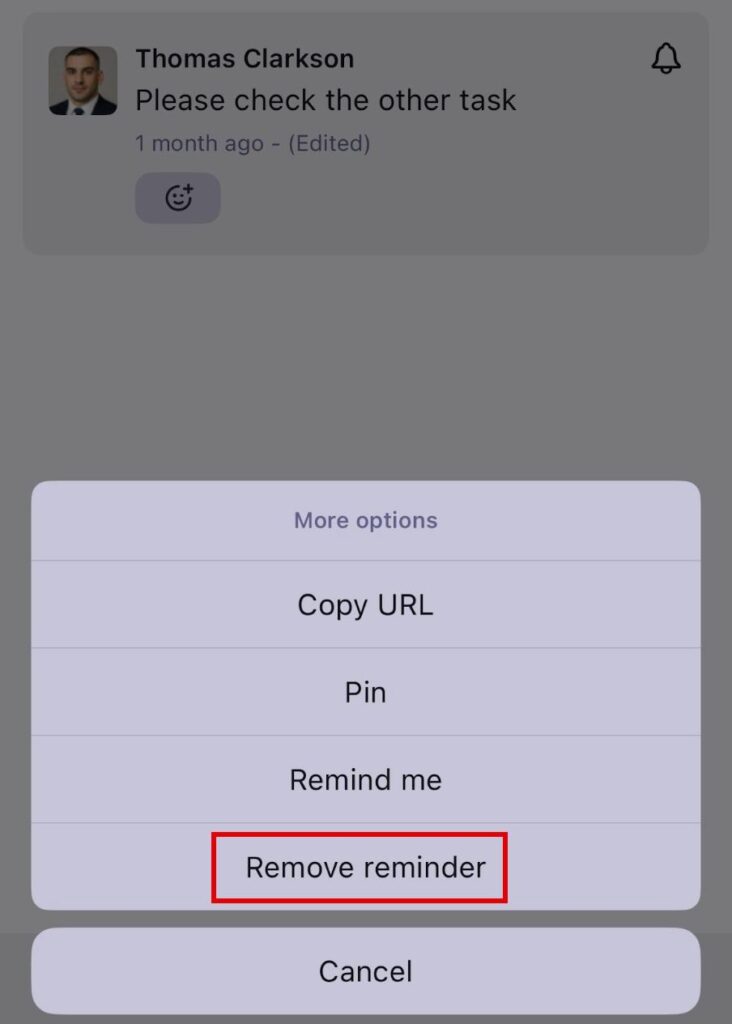
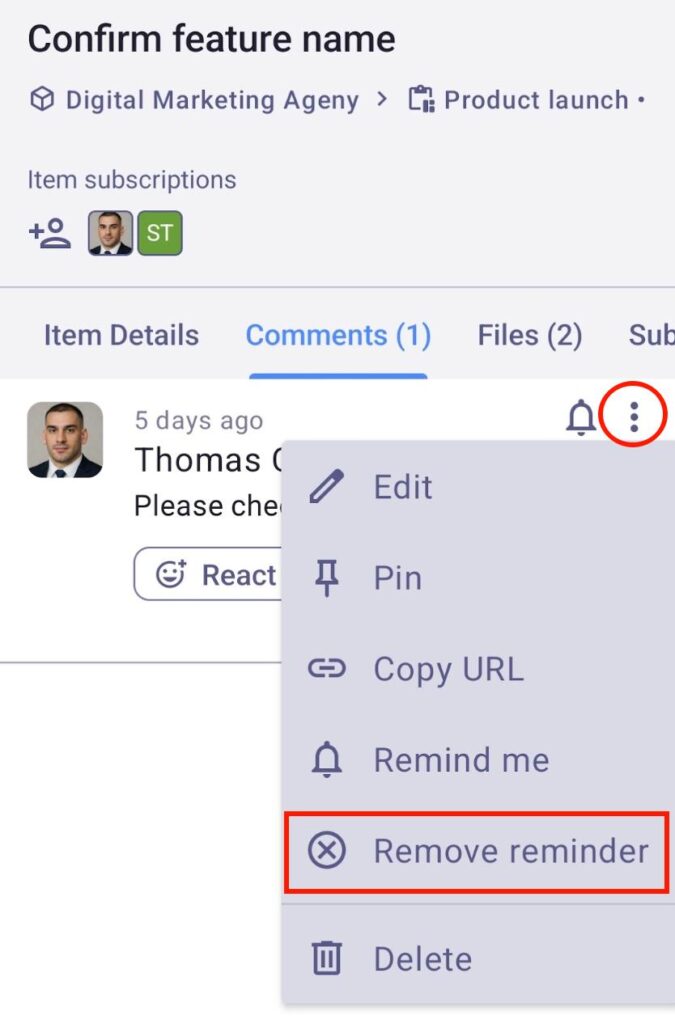
Once the reminder is set up, you can update it in the same way. Also, you can remove the reminder by following these steps:
- Click on the three dots on the right side of your comment
- Click Remove reminder
- Open the Comments tab
- Swipe right
- Tap on More
- Tap on Remind me
- Select predefined or custom time for the reminder
Once the reminder is set up, you can update it in the same way.
Also, you can remove the reminder by following these steps:
- Open the Comments tab
- Swipe right
- Tap on More
- Tap on Remove reminder
- Tap on the three dots on the right side of your comment
- Tap on Remind me
- Select predefined or custom time for the reminder
- Tap on Save
Once the reminder is set up, you can update it in the same way. Also, you can remove the reminder by following these steps:
- Tap on the three dots on the right side of your comment
- Tap on Remove reminder
Here are some things you should know about reminders:
- Reminders can be set to a predetermined or custom time
- Reminders are sent as notifications
- Comments with a set reminder will have a bell icon that shows reminder details
Delete a comment #
Deleting comments can be useful for correcting mistakes, removing irrelevant information, or maintaining clarity in your project discussions. To delete a comment:
- Click on three dots in the top right corner of the comment
- Select Delete comment
- Select Delete in the confirmation modal to complete the action
Only the Board Owner can delete other users’ comments.
Files #
In the Files section, you can manage the files attached to the Item. Files can be uploaded, downloaded, opened, searched and deleted. There is also the option to play video and audio files and see the preview of files in PDF.
To upload files: #
- Navigate to the Files tab
- Click Add Files
- Choose one or more files from your local storage

Maximum size of a single uploaded file on Free plan is 10MB, on Pro plan 25MB, while on Enterprise plan 100MB.
Once the file has been uploaded, it can be opened, downloaded and deleted by clicking the three dots button in the upper right corner.
Plaky supports the following types of files:
| File Type | Extensions |
| WORD | .doc .docx |
| EXCEL | .xls .xlsx |
| PPT | .ppt .pptx |
| TXT | .txt |
| PNG | .png |
| JPEG | .jpeg .jpg |
| SVG | .svg |
| GIF | .gif |
| MP4 | .mp4 |
| AVI | .avi |
| ZIP | .zip |
| RAR | .rar |
| WEBM | .webm |
| MOV | .mov |
| WEBP | .webp |
| BMP | .bmp |
| CSV | .csv |
| 7Z | .7z |
| MP3 | .mp3 |
| RTF | .rtf |
| MPEG | .mpeg |
| WAV | .wav |
- Tap on the Files tab
- Tap on Add File button and choose one or more files from your local storage
Plaky iOS app supports the following types of files:
| FileType | Extensions |
| WORD | .doc .docx |
| EXCEL | .xls .xlsx |
| PPT | .ppt .pptx |
| TXT | .txt |
| PNG | .png |
| JPEG | .jpeg .jpg |
| SVG | .svg |
| GIF | .gif |
| MP4 | .mp4 |
| AVI | .avi |
| ZIP | .zip |
| RAR | .rar |
| WEBM | .webm |
| MOV | .mov |
| BMP | .bmp |
| CSV | .csv |
| 7Z | .7z |
| MP3 | .mp3 |
| RTF | .rtf |
| MPEG | .mpeg |
| WAV | .wav |
- Tap on the Files tab
- Tap on + button
- Choose the file type
- Choose one or more files from your local storage
Plaky Android app supports the following types of files:
| FileType | Extensions |
| WORD | .doc .docx |
| EXCEL | .xls .xlsx |
| PPT | .ppt .pptx |
| TXT | .txt |
| PNG | .png |
| JPEG | .jpeg .jpg |
| SVG | .svg |
| GIF | .gif |
| MP4 | .mp4 |
| AVI | .avi |
| ZIP | .zip |
| RAR | .rar |
| WEBM | .webm |
| MOV | .mov |
| BMP | .bmp |
| CSV | .csv |
| 7Z | .7z |
| MP3 | .mp3 |
| RTF | .rtf |
| MPEG | .mpeg |
| WAV | .wav |
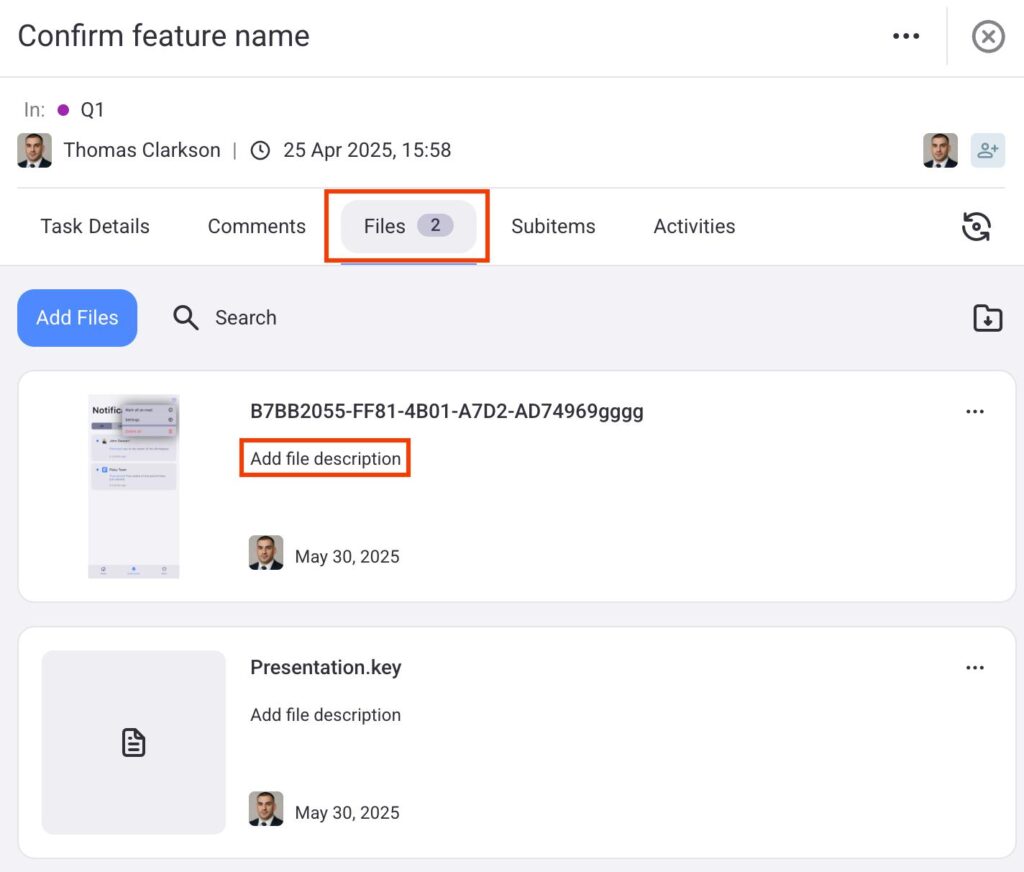
Add file description: #
- Click on the Files tab
- Click on Add file description
- Write the file description
- Press Enter to complete the action
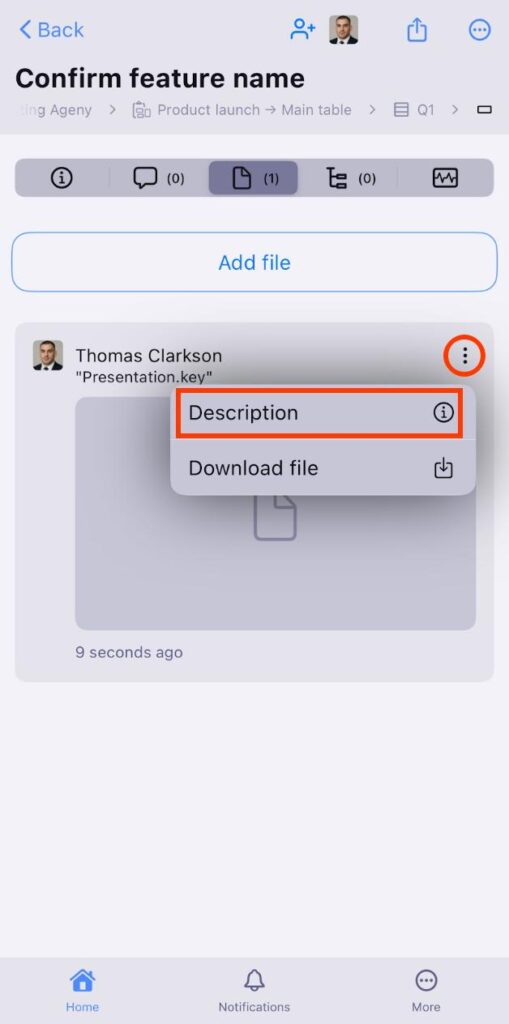
- Open the files tab
- Tap on the three dots
- Tap on Description
- Write the description
- Tap Save to complete the action
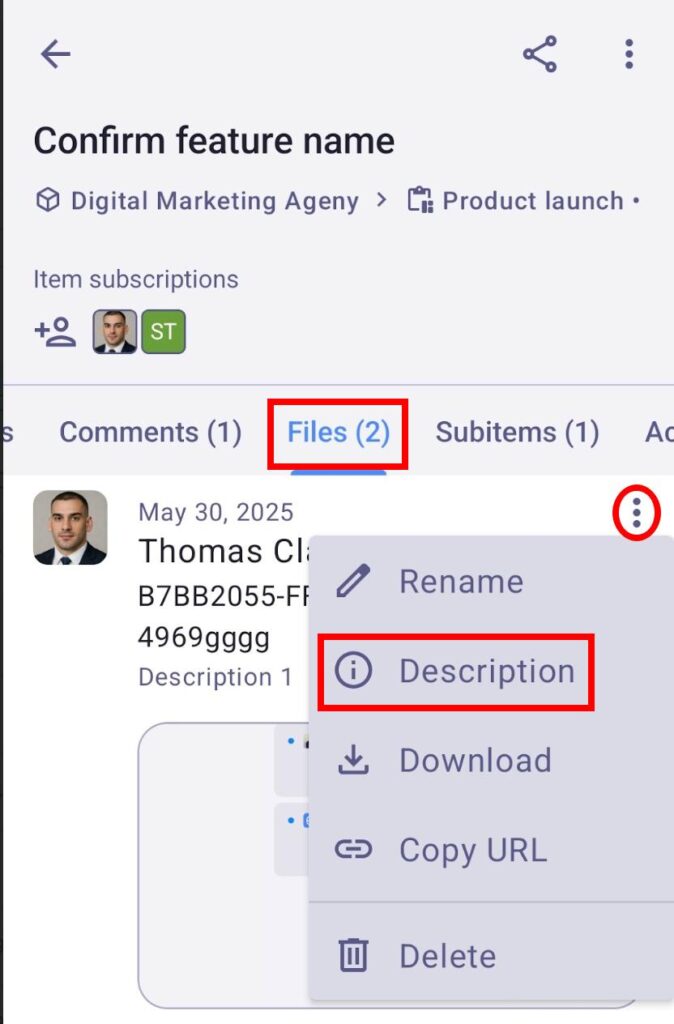
- Open the Files tab
- Tap on the three dots
- Tap on Description
- Write the description
- Tap on Change to complete the action
To rename files: #
- Click on the Files tab
- Click on three dots on the top right corner of the File
- Select Rename File
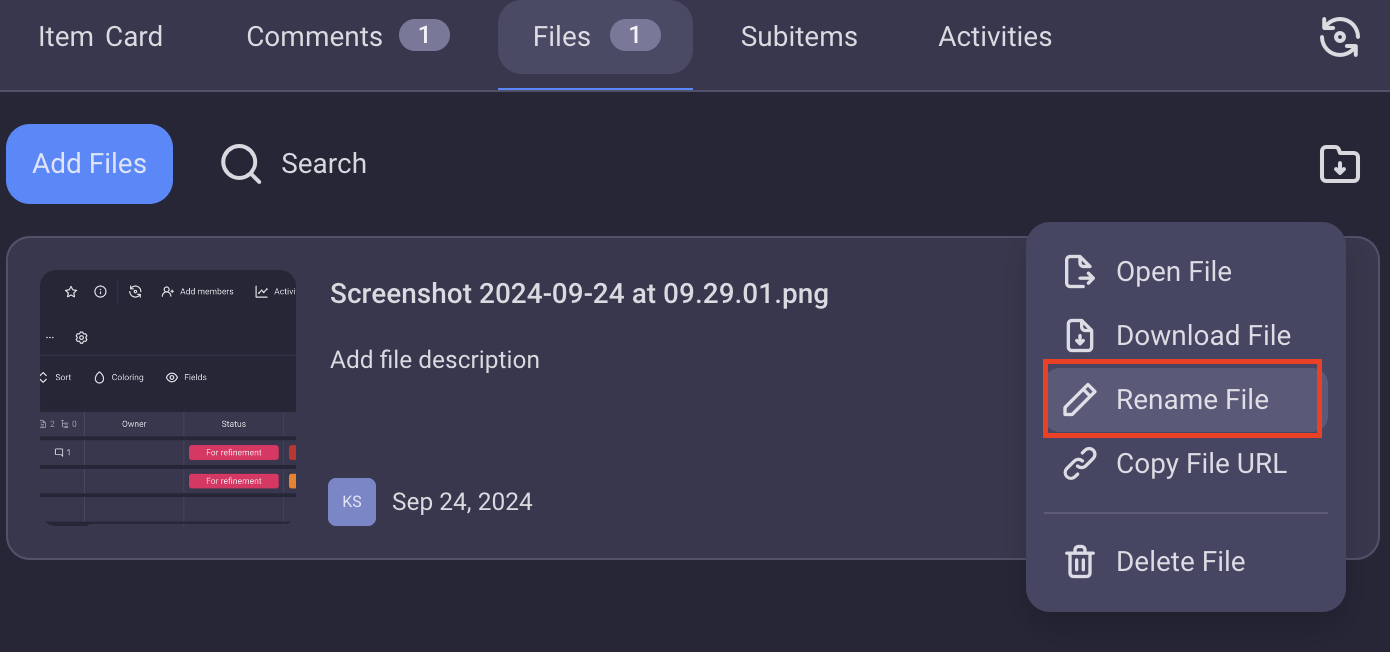
- Enter new File name
- Press Enter/Click outside the designated area to complete the action
or
- Navigate to the Files tab
- Click on the File name
- Enter new File name
- Press Enter/Click outside the designated area to complete the action
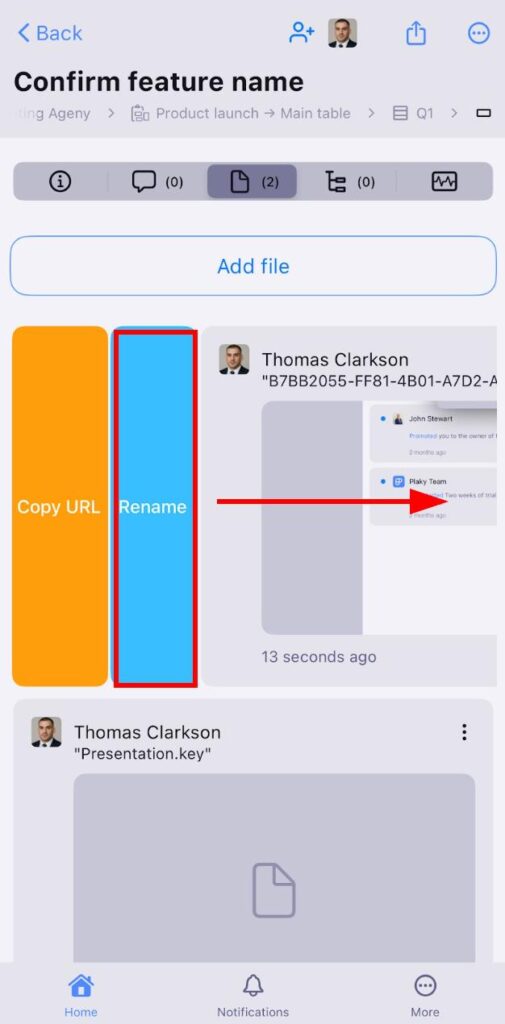
- Open the files tab
- Swipe right over the desired file
- Tap on Rename
- Write the new name
- Tap Save to complete the action
- Open the Files tab
- Tap on the three dots
- Tap on Rename
- Write the new name
- Tap on Rename to complete the action
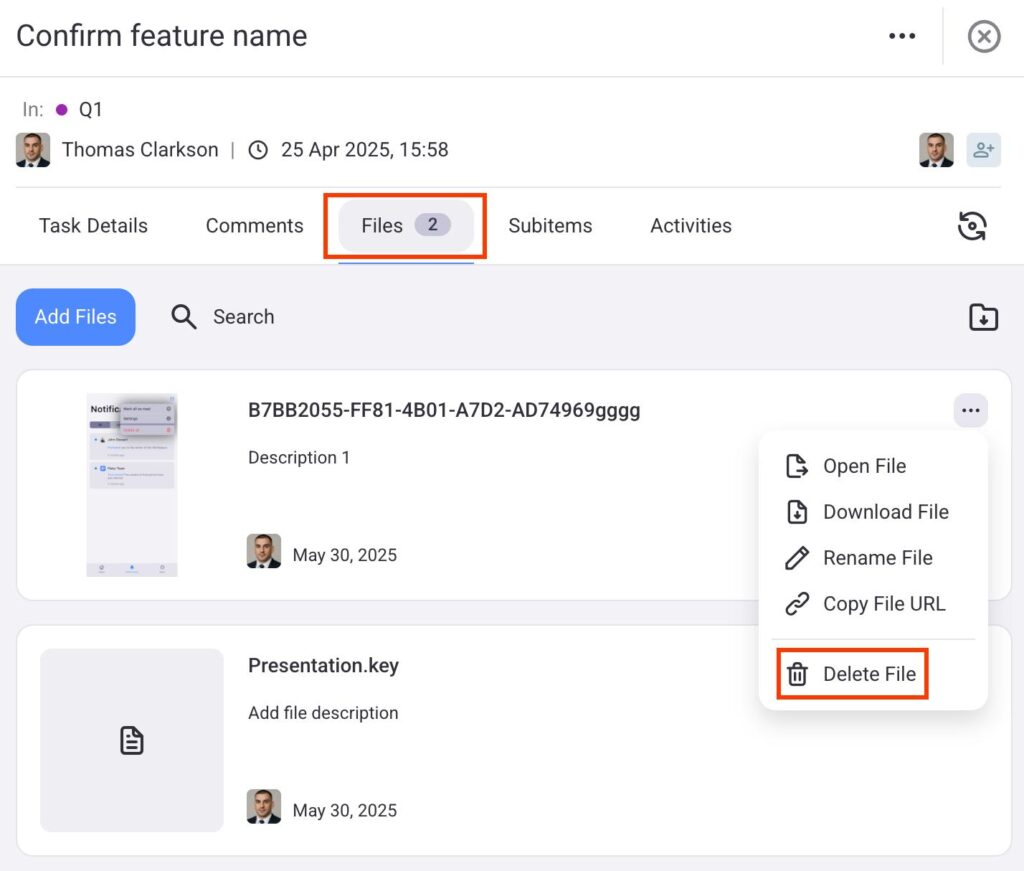
To delete files: #
- Navigate to the Files tab
- Click on three dots on the top right corner of the File
- Select Delete File
- Click Delete in the confirmation modal to complete the action
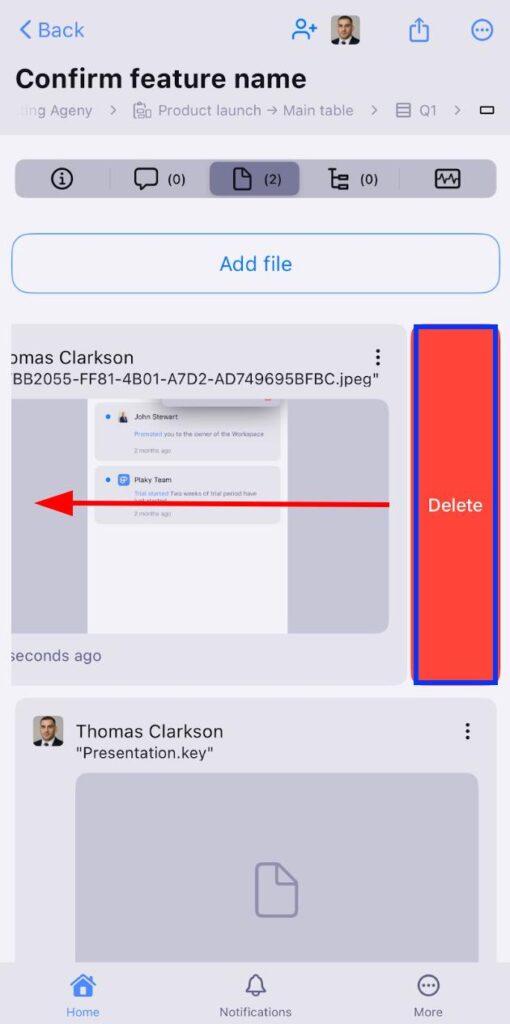
- Open the files tab
- Swipe left over the desired file
- Tap on Delete
- Tap Delete again to confirm the action
- Open the files tab
- Tap on the three dots
- Tap on Delete
- Tap Delete again to confirm the action