
Custom Fields
In Plaky, each Custom Field represents some entity that is relevant for the project or some other type of content presented in a Board.
Keep in mind that Fields are created and managed on a Board level and as such any modification (add, edit, delete) reflects on all Items/Item Groups on the Board.
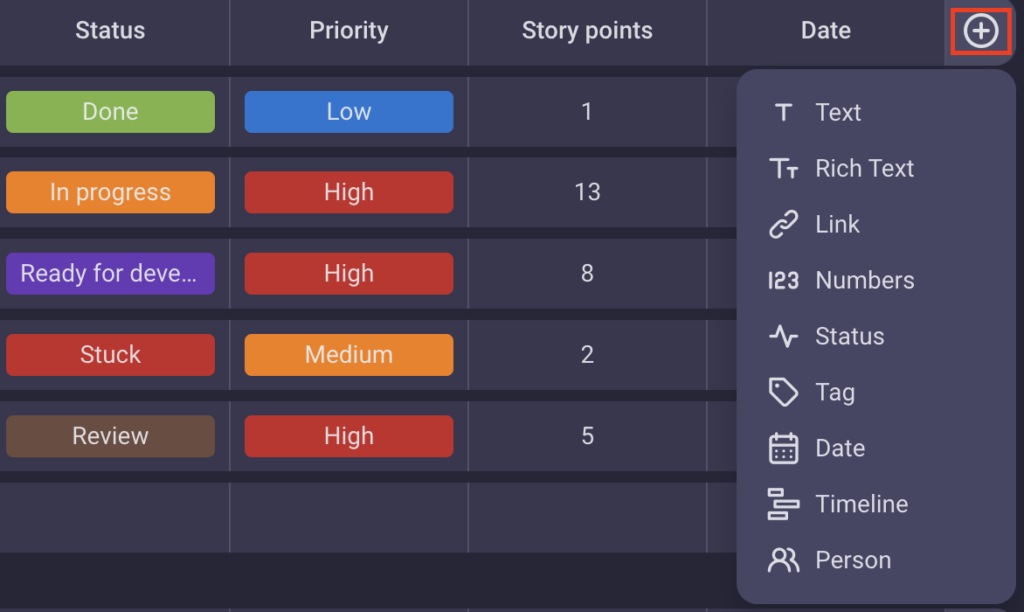
There are different types of Fields that help you define the content on the Board:
- Text
- Rich Text
- Link
- Numbers
- Status
- Tag
- Date
- Person
- Timeline (available on paid plans)
To add a Custom Field:
- Click on + at the top right corner of any Item group
- Choose the Field type you want to add to your Board to complete the action
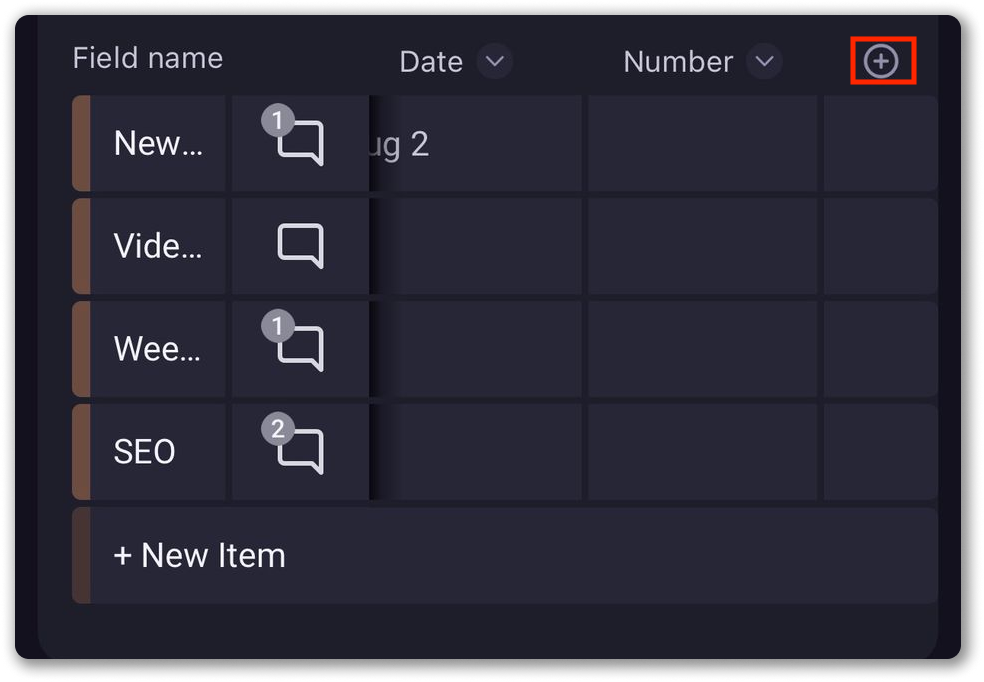
- Choose Board
- Tap the + button on right of your Item Group (if you don’t see the button, swipe left across the screen)
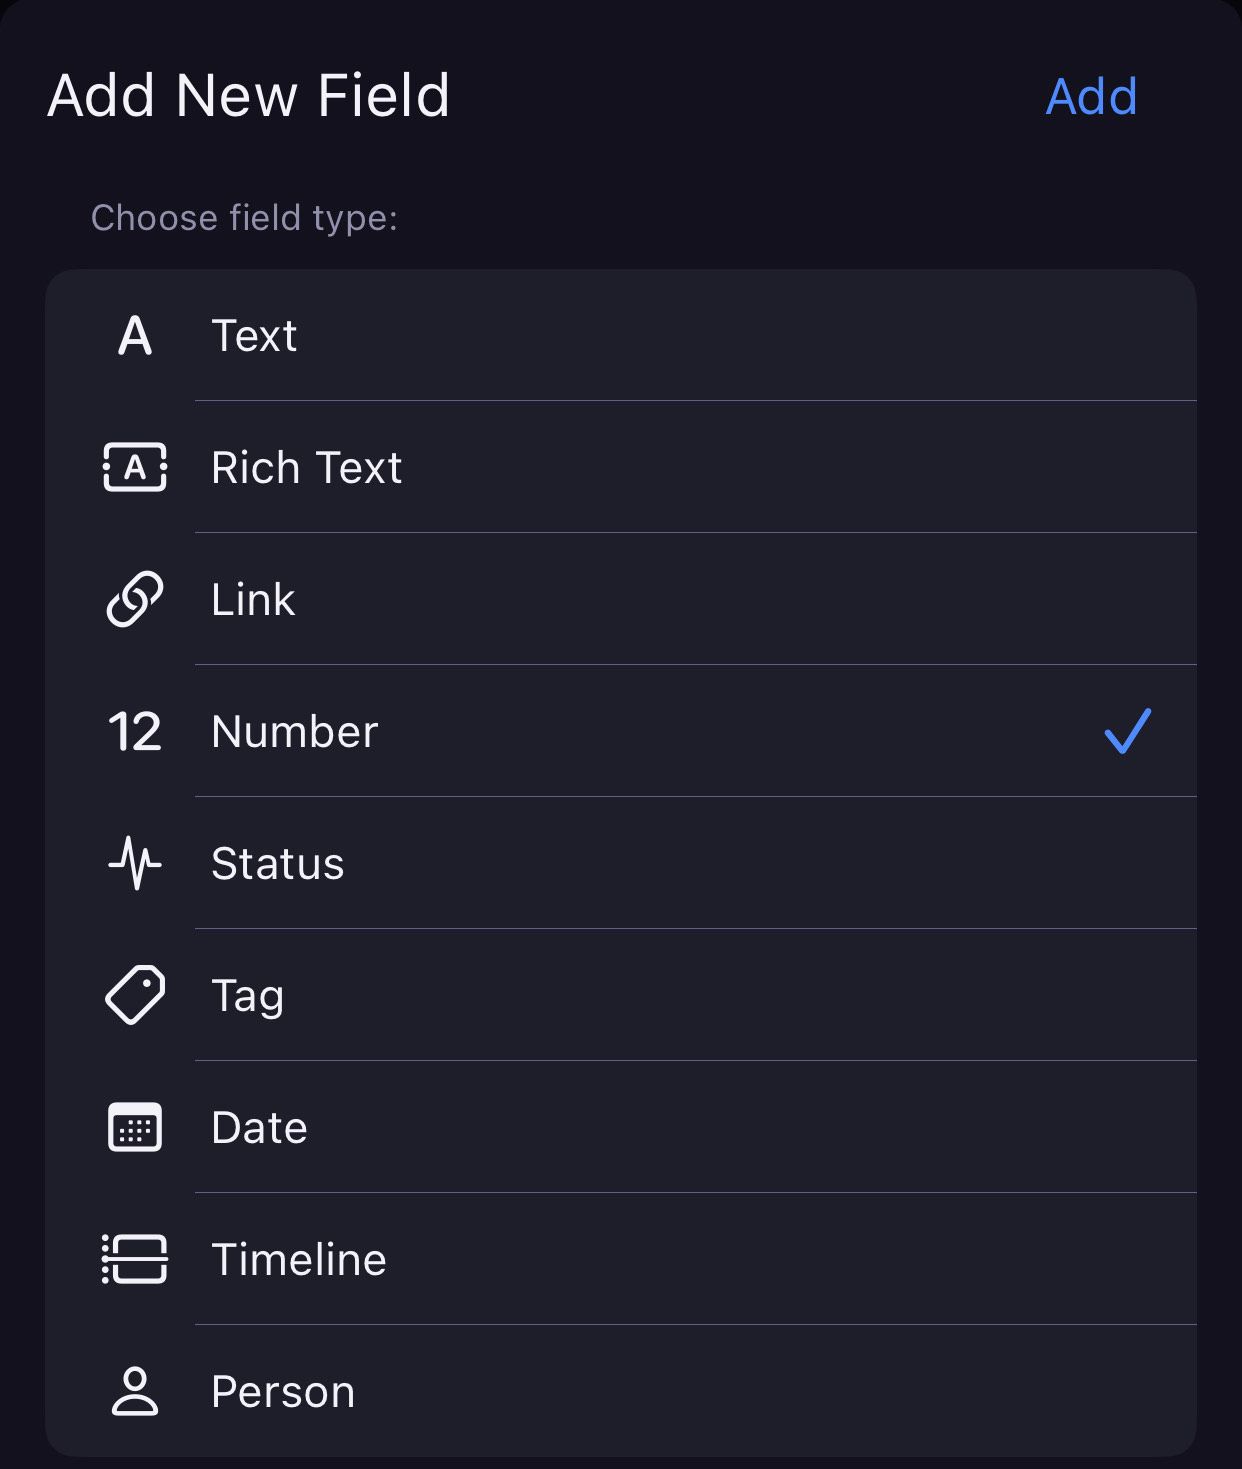
- Choose type of Field
- Tap Add
If selected field type is Timeline:
- Tap on the Timeline column
- Toggle the switch and choose the start date
- Tap on End date to proceed
- Toggle the switch and choose the end date
- Tap Save to complete the action
The Field will be added to all the existing Items and all newly-created Items on the Board will contain this Field.
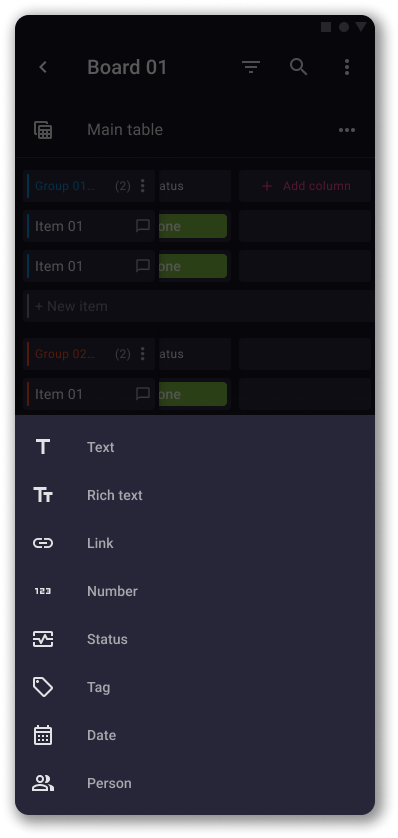
- Swipe to the left to the last Field in the Item group and tap on +New Field
- Choose the Field type to complete the action
If selected field type is Timeline:
- Choose the start date and tap Save
- Choose the end date and tap Save
- Tap Save to complete the action
Text #
This type of Field allows you to add any type of text (e.g. details, description, short explanation…).
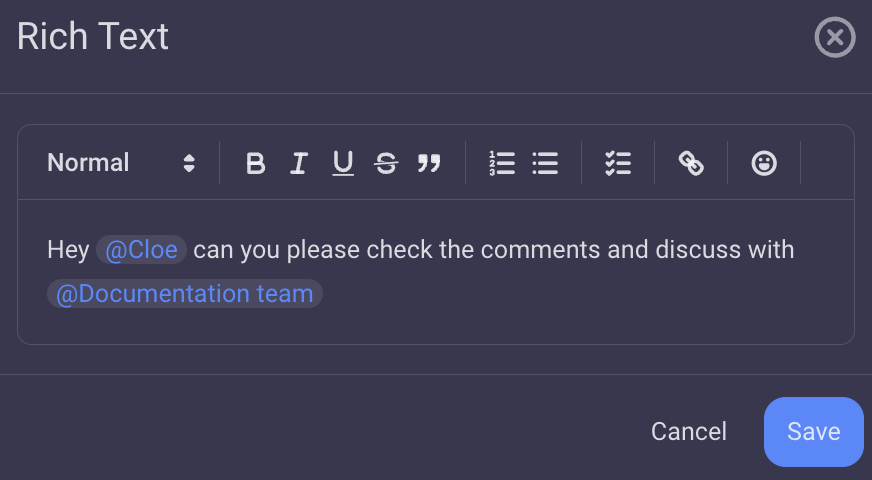
Rich text #
With Rich Text format, you can add text files and transfer them in different text editors, between different processors and operating systems. If you’d like to take more time creating the text file, you can put it in draft and get back to it later on.
If another user modifies a Rich text field simultaneously and saves the changes, you will be notified at the bottom left corner of the modal.
Team mention #
Besides adding text and text files in different formats, rich-text Field offers the possibility to mention the whole team at once, so that all Team Members keep up with the project development relevant to them and other Team Members.
To mention the Team:
- Navigate to the Rich-Text Field in the Board and Project you’d like to add the mention in
- Enter @ and choose Team you’d like to mention from the ones listed below
- Click/Tap Save
Once you’ve done that, all Team Members will get Email and Bell Notification. Both types of Notifications display the content and the link to jump to that Rich-Text Field in the app.
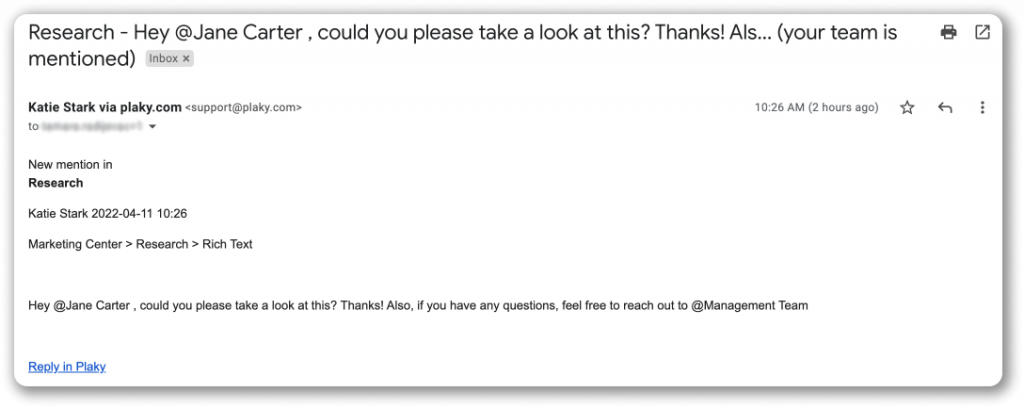
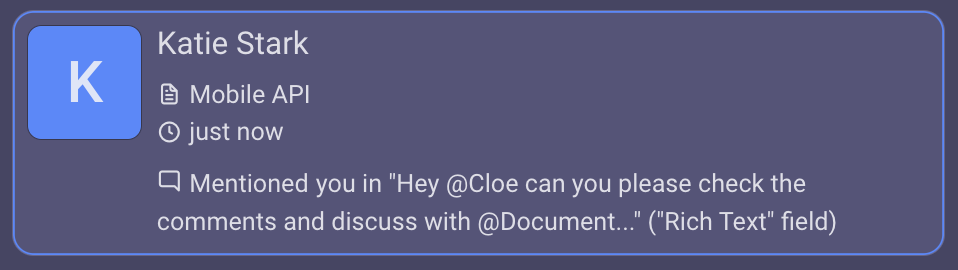
Any change made to the Field and the Team mentioned will trigger both Email and Bell Notifications for all Team Members.
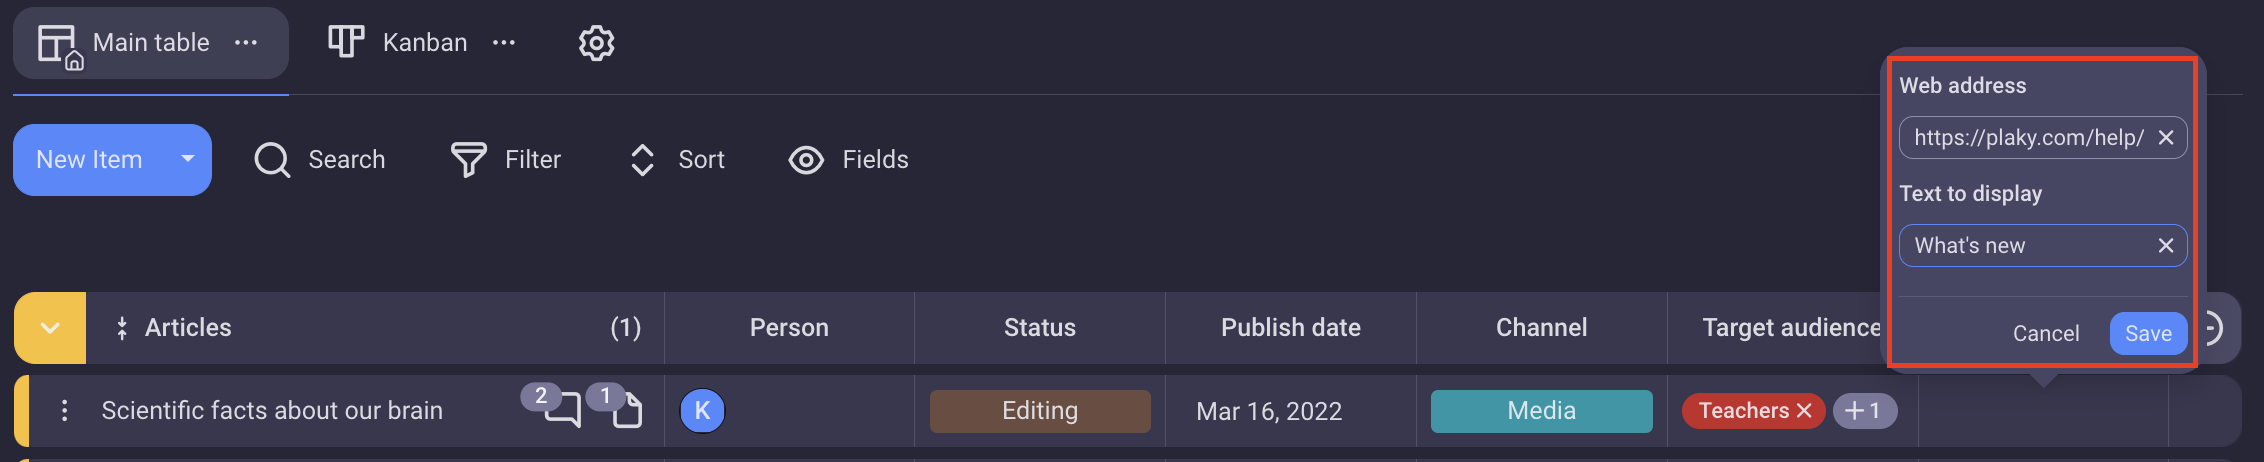
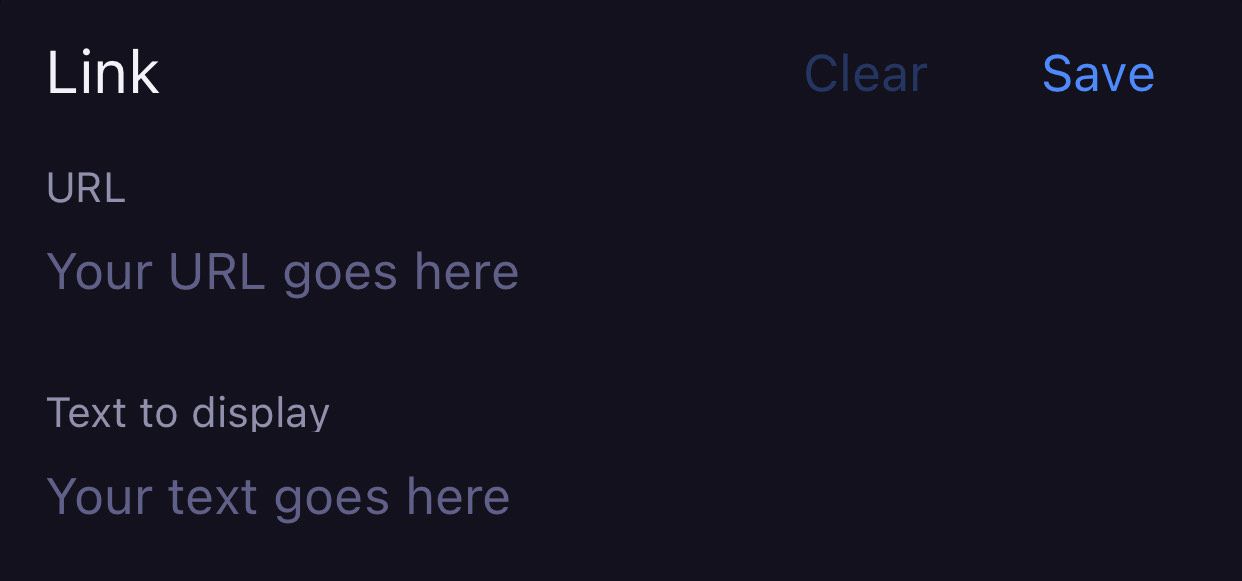
Link #
Link Field allows you to link any website to the Item. This way, you can customize each Item with the specific web address and the text that will be displayed in the Field.
To do that:
- Click + that appears when you hover over Link Field
- Enter Web address and Text to display in modal that appears
- Click Save to complete the process
- Tap + on the Link Field on a specific Item
- Enter Web address and Text to display in modal that appears
- Tap Save to complete the process
- Tap on the Link Field on a specific Item
- Enter Web address and Text to display in modal that appears
- Tap on tick icon in the top right corner to complete the action
Numbers #
You can use this Field to enter number related to any aspect of the project you’re tracking such as the number of hours spent working on a project, number of Items, Team Members working on project/task, or anything else that makes sense to you.
Add numbers Field just as any other Custom Field in Board and enter the required number in the appropriate field.
Value in the number Field is configurable. To configure number Field:
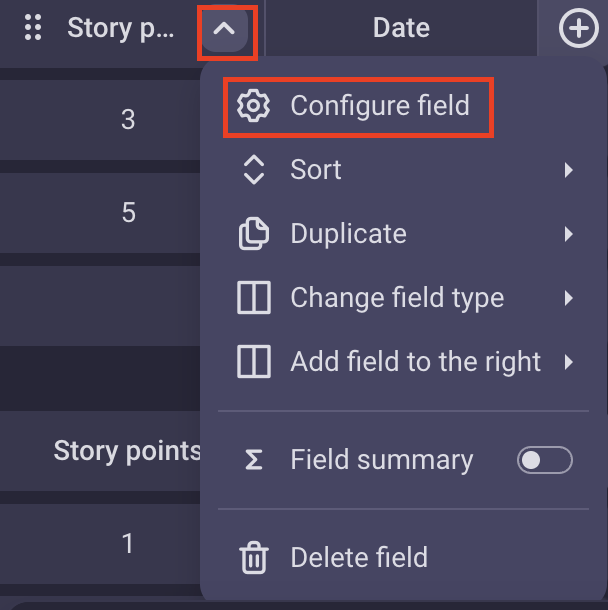
- Click on the arrow next to the Number field label
- Select Configure field from the dropdown
- Choose the Unit and the Alignment
- Click outside of the designated area to complete the action
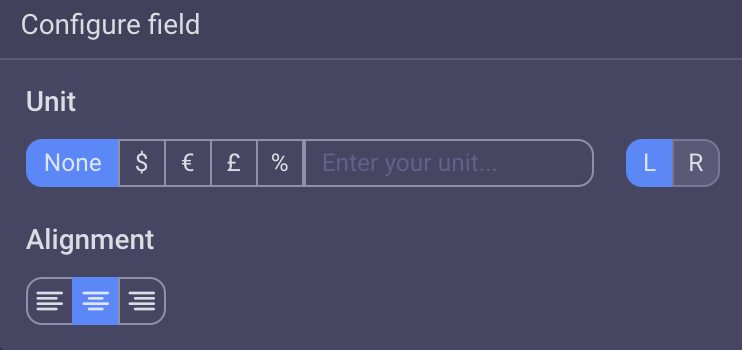
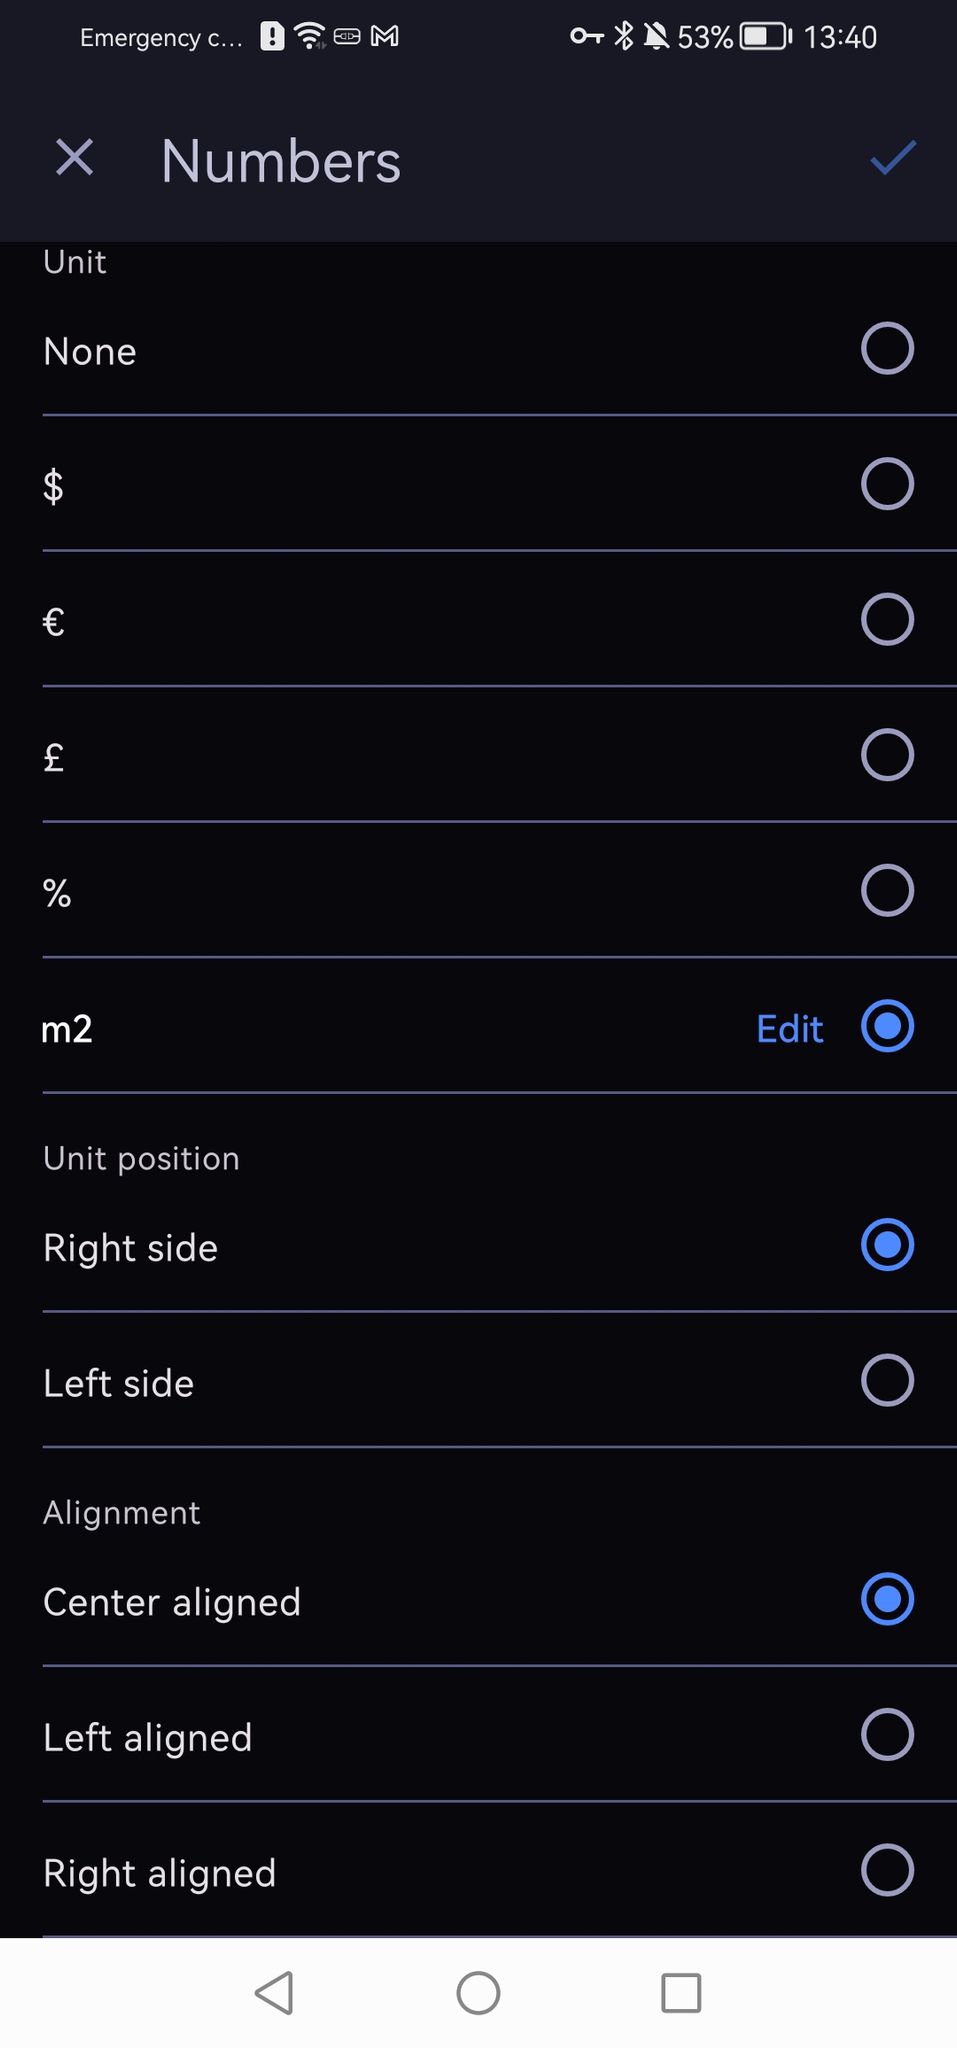
If the number in one Field represents, for instance, a sum of money, the unit can be defined as currency: $, €, £, %. If it doesn’t match any of the options listed, custom unit can be typed in the designated field.
Alignment can also be adjusted and the unit value can be positioned on the left or right.
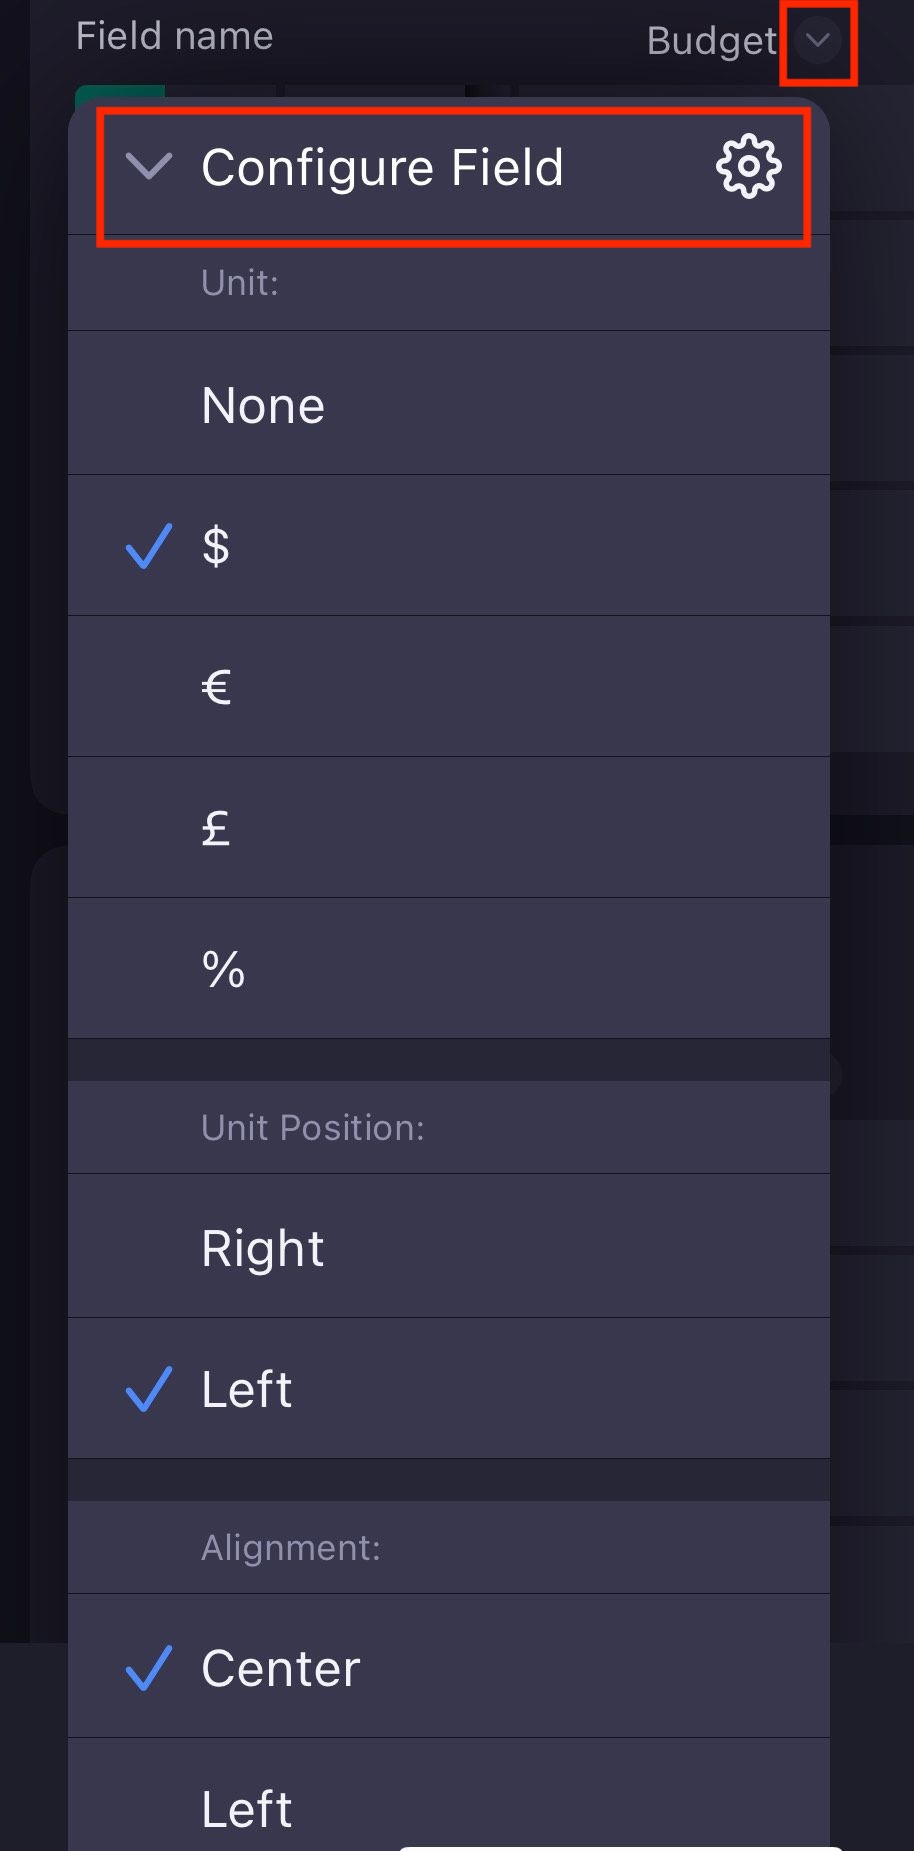
- Tap on the arrow next to the Field name
- Tap Configure Field
- Select the Unit, Unit position and Alignment
- Tap anywhere outside of the modal to save the changes
- Tap on the Number Field
- Select or enter the unit
- Choose unit position
- Choose alignment
- Tap on the tick icon in the top right corner to complete the action
Status #
In this Field, you can visually present the state of your tasks, or follow the progress of tasks of other Team Members. This is done by marking the status with some predefined labels (e.g. To do, In progress, Done) which can be customized, as well.
For more information on Status Field and its labels, check out the article: Configure Status Field.
Tag #
With Tags you can list multiple words that will appear after the hashtag symbol (#). You can use them to define the keywords for each Item, so that you can recognize it more easily in the Board, or even Group the Items with similar content across different Boards.
For more information on Tag Field, check out the article: Configure Tags.
Date #
The Date Field allows you to set due date for your tasks, or any sort of a deadline. To do that, simply click on the date Field and pick the date from the calendar. To configure Date Field:
- Click on the arrow next to the Number field label
- Select Configure field from the dropdown
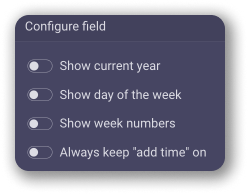
- Toggle the switches to:
– Show/Hide current year
– Show/Hide day of the week
– Show/Hide week numbers
– Show/Hide “add time” - Click outside of the designated area to complete the action
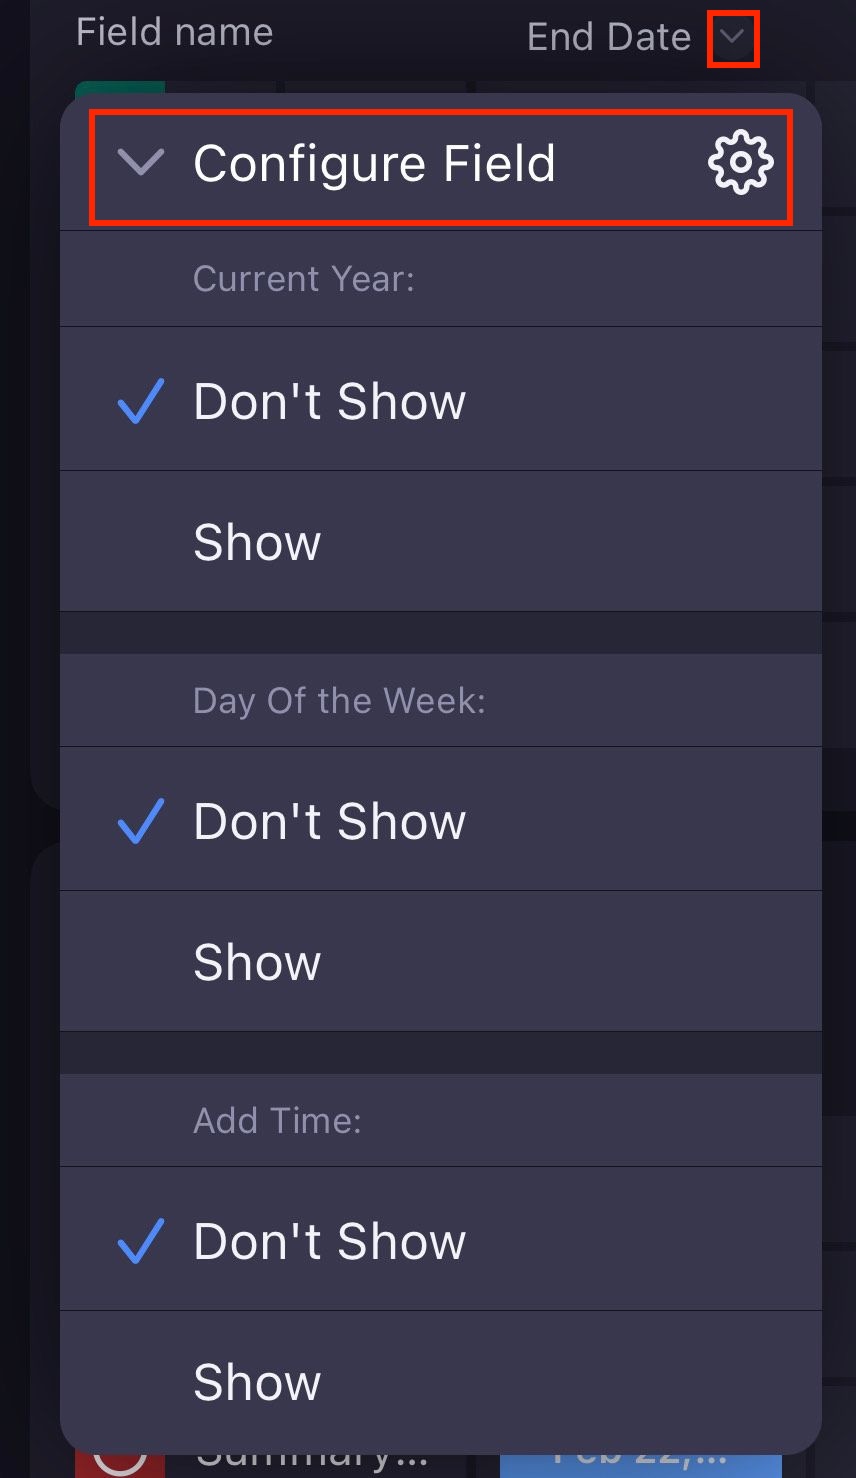
- Tap on the arrow next to the Field name
- Tap Configure Field
- Select to display/not display current year, day and time
- Tap anywhere outside of the modal to save the changes
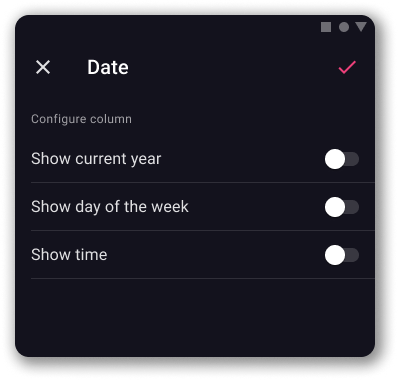
- Tap on the Date Field
- Toggle the switches to:
– Show/Hide current year
– Show/Hide day of the week
– Show/Hide time - Tap on the tick icon in the top right corner to complete the action
Person #
Person Field allows you to assign tasks to your Team Members, or check who in your team is responsible for which task. You only need to create the Field from the dropdown and select the person. That can be the Member of your Board, or your Team Member.
To configure Person Field:
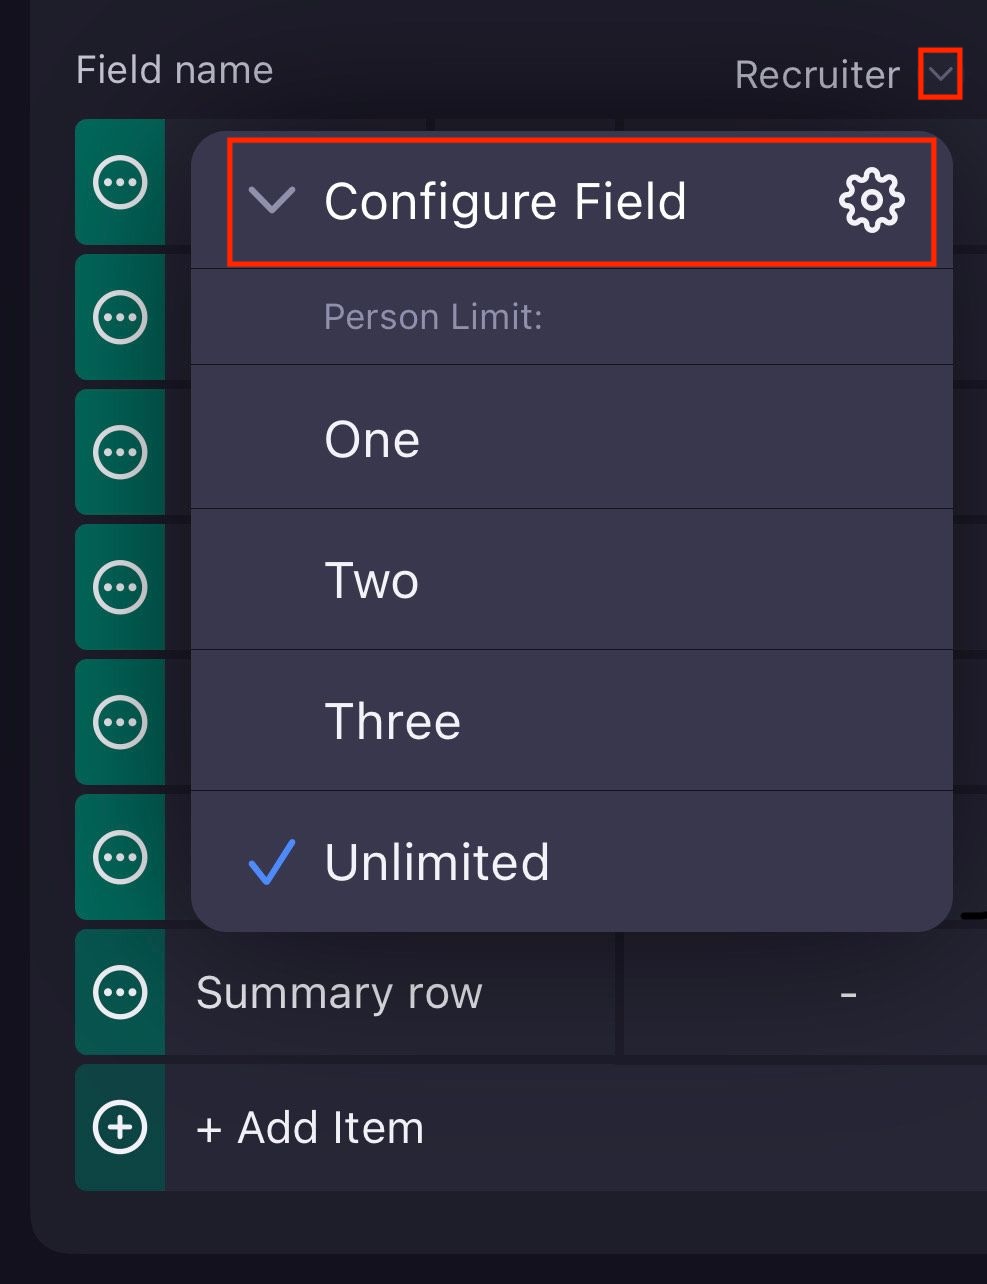
- Click on the arrow next to the Person field label
- Select Configure field from the dropdown
- Select the person limit (one, two, three, or unlimited)
- Click outside the designated area to complete the action
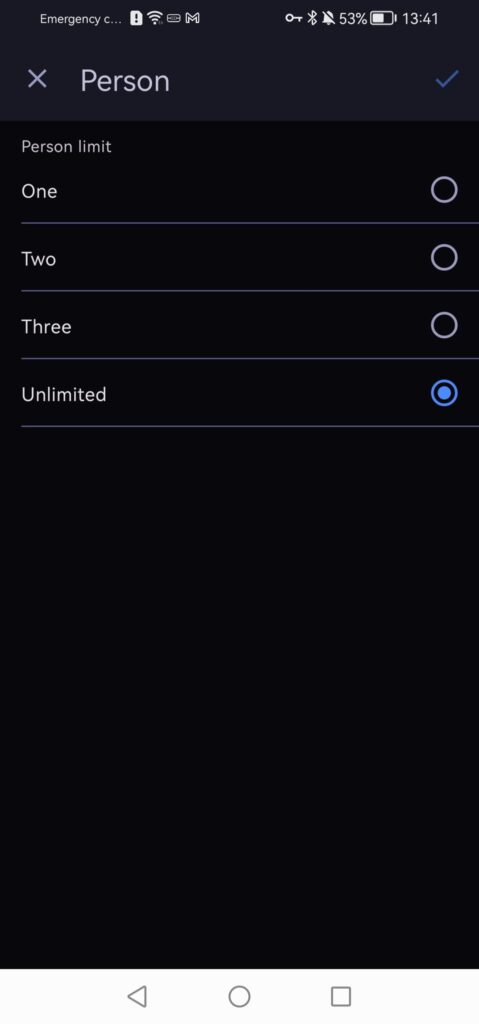
- Tap on the arrow next to the Field name
- Tap Configure Field
- Select the person limit
- Tap anywhere outside of the modal to save the changes
- Tap on the Person Field
- Select the person limit (one, two, three, or unlimited)
- Tap on the tick icon in the top right corner to complete the action
Timeline #
The Timeline field (available on paid plans only) is a powerful feature for project period management. With this field, it is easy to input and track time periods using two date pickers. To do it, add a Timeline field, click on the added Field and select the year and two dates from the calendar, or manually type in the start and the end date.
To configure Timeline Field:
- Click on the arrow next to the Timeline field label
- Select Configure field from the dropdown
- Toggle the switch to show/hide current year
- Toggle the switch to show/hide time
- Click outside the designated area to complete the action
- Tap on the Timeline field
- Tap on Configure field
- Toggle the switch to show/hide current year
- Toggle the switch to show/hide time
- Tap outside of the designated area to complete the action
- Tap on the Timeline Field
- Toggle the switch to show/hide current year
- Toggle the switch to show/hide time
- Tap on the tick icon in the top right corner to complete the action