
Manage Item
Once created, Items can be moved and their content in Plaky can be edited. Board Fields keep the Items organized and structured.
This text gives you an overview of how you can manage an Item on your Board.
Rename Item #
If you need to update the name of an Item for better organization or clarity, follow these steps:
- Click on the three dots on the left side of the Item
- Select Rename
- Type new Item name
- Press Enter/Click outside the designated area to complete the action
or
- Click on the Item
- Type new Item name in the Item header
- Click outside the designated area to complete the action
- Open an Item
- Tap on the three dots in the top right corner
- Select Rename Item
- Type new Title
- Tap Done
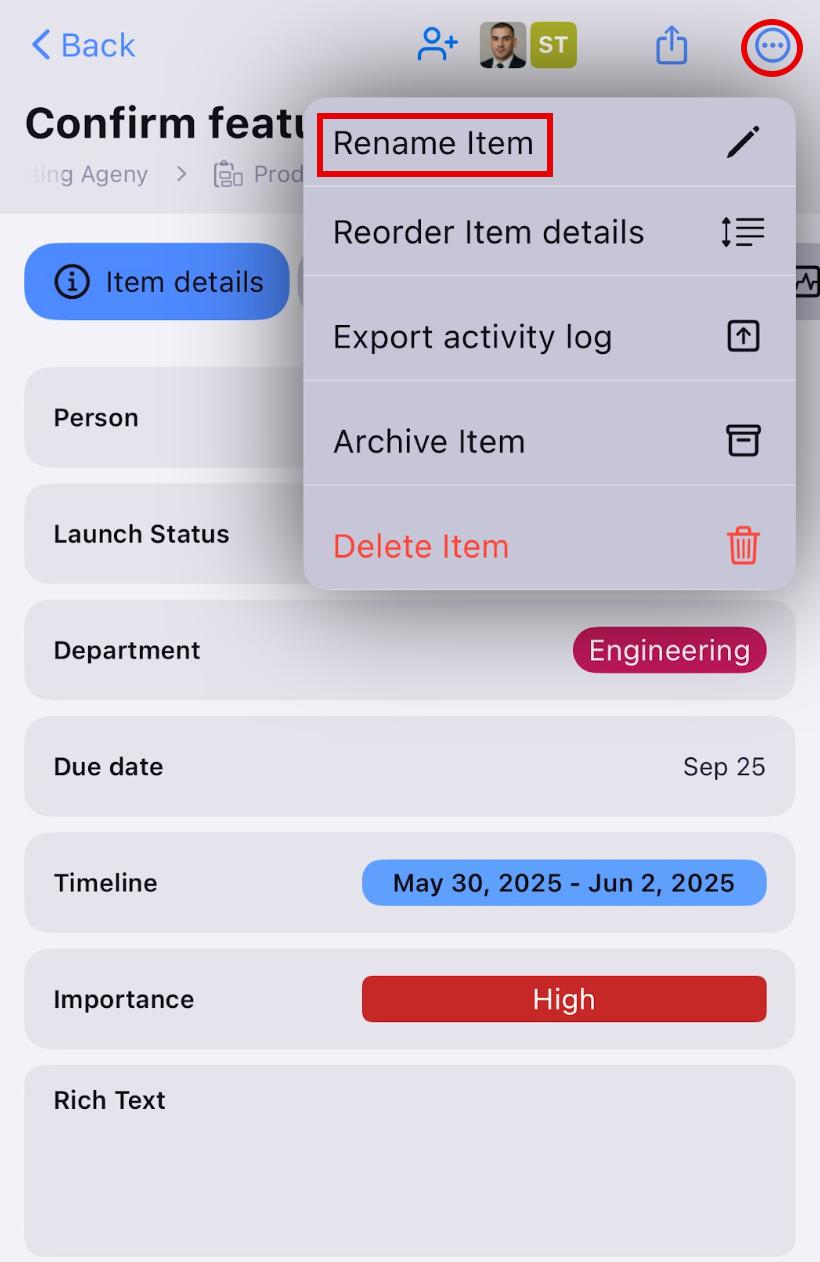
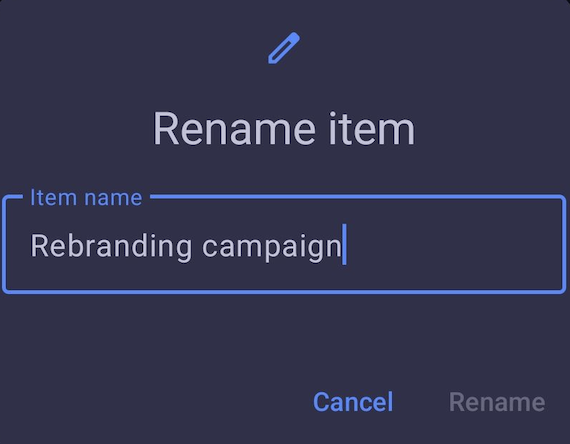
- Tap on the Item
- Tap on three dots in the top right corner to open the Item menu
- Select Rename Item
- Type new Item name
- Tap Rename Item to complete the action
Add Subscribers #
Item subscribers are users who receive notifications and updates related to that specific Item. They do not need to be assigned in the Person Field as the user responsible for the task. The user who creates an Item is automatically subscribed to that Item.
To add an Item subscriber:
- Click on the Item to open the Item card
- Click on the add subscriber icon at the top right corner of the Item card
- Click on the Find users field
- Select the user from the dropdown
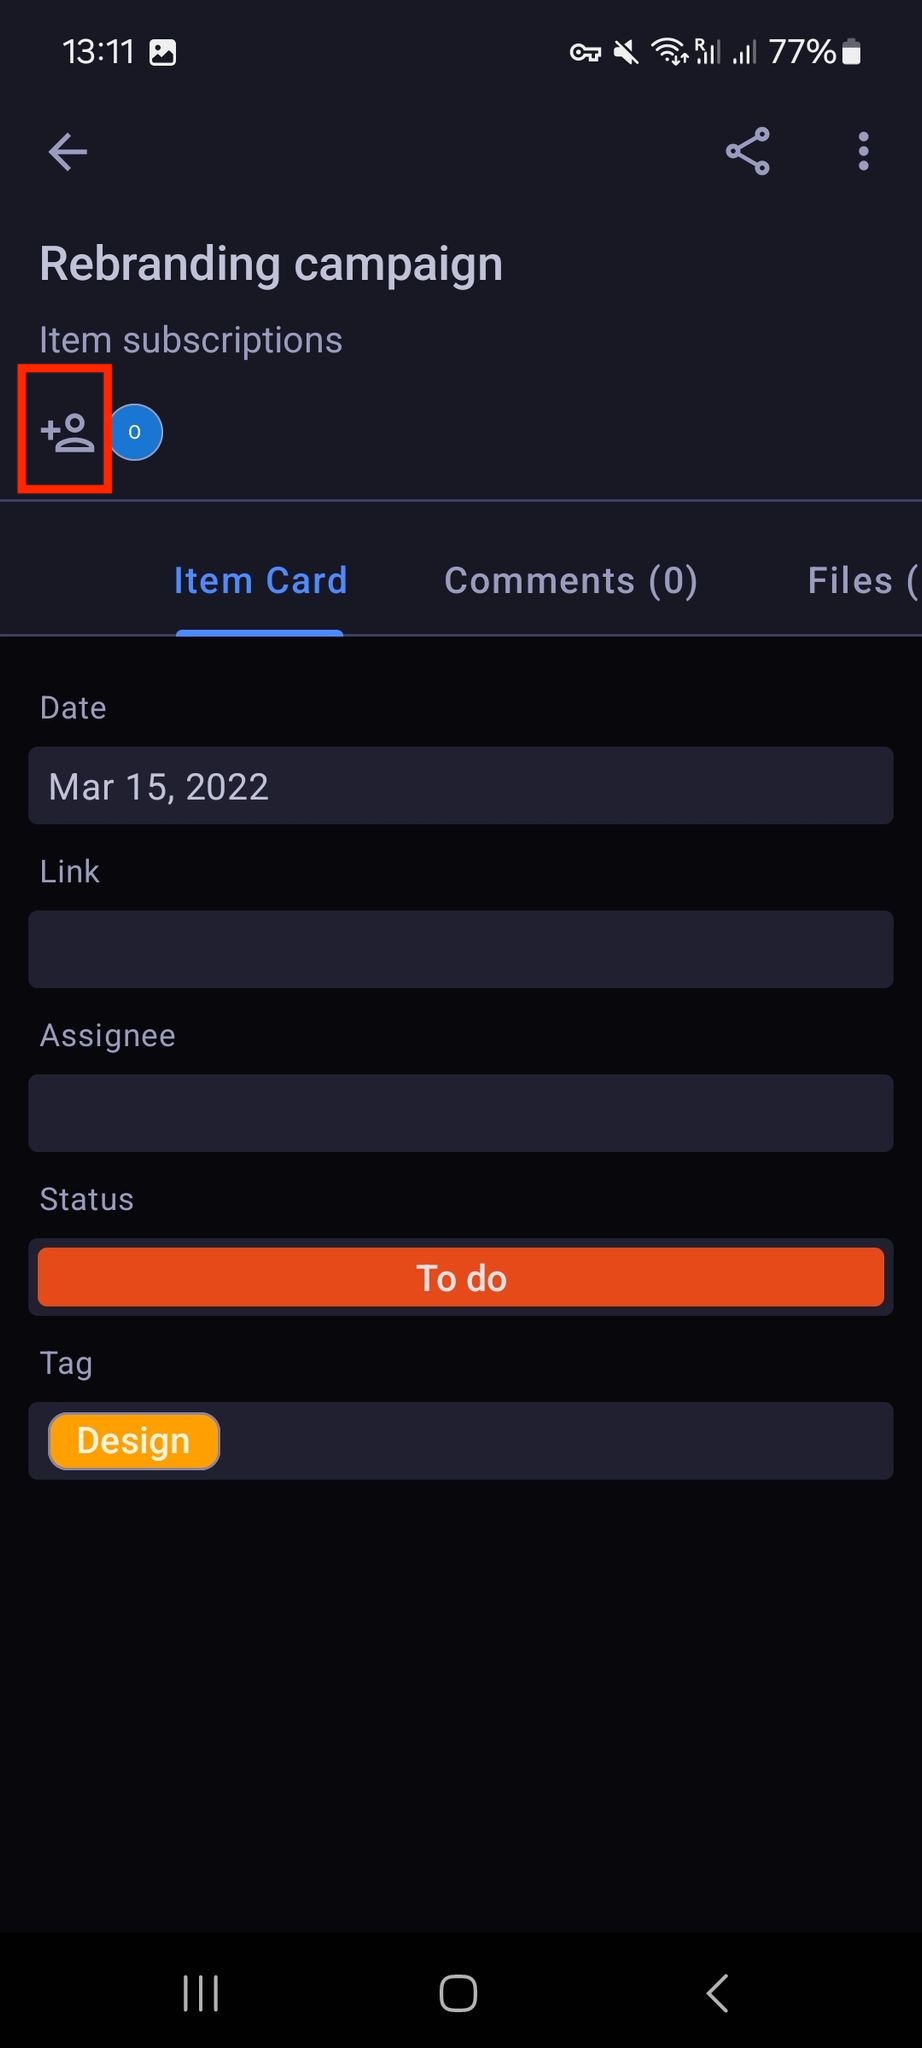
- Tap on the Item to open the Item card
- Tap on the add subscriber icon at the top right corner of the Item card
- Find the user/team using the search field
- Tap Save to complete the action
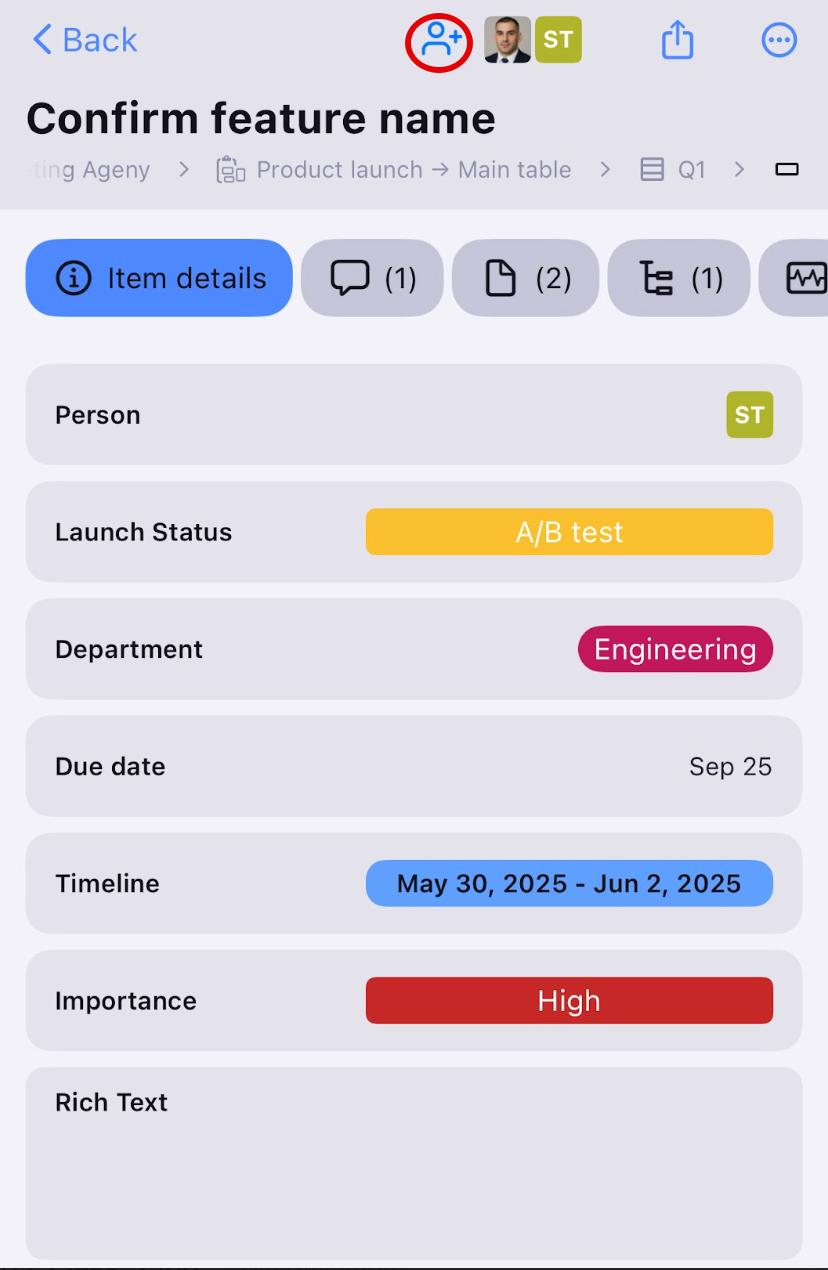
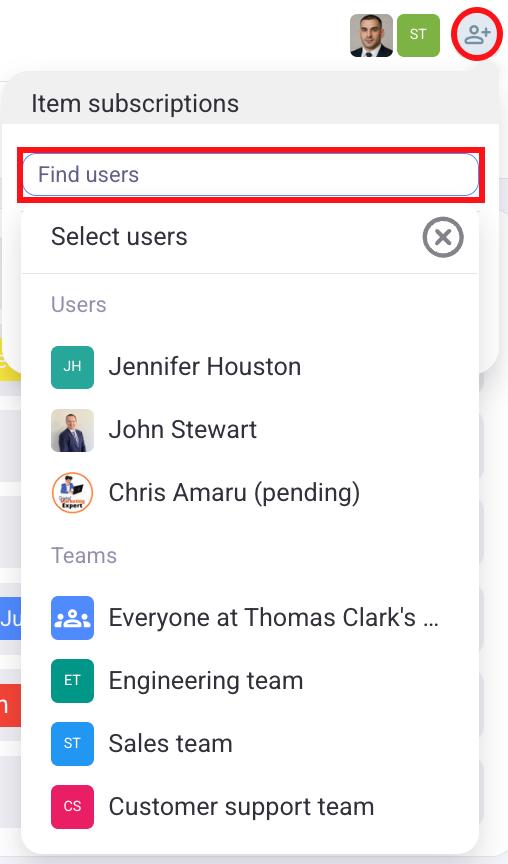
- Tap on the Item to open the Item card
- Tap on the add subscriber icon at the top left corner of the Item card
- Find the user/team in the list
- Tick the checkbox next to the user’s name
- Tap Save to complete the action
A user assigned to an Item is automatically subscribed to the Item.
Only Item owner is automatically subscribed to any Subitem created for the given Item.
Duplicate Item #
Duplicating Item feature allows you to quickly create new Items based on existing ones.
To duplicate Item:
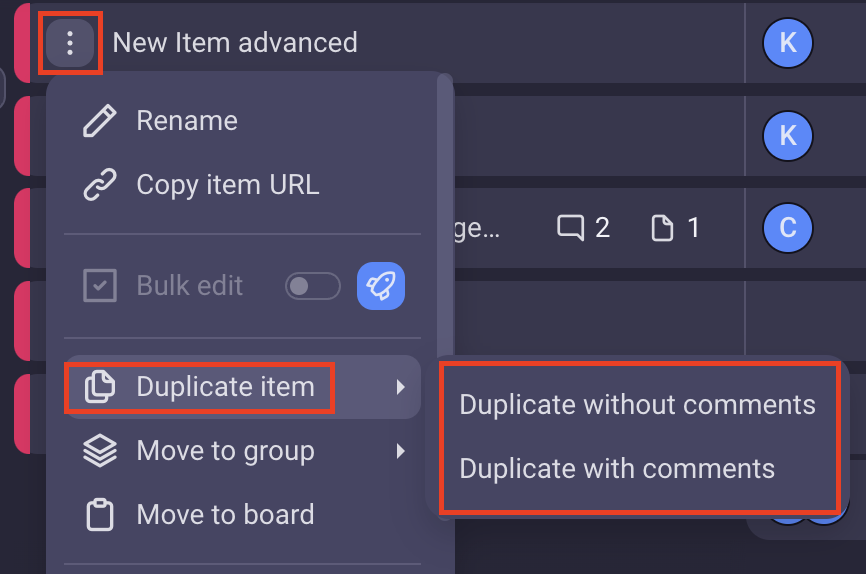
- Navigate to the Item you’d like to duplicate
- Click on the three dots to open a dropdown menu
- Hover over Duplicate Item
- Choose either Duplicate with comments or Duplicate without comments
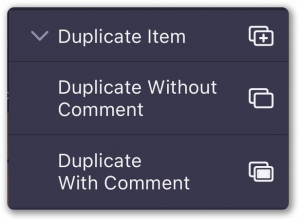
- Click on three dots at the left side of the Item to open the Item menu
- Tap on Duplicate Item
- Tap Duplicate Without Comment or Duplicate with Comment to complete the action
- Tap on three dots on the Item to open the Item menu
- Select Duplicate item
- Tap Duplicate Without Comment or Duplicate with Comment
- Tap Duplicate to complete the action
If you choose to duplicate with comments, all Item values, subscribers and files will be duplicated, including comments.
If you choose to duplicate without comments, all Item values, subscribers and files will be duplicated, without comments.
Additionally, assigned users and subscribers will receive a notification that they are now assigned / subscribed to the newly-created Item.
After the duplication process is completed, both Items (the original and the duplicate) can be edited independently. This means that, any modifications made to the original Item, won’t affect its duplicate.
All the subitems associated with the given item will be duplicated.
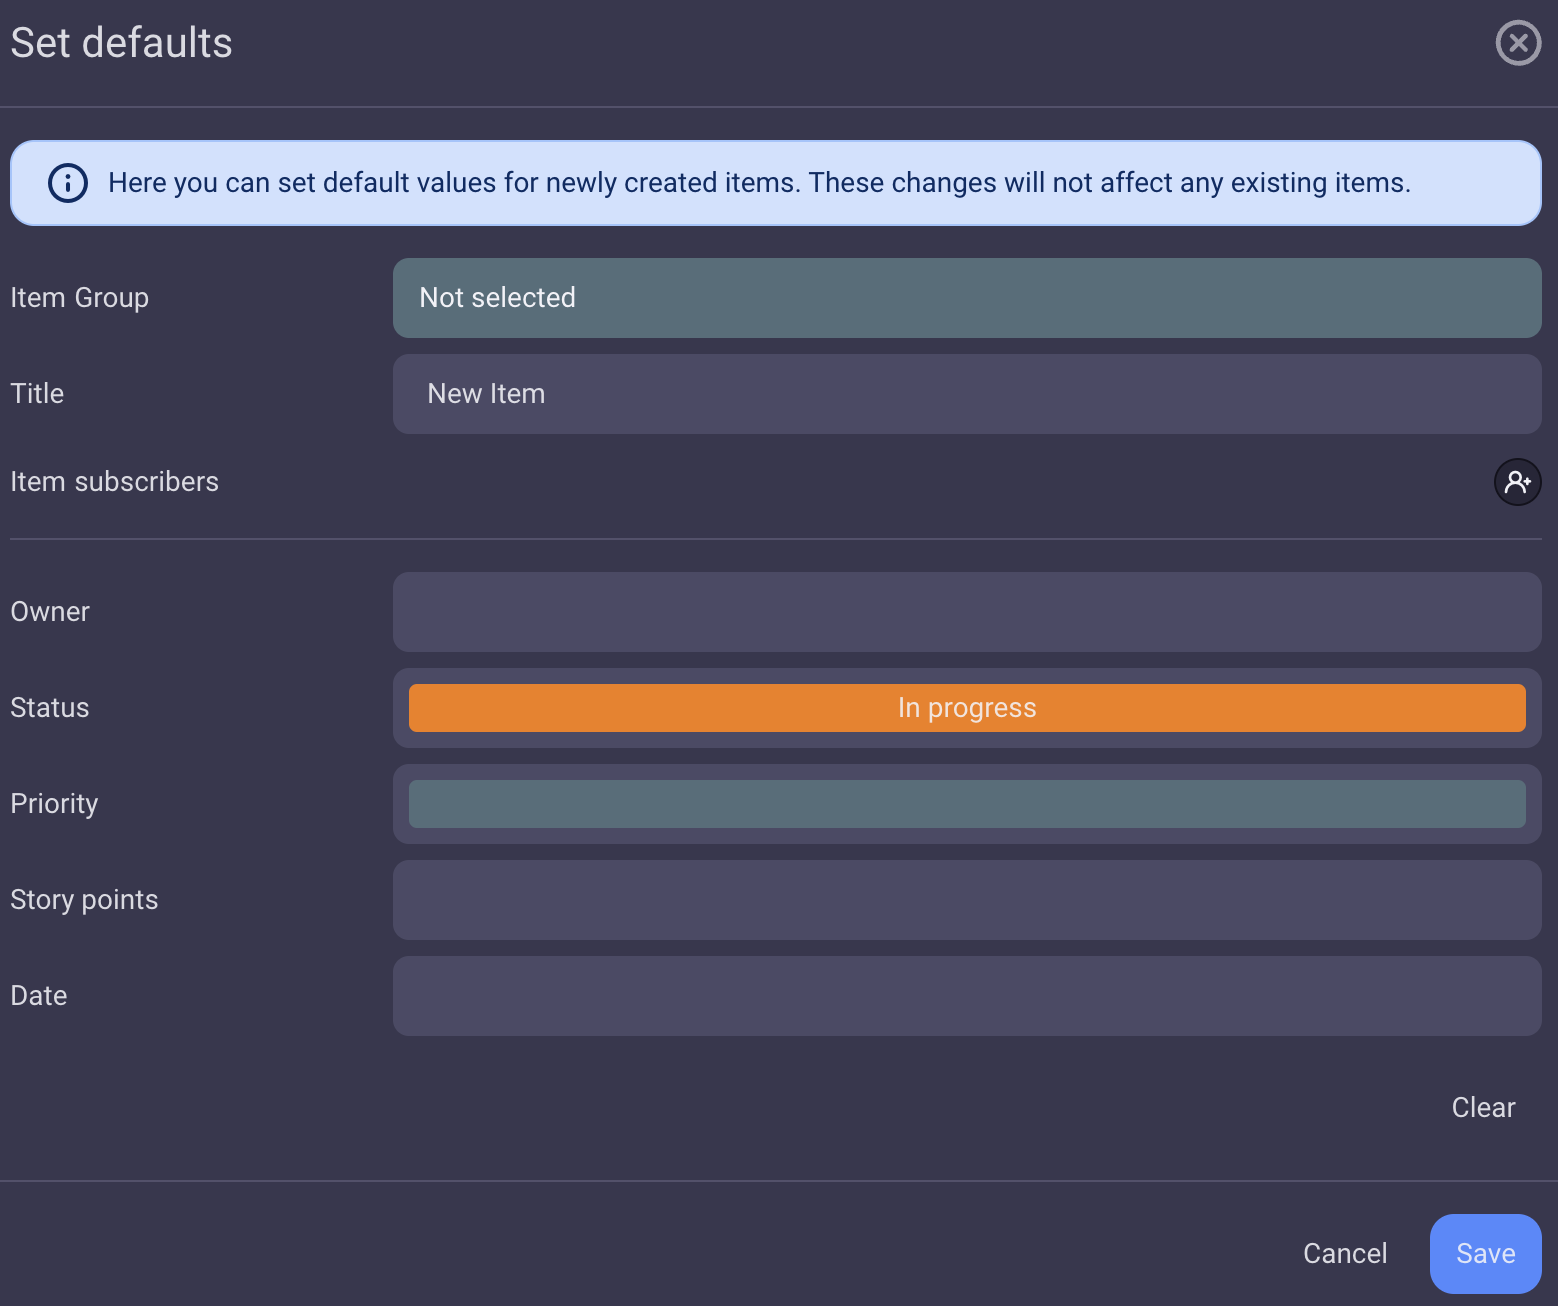
Set Item template #
You can set default values for newly created Items. This way, all newly created Items will have these configured values, by default. Please note that these changes won’t affect any of the existing Items. This feature is available on Web version of the app on paid plans only.
To set Item template:
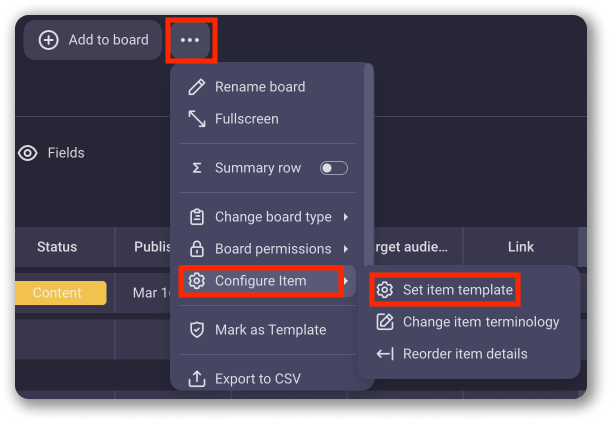
- Click on the three dots menu at the top right corner
- Hover over Configure item
- Choose Set Item template
- In the Set defaults modal set the values for the default Item
- Save the configuration
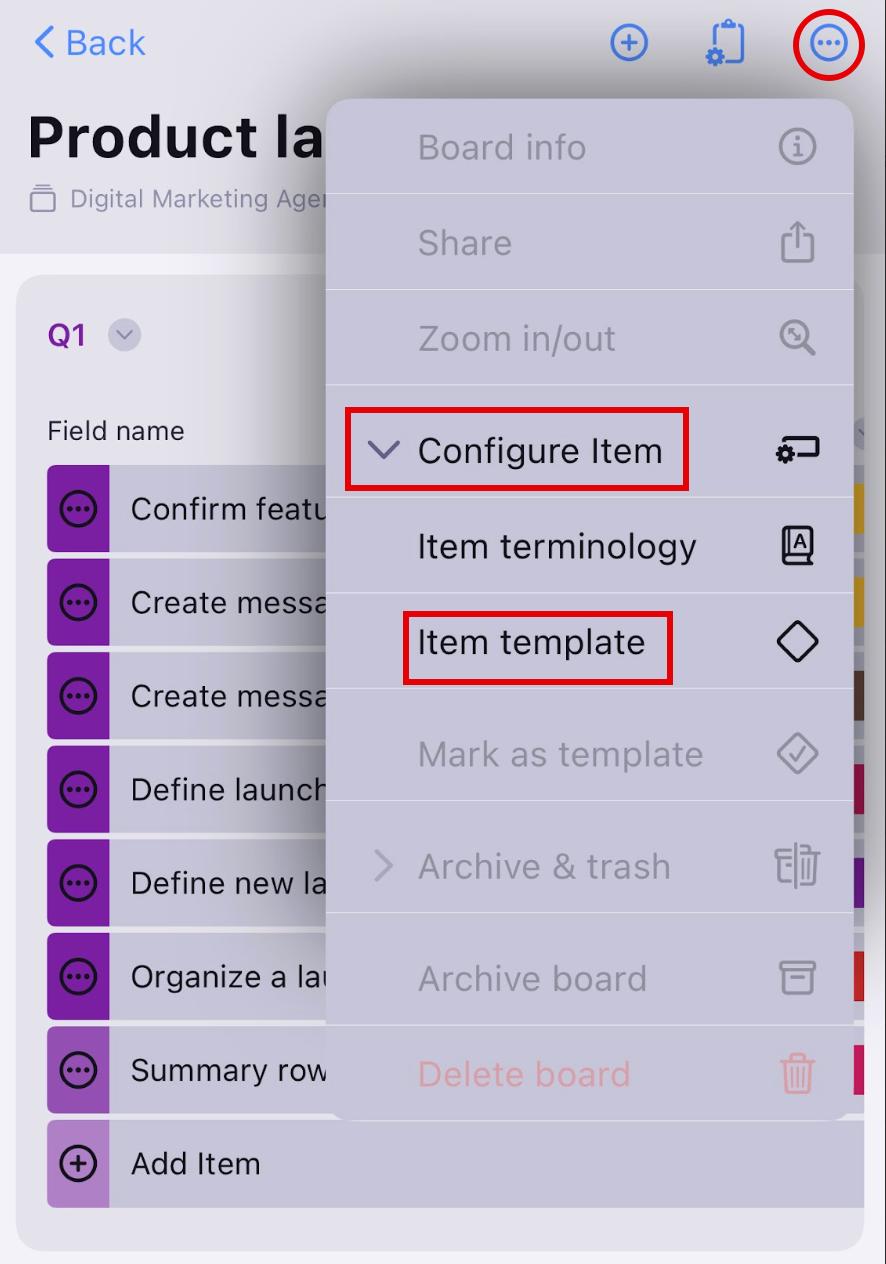
- Tap on the three dots menu at the top right corner
- Tap on Configure Item
- Tap on Item template
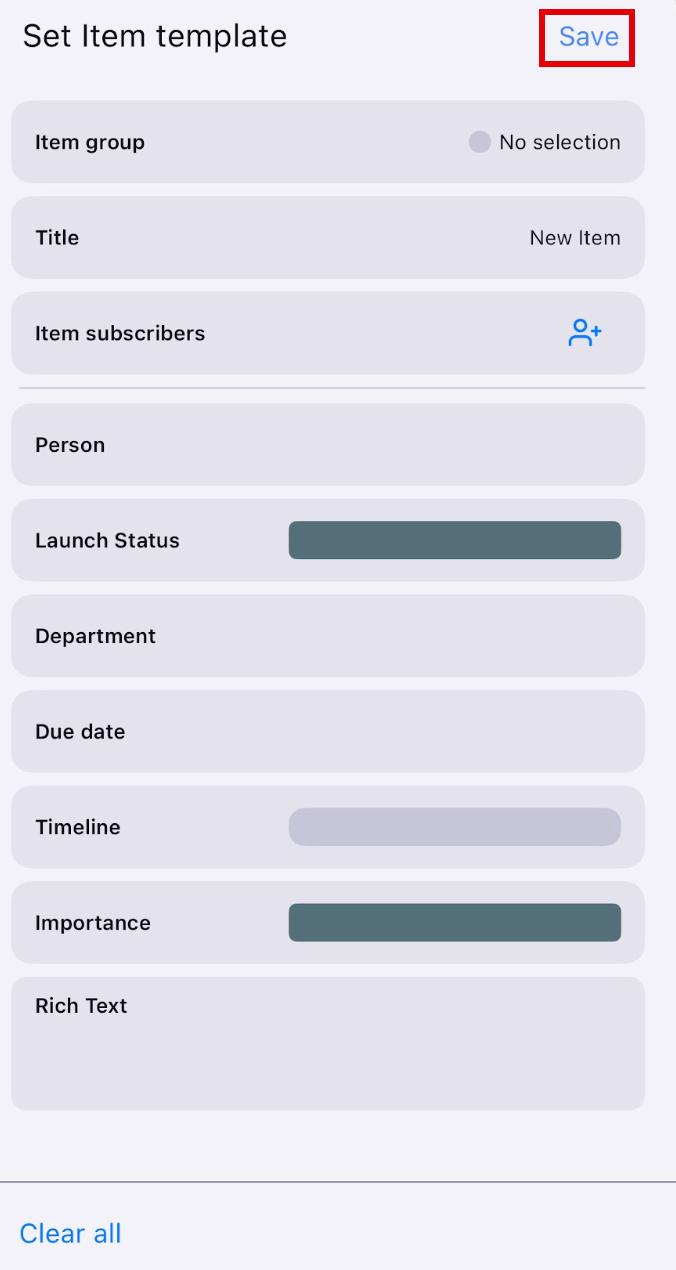
- In the Set Item Template modal set the values for the default Item
- Save the configuration to complete the action
COMING SOON
If set as a default Item subscriber, the User is notified each time a new Item is created.
Change Item terminology #
You can also manage an Item by changing its terminology on your Board. This means that, if the term “Item” doesn’t correspond to the purpose of your Space, you can change it to any other term that reflects this in a better way. To do so:
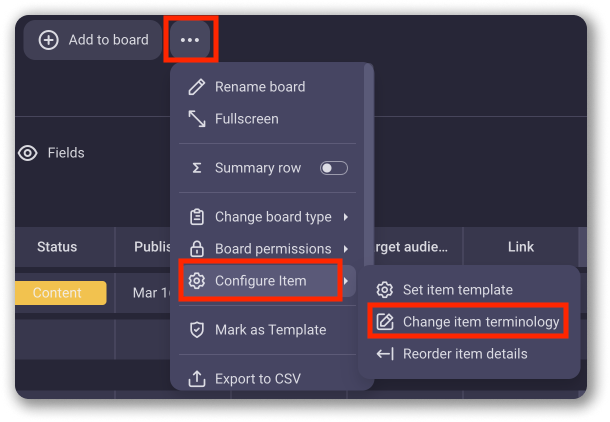
- Click on the Board menu at the top right corner
- Hover over Configure item
- Choose Change item terminology from the dropdown
- In the Change item naming modal, enter the term which you’d like to be used to refer to the Item on this Board (e.g. Task).
- Click Save to complete the action
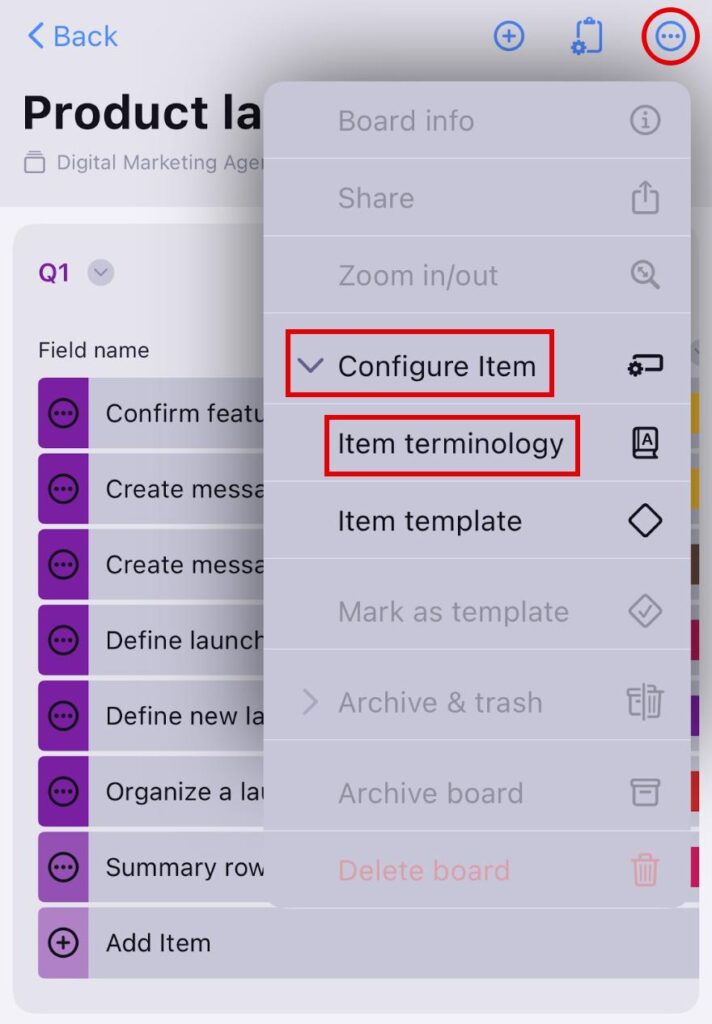
- Tap on three dots in the top right corner of the Board to open the Board menu
- Tap on Configure Item
- Select Item terminology
- Type Item terminology name
- Tap Done to complete the action
- Tap on three dots on the top right corner of the Board
- Select Change item terminology
- Type Item terminology name
- Tap Save to complete the action
All the Items on the Board will be referred to as the term you entered (e.g. “Tasks”). This change will also be reflected on all other actions related to the Items on this Board, including adding, editing and deleting the Item.
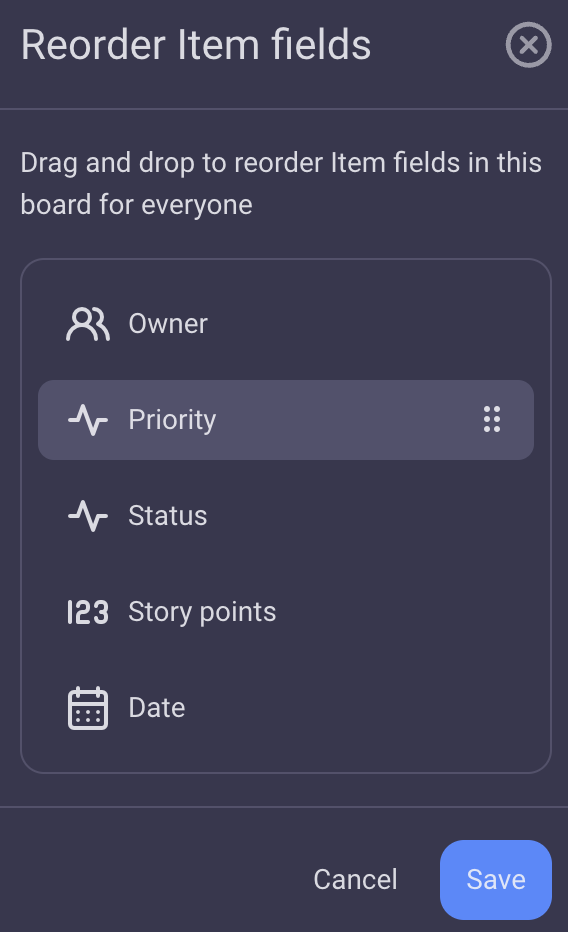
Reorder Item details #
Customize your Board even more by arranging the order of fields on items to suit your preferences. This change is visible to all users. To reorder Item details:
- Click on the Board menu at the top right corner
- Hover over Configure item
- Choose Reorder item details
- Drag and drop to reorder Fields
- Click Save to complete the action
- Tap on the Item
- Tap on three dots in the to right corner to open the Item menu
- Select Reorder Item Details
- Drag and drop the fields to reorder them
- Tap Save to complete the action
COMING SOON
Reorder Item details option is intended for rearranging the order of Fields within the Item Card only.
Copy Item link #
Links to Items in Plaky can be copied and pasted in any chat application that you use to correspond and collaborate with your colleagues. This way, Plaky users can reach the specific Item in question and be aware of any kind of development related to it.
To copy Item link:
- Click on the three dots on the Item
- Choose Copy item link
Your Item will be copied to a clipboard ready to be pasted in any chat app you’d like.

- Tap on Item you’d like to share
- Tap on share icon at the top right corner
- Copy the link to complete the action
- Tap on three dots on the right corner of the Item you’d like to share
- Select Copy item URL to complete the action
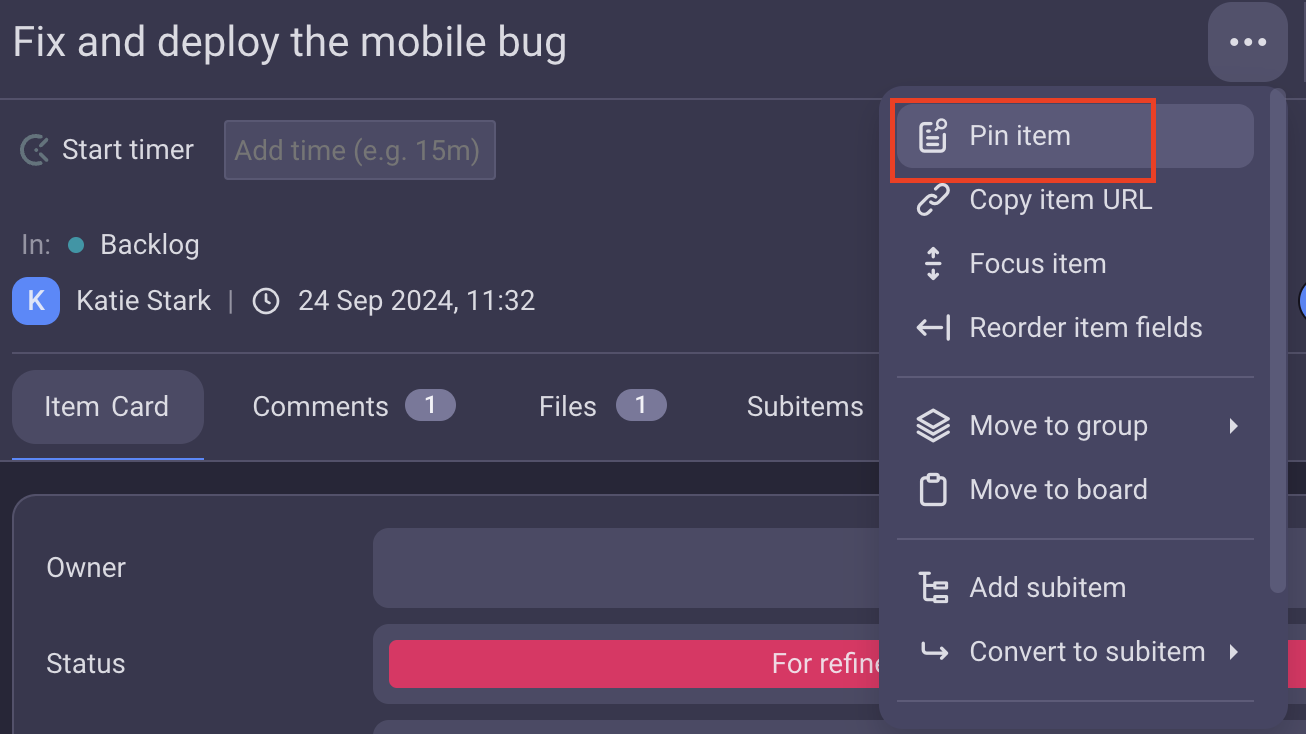
Pin Item to Sidebar Panel #
Pin an important Item in a sidebar panel for quick access while maintaining a clutter-free main interface. By pinning Items to the sidebar panel, you can quickly toggle between Space, Board pages and Home page without navigating away from the pinned Item.
To pin/unpin an Item:
- Click on three dots in the top right corner of the Item
- Select Pin/Unpin Item to complete the action
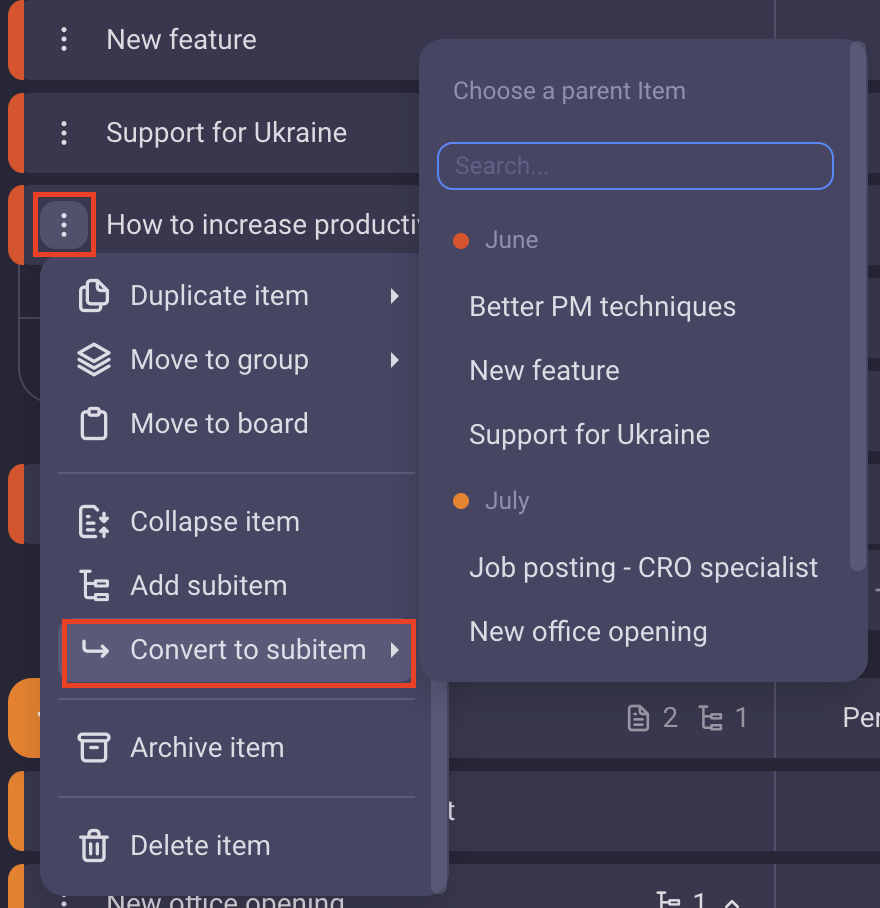
Convert Item to Subitem #
You can convert Items to Subitems, allowing them to function independently within your project. To do it:
- Click on three dots on the Item to open the Item menu
- Hover over Convert to subitem
- Select the parent Item from the list
- Click on Proceed on the confirmation modal to complete the action
- Tap on three dots on the Item to open the Item menu
- Tap on Convert to subitem
- Select the parent Item from the list
- Click on Proceed on the confirmation modal to complete the action
COMING SOON
If the converted Item had subitems, those subitems will be assigned to the same parent Item as the converted Item.
Delete Item #
If you no longer need an Item, you can delete it following these steps:
- Click on the three dots on the left side of the Item
- Select Delete
- Click Delete on the confirmation modal to complete the action
The deleted item will be kept in your Trash for 30 days, so you can restore it during that period.
- Tap on three dots at the left side of the Item to open the Item menu
- Select Delete
- Tap Delete on the confirmation modal to complete the action
- Tap on the Item
- Tap on three dots in the top right corner to open the Item menu
- Select Delete
- Tap Delete item on the confirmation modal to complete the action