
Admin Settings
Admins have permissions to control and manage the way other members in the Workspace use features available to them in their accounts.
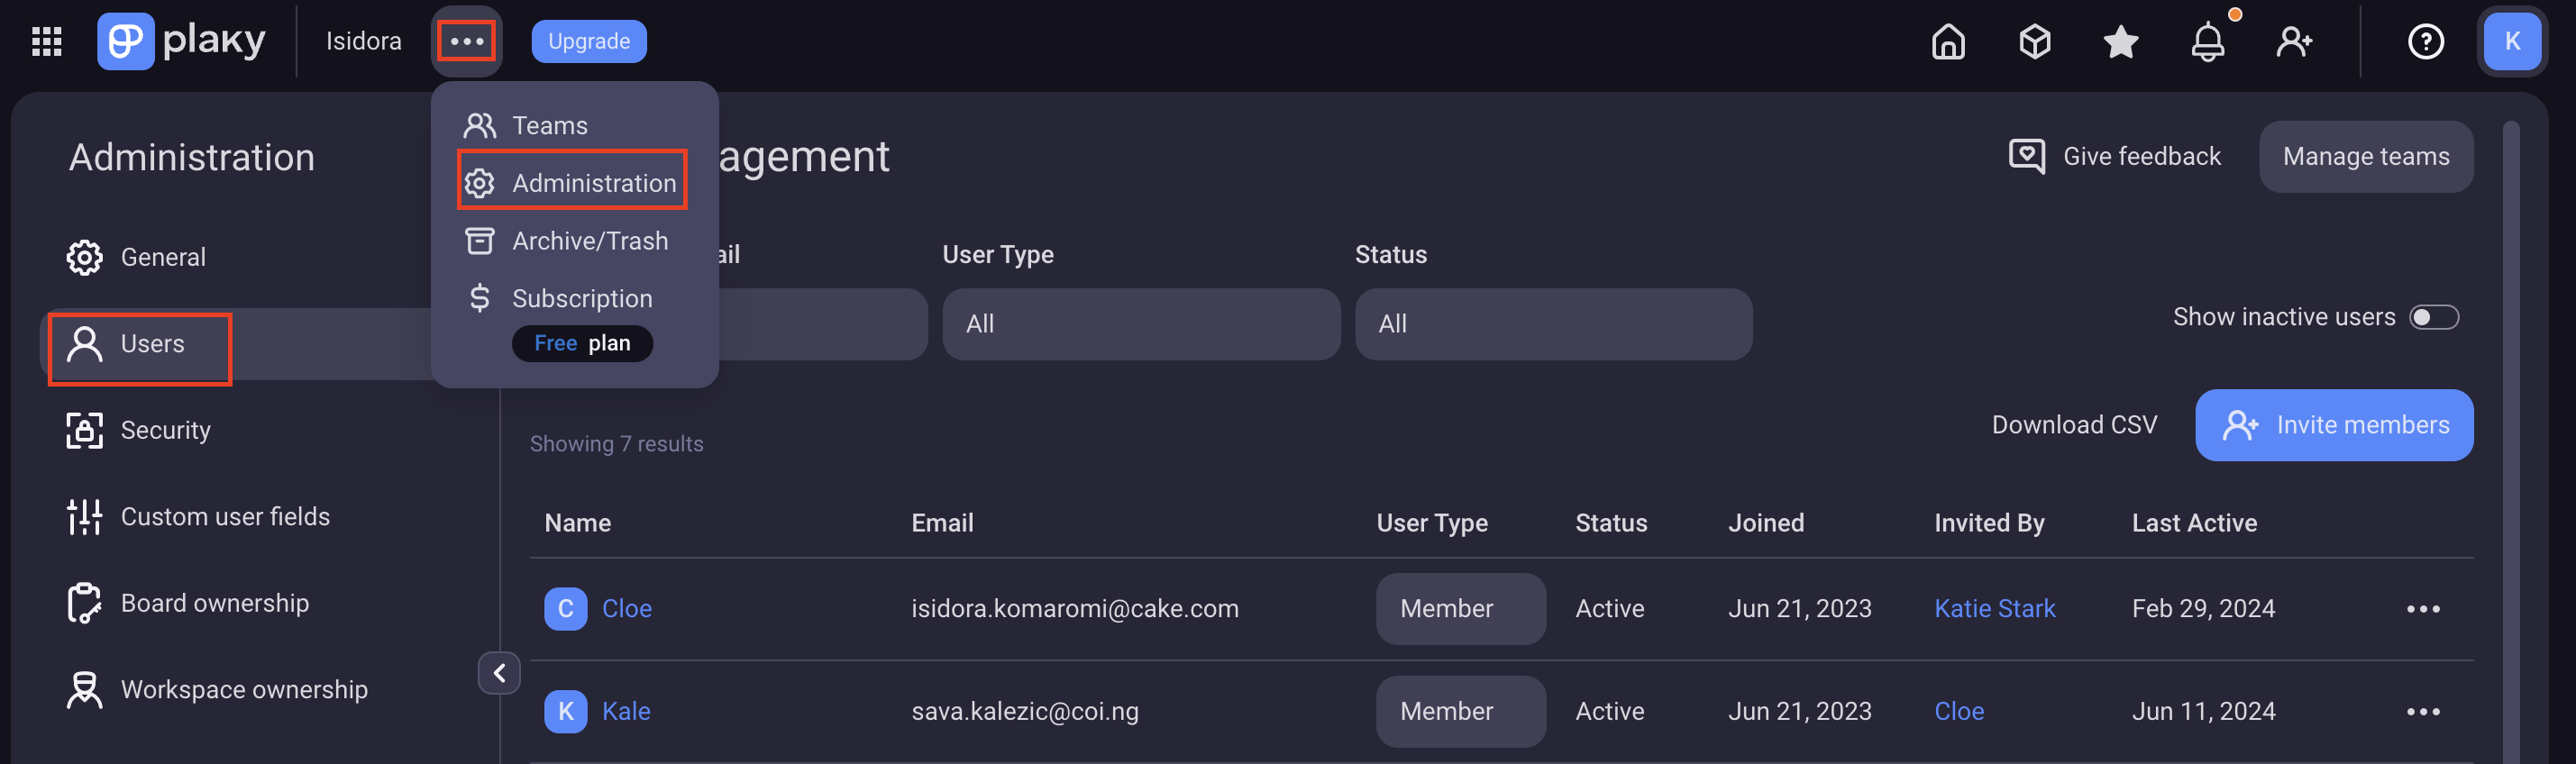
For Admin settings:
- Click on the user menu at the top left corner of the screen
- Choose Administration from the menu
You can perform multiple actions here.
Users section has a list of Users in your Workspace. Admin can edit User’s email address, change user role, or deactivate user.
Deactivate user #
To change email address, or deactivate user:
- Click on the three dots in the Users list on the right
- Click on Deactivate user
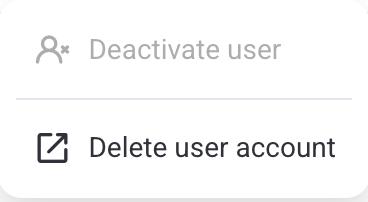
Admins cannot deactivate other admins. Only the Workspace Owner can do that.
Change user role #
To change the user role of another user in the Workspace:
- Click on the User Type Field in the Users list
- Choose the role from the dropdown.
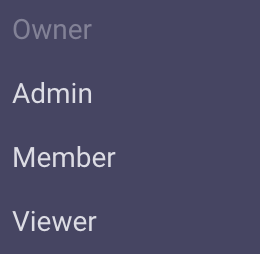
Viewer user type is available only on paid plans.
Admins can appoint other users admins, but cannot remove an admin role from another admin. Only Workspace Owner can do that.
Export users to CSV #
To export the list of your Workspace users in a CSV format click on Download CSV in the Users tab of the Administration page, and a file containing the users’ names and profile data will be saved to your computer..
Configure SSO #
Enhances security at scale by eliminating the need for user passwords. Enable centralized access control and efficient management of login credentials by configuring Single Sign-on (SSO). To do it:
- Open Security tab in Admin
- Access SSO tab
- Click on + icon in the top right corner to add SSO configuration
Check out this article for more detailed information on how to set up Single Sign-on (SSO).
Customize user Fields #
Customize the fields that your teammates will be required to fill in on their profiles, ensuring that your team’s collective data is comprehensive and well-structured for effective collaboration.
To add custom user Fields:
- Open Customization tab on Admin page
- Click on + Add new custom Field
- Edit Field title and description
- Click on the Field icon to choose the icon
- Click Save changes to complete the action
Drag and drop the Fields to change their order. To delete a custom user Field, click on X.
To edit any custom Field, just click on its title, description or the icon.
Editing the existing user Fields and adding custom user Fields is available only on the Enterprise and Trial plan.
Change Workspace name and subdomain #
If you navigate to the General tab, you’ll jump to the Workspace settings screen. Here, you can see and edit your Workspace name and Workspace subdomain.
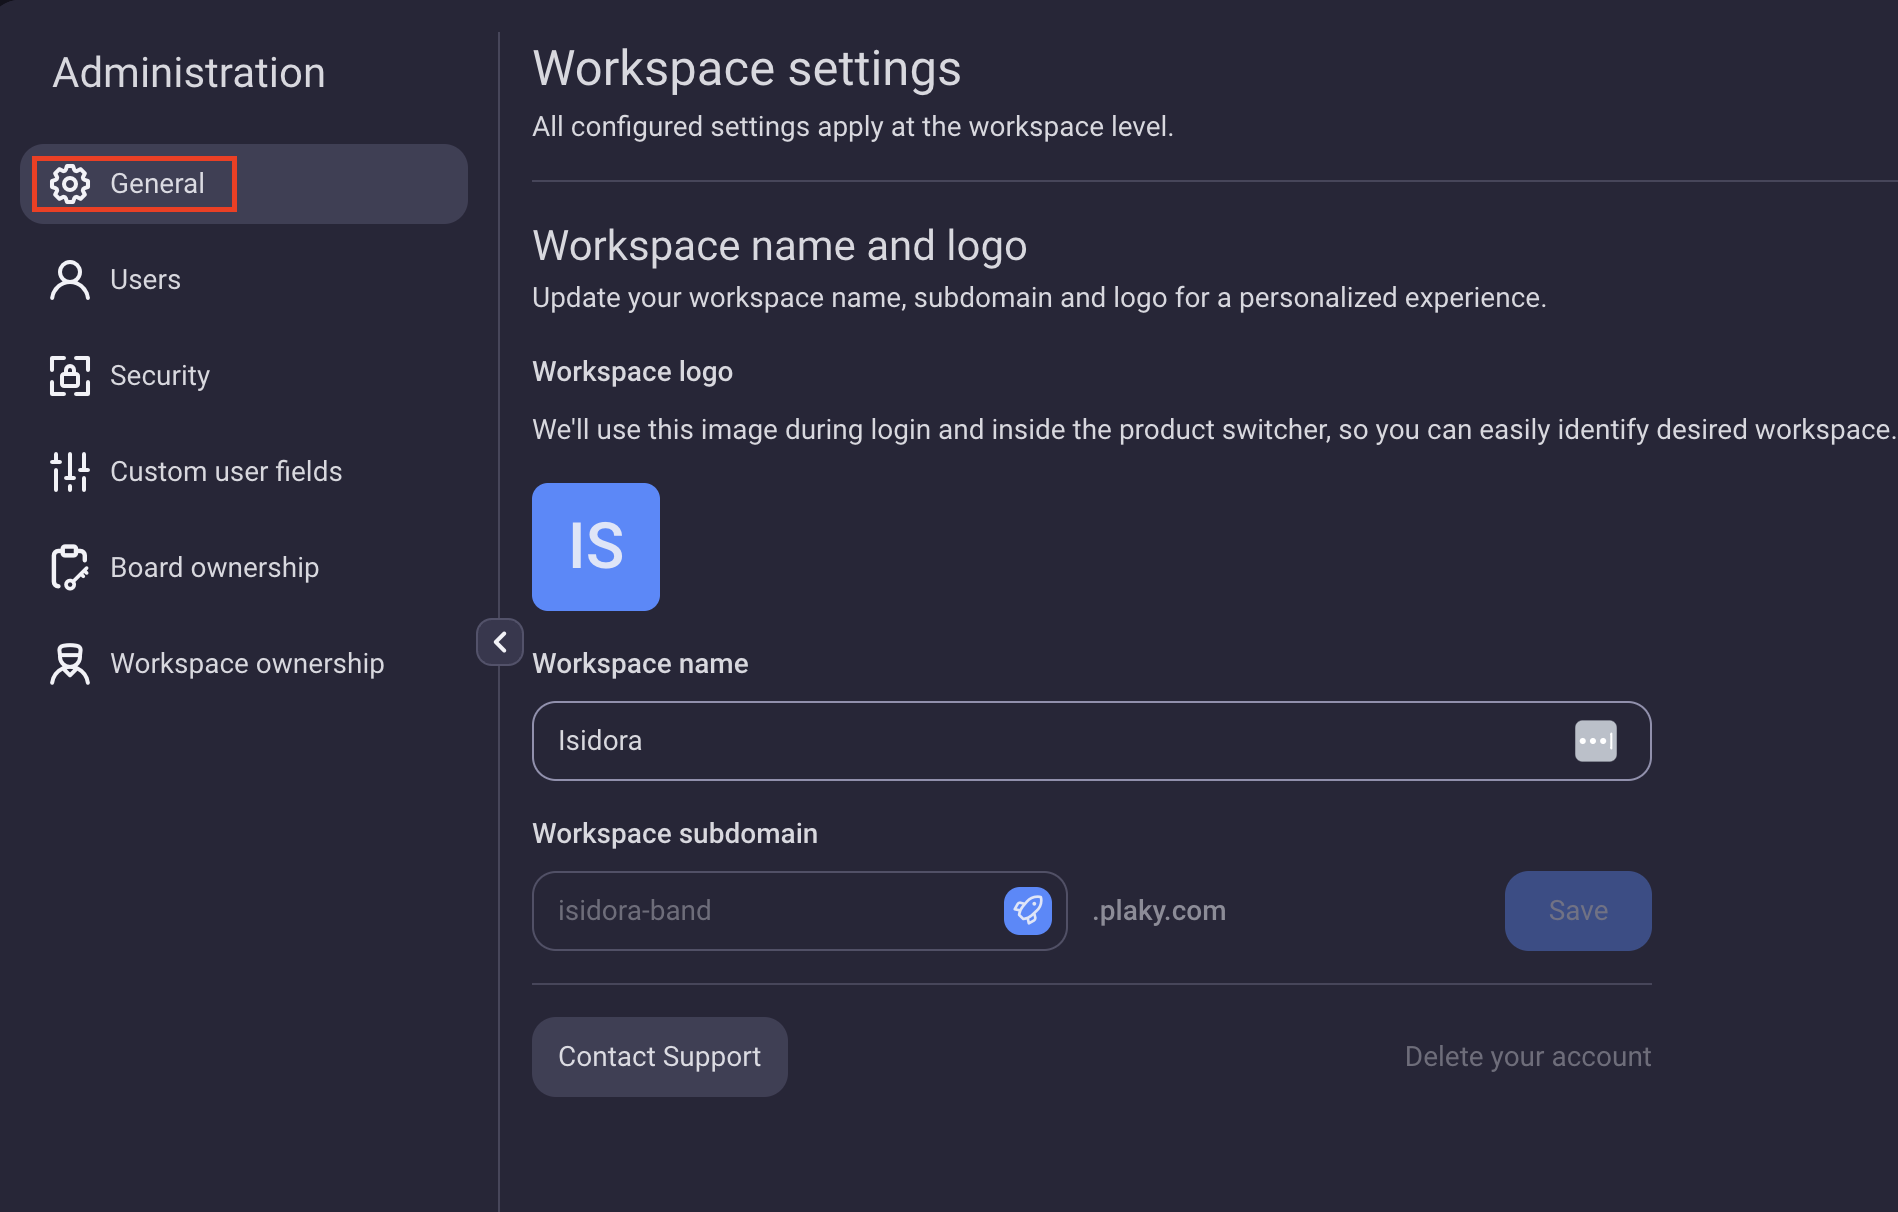
Workspace name is the name of your company’s virtual space that incorporates the administration, management and purpose of multiple Spaces created in it. Admins can change Workspace name.
To change Workspace name and subdomain:
- Open General tab in Admin
- Edit the existing Workspace name/Workspace subdomain
- Click Save to complete the action
After the name is changed, all members of the Workspace will receive an email informing them of the change and Workspace’s new name. When a user changes the subdomain, they will be automatically logged out of Plaky.
Workspace subdomain is part of a web address Workspace members use in order to log in to Plaky. It can be changed on Enterprise plan only, once a month.
Once the Workspace subdomain is changed, URLs containing the previous subdomain will remain active for a limited one-month period. Within this timeframe, it is essential for all Workspace members to promptly revise and update their bookmarks and any URLs stored in external documents, as the former URLs will cease to be operational after this period.
If the Workspace has Single Sign-On (SSO) configured, please refer to this article for instructions on the necessary steps to follow after the subdomain change.
Change Workspace image #
Customize your Workspace by adding a personalized image that reflects your team’s identity or project theme. To update your Workspace image:
- Open General tab in Admin
- Click on the Workspace image
- Upload an image
- Click on Save changes to complete the action
Manage who can invite new Members #
This is a paid feature that allows Admins to control who can invite new users to a Workspace. To configure these permissions:
- Open Security tab in Admin
- Access the Users tab
- Toggle the switches to enable/disable new Member invitations for::
- Members and Admins
- Admins
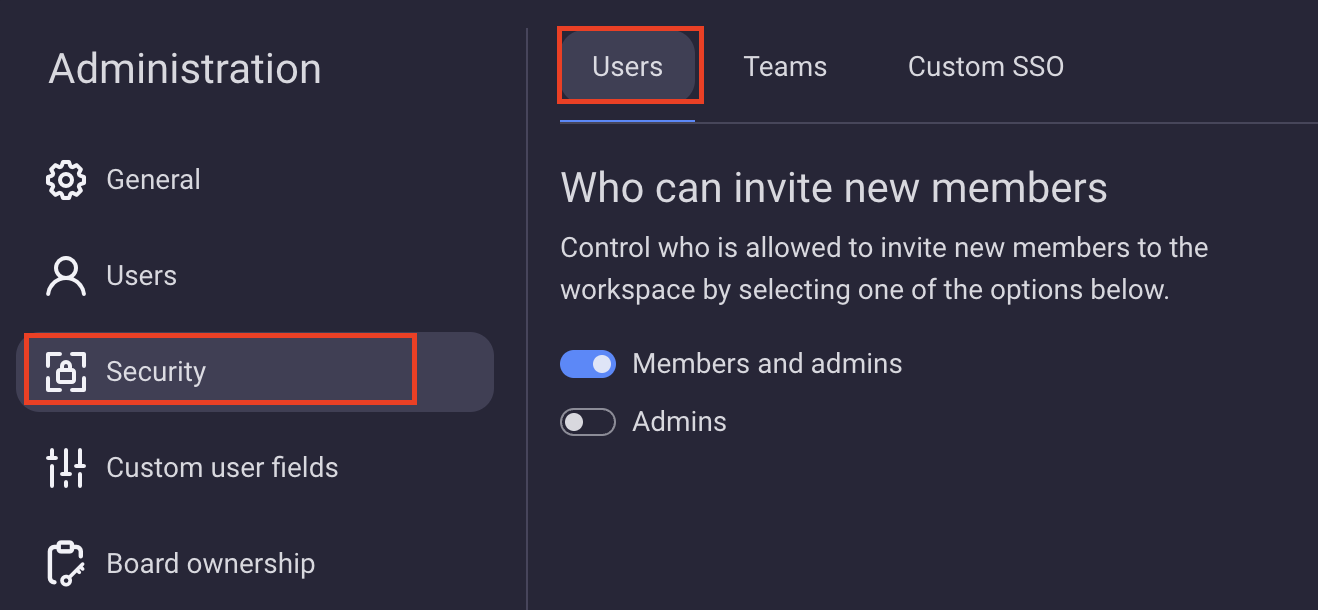
The default setting allows both Members and Admins to invite new users.
Change who can manage teams #
This is a paid feature that allows Admins to control who can invite and remove users from teams, rename and delete teams, etc. To configure these permissions:
- Open Security tab in Admin
- Access the Teams tab
- Toggle the switches to enable/disable managing teams for:
- Admins
- Admins and team creators
- Admins and team members
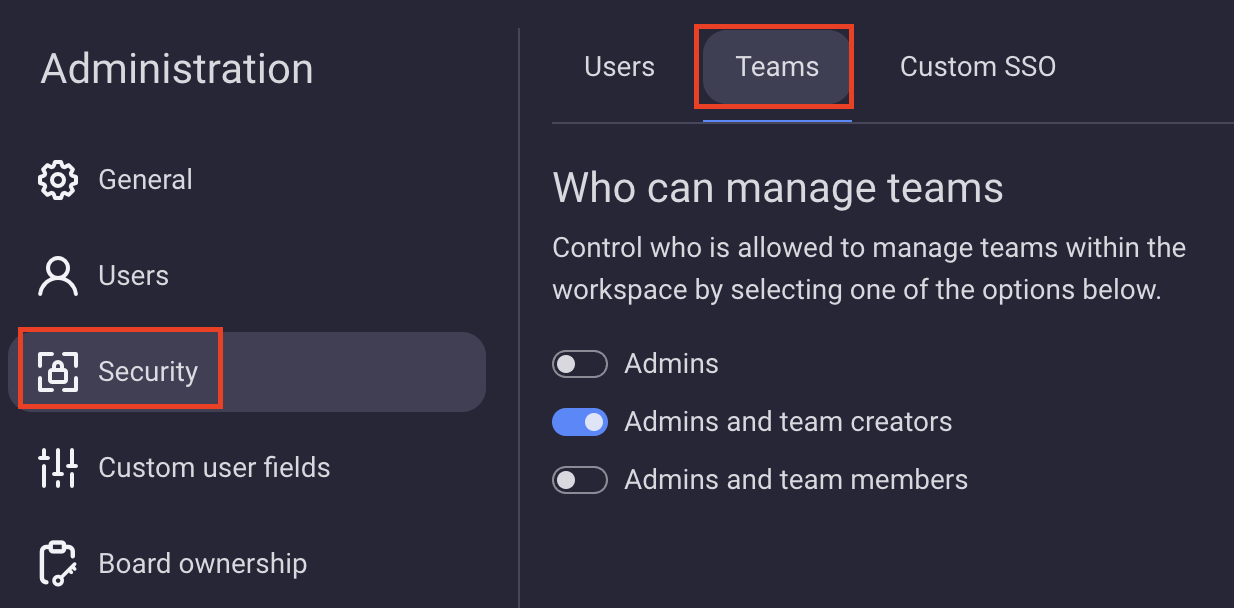
The default setting allows both Admins and team members to manage teams