
Import CSV to a Board
Import a CSV file into a Board and transfer important data to your existing Plaky Board. With this solution, you can integrate information from external systems and Plaky.
Import CSV #
To start, you will need to import your prepared CSV file into your Plaky Board. Here’s how:
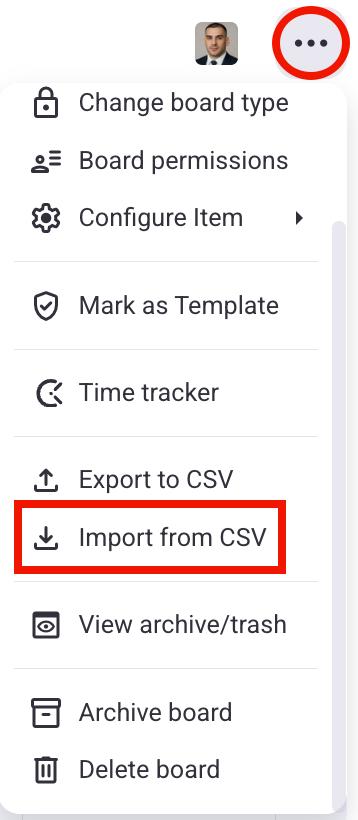
- Click on the three dots on the right
- Select Import from CSV
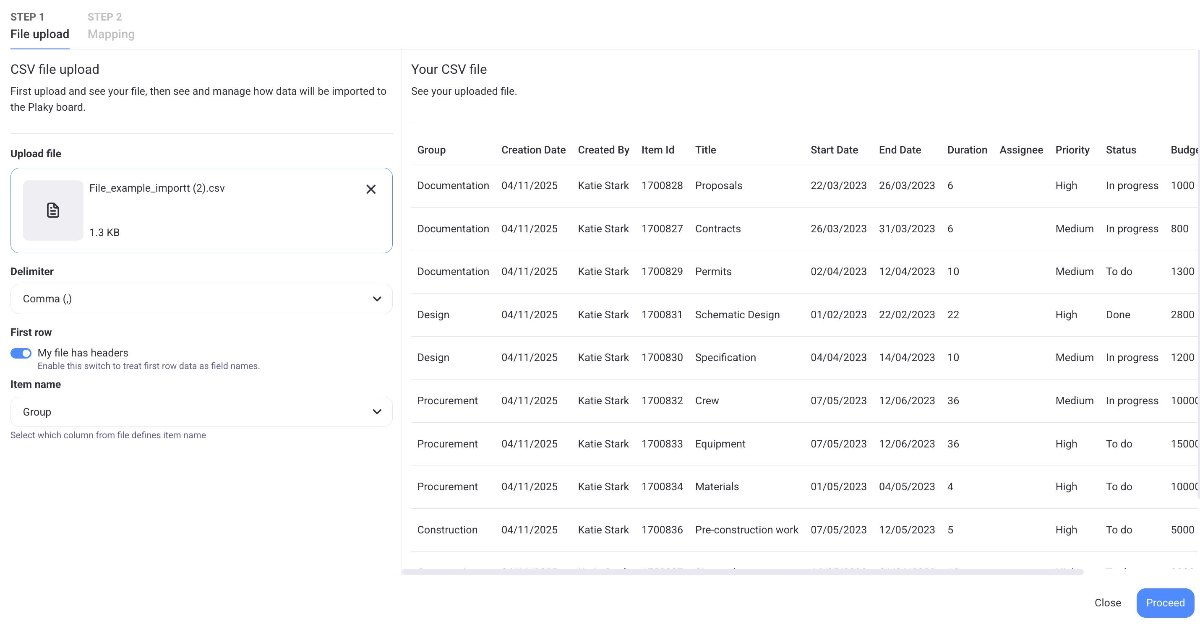
- Upload a CSV file
- Select the delimiter
- Toggle if the first row should be headers
- Select which column shows the Item name
- Click Proceed to move on to mapping
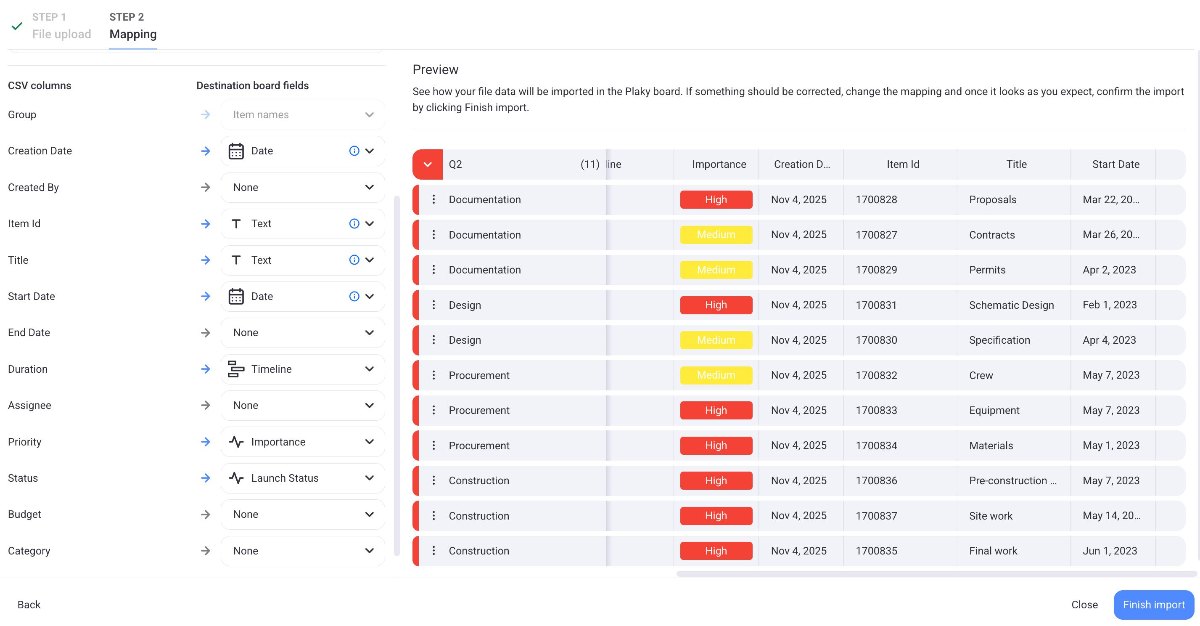
After uploading a CSV, you can map CSV columns to Board fields.
- Select the destination group
- Select one of the existing Item groups
- Create a new Item group
- Select a CSV column for group name
- Map to which Board Fields you want to import the data from the CSV
- Click on Finish import to complete the action
If the CSV column contains more columns than allowed number of Fields on the Board (defined by subscription plan of your Workspace), you can map the csv columns up to that limit, and additional columns mapping will be disabled. If some column’s data is not that important for you, you can always choose to skip the mapping for that column by choosing the option None.
Subitems cannot be imported from CSV.
Columns that are not mapped will be lost.
Required CSV format #
- Plaky uses a comma as the default delimiter. However, you can change it to a tab, a pipe, a space, or a semicolon.
- If the file is not marked as having headers, the first row is treated as item data, and for CSV, column names are generic: Column 1, Column 2, etc.
- The maximum CSV file size is 10MB.
If you have a large file, a file with lots of rows, divide it so it doesn’t exceed limit.
CSV example #
You can create a CSV file: By opening an Excel file and then going Save as and choosing CSV format; or by opening a plain text editor (like Notepad) and putting headers in the first row (where you separate values with, for example, a comma), and listing values in new rows.
Group, Creation Date, Created By, item-id, Title, Publish Date, Person, Copy, Design, Publication status, Channel

GroupA1,Creation DateA,,

GroupB1,Creation DateB,,

GroupB2,Creation DateB,Created ByB1,

GroupC1,,Creadted ByC1,

GroupC2,,Creadted ByC1,item-id1

,,,"item-id2,item-id3"
Notes #
- If you don’t select which column defines the Item name, the first column from your CSV file will be used by default as the Item name.
- The maximum number of rows in the CSV file is 1001.
- Character limits within the app also apply to CSV files.
- A CSV file can contain up to 18 values for the Status field; any additional values will be skipped during the import.
- The maximum number of Item groups to import is 20; any additional Item groups will be mapped to the last Item group on the Board.
- The content of the CSV file does not need to be in English.
- You can upload only one CSV file to a Board at a time; a new CSV file can be uploaded only after the import of the first file is complete.
- Each Field on the Board can be mapped to only one column from the CSV (1 column = 1 Field).
- CSV columns containing letters or numbers can be mapped to textual fields. However, if you attempt to map textual columns to timeline, date, or number fields, they will be skipped during the import.