Create and manage a Space
In this article
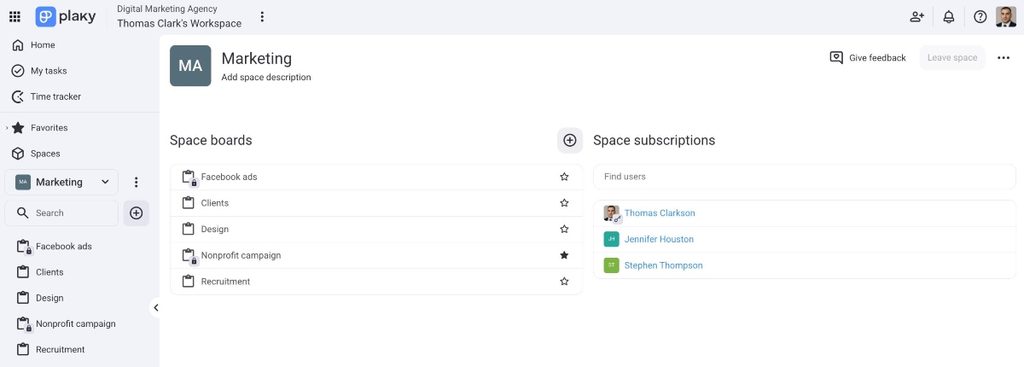
All the work inside Plaky happens on a Space, which contains Boards and Items. When you first register, Plaky will automatically create a default Main Space. You can then create as many additional Spaces as you need.
¿Qué es un Espacio? #
A Space is a top-level entity in Plaky, and it contains Boards and Folders, which contain Items. Think of a Space as a dedicated area for a team, department, or project portfolio. Everything in Plaky lives inside a Space.
Create a Space #
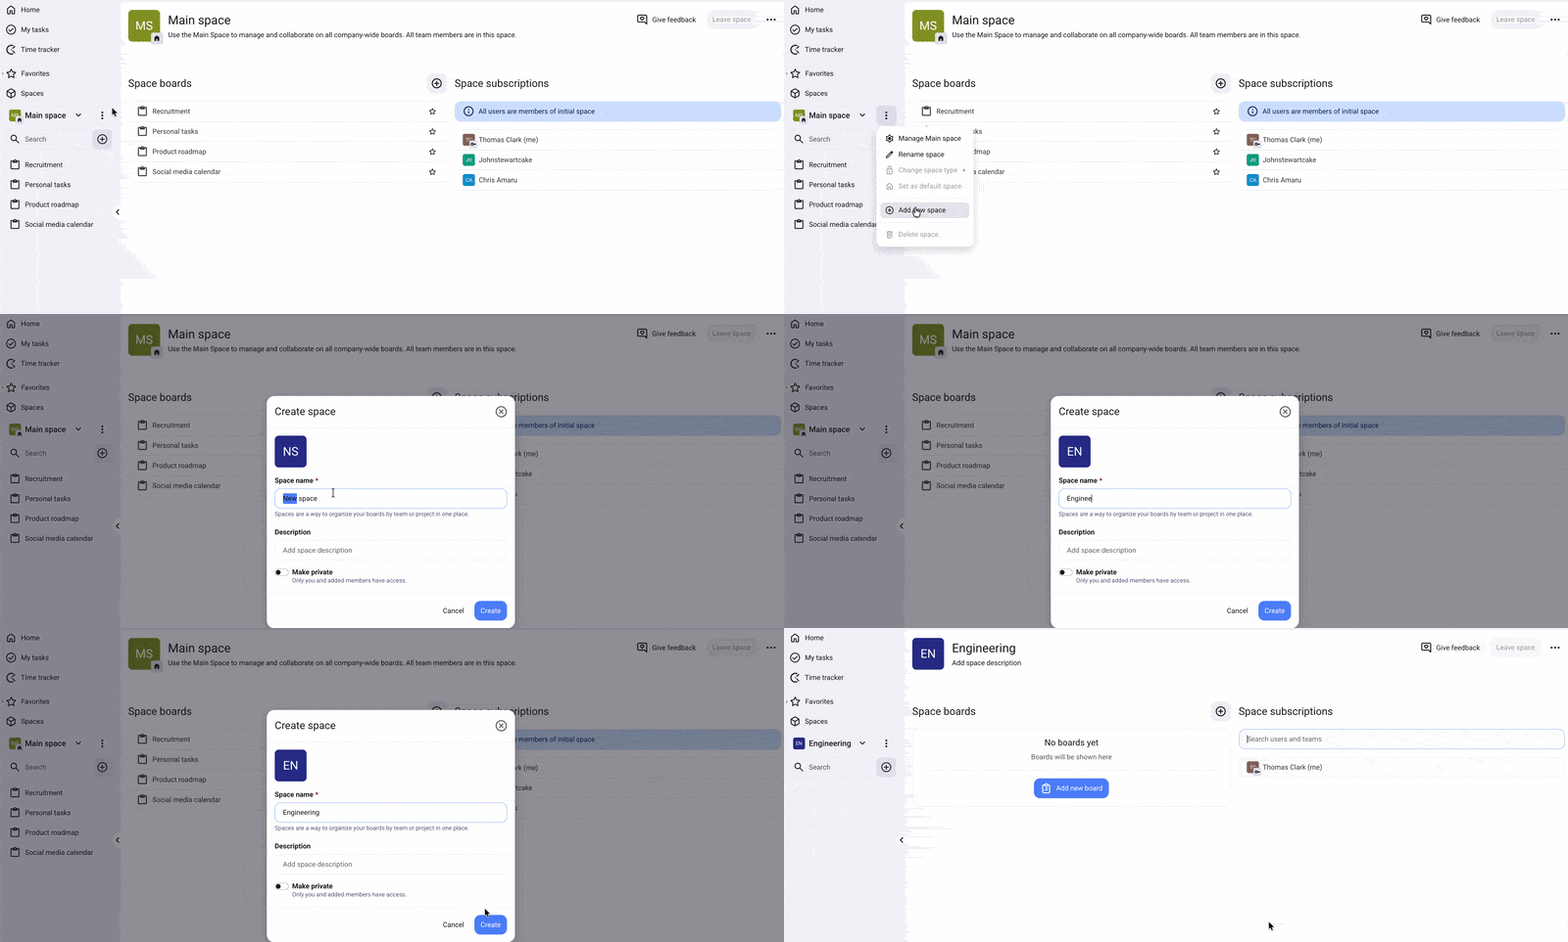
Here’s how you can create a Space in Plaky:
- Click the three dots in the left sidebar
- Choose Add new space from the dropdown
- Introduce el nombre del espacio
- Enter Space description (optional)
- Toggle if you want the Space to be private (optional)
- Haz clic en Crear para completar la acción
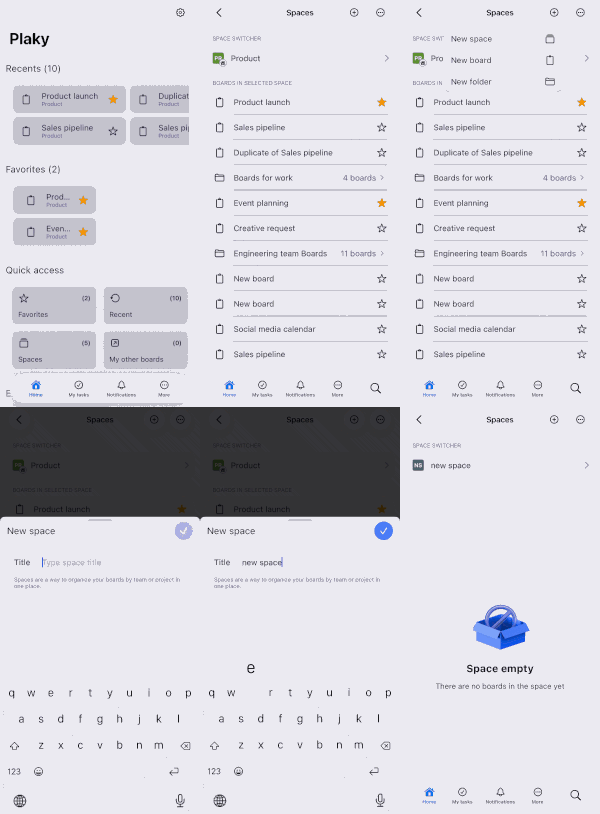
- Toca Espacios en la página de inicio
- Tap on the + icon in the top right corner
- Select New space
- Introduce el nombre del espacio
- Tap on ✔️ to complete the action
Any Workspace member can create a Space. The member who creates it automatically becomes the Space Owner.
Configure your Space #
Once you have created a Space, you can configure it to suit your needs. Let’s look at what you can configure and how to do it.
Set icon/color #
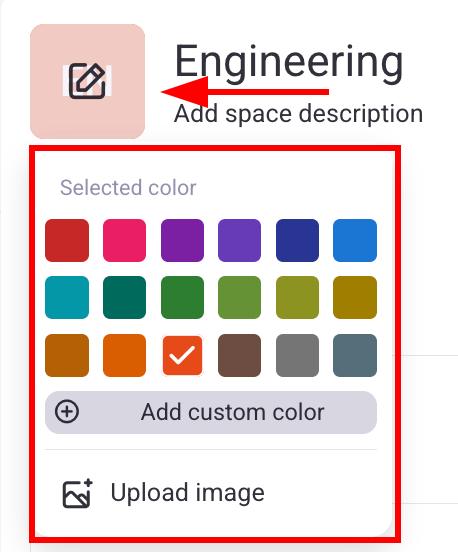
You can set the icon/color to help users gain a visual understanding of the Space. Here’s how to do this:
- Open a Space
- Click on the icon next to the Space name
- Select a color or upload an image
- Toca Espacios en la página de inicio
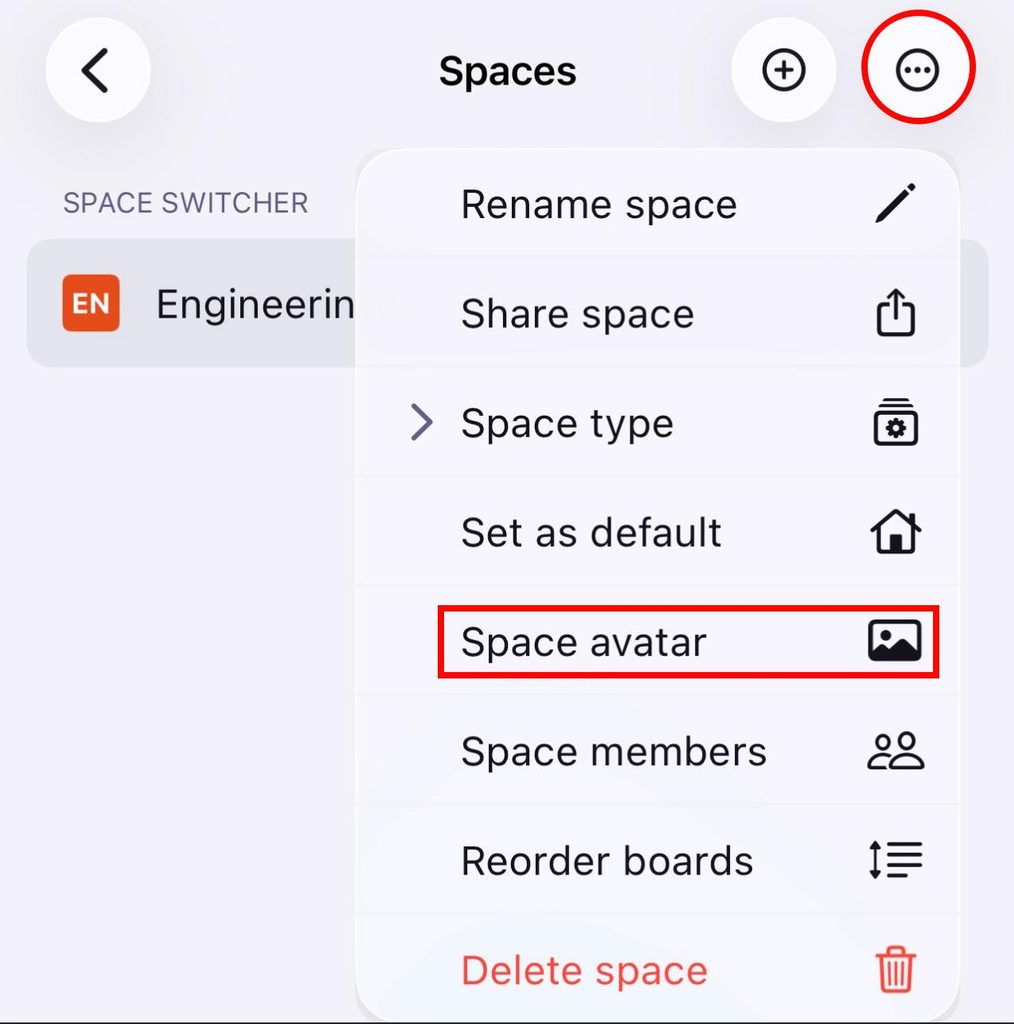
- Tap on the Space in the space switcher section
- Select the Space in the space switcher
- Toca los tres puntos en la esquina superior derecha
- Select Space avatar
- Select Choose background color
- Select a color
- Tap on ✔️ to complete the action
Cambiar tipo del espacio #
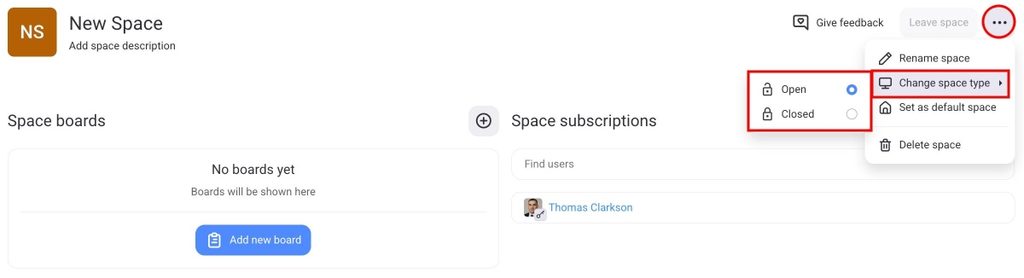
A Space can be either open or closed. An open Space can be accessed by everyone, while a closed Space can only be accessed by Space subscribers. Here’s how you can change the Space type:
- Open a Space
- Haz clic en los tres puntos en la esquina superior derecha
- Pasa el cursor sobre Cambiar tipo de espacio
- Select if you want an Open/Closed Space
- Toca Espacios en la página de inicio
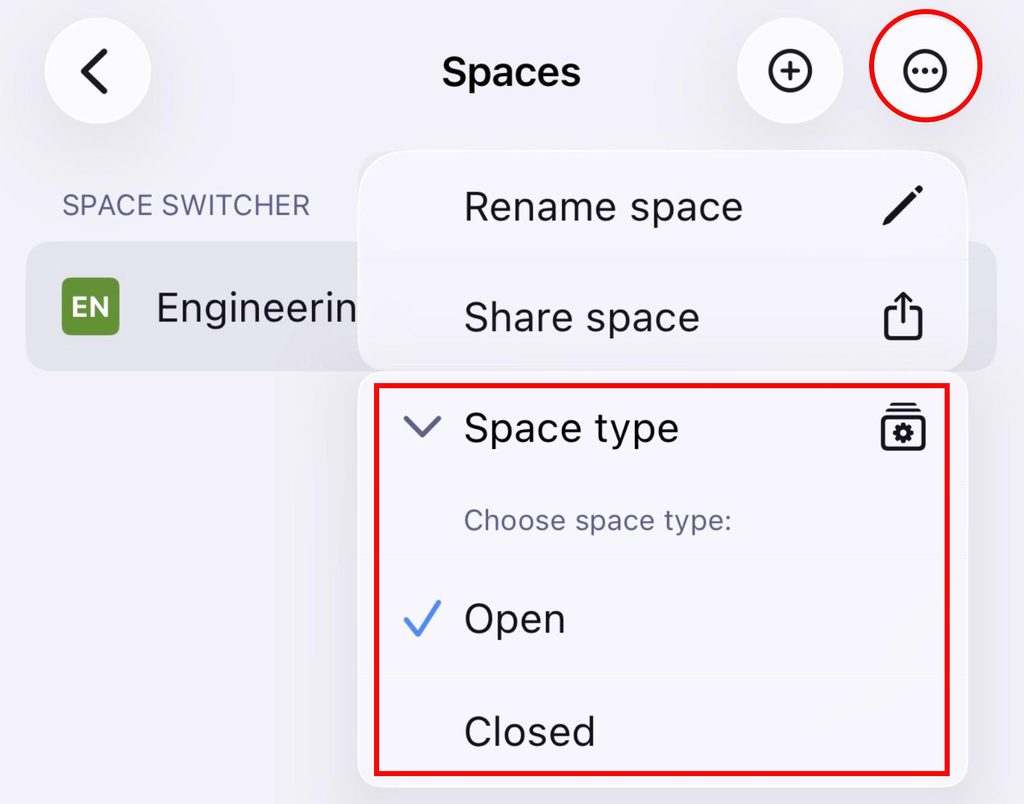
- Tap on the Space in the space switcher section
- Select the Space in the space switcher
- Toca los tres puntos en la esquina superior derecha
- Tap on Space type
- Choose Open or Closed
Establecer espacio como predeterminado #
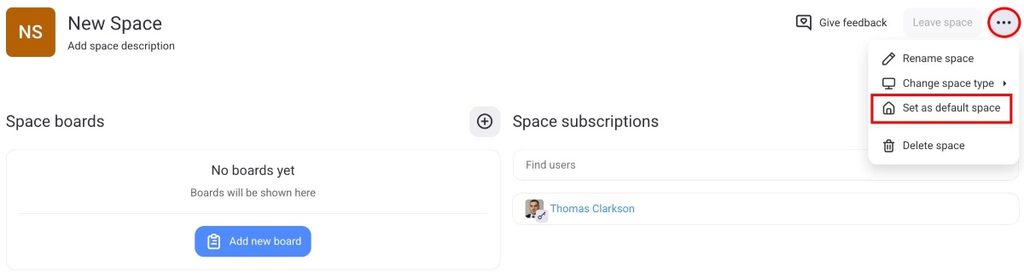
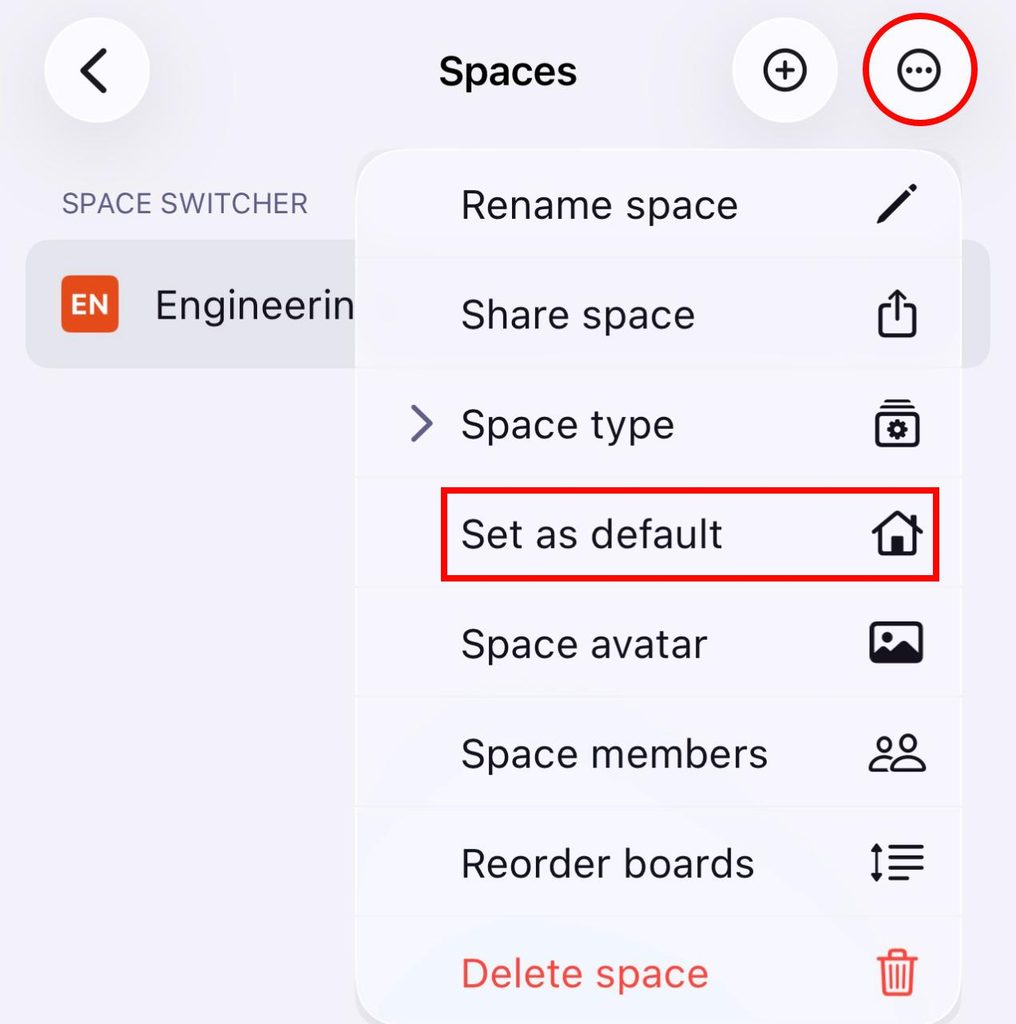
The default Space is the one Plaky opens when you log in. Additionally, you can set any Space as the default.
Aquí te explicamos cómo agrupar los elementos:
- Open a Space
- Haz clic en los tres puntos en la esquina superior derecha
- Elige Establecer como espacio predeterminado
- Toca Espacios en la página de inicio
- Tap on the Space in the space switcher section
- Select the Space in the space switcher
- Toca los tres puntos en la esquina superior derecha
- Selecciona Establecer como predeterminado para completar la acción
Renombrar espacio #
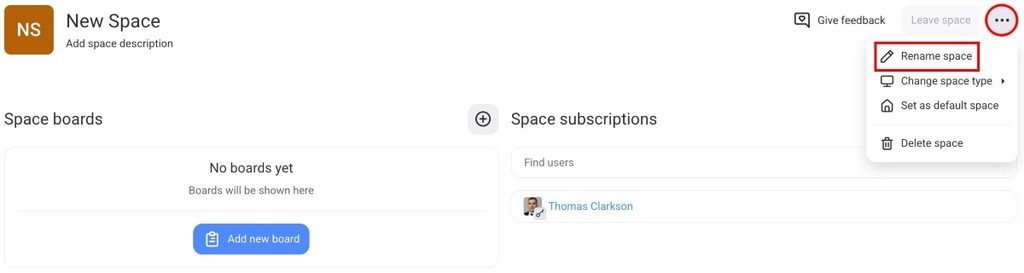
You can always change the name of a Space according to your needs. Here’s how:
- Open a Space
- Haz clic en los tres puntos en la esquina superior derecha
- Choose Rename Space
- Edita el nombre como corresponda
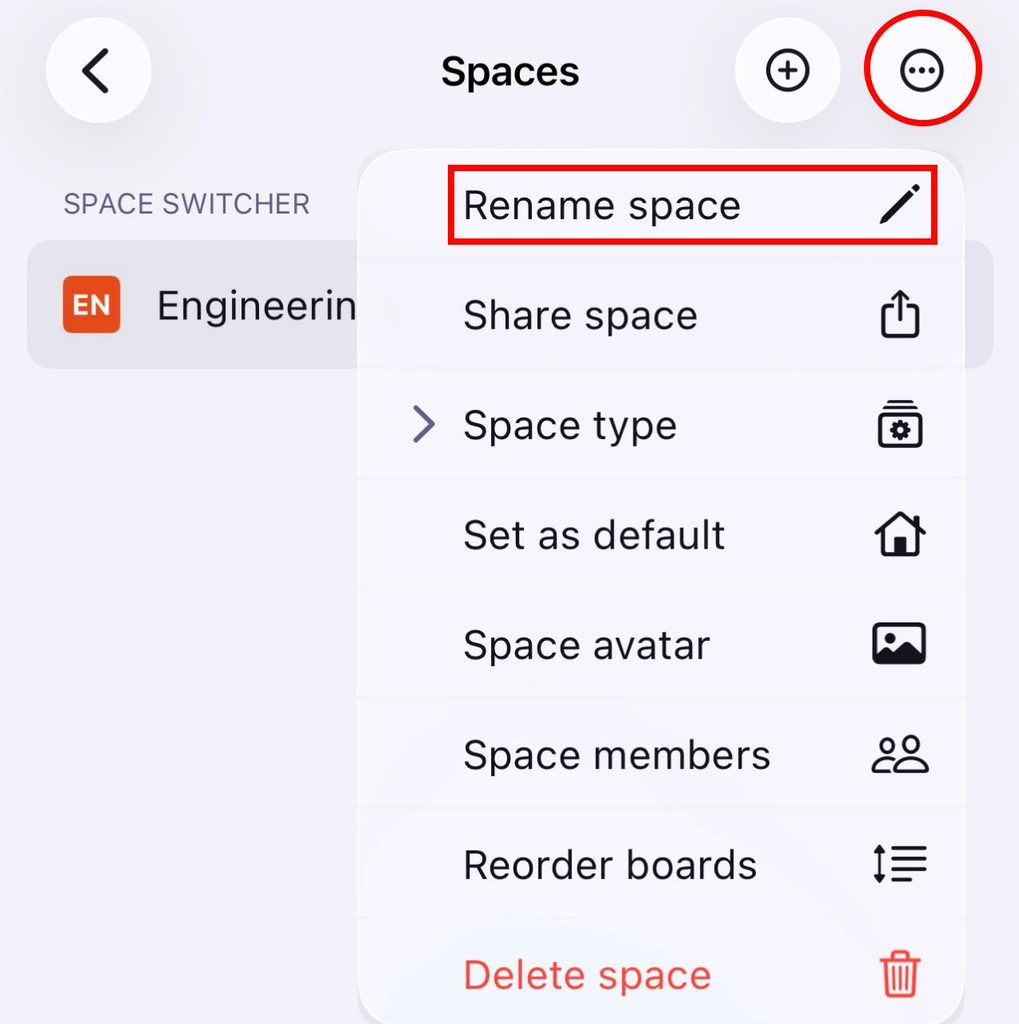
- Toca Espacios en la página de inicio
- Tap on the Space in the space switcher section
- Select the Space in the space switcher
- Toca los tres puntos en la esquina superior derecha
- Select Rename Space
- Introduce el nuevo nombre del espacio
- Toca Cambiar nombre para completar la acción
Join or leave a Space #
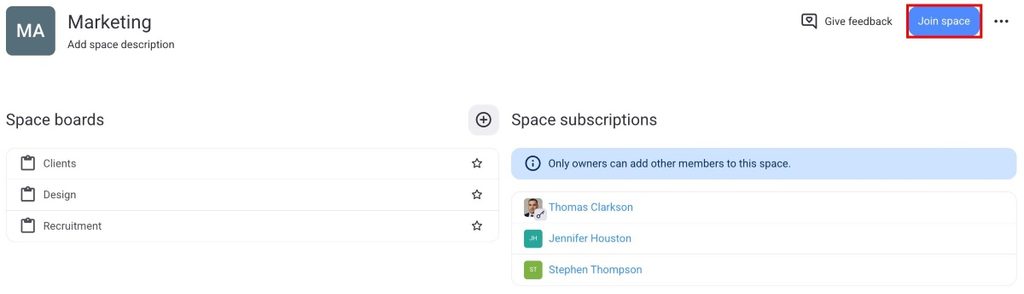
As a team member, you can join or leave a Space simply by clicking Join space next to the Space name on the right. To leave the Space, click X next to your name in the member’s list and confirm by clicking Unsubscribe, or click the Leave Space button in the top right corner.