Criar quadro a partir de CSV
Configure rapidamente um novo quadro importando um arquivo CSV usando esta ferramenta do Plaky que agiliza o processo de criação do quadro e economiza tempo.
Veja aqui como fazer isso:
- Navegue até o menu Espaço no canto superior esquerdo
- Clique em +Adicionar
- Escolha Novo quadro no menu suspenso
- Selecione Criar do arquivo
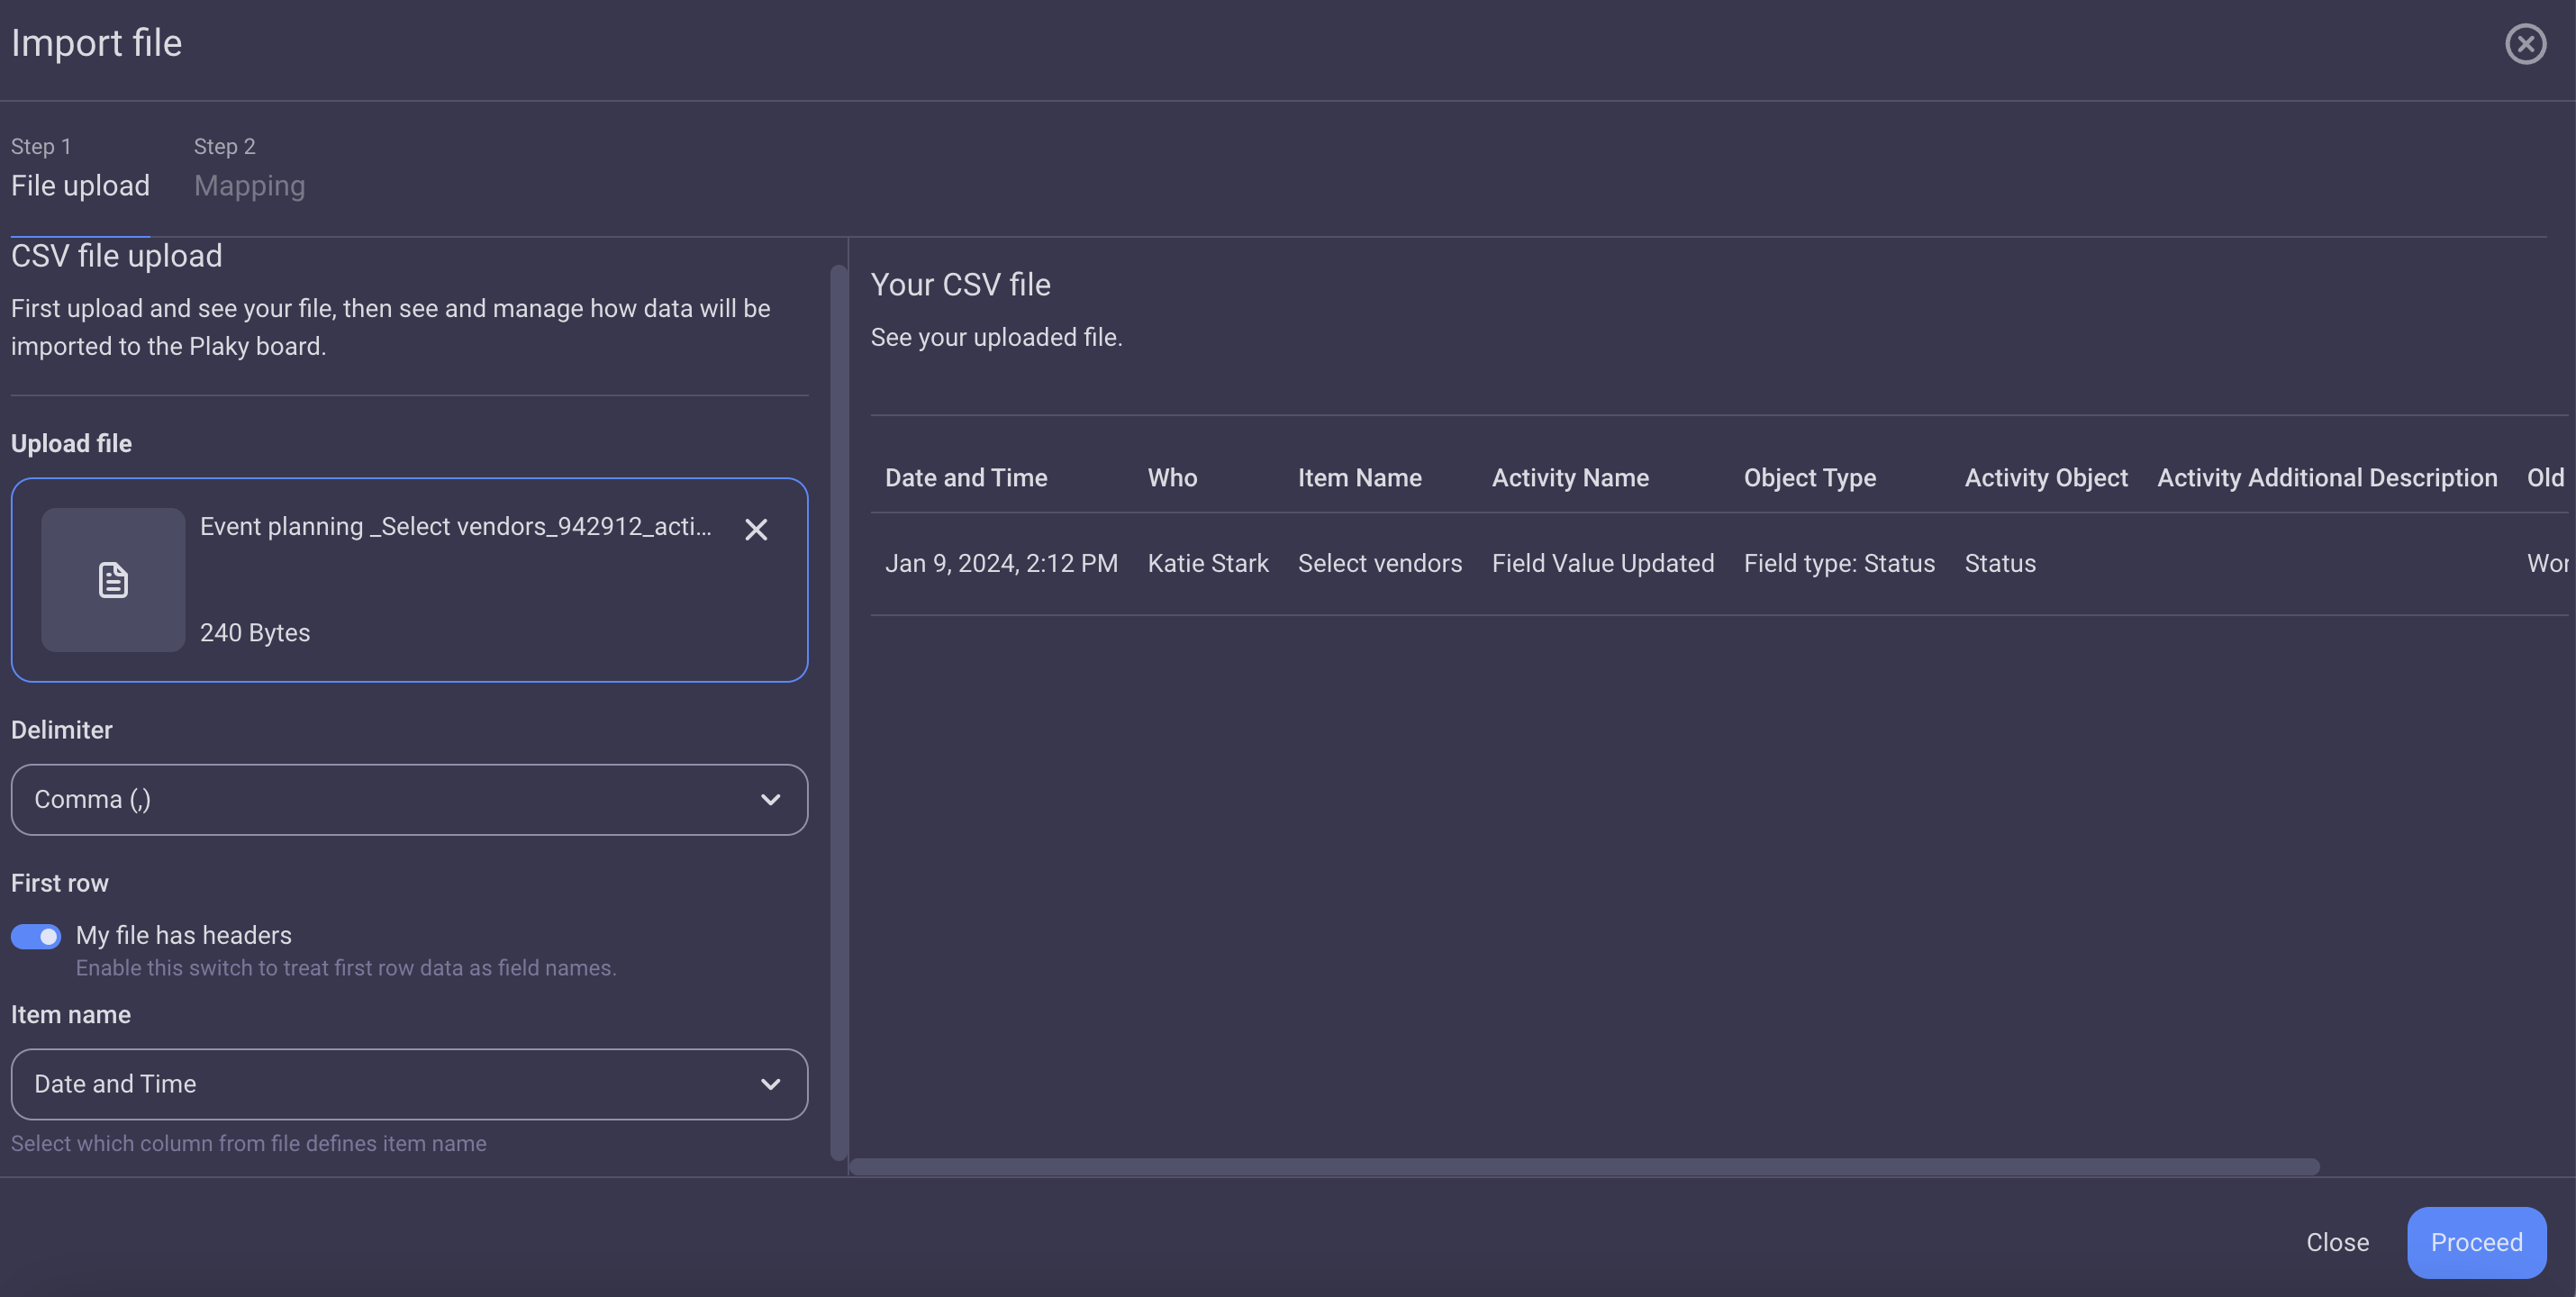
- Clique em Importar de CSV
- Selecione um arquivo para importar
- Escolha o delimitador no menu suspenso
- Marque se há cabeçalhos no arquivo
- Select which column from the file defines item name

After uploading the file, a table generated from its contents will immediately appear on the right side of the modal.
Plaky uses comma as the default delimiter. However, you can change it to a tab, pipe, or semicolon.
If the file is not marked to have headers, the first row is treated as item data and for CSV column names generic names will be used: Column 1, Column 2, etc.
If you don’t select which column defines the item name, the first column from your CSV file will be used by default as the item name. - Click Proceed
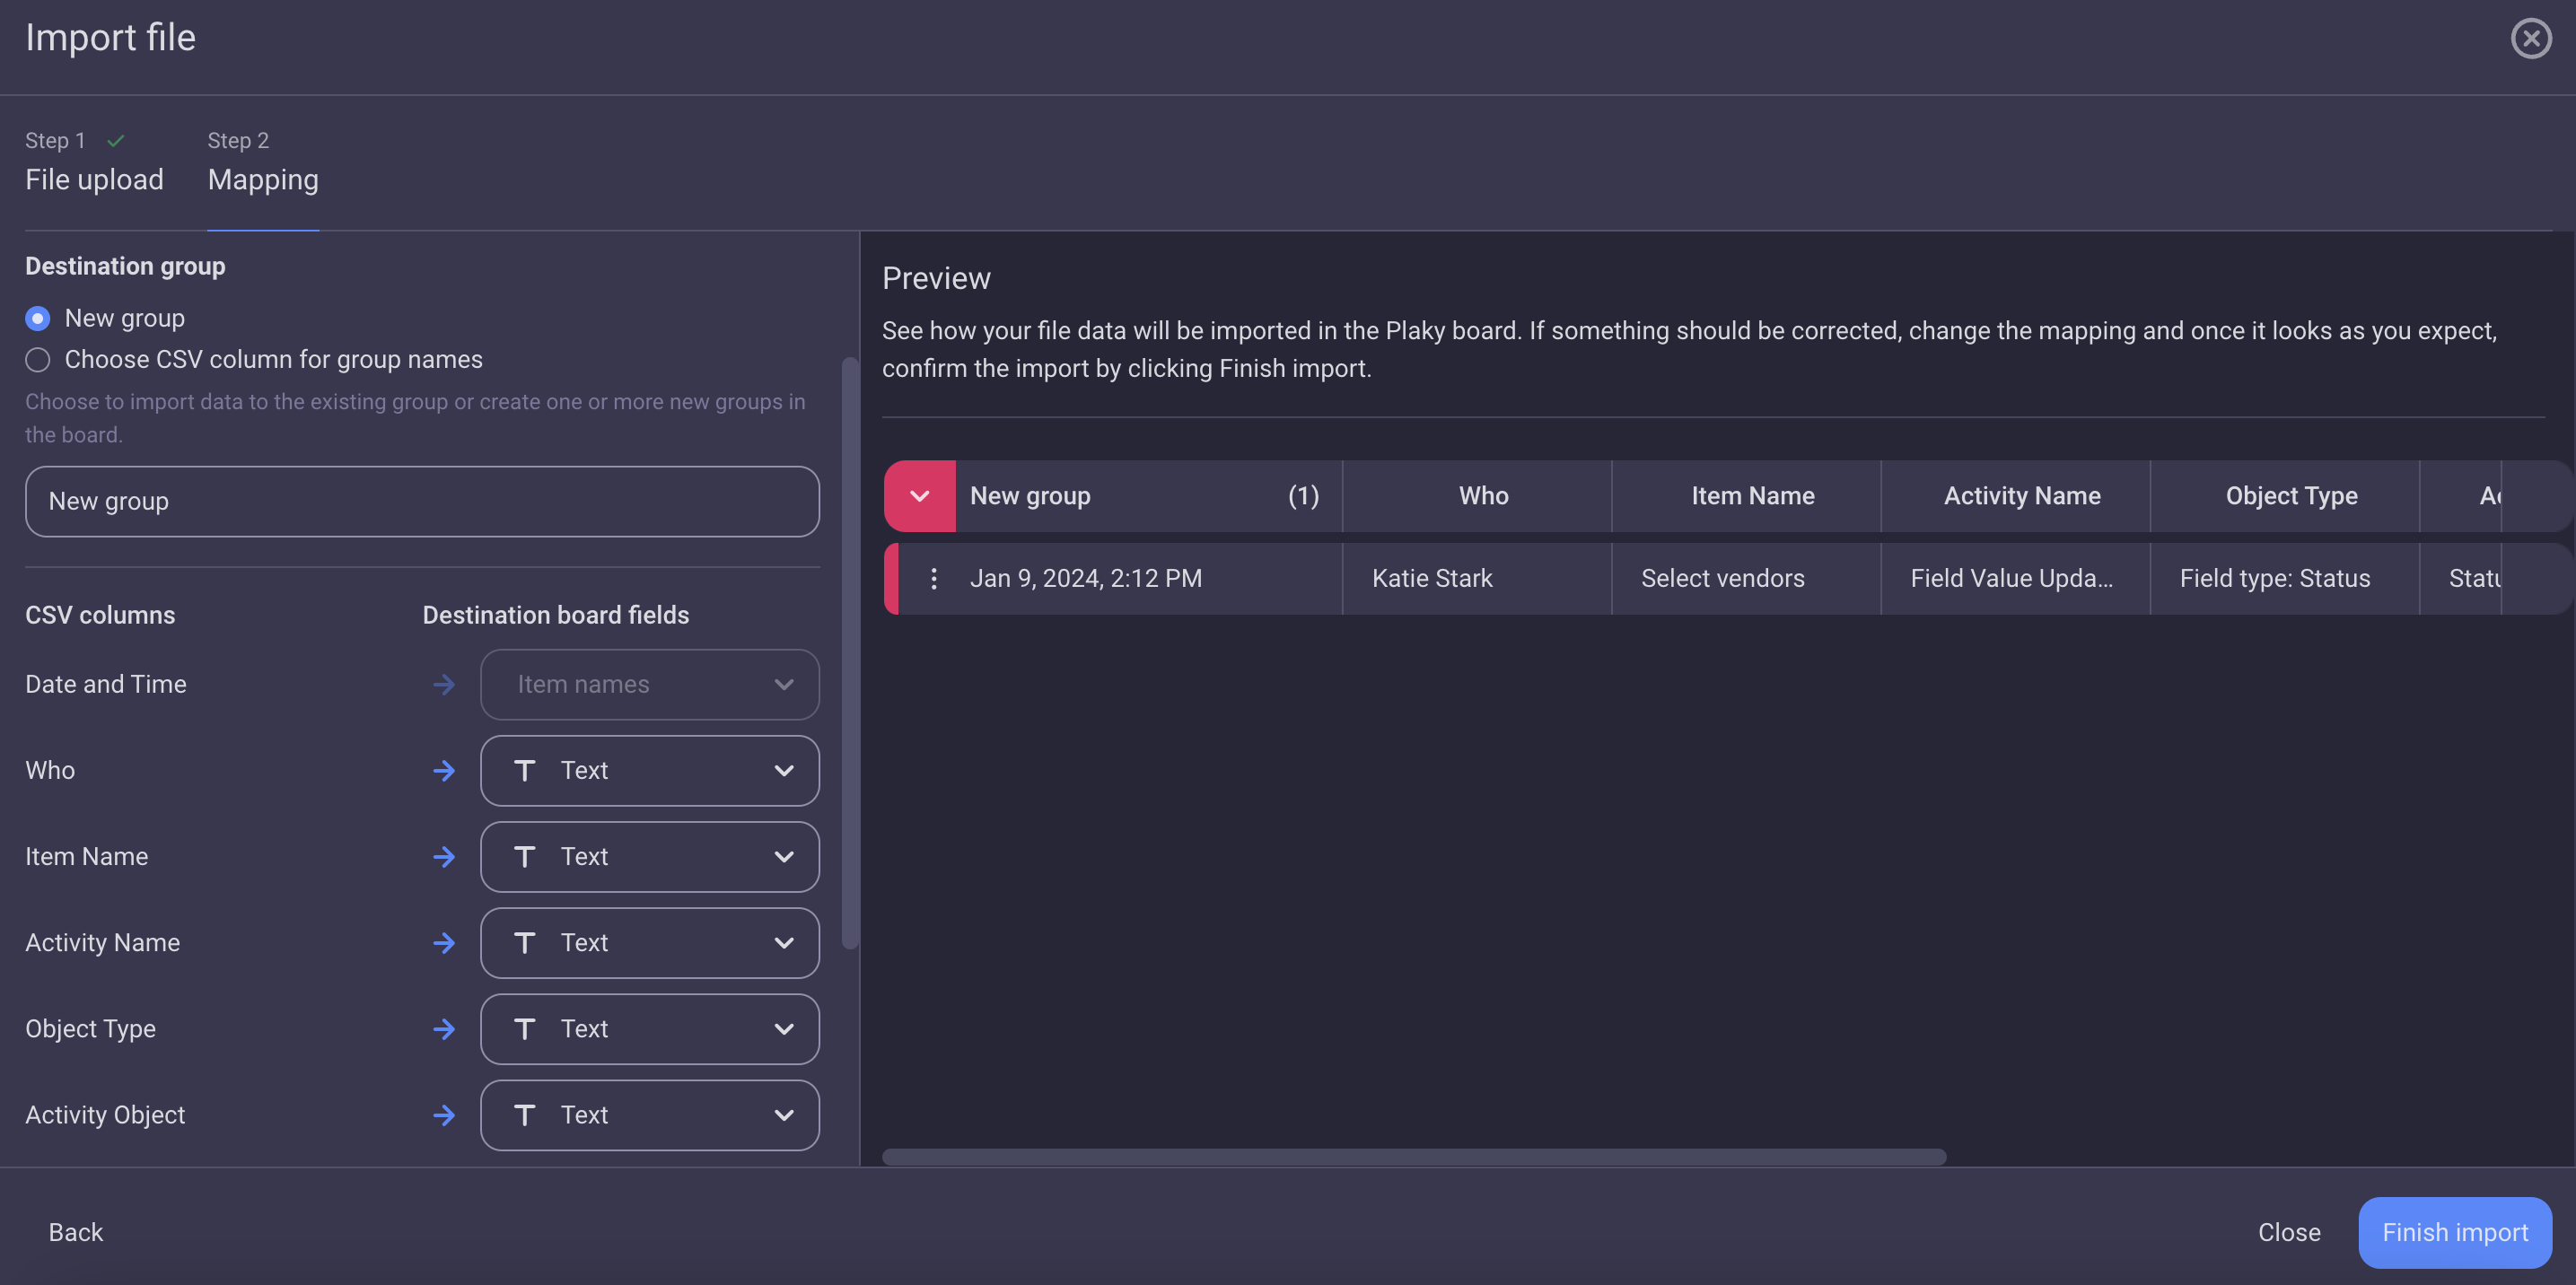
- Select the destination group:
– New group (type the name)
– Choose CSV column for a group name (select the column from the dropdown menu) - Select the type of destination board fields for each CSV column from the dropdown:
– Any column type from the dropdown
– None (don’t map the column)
By default, all the CSV columns are imported as Text fields. - Click Finish import to complete the action
Se a coluna CSV contiver mais colunas do que o limite permite, por padrão, o conjunto inicial de colunas será mapeado e outras colunas serão desativadas até que o campo de destino de qualquer outra coluna seja alterado para Nenhum.
Esse artigo foi útil?
Thank you! If you’d like a member of our support team to respond to you, please drop us a note at support@plaky.com
