
Manage Board
Once you’ve created a board, you have the flexibility to edit and customize it to your exact specifications, allowing you to tailor different parameters and settings to align the Board perfectly with your specific needs.
This article will help you to effectively modify, organize, and optimize your Board.
Manage Team Members #
With Plaky, you can manage your Team Members within your Board. Invite any Team Member, or the entire Team to the Board, or share the Board with them.
Board Member = Board Subscriber
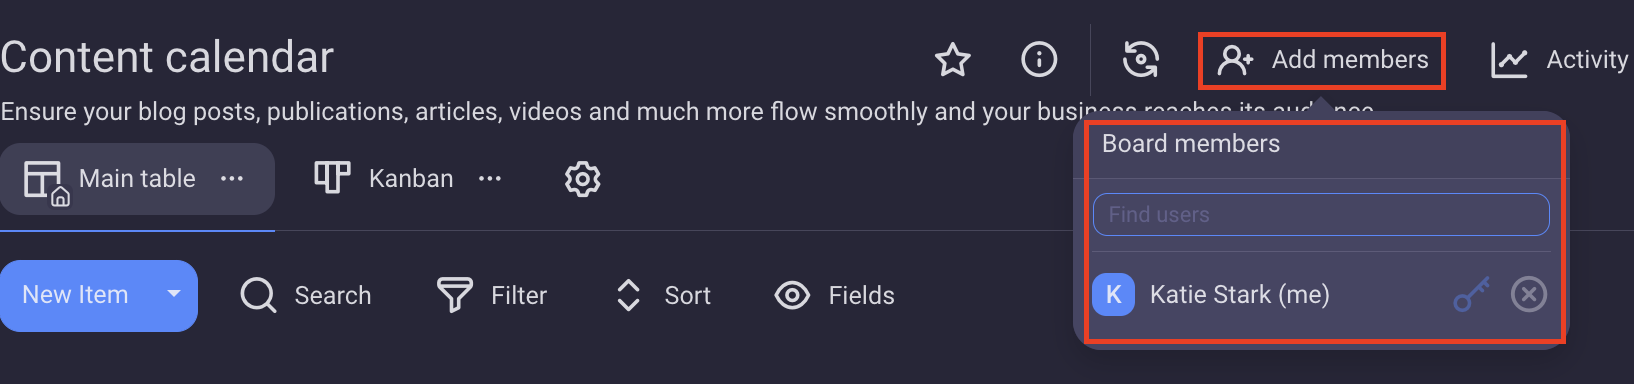
To add Board Members:
- Click on the Add Members icon
- Type the User name
- Click on it in the dropdown menu to complete the action
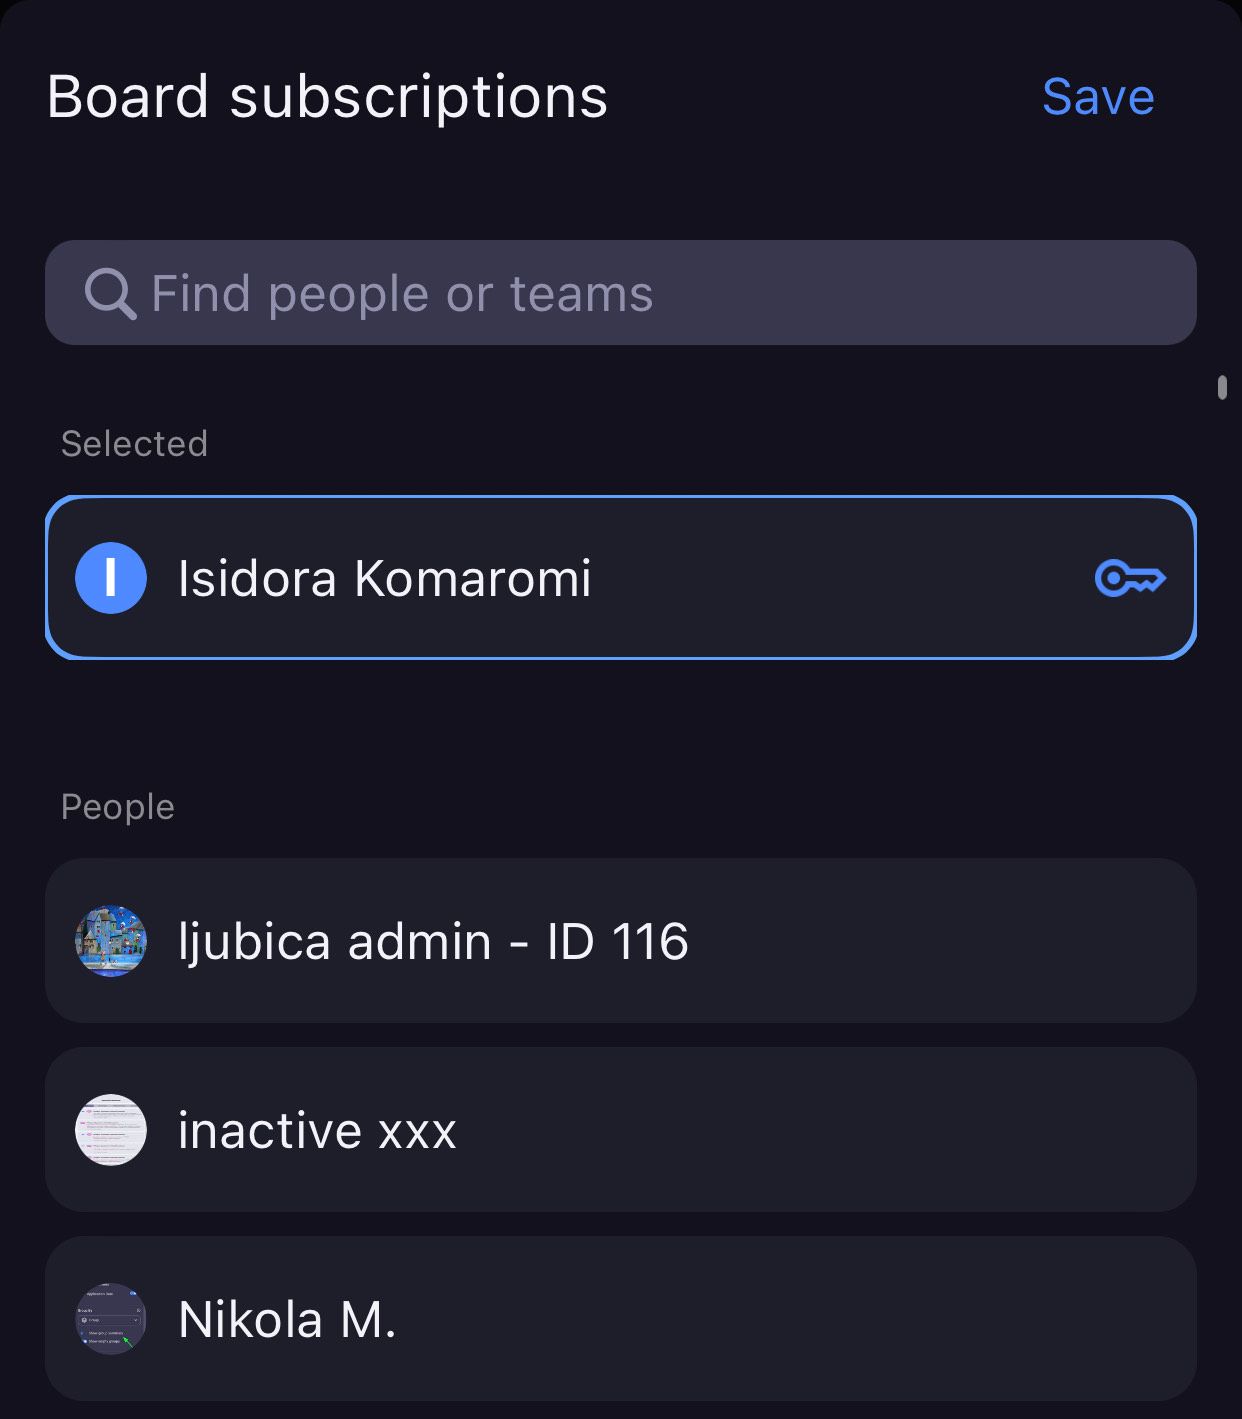
To add Board Members:
- Tap on three dots in the top right corner to access Board menu
- Select Board info
- Tap on Members
- Tap on user name(s) from the list or find them using search and tap on their name(s) to subscribe/unsubscribe them
- Tap Save to complete the action
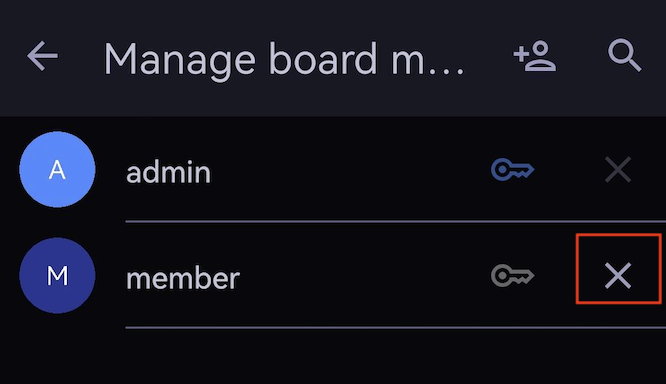
To remove Board Members:
- Tap on three dots at the top right corner to open the Board Menu
- Select Manage board Members
- Tap on X next to the user’s name to remove them from the Board
- Tap Remove to complete the action
To remove yourself from a Board:
- Tap on three dots at the top right corner to open the Board Menu
- Select Manage board Members
- Tap on X next your name to remove yourself from the Board
- Tap Unsubscribe to complete the action
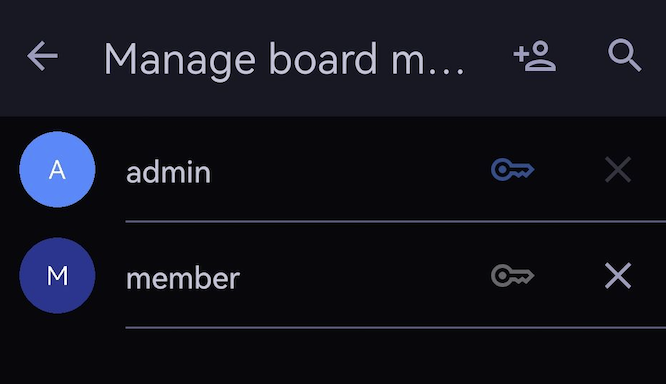
To remove yourself as an Owner of the Board:
- Tap on three dots at the top right corner to open the Board Menu
- Select Manage board Members
- Tap on the key icon next your name to remove yourself as the Board Owner
- Tap Remove Ownership to complete the action
Duplicate Board #
Members added to the Board can duplicate an already existing Board in the Space. This feature is available on Web app only at the moment.
There are three ways in which the Board can be duplicated:
- Structure only (bare bone structure of the Board)
- Structure and items (structure, Fields and Items)
- Structure, items and updates (structure, Fields, Items, added comments, files and any other update that has been made)
Rename Board #
If you need to refine your Board’s identity or adapt to evolving project needs, you can rename your Board following these steps:
- Click on the Board name
- Delete it and enter new Board name
- Click outside of the designated area to save the changes
- Tap on three dots in the top right corner
- Select Board Info
- Tap on the Board name
- Delete it and enter new Board name
- Tap Done to complete the action
Move Board #
Board can be moved to:
- Folder
- Space
This action can only be performed by Board Owners and is available on Web app only at the moment.
Board can only be moved to a Folder if it is in the same Space.
Sort the Board #
You can sort each Field according to some sort of criteria. This can help you better organize your Board and have a clearer overview of all the Items on the Board.
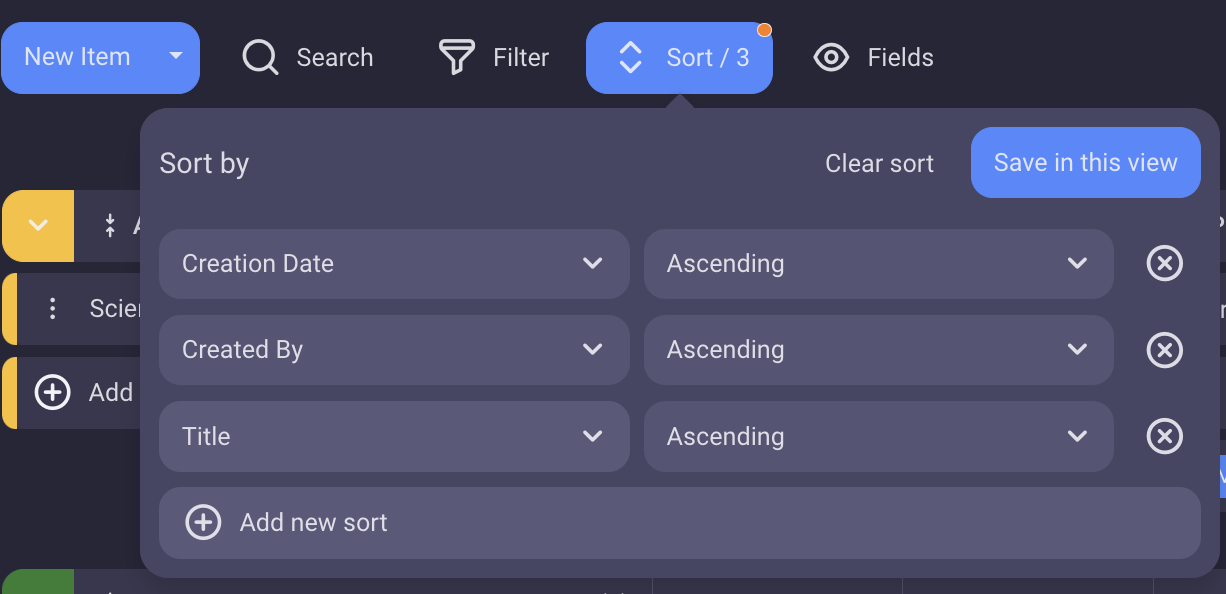
To configure Board sorting:
- Click the Sort button at the top of the Board
- With + Add new sort add the criteria by which you’d like to sort
- Pick the criteria from the dropdown you get when you click on the criteria label
- Choose Ascending/Descending order
- Click Save in this view to complete the process
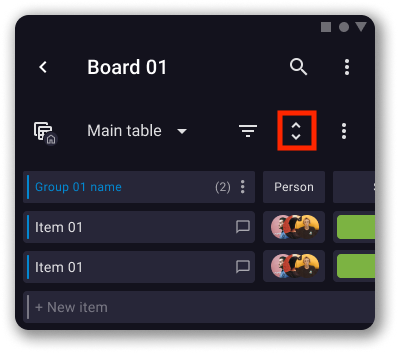
To add new sort:
- Tap on three dots in the top right corner to open the Board menu
- Select Sort
- Tap on Add new sort
- Select the Field you want to sort the Board by
- Tap Next
- Choose Ascending/Descending order
- Tap Save
- Tap Apply to complete the action
Sort is only available with a Table Board View.
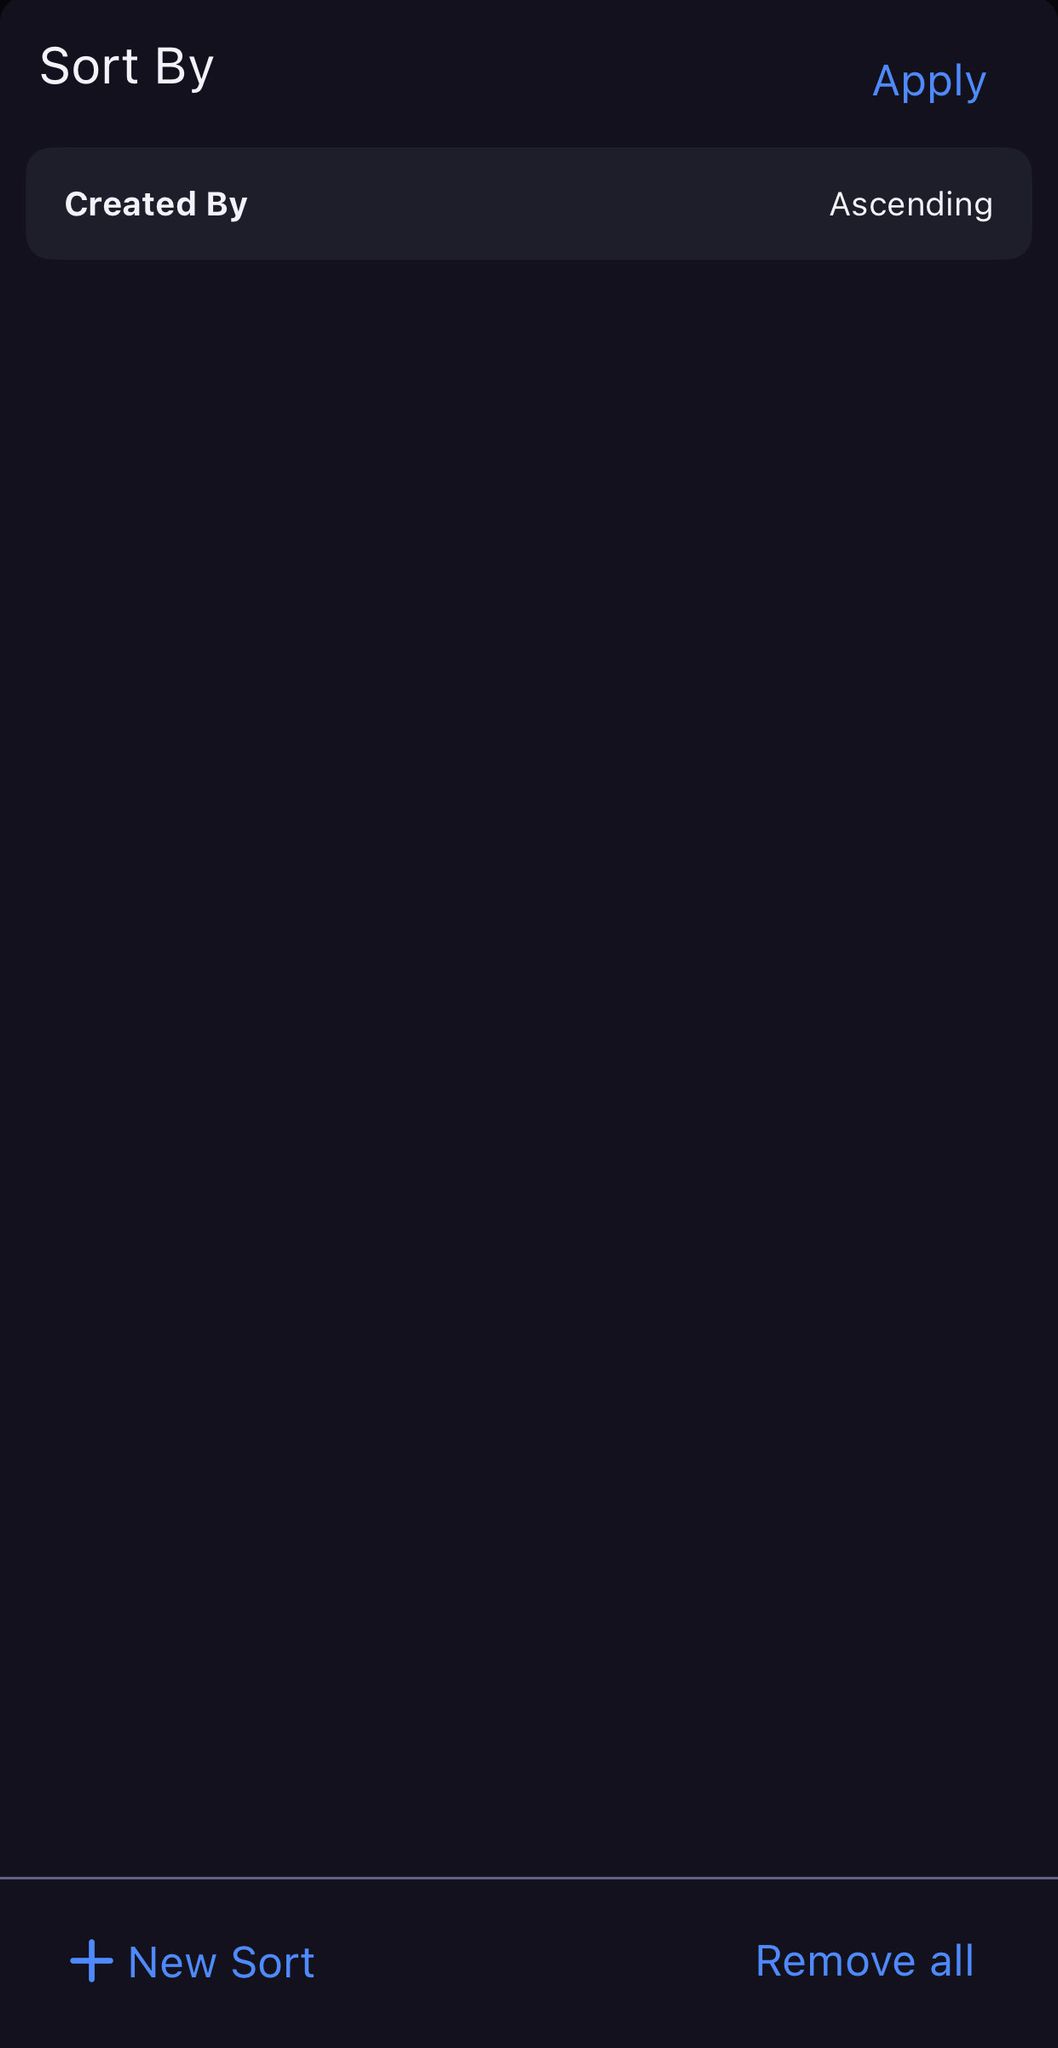
To add new Sort:
- Tap on Sort icon on the Board
- Tap on New sort+
- Select the Field you want to sort the Board by from the dropdown
- Choose Ascending/Descending order from the dropdown
- Tap Add new sort
- Tap Save to complete the action
Sort is only available with a Table Board View.
Add/Change Board View #
The way your data is displayed on the Board can help you have a better overview of the information that is at your disposal. Checkout this article to learn how to add a Board View.
To change Board View, just click on one of the available Views on the top of your Board.
To change View:
- Tap on the three dots in the top right corner to open Board menu
- Select Change View
- Tap on the View you want to apply to the Board to complete the action
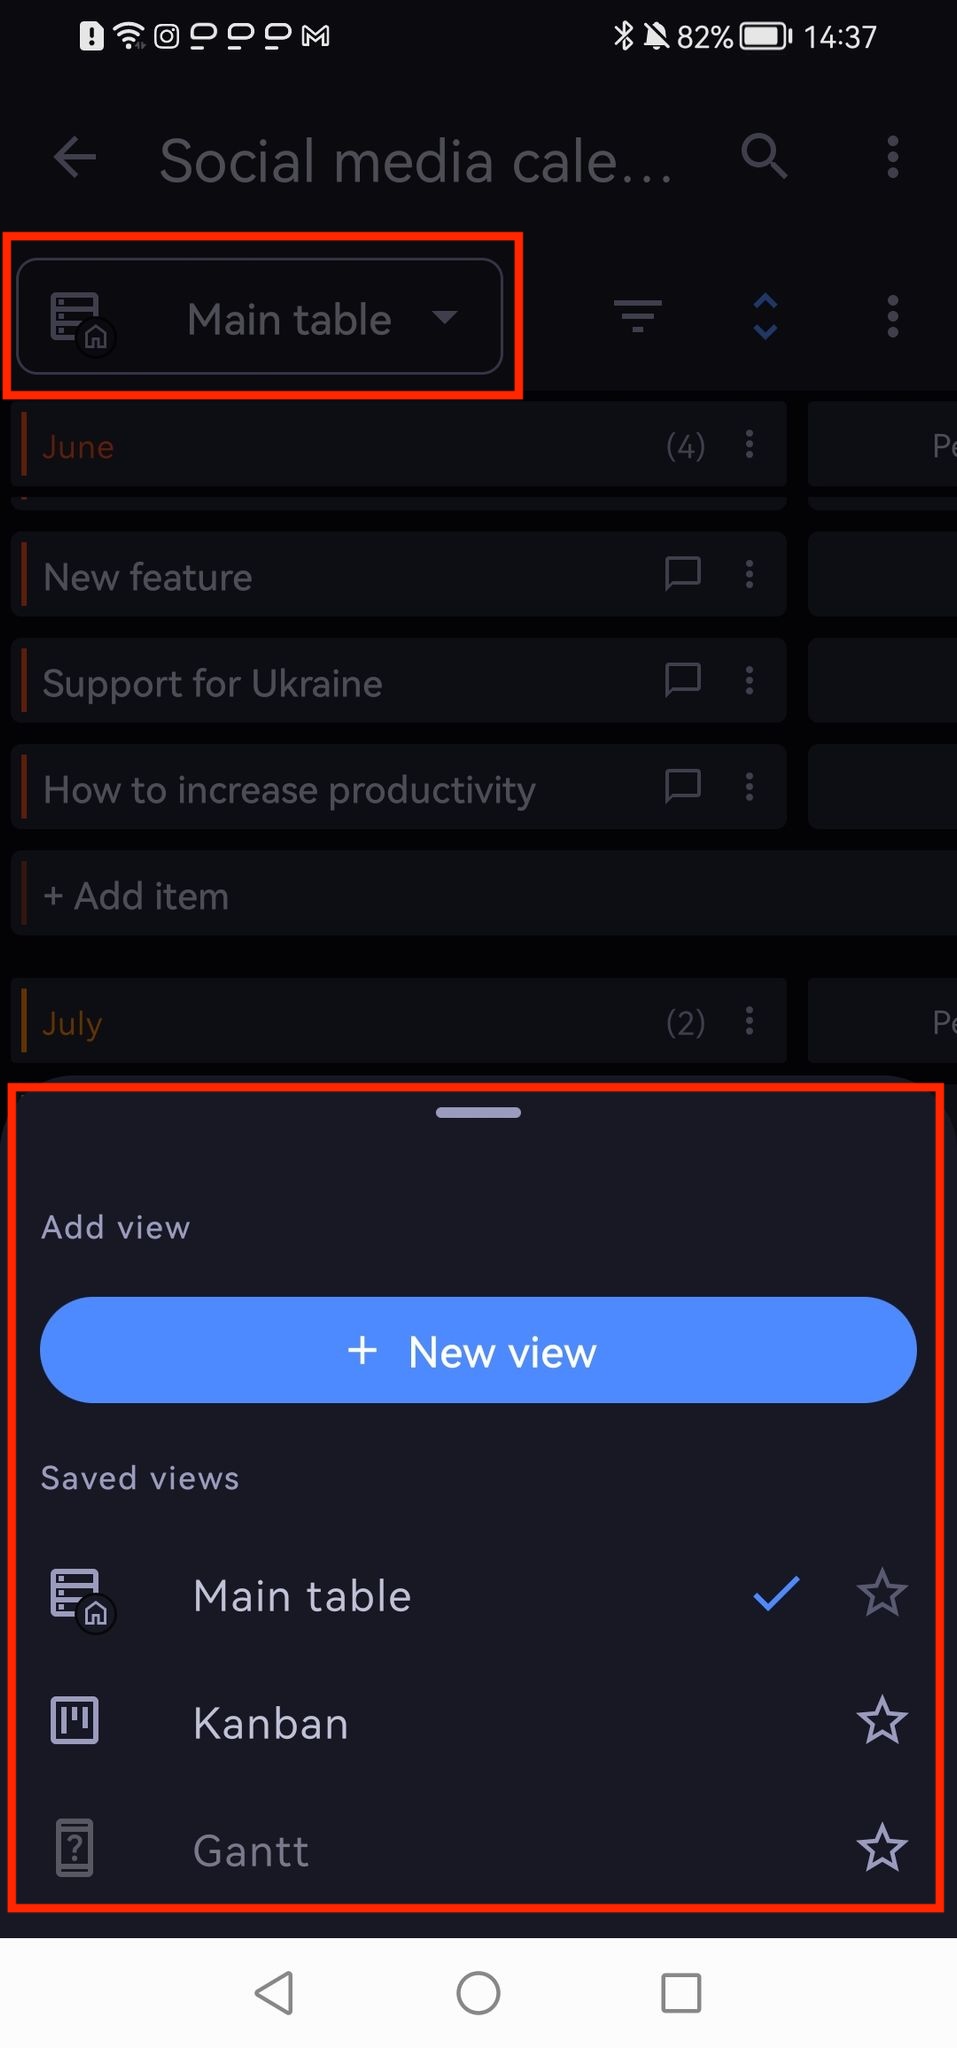
To change View:
- Tap on current Board view on the top left
- Tap on the View you’d like to apply on your Board to complete the action
Set as board default view #
If you find any of the Board Views preferable, you can set it as a Default Board View, so that it’s the first one displayed when you visit the Board.
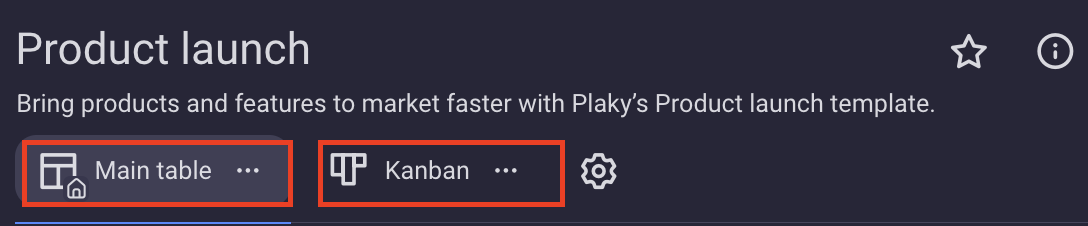
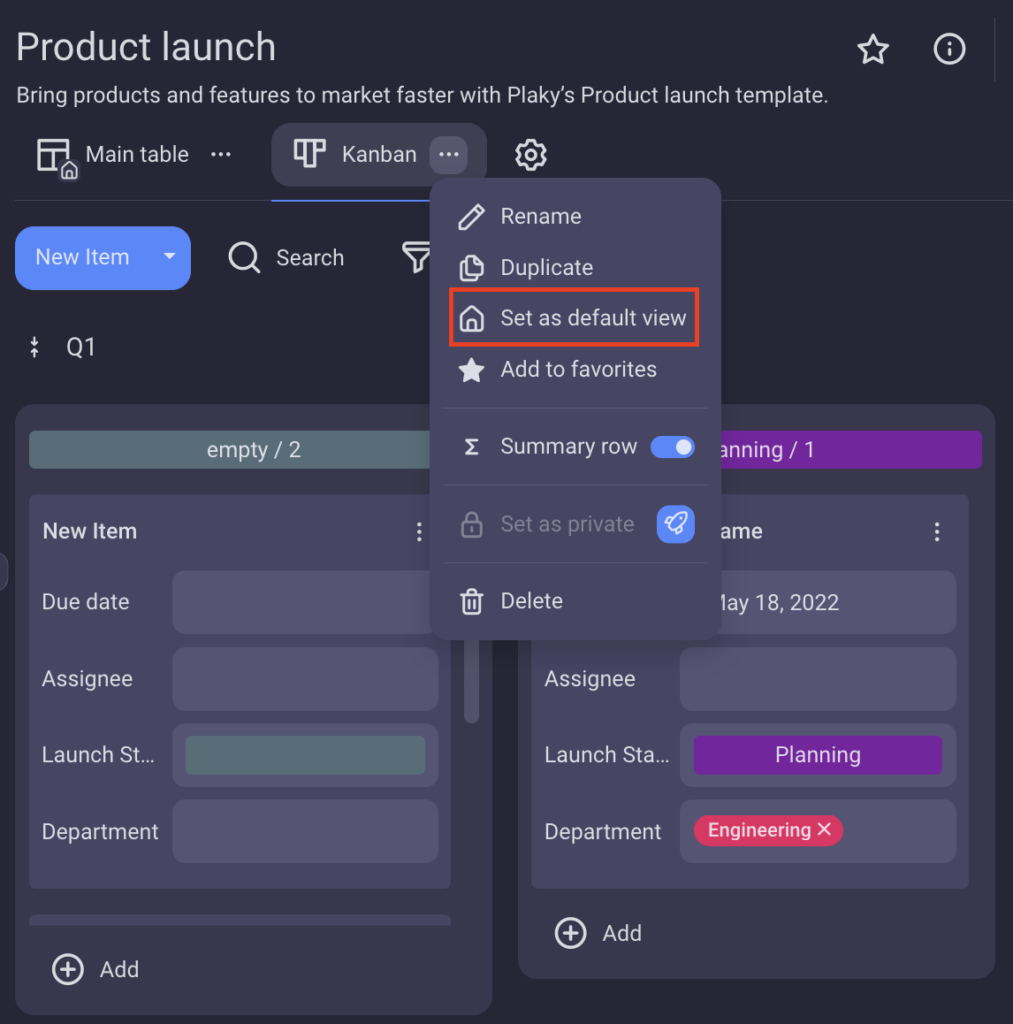
To set Board View as default:
- Navigate to the Board View (Table/Kanban) at the top of the Board
- Click the three dots to open the menu
- Choose Set as default view
The View that you chose will be the first one displayed and marked appropriately when you visit the Board.
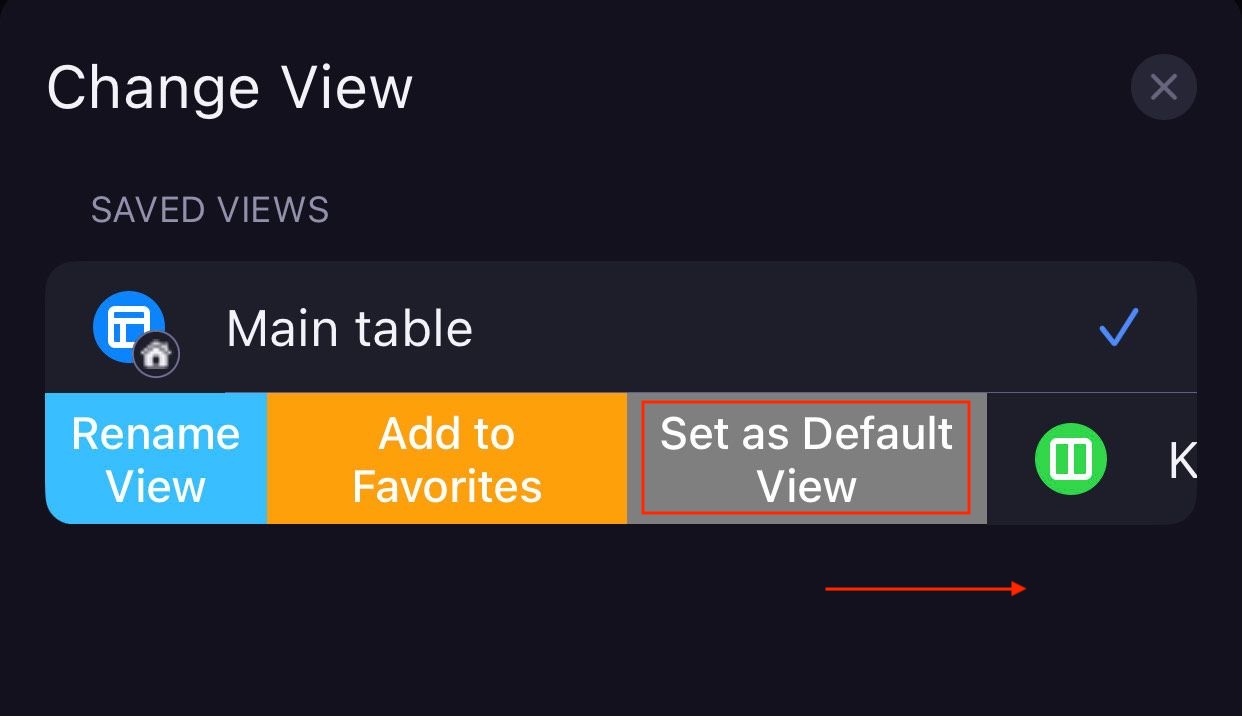
To set a View as default:
- Tap on the three dots in the top right corner of the Board to open the Board menu
- Select Change View
- Swipe that specific View to the right
- Tap on Set as Default View to complete the action
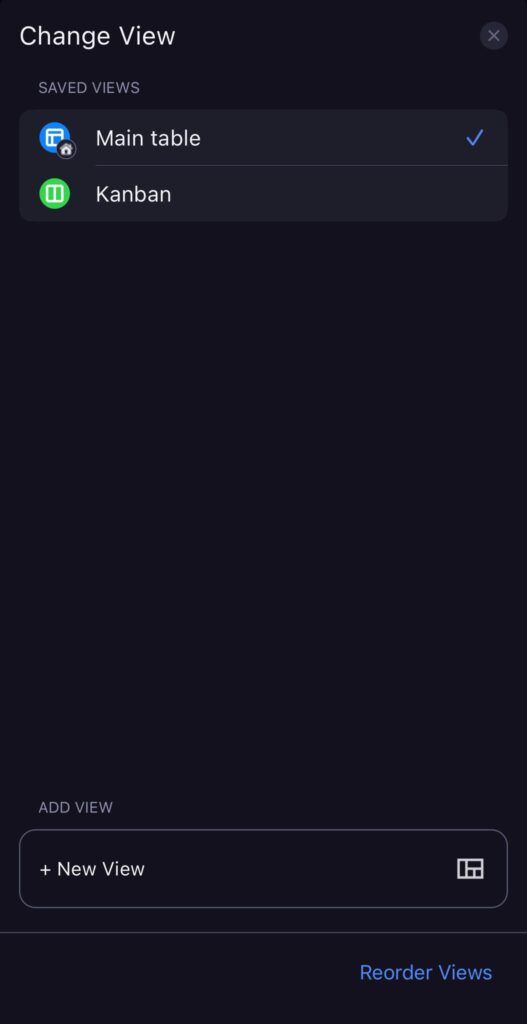
To set View as a default:
- Tap on current Board view in bottom sheet
- Tap on three dots next to that specific View
- Select Set as default View to complete the action
Apply Filter #
Depending on the project, Boards in Plaky can sometimes seem overwhelming. To keep things in order, you can Filter them out according to your needs and preferences.
Show/Hide Fields #
This feature allows you to effortlessly control the visibility of Fields on your board, tailoring your Board to focus on the most relevant information.
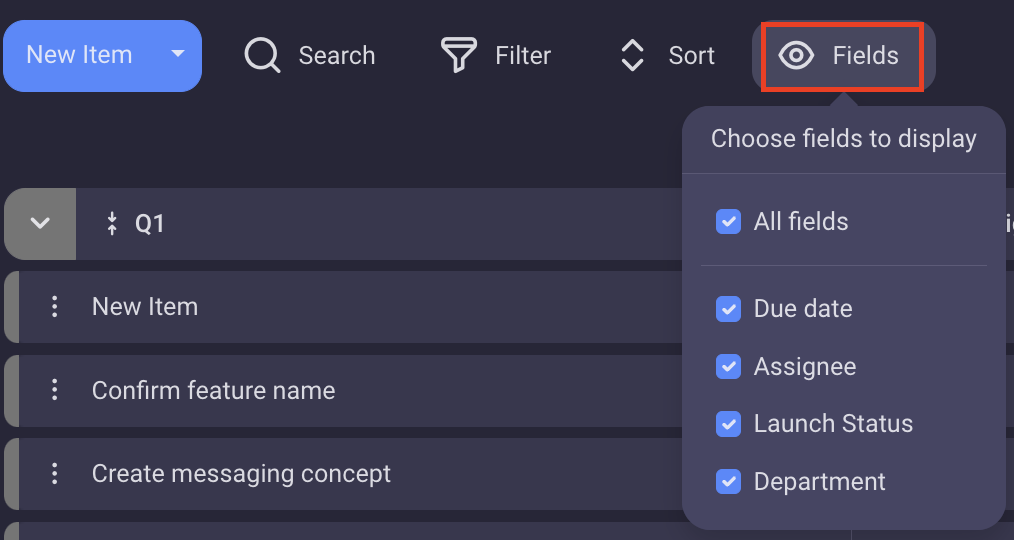
To configure Fields visibility:
- Click on the Fields visibility icon
- Select the Fields to display
- Click anywhere on the screen
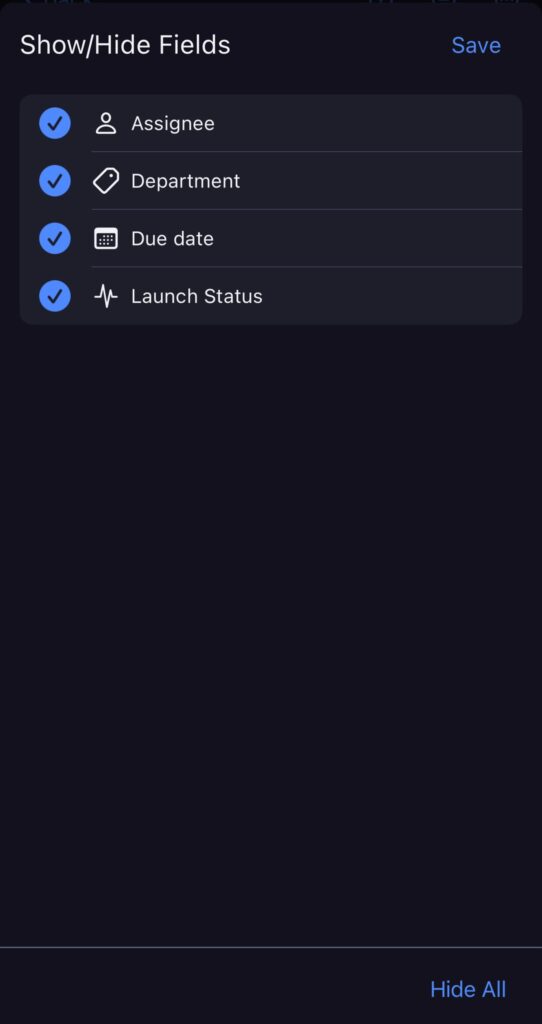
To configure Field visibility:
- Open Show/Hide Fields from the Board Menu
- Check the Fields you want to hide/uncheck to unhide
- Tap Save to complete the action
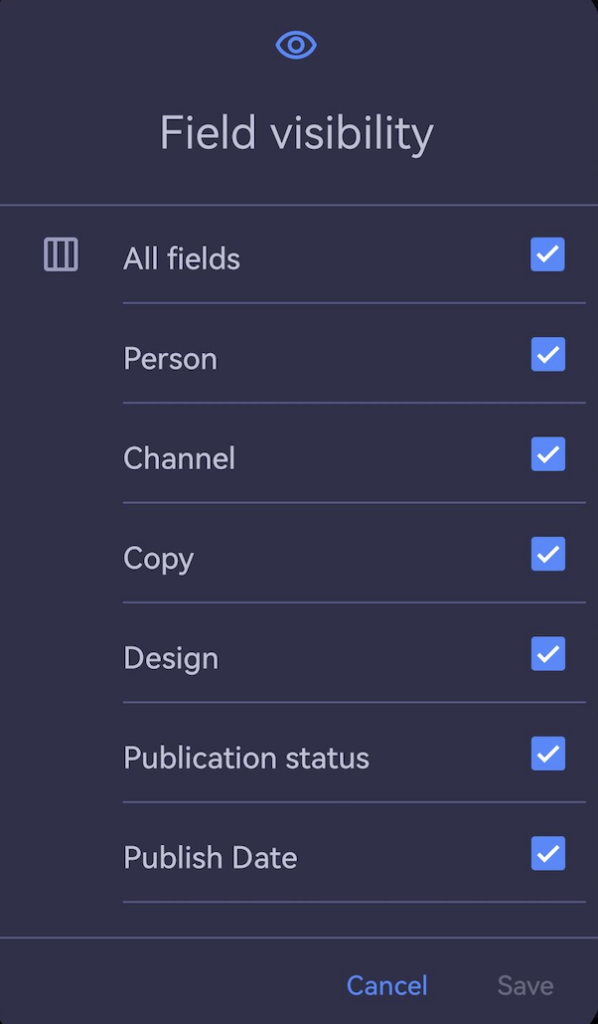
To configure Field visibility:
- Tap on the three dots in the top right corner to open the Board menu
- Select Field visibility
- Choose Fields to display
- Save changes to complete the action
Expand or collapse groups #
Streamline task management by expanding or collapsing groups on the board in Plaky.
To expand/collapse one Item group:
- Click on the downward arrow next to the Item group name
- Select Expand/collapse group to complete the action
To expand/collapse all groups:
- Click on the downward arrow next to any Item group name
- Select Expand all groups/Collapse all groups to complete the action
To expand/collapse a group:
- Tap on the downward/upward arrow next to the group name
To expand/collapse a group:
- Tap on the three dots next to the group name
- Select collapse/expand to complete the action
To expand/collapse all groups:
- Select the View from the dropdown menu in the top left corner
- Click on three dots in the top right corner
- Select Collapse all groups / Expand all groups to complete the action
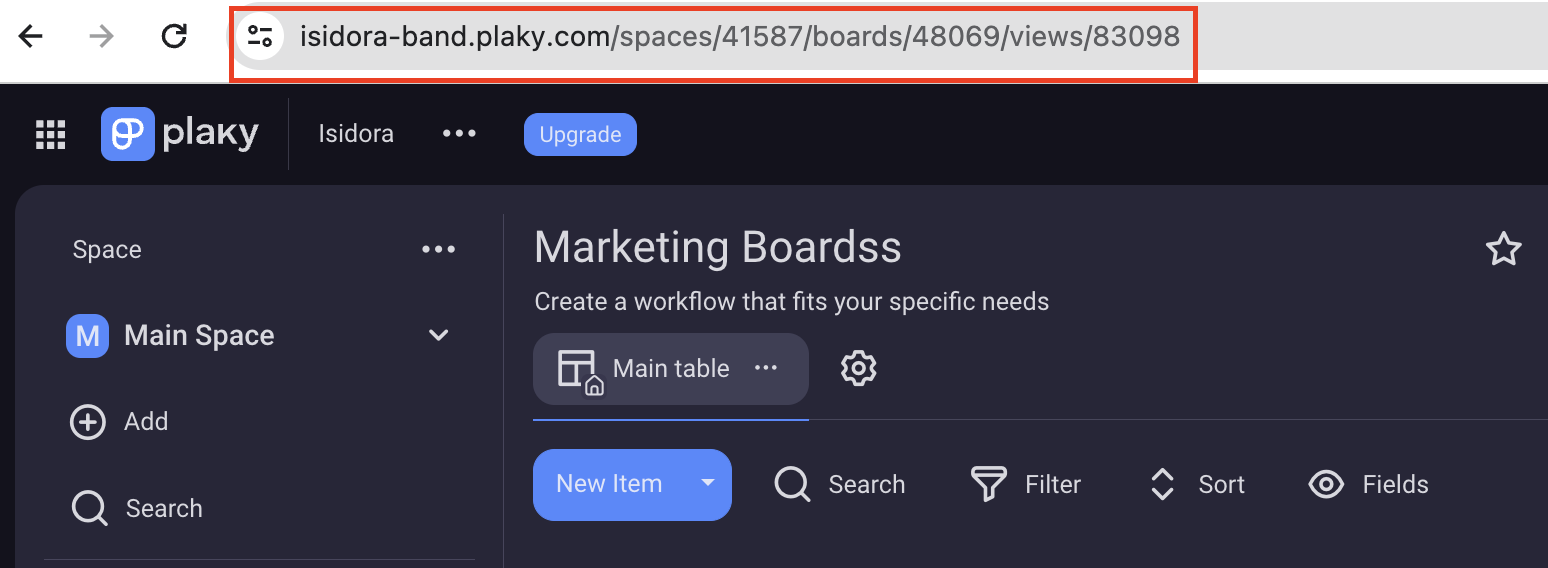
Copy Board URL #
If you need to share your Board’s URL with your teammates, you can copy the link to your Board from the Browser.
To copy Board URL follow these steps:
- Tap on three dots in the top right corner to open the Board menu
- Tap on Copy Board URL to complete the action
To copy Board URL follow these steps:
- Tap on three dots in the top right corner to open the Board menu
- Tap on Copy Board URL to complete the action