
Track Time With Clockify Directly in Plaky
This feature is available on all plans.
Tracking time on your projects can help you understand how much time you spend on specific tasks. Plaky allows you to track time for each item, and later see and run reports on tracked time in Clockify.
Create a Plaky Board #
Items and Subitems in Plaky are displayed on entities called Boards, and before you can start tracking time, you have to create a Board. Here’s how you can do this:
- Click + in the left sidebar
- Hover over New Board
- Select how you want to create the Board
- Create from scratch — creates an empty Board
- Create from template — select a predefined Board template
- Create from file — upload a CSV Board file
Connect Plaky Board with Clockify Project #
Only Board owners can connect Clockify Project to a Plaky Board. The Project and Board have to be part of the same CAKE.com organization for you to connect them.
If you don’t have a Clockify workspace, you will need to create one to track time in Plaky.
Before you begin tracking time in Plaky, you need to connect your Plaky board with an existing Clockify project. Here are the steps to doing this:
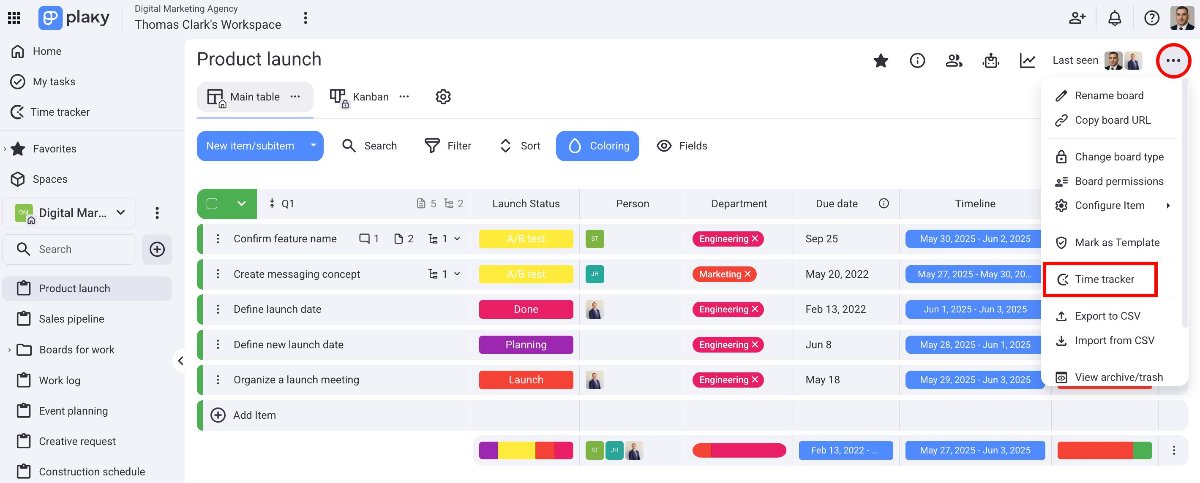
- Click on the three dots in the top right corner of your board
- Click on Time Tracker
- Choose the Clockify workspace from the dropdown
- Select/Create a Clockify project from the dropdown
- Click Save to connect Clockify and Plaky
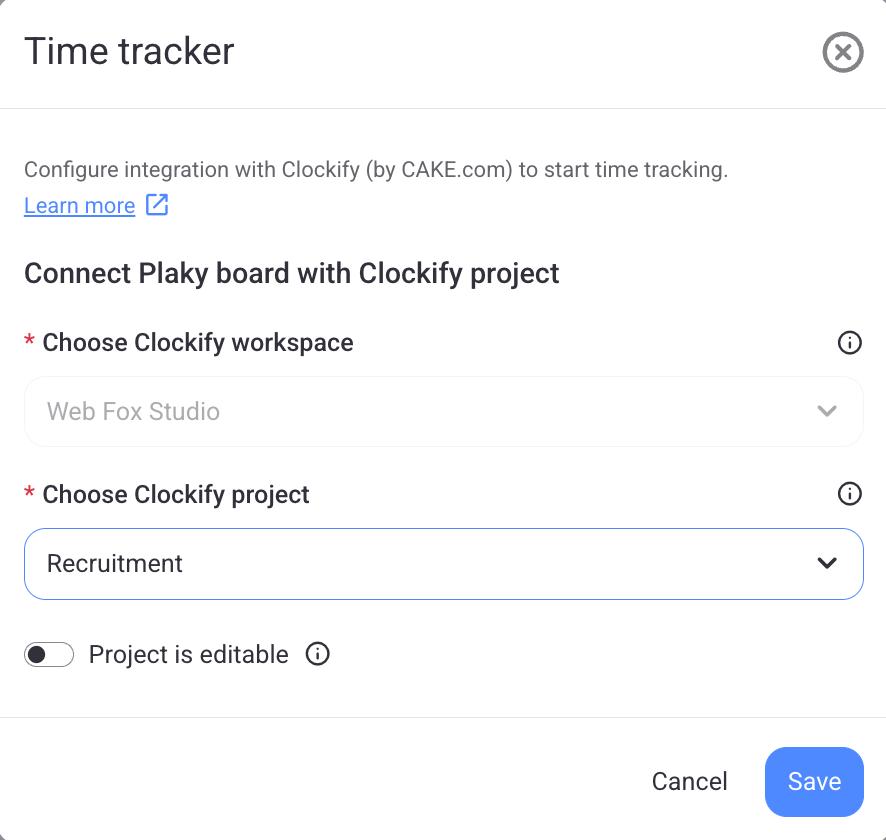
If you toggle the Project is editable button when connecting the Board and Project, you will be able to change the Clockify Project once you start tracking time on an Item.
Once the two apps are connected, you can start tracking time.
Track time directly from an item/subitem #
In Plaky, you can track time directly from an item/subitem. Each item/subitem you track in Plaky automatically creates an individual time entry in Clockify. This way, you can track and manage your time in both apps. Here’s how you can do it in Plaky:
Timer mode lets you track time by using a timer.
- Open an item/subitem from your board
- Select the Time tracker tab
- Choose the Timer tab
- Select Project
- Select Task
- Add additional details
- Click Start timer to start tracking time
- Click Stop timer when you want to stop
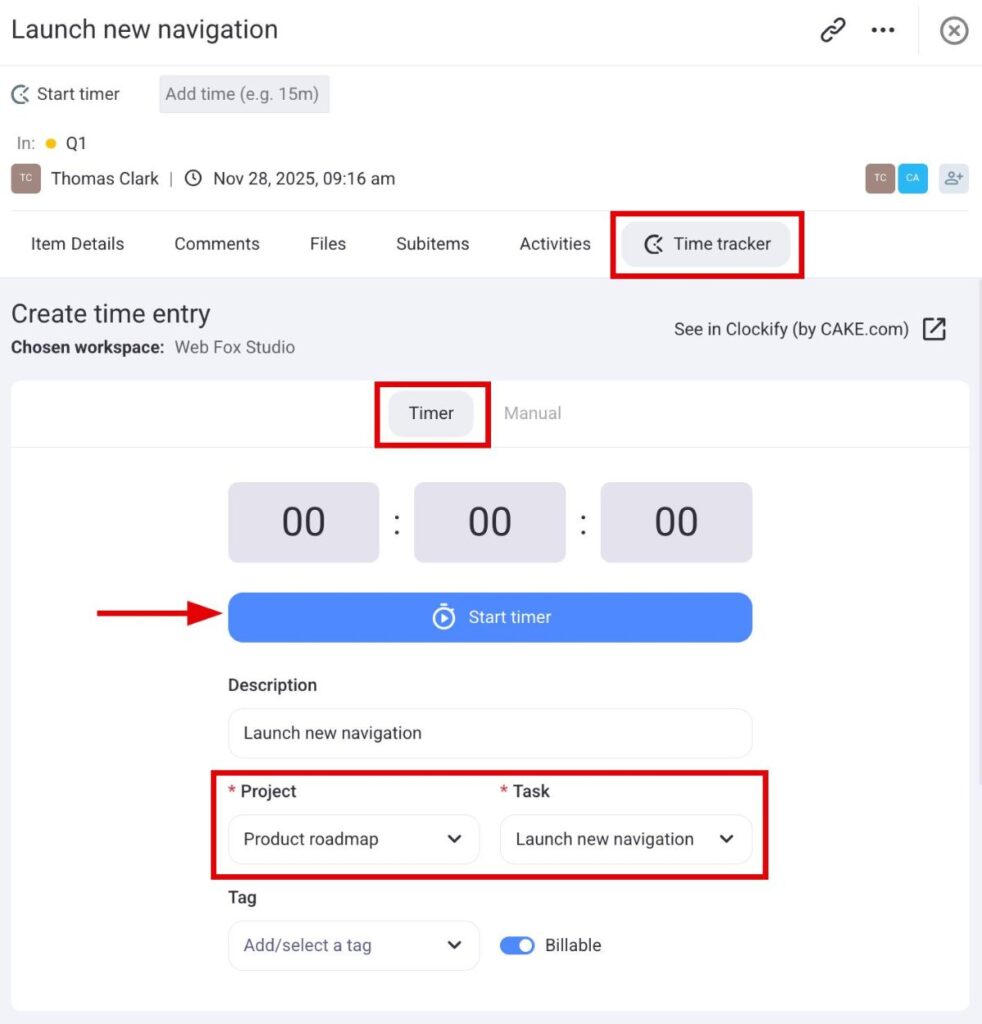
Fields that are marked with a red star are required.
Manual mode lets you enter the start and the end time for a time entry.
- Open an item/subitem from your board
- Select the Time tracker tab
- Choose the Manual tab
- Add date, start time, and end time
- Select Project
- Select Task
- Add additional details
- Click Add time to save the time entry
Fields that are marked with a red star are required.
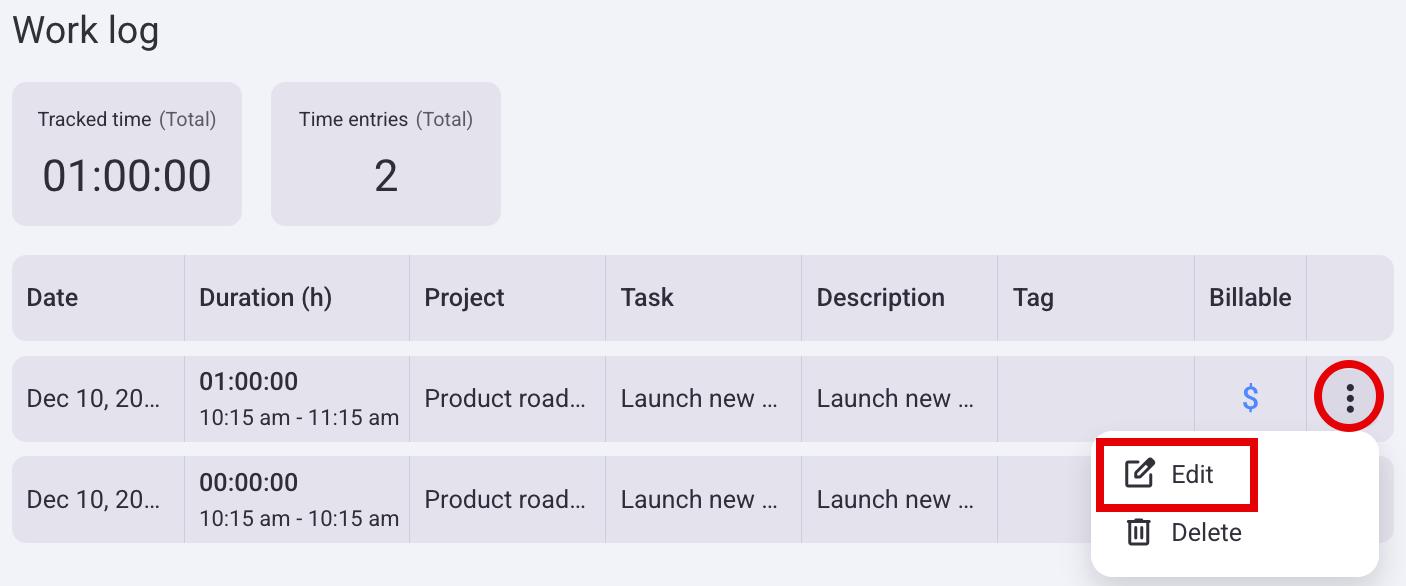
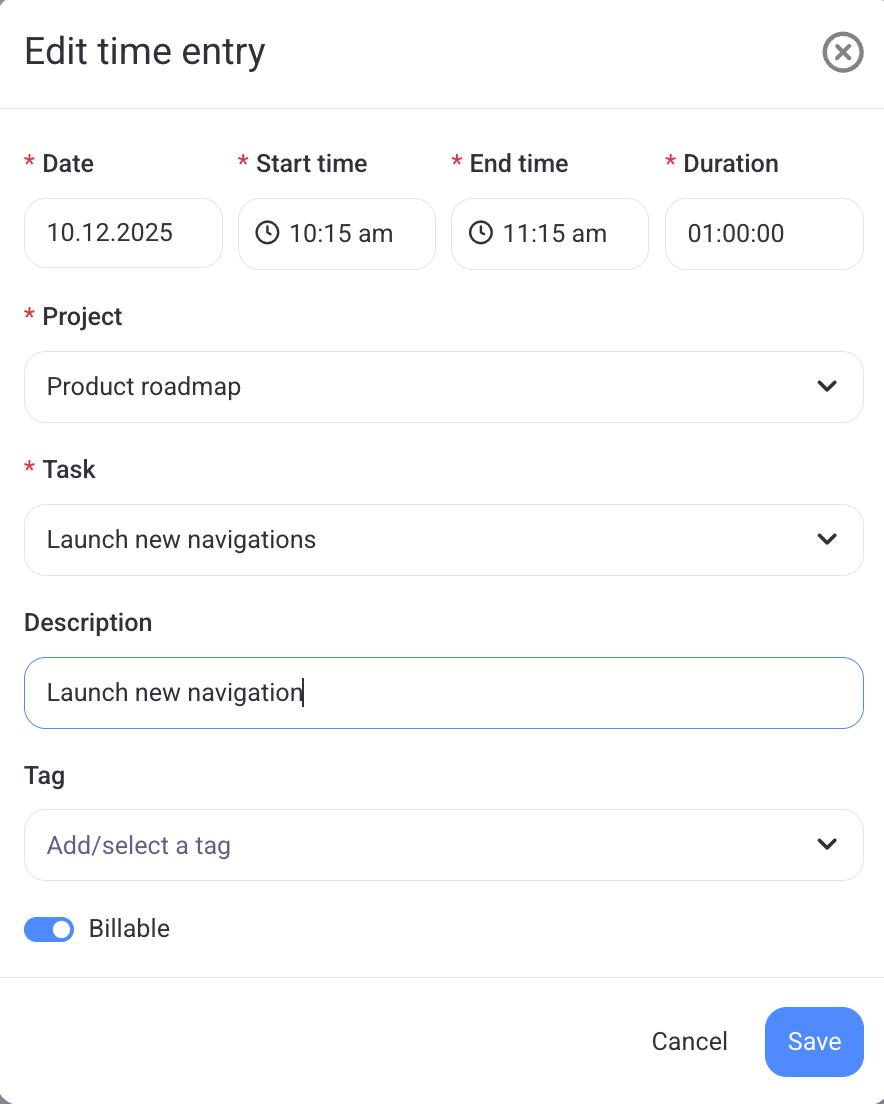
Edit time entries #
If you want to modify a specific time entry, you can edit it directly through Plaky. Here’s how you can do it:
- Open the Time tracker tab
- Click on the three dots on the right side of a time entry
- Click on Edit
- Enter the time entry details (date, project, start/end time)
- Click Save to complete the action
All information you add about a time entry in Plaky will also be shown in Clockify. Also, everything you add in Clockify will be shown on Plaky.
Plaky & Clockify #
To better understand how Plaky and Clockify relate to each other, we have added a table that shows how the elements correlate between the apps.
| Plaky | Clockify |
| Board | Project |
| Item | Task |
| Subitem | Task |
| Item/Subitem Name | Description |