
Crear tablero desde CSV
Además de importar datos CSV a un tablero existente, también puedes crear un nuevo tablero directamente desde tu archivo CSV. Migra datos desde CSV fácilmente y continúa trabajando con ellos en Plaky. Crear un nuevo tablero a partir de un archivo CSV te permite integrar información de sistemas externos en un nuevo tablero Plaky de manera eficiente.
Importar CSV para crear un nuevo tablero #
Para crear un nuevo tablero a partir de un archivo CSV:
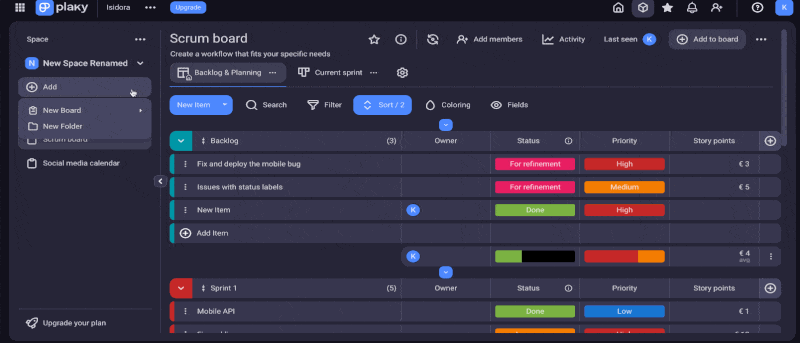
- Navega al menú del espacio en la esquina superior izquierda
- Haz clic en el botón +
- Elige Nuevo tablero en el menú desplegable
- Selecciona Crear desde CSV
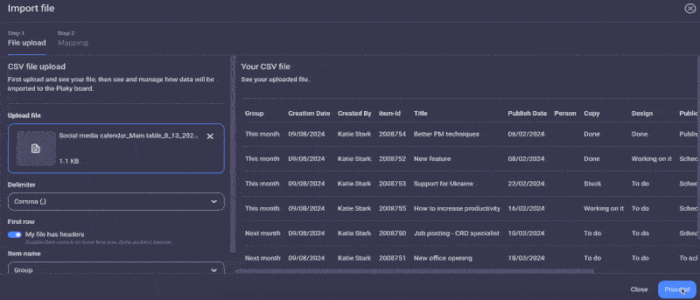
- Haz clic en Importar desde CSV
- Selecciona un archivo CSV para importar
- Elige el delimitador CSV en el menú desplegable
- Marca si hay encabezados en el archivo (en caso afirmativo, la primera fila se considerará como nombres de columna; en caso contrario, la primera fila CSV también se considerará como datos para importar)
- Selecciona qué columna del archivo define el nombre del elemento (de forma predeterminada, la primera columna del CSV se toma para el nombre del elemento)
Después de cargar el archivo, aparecerá inmediatamente una tabla generada a partir de tu contenido en el lado derecho del modal, por lo que siempre podrás verificar rápidamente si elegiste las opciones correctas para encabezados, delimitadores y nombres de elementos. - Haz clic en Continuar
- Selecciona el grupo de destino:
– Nuevo grupo (escribe el nombre del grupo que quieres crear en el Tablero)
– Elige la columna CSV para un nombre de grupo (selecciona la columna del menú desplegable si quieres que los datos se importen a un grupo creado en función de una de las columnas CSV) - Selecciona el tipo de campos del tablero de destino para cada columna CSV en el menú desplegable:
– Cualquier tipo de columna del menú desplegable
– Ninguno (elige esta opción si no quieres importar los datos de esta columna CSV en particular)
Si estás importando datos a un nuevo tablero, cada columna CSV creará un nuevo campo en el tablero. De forma predeterminada, cada columna CSV se asigna a Plaky como tipo de campo de texto, pero puedes cambiar el tipo de campo durante el proceso de importación o hacerlo más tarde.
Puedes obtener una vista previa inmediata de cómo se verán los datos importados mientras realiza el mapeo (eligiendo el grupo de destino y los campos de destino) en el lado derecho de la pantalla. - Haz clic en Finalizar importación para completar la acción
Las columnas no asignadas se perderán. La asignación de las columnas utilizadas para el nombre de la tarea se puede cambiar si tiene que volver al primer paso. La asignación de las columnas utilizadas para el nombre del grupo también se puede cambiar en la sección donde se definió la asignación para el grupo de destino.
Si la columna CSV contiene más columnas que la cantidad permitida de Campos en el Tablero (definida por el plan de suscripción de tu Espacio de trabajo), puedes asignar las columnas CSV hasta ese límite y se deshabilitará la asignación de columnas adicionales. Si los datos de alguna columna no son tan importantes para ti, siempre puedes optar por omitir la asignación de esa columna eligiendo la opción Ninguno.
Los subelementos no se pueden importar desde CSV.
Formato CSV obligatorio #
- Plaky uses comma as the default delimiter. However, you can change it to a tab, pipe, space, or semicolon
- Si el archivo no está marcado para tener encabezados, la primera fila se trata como datos del elemento y para los nombres de las columnas CSV se utilizarán nombres genéricos: Columna 1, Columna 2, etc.
- El tamaño máximo del archivo CSV es 10 MB
Si tienes un archivo grande, un archivo con muchas filas, divídelo para que no exceda el límite.
Ejemplo de CSV #
Puedes crear un archivo CSV: abriendo un archivo de Excel y luego ve a Guardar como y elige el formato CSV; o abriendo un editor de texto sin formato (como el Bloc de notas) y colocando encabezados en la primera fila (donde se separan los valores, por ejemplo, con una coma) y enumerando los valores en nuevas filas.
Descarga un archivo CSV de ejemplo
Grupo, Fecha de creación, Creado por, id-de-elemento, Título, Fecha de publicación, Persona, Copia, Diseño, Estado de publicación, Canal

GrupoA1,Fecha de creaciónA,,

GrupoB1,Fecha de creaciónB,,

GrupoB2,Fecha de creaciónB,Creado porB1,

GrupoC1,,Creado porC1,

GrupoC2,,Creado porC1,id-de-elemento1

,,,"id-de-elemento2,id-de-elemento3"
Notas #
- Si no seleccionas qué columna define el nombre del elemento, la primera columna de tu archivo CSV se usará de forma predeterminada como nombre del elemento
- El número máximo de columnas en el archivo CSV es 70
- El número máximo de filas en el archivo CSV es 1001
- Los límites de caracteres dentro de la aplicación también se aplican a los archivos CSV
- El archivo CSV puede contener hasta 18 valores para el campo Estado; Cualquier valor adicional se omitirá durante la importación
- La cantidad máxima de grupos de elementos para importar es 20; Cualquier grupo de elementos adicional se asignará al último grupo de elementos del tablero
- No es necesario que el contenido del archivo CSV esté en inglés
- Puedes cargar solo un archivo CSV para crear un tablero a la vez; Se puede cargar un nuevo archivo CSV en ese tablero o crear otro tablero solo después de que se complete la importación del primer archivo
- Cada campo en el tablero se puede crear a partir de una sola columna en el CSV (1 columna = 1 campo)
- Las columnas CSV que contienen letras o números se pueden asignar a campos textuales. Sin embargo, si intentas asignar columnas de texto a campos de línea de tiempo, fecha o números, se omitirán durante la importación